Relatively recently, we saw the release of Red Hat Enterprise Linux 7, a distribution that is rightly considered to be the number one in the corporate sector. Without waiting for its clones, we decided to look at what is new in this giant of open source world which was able, at some point, to combine the seemingly incompatible – making money and using an open-source model.
Red Hat releases major versions of its distributions every three to four years, which is an eternity in today’s IT world. On June 10, the company released the seventh version of RHEL, its flagship product. First of all, here is a brief overview of what’s new in this distribution:
- Kernel 3.10, which now has Bcache, a caching level that allows to use SSD drives as a cache for HDD, and support for zSwap, a technology for in-memory compression of unused pages without writing them to the disk.
- XFS file system. Apparently, Btrfs was found too crude for corporate sector, although you can find it in the list of available file systems.
- Systemd did, in fact, replace the old good SysV initialization.
- GNOME 3 is used as a graphical environment. However, unlike some other distributions, Red Hat has included Classic Shell interface to ensure smooth transition from older versions.
- Samba 4, that allows you to create an Active Directory domain controller.
- x86 platform is no longer supported, this distribution supports only x64.
I could list much more, but the purpose of this article is not to reprint the Release Notes. Therefore, let’s stop at this and move on to the review.
Installation
Red Hat remains true to itself, it does not release the live versions of Linux distributions. So to get familiar with RHEL, you will have to start everything in the old-fashioned way — by installation. You can install the system both from a DVD and USB flash drive (when using the latter on non-UEFI systems, just copy the DVD image to USB flash drive with ‘dd’).
During the installation, Red Hat provides three different distribution images — Server, Workstation and Client. In practice, however, the set of packages in Workstation is the same as in Client. It is even larger and, therefore, it doesn’t make sense to review Client.
After loading the installation package from the media and optional integrity check, the system will run Anaconda, the standard RHEL installer, which will prompt you to specify the language. Following the selection of language, you will see the installation overview screen, where you can set up the network, time zone and partitioning, and select specific packages. In this regard, the installer is different from previous versions where these settings have been selected on several consecutive screens.
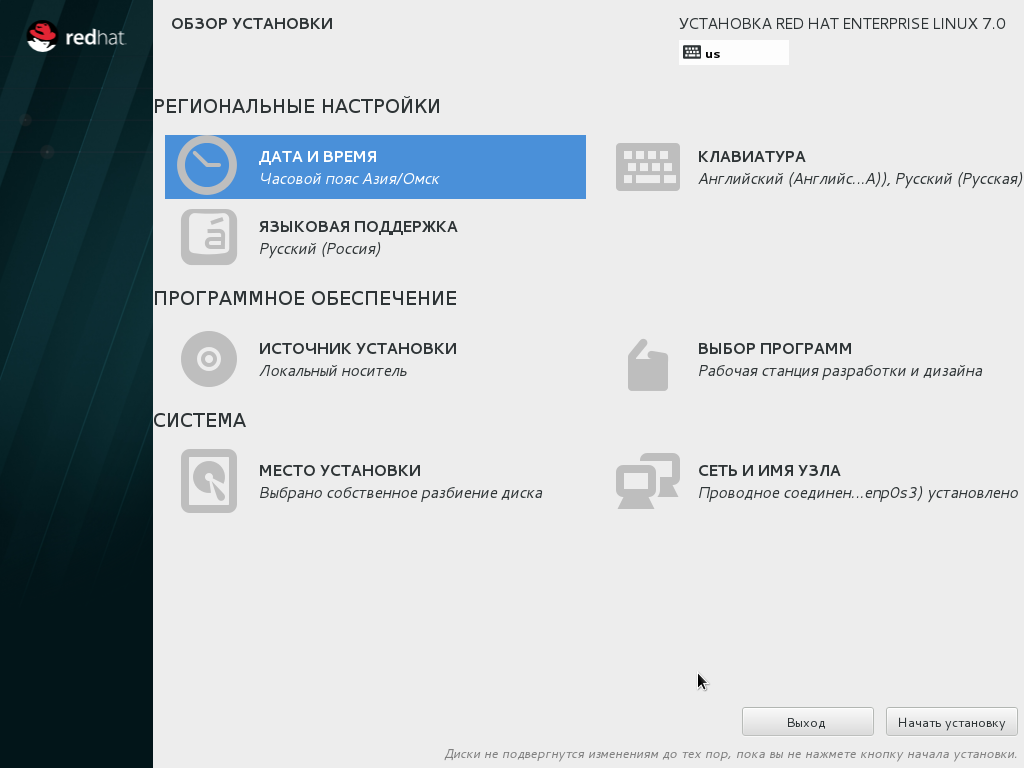
The list of time zones includes my hometown, which is not available in many other products (even proprietary ones).
The network adapter is disabled by default, even if it is the only one available. This solution seems rather controversial — for example, in the same dialog for selecting the time zone that comes first on the overview screen, there is a radio button for NTP, which will simply not work without the network.
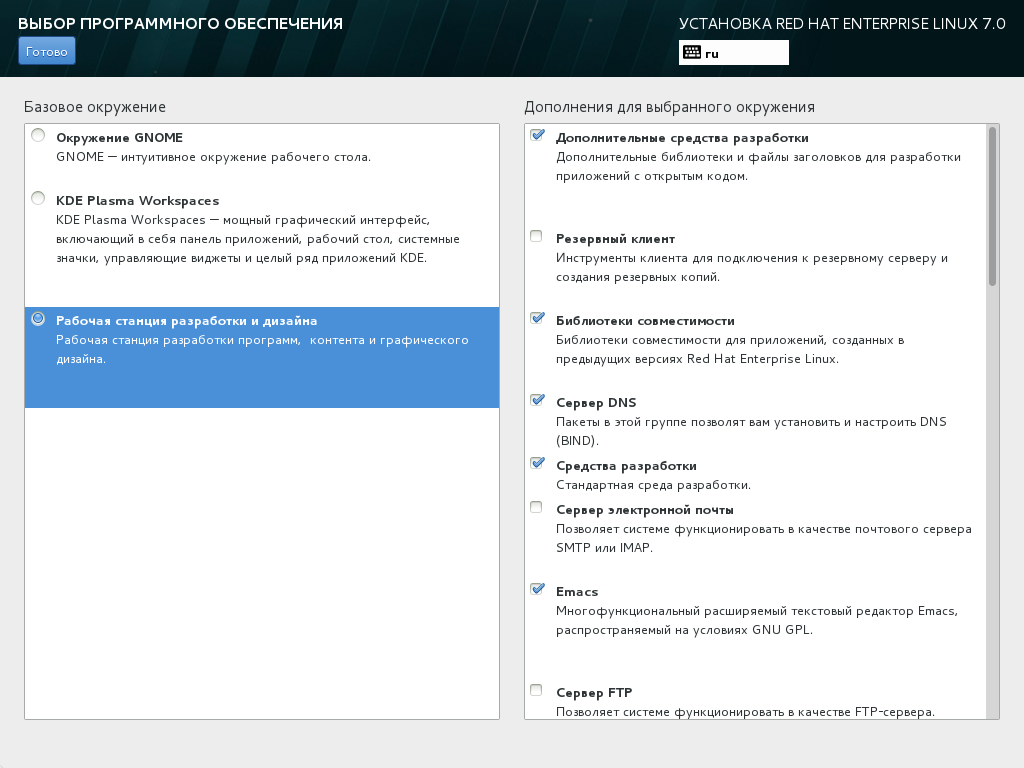
The selection of packages comes down to selecting the categories, which is rather logical. I was a bit confused by the fact that, when you switch the main options, the additional options are not saved. Apparently, it is assumed that the user knows exactly what he/she wants. I also noticed a slightly incorrect translation: The Backup Client is translated as the ‘Client for Backup’. Moreover, in most cases, it is not quite obvious what software the names of additions correspond to. For example, one can only guess that the ‘Office Suite’ means LibreOffice. It is not clear at all what is meant by ‘Standard Development Environment’.
The automatic disk partitioning is similar for all three release options. It includes the ‘/boot’ partition (and ‘/boot/efi’, if you use UEFI) and LVM volume, which has only two partitions (root and swap). I would rather disagree with this partitioning scheme — I would prefer to have an additional ‘/home’ partition. However, nothing prevents you from partitioning the disk as you like it. In addition to LVM partitioning, there are also the regular partitions, dynamic LVM and ‘btrfs’. The partitioning is applied only after you click ‘Start Installation’.
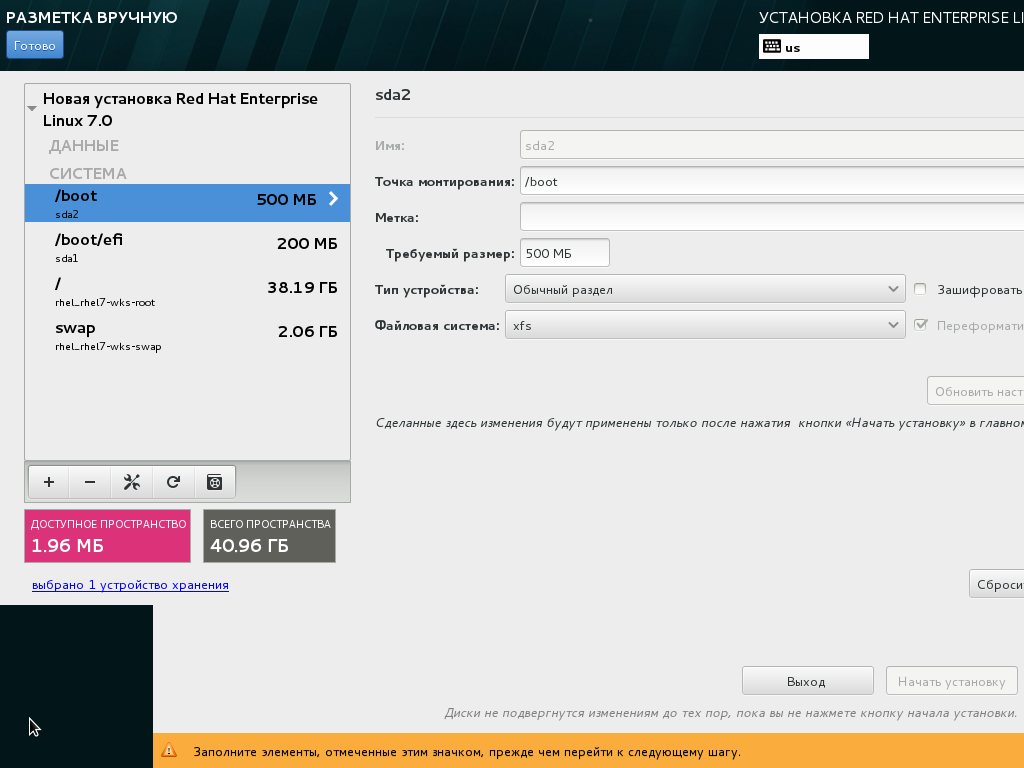
By clicking this button, you will start creating the file systems and installing packages. In my case, the entire process took 21 minutes. Simultaneously with this process, you can set the ‘root’ password and create a new user. While the first task has nothing noteworthy, the creation of the user requires one explanation. ‘Make user an administrator’ means only that the user will be included in the ‘wheel’ group. In addition, the Russian localization of this dialog box has a very silly spelling error.
Finally, the installation is complete. Click the appropriate button and restart.
First Start and First Impressions
The first start of the system takes about 20 seconds. This is not very fast, probably, due to the use of VirtualBox. After that, you need to specify some settings for ‘kdump’ and subscription. The default settings for ‘kdump’ are OK. So if you do not have to send the dump files to a remote computer, leave everything as it is.
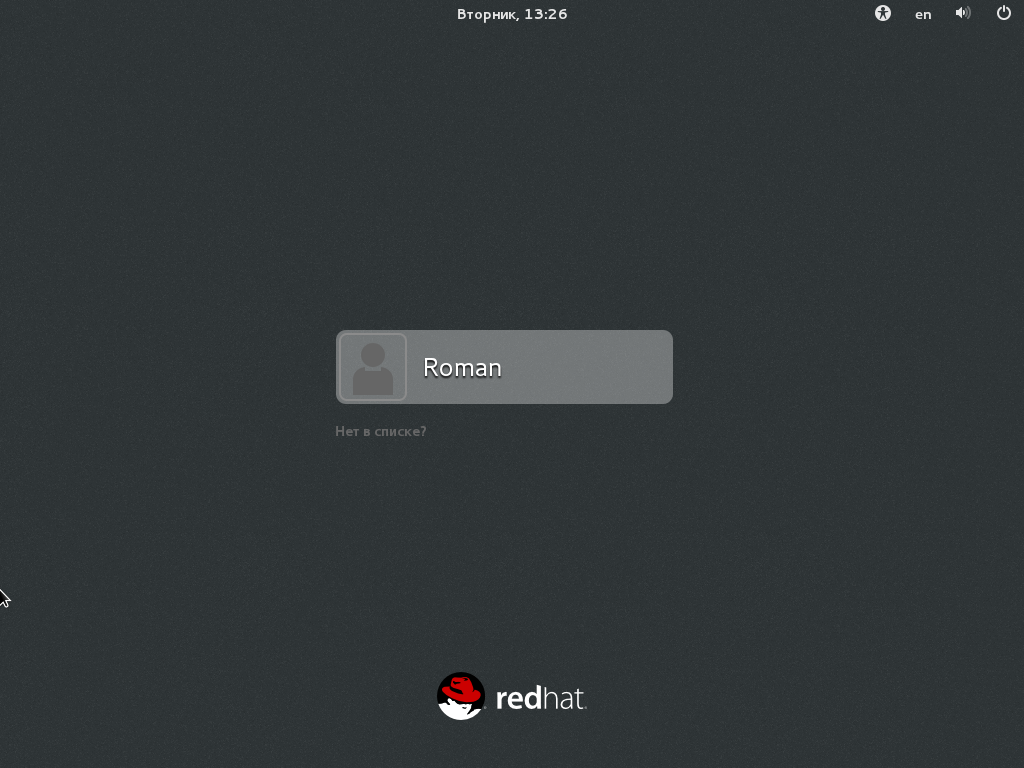
After you log into the system, you need to configure GNOME. Since there is nothing to change, I will not describe this procedure. Next, you will be prompted to update the packages and restart again. By the way, in this version, you can finally confirm the privileges by using the standard user password. However, in some cases, you still need the ‘root’ password. After all this, you can finally start working.
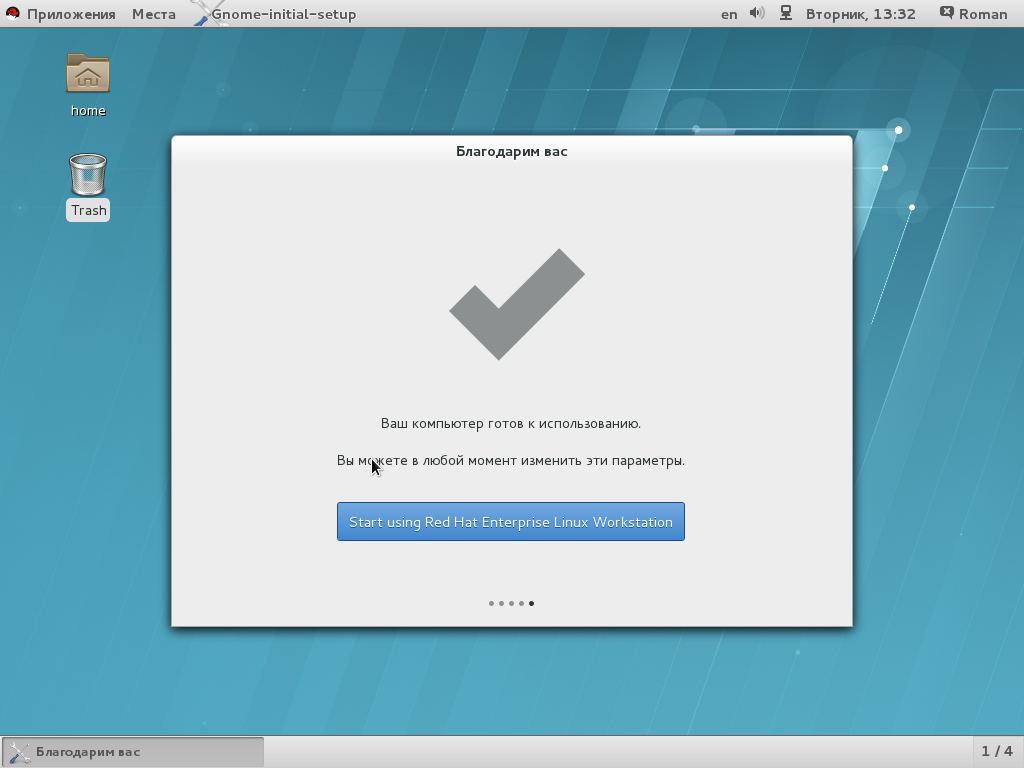
Apparently, the developers have tried to make the migration from previous versions of GNOME as painless as possible. Nevertheless, they didn’t eliminate certain things, whether because they represent a fundamental part of the Gnome 3 or for some other reason, I don’t know. These things include panels that pop up whenever you position the mouse over certain area of the screen. Like in all other distributions based on GNOME 3, the creation of desktop icons is not intuitive.
Now, let’s move to main applications. As its Internet browser, the system uses Firefox 24 ESR. Unlike Canonical, Red Hat does not update it to the latest version simply because such version is already available. The video playback is supported out of the box, just like the Java applets (the latter, however, are supported almost everywhere).
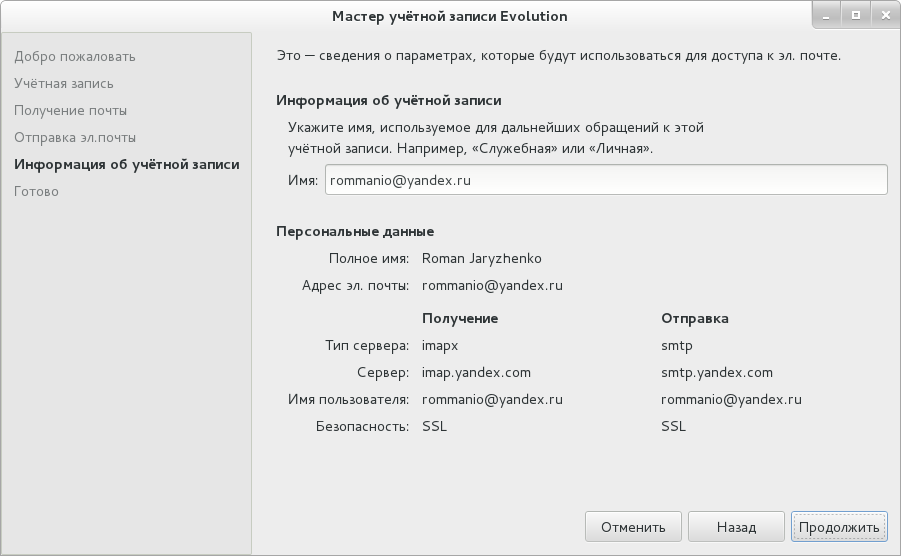
As in older versions, Evolution, the e-mail client, is as stable as ever. Like many other e-mail clients, it supports automatic detection of mail servers when creating/adding an account.
When you try to play back the majority of local video files, you run into a problem, as there are no video codecs. However, Red Hat always had a certain attitude about them. Besides, it is not absolutely necessary to play music/video on a workstation.
LibreOffice 4.1 had no trouble opening all my .docx files, which is not surprising. Visio files also have been opened without any problem.
However, Nautilus disappointed me, primarily, because of failures that accompanied my attempts to use it for browsing a Windows network. It would have been a different matter if there was no way at all to connect to NAS via SMB, but the option ‘Connect…’ was ready for use. Moreover, Nautilus led to a hang of GNOME, and I had to restart the system rather than try to kill the hang processes. However, all of the above may be related to the fact that, in this case, the network connection type used in VirtualBox was NAT.
I would also like to mention ACL, the Access Control Lists, which are for a long time supported in Linux, but there is still no graphical user interface for their creation/editing. Of course, at home, you wouldn’t need ACL. But, for corporate users, a graphical tool could be very useful.
This version of RHEL finally features something that was included in many other distributions a long time ago — the auto-complete of command arguments when you press the tab key. For example, if you forget a specific ‘systemctl’ subcommand, you can press Tab twice to display their list.
A couple of words about KDE. When you start it for the first time, the desktop is squeaky clean, there is even no recycle bin or link to home directory. You have to start everything from the menu. It has a standard form for KDE 4. In my view, it is too standard. When you call it up for the first time, you see the Favorites which include Web Browser. When you click it, this will not start the Firefox (which would be logical) but Konqueror. Please, do not misunderstand me, I have nothing against Konqueror. But, by its nature, the corporate distribution policy implies certain uniformity, which is not available here. As for the rest… KDE can be safely recommended to those who are annoyed by GNOME 3, despite all attempts to bring it to its familiar form.
However, it is time to move to internal workings of RHEL 7.
Under the Hood
Kernel and File System
Let’s start with the loader. Its function is performed by Grub 2 with UEFI and Secure Boot. If you never had to deal with it before (unlikely, but who knows), please remember that it no longer can be configured manually. For configuration, it uses scripts based on which the command ‘grub2-mkconfig’ generates a configuration file.
Kernel 3.10 supports, among other things, the module signing and, in RHEL, you can configure the boot options so that it becomes simply impossible to load any unsigned module. To do this, add ‘enforcemodulesig = 1’ line in ‘GRUB_CMDLINE_LINUX’ in /etc/default/grub.
As I already mentioned above, the version 7 of this corporate distribution uses XFS as its default file system. It deserves a more detailed description. XFS was developed in 1993 by SGI for its version of UNIX called ‘IRIX’ and, at that time, it was really an advanced file system supporting the work with large files (keep in mind that SGI was specializing in graphics workstations for creating video with the appropriate requirements). Years later, it was ported to Linux. Nevertheless, back in 2008, there were some performance issues (by now, they have been fixed, in particular, by using a delayed writing of metadata) and, because of them, the file system had lower speed than ‘ext4’. Today, when used in eight-core configuration, XFS is 2x faster than ‘ext4’. I would also note that ‘ext4’ has some legacy issues at the architecture level. When compared with ‘Btrfs’, XFS looks much more mature. For example, take the service utilities, you may never need them, but they must be there. However, ‘Btrfs’ has no analog for ‘debugfs’, while XFS includes one (‘xfs_db’). Still, XFS has its own shortcoming, as you cannot reduce the size of the file system.
Network
Now, let’s turn to the network subsystem. Already during the installation, you could notice that the network interfaces are named in a new way. This is because, in the old model, it was not clear from the names, which physical interface corresponds to a particular name. Now, there are five naming schemes that are selected by ‘systemd’ according to defined rules. These schemes are as follows:
- The names are assigned based on the number of embedded network card provided by the firmware or BIOS. This scheme has the highest priority, if it is not appropriate, go to the second scheme. For example, eno1, where ‘eno’ stands for ‘ethernet on-board’.
- The names are assigned in accordance with PCI-E slot provided by firmware, if it is not appropriate, go to the third scheme. For example, ens1, where the letter ‘s’ means ‘slot’.
- The devices are named according to their physical location. For example, ‘enp0s3’, where ‘p0s3’ is the location on PCI bus.
- If none of these schemes is appropriate, use the traditional scheme.
- There is also an alternative naming scheme based on MAC address, for example, ‘enx0800277b76b5’.
As a network configuration tool (including for all kinds of routing), you can use Network Manager, which provides a unified control over the network devices. The old method involving the use of ‘ifcfg’ scripts is still supported.
The firewall is now provided by ‘firewalld’ which is basically a wrapper around ‘iptables’. It provides the dynamic addition of rules (without re-reading the entire configuration file), and has a D-Bus interface, which allows some services to query the opening of certain ports or display the notification in the tray. ‘firewall-cmd’ command also allows you to execute commands similar to those available for ‘iptables’. However, in my opinion, the only benefit is the support of D-Bus, while the rule description language is rather poor. So, if you want just a good firewall, I can recommend a proper wrapper around ‘iptables’ called ‘shorewall’.
Control and Monitoring Tools
For a long time, Linux systems lacked some equivalent of WMI to abstract away from configuration files. Such tools began to emerge. One of them called ‘OpenLMI (Linux Management Infrastructure)’ was introduced in the new version of RHEL. In short, it includes two parts – CIMOM, CIM Object Manager, which is OpenPegasus running on the side of controlled system and matching WBEM specifications, and clients running on the administrator computer and requesting a particular operation from this broker. This is exactly a broker, because OpenPegasus is useless by itself without the providers delivering a particular functionality. Here is the list of some packages that contain CIM providers:
- ‘openlmi-account’ — user management;
- ‘openlmi-logicalfile’ — reading the files and directories;
- ‘openlmi-networking’ — network Management;
- ‘openlmi-service’ — service management;
- ‘openlmi-hardware’ — providing information about the equipment.
The main language for writing providers (otherwise called ‘agents’) is Python, though, of course, C/C++ is supported as well.
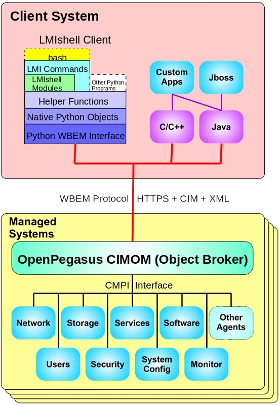
LMIShell runs on the administrator side and represents a convenient CLI shell that allows, among other things, to write scripts. The support for WBEM and CIM standard automatically implies the support for CQL/WQL, a subset of SQL designed specifically for this standard. The operators available in this subset include SELECT, WHERE, FROM, LIKE, and logical operators (NOT, AND, OR). That is, WQL includes most of basic SQL operators, except JOIN.
However, the situation with OpenLMI is not all that rosy as it may seem at first glance. The technology is new, and providers have not been thoroughly developed, while the security leaves much to be desired — consider only the fact that any (any!) user with access to OpenLMI can, in case of corresponding provider, without problem view the password hash of any other user. Yes, including the root password. And until at least this hole is not closed, I would highly recommend not to use it.
A new utility called ‘operf’ can monitor the performance in OProfile, which uses the hardware capabilities of modern processors. It allows you to measure the performance of individual applications without root privileges and, in fact, serves as a replacement for ‘opcontrol’, which is now considered obsolete, although it is still available in the system.
Do not forget about SystemTap that can, for example, support ‘uprobes’, which allows you to have fewer context switches when using the tapsets. In addition, the version of SystemTap included in RHEL 7 supports the monitoring of guest operating systems that run in virtual machines by using ‘libvirt’.
Security and Logging
RHEL 7 introduces new capabilities in the area of security. In addition to improvements of SELinux (in particular, the added support for SELinux labels in NFS and new domains), Red Hat has moved to ‘systemd’, which allows you to use some of its benefits. For example, previously, the directory ‘/tmp’ was public and any process could write in it. This, along with some errors made by developers, could lead to an attack on particular daemons which had these errors. The appearance of ‘systemd’ introduced the support for PrivateTmp — the service can have a separate namespace that is connected to ‘/tmp’ and does not intersect with other such namespaces. In addition, running services through ‘systemd’ is safer than running them manually. It is even safer that running them with the scripts, because the environment variables during the loading are not the same as those during the work.
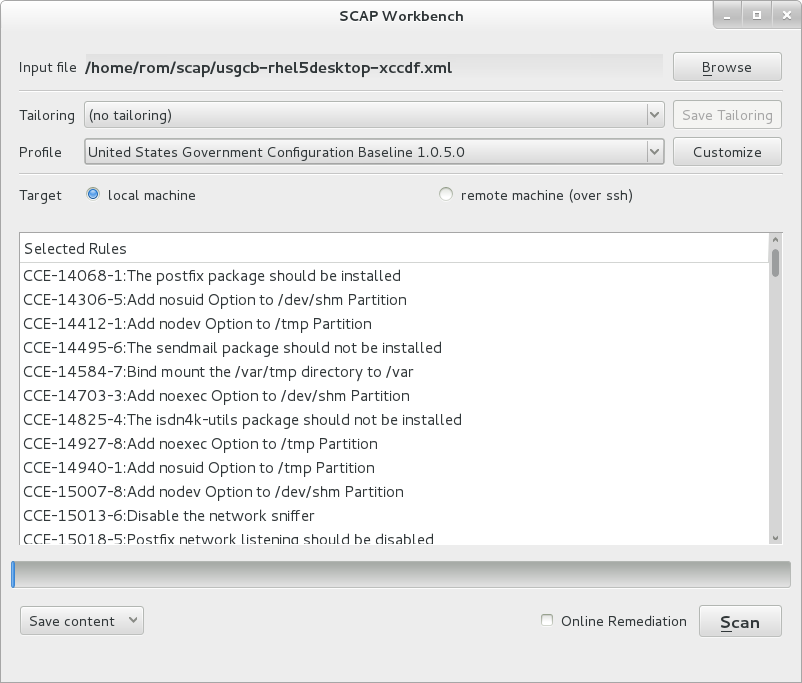
Among other things, RHEL now has a new graphical tool called ‘SCAP Workbench’, a front-end tool of OpenSCAP that allows you to scan local and remote systems for compliance with the requirements described in one of the standard formats (OVAL or SCDDF).
In RHEL, the logging is provided by the combination of ‘journald’ and ‘rsyslogd’, the format of log file is the same but can also include new fields introduced in ‘journald’. One of the most notable features of ‘journald’ is FSS (Forward Secure Sealing) that allows you to use cryptographic techniques to certify that the log files have not been changed. It works as follows: The system generates a pair that includes public and private key, the first message in the logs is signed by the private key, then this key is sent to the administrator and destroyed, while the logs that follow with a certain interval are hashed and, for each subsequent hash, the system uses the current hash and public key. Thus, the attacker will not be able to change the entries in the log files that indicate the penetration — he/she would only be able to delete the entire log file, which will certainly draw attention of a vigilant administrator.
Conclusion
RHEL 7 can be considered both from the point of view of the user, and from the point of view of corporate business and comfortable administration. For home users spoiled by multimedia capabilities of other products, the distribution released by the company from North Carolina will seem too old-fashioned and somewhat inconvenient, in particular, it cannot play video and MP3, but this distribution is not intended for home use.
However, from a corporate business perspective it is ideal. Almost. It has some shortcomings, the most important of which, in my opinion, is the aforementioned hole in OpenLMI. However, until this tool is not installed or run by default, this breach can be tolerated. Personally, I also felt uncomfortable working with the new Gnome even in its classical style, although I should note again that the developers of Red Hat, unlike some other companies, have tried to make the transition to it as painless as possible. Compared to Gnome 3, KDE4 looks more classic, but it has some minor drawbacks in terms of commonality.
Overall, the version 7 of this distribution can be safely recommended to those companies that can afford to subscribe to it. Those who cannot afford this have to wait for the release of its clones. Thankfully, they should already appear by the time this article is published. Red Hat has a surprising degree of tolerance for them.
