The ability to encrypt your traffic and route it through other countries is so essential now that I won’t waste your time listing all the situations where a VPN is a must. That said, most people go with turnkey services: either free ones—unreliable and loaded with ads and tracking—or paid ones that end up pricier than a basic hosting plan.
Setting up your own VPN means getting your hands dirty with the command line. For geeks like you and me, that’s half the fun: I spun one up in a single evening with zero prior experience. Soon friends started asking if they could have the same fast, reliable, and inexpensive service. The problem was, none of them wanted to mess with the setup.
For a long time I was generating and handing out prebuilt configs, but it got tedious. So I decided to build my own solution with rapid deployment, Telegram-based administration, and time-limited user quotas. In this article, I’ll go into the details and share all the source code you need to deploy it.
warning
By providing a proxy service to others through a hosting account registered in your name, you’re taking responsibility for everything they do online. Make sure to agree in advance on what is and isn’t allowed from your IP address. And if you plan to run a commercial service, consider drafting Terms of Service to limit your liability.
Why WireGuard?
I chose WireGuard because of its speed compared to OpenVPN and IPsec. Just look at these charts.


Benchmarks by Protectli and Entrostat report similar results. On Linux, WireGuard runs in the kernel, which provides an additional speed boost.
WireGuard doesn’t offer as broad a selection of asymmetric algorithms as OpenVPN and other protocols. But that’s also a benefit: it reduces the protocol’s attack surface.
Admin Panel and Telegram Bot
So, what does interacting with my bot look like from the user’s perspective? Let’s start with the main menu.

When a user logs in for the first time, the bot sends a welcome message and grants a trial subscription. In the bot’s configuration, you can customize all messages and parameters, including the trial duration.
In the main menu, users can check their subscription status, renew it, and download a configuration file with detailed setup instructions; in the “Renew” section, they can purchase a subscription for a chosen term.

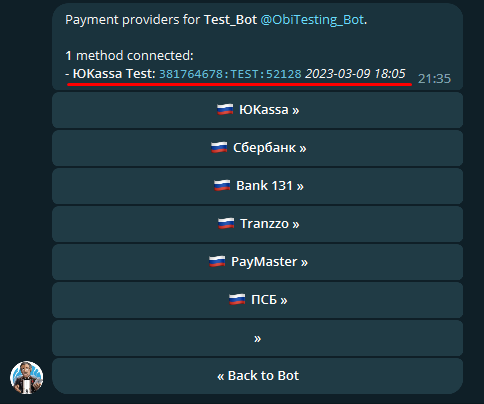
Payment is processed online, directly in Telegram. Therefore, we can choose any payment provider from Telegram’s supported providers.
info
I was planning to use Qiwi for payments since it offers an open API for generating invoices and doesn’t require registering as self-employed or setting up a sole proprietorship. Unfortunately, Qiwi recently suspended issuing the necessary tokens and hasn’t given any timeline for when this will resume. That said, you’ll still find a Qiwi admin panel option in the source code.
Once the user selects and pays for a subscription, they receive a payment confirmation, and their subscription details are updated immediately.

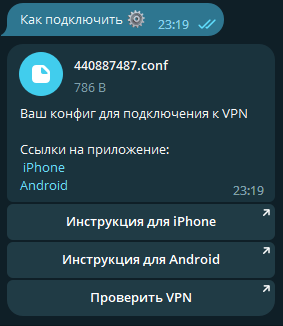
In the How to connect section, users can download their personal configuration for connecting to the VPN server, along with a step-by-step guide on setting up WireGuard on their phone and using it.

And finally, the most important section—the Admin Panel—which only the bot’s administrator can access.

The “List Users” section lets you retrieve a list of all users in the system or only those with a paid subscription.

In the Edit User by ID section, enter the user’s Telegram ID to either extend their time or reset it (i.e., revoke the subscription).

The Static Users section may be needed to grant VPN access to users who aren’t registered on Telegram. In this section, you can create static users, delete them, and download configuration files for connecting.

That’s the whole menu. The bot also sends notifications to users when their subscription ends. All notification texts can be edited in a JSON file.

Bot setup
You’ve seen what the bot looks like; now I’ll show you the settings and the script that deploys and configures WireGuard in just a couple of clicks.
Let’s start with the bot’s configuration files. The first one is config., which contains the bot’s core settings.
{ "admin_tg_id": 440887487, "one_month_cost": 120, "trial_period": 2700, "UTC_time": 3, "tg_token": "********:**************_**********", "tg_shop_token": "56456767:TEST:343455"}-
admin_tg_id— Telegram ID of the admin. You can get your ID from @userinfobot. -
one_month_cost— monthly subscription price in rubles. The minimum in RUB must be equivalent to 1 USD, but in practice it’s better to set it slightly above the current USD rate. The rate Telegram uses is listed on the official site. -
trial_period— length of the free trial. Default is 45 minutes (2700 seconds). -
UTC_time— time zone in UTC format. The bot will use it when displaying times. Default is UTC+3 (Moscow time). -
tg_token— the bot token obtained from @BotFather. -
tg_shop_token— Telegram Payments provider token. Required to accept payments. If left empty, the bot won’t send a payment form and online payments will be unavailable.
How do I get the tg_shop_token? Open Telegram and go to @BotFather, then send /. Select your bot and open the Payments section. There you can review all supported payment providers and how to connect them. After you link a payment provider, return to BotFather. The token you need should appear in the Payments section.

The last configuration file contains the message texts the bot sends to users. Messages can be formatted using Telegram’s HTML styles; see how to use them in the documentation.
{ "hello_message": "<b>Why choose Obi VPN?</b>...", "trial_message": "To let you evaluate our VPN...", "how_to_connect_info": "Your configuration for connecting to the VPN...", "success_pay_message": "Payment successful...", "ended_sub_message": "Your subscription has ended...", "alert_to_renew_sub": "Until expiration..."}I think it’s clear enough which message does what, so let’s not dwell on that and move on to the deployment.
Deployment
Full disclosure: I developed the script on Ubuntu and only tested it on Ubuntu 20.04 and 22.04, so I can’t guarantee it will work on other Linux distributions.
Installation is done with a single command:
sudo wget https://raw.githubusercontent.com/Obi0Wan0Kenobi/ObiVpn/master/Wireguard-installer-with-Adminpanel.sh \
&& chmod 774 Wireguard-installer-with-Adminpanel.sh \
&& ./Wireguard-installer-with-Adminpanel.sh
This command downloads the installation script, makes it executable, and then runs it.
When the welcome message appears, get ready to fill in the required fields—they’re necessary for the VPN to work properly. The script will automatically pull some values from your system and then ask you to either confirm they’re correct or adjust them.
- Enter the public IPv4 address (you can get it by running
ipin the terminal or from your hosting provider’s admin panel).-a - Specify the network interface (you can also find it in the
ipoutput; commonly-a eth0,ens5, or similar). - Set the port WireGuard will use (by default, the script picks a random port between 49152 and 65535, but you can choose any).
- Primary DNS server to embed in generated client configs (Cloudflare by default).
- Secondary DNS server (Cloudflare by default).
- Choose whether to install the admin panel.
- Enter your bot’s API token from BotFather.
- If you don’t provide a payment provider API token, payments in the bot will not work.
- Finally, enter your Telegram ID, which you can get from @userinfobot (https://t.me/userinfobot). The user with this ID will become the admin of the bot and the entire service.
After you’ve filled in all the fields, press any key to start the installation. When it’s done, the script will display “WireGuard Installed.”
Now open our bot and send the / command.

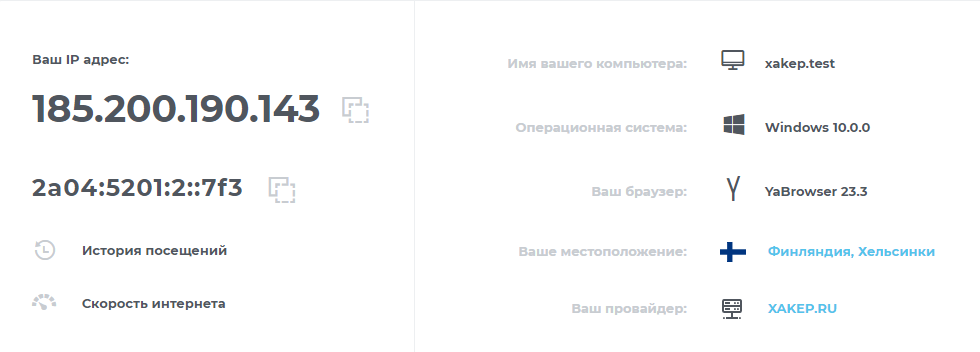
The bot responded, which means the installation was successful. Now we can ask the bot to generate a config, import it into the WireGuard client on our device, and then visit 2ip.ru to verify the VPN is working. As you can see, our original IP, location, and other parameters have changed, which means the VPN is working perfectly.

Key takeaways
We’ve shown how to deploy your own VPN service with a user-friendly admin panel in just a couple of minutes. You can use it to share access with friends or even try to earn a bit of money on the side.
Lastly—a couple of tips for choosing a hosting provider. While WireGuard is faster than other protocols, don’t forget about the impact of the data center’s location. I recommend not committing to a long-term VPS upfront; first compare different regions, data centers, and providers, then choose the best option.
