The idea to test a modern emulation platform came to me when I was overseeing a team of cybersecurity engineers. They explored, deployed, integrated, and tested various products. There are plenty of vendors and solutions, but most of the engineers focused on the protection of the same kind of systems and standard corporate infrastructure: workstations, AD servers, file shares, mail servers, web servers, and database servers. In addition, any infrastructure includes some standard hierarchy of user groups, network segmentation, software, and network equipment (switches, routers, firewalls, etc.).
Integration tasks are usually typical, too: setting up authentication via AD/Radius, connecting to mail servers, rolling out agents, assembling a cluster, providing mirrored traffic, submitting logs or flows to analysts, etc. Experience shows that without a standardized approach, each engineer eventually builds up a similar infrastructure with a unique blackjack. As a result, you have a horde of differently configured virtual machines running almost the same software. Most likely, other team members won’t be able to use such VMs without preliminary research.
In addition to ‘personal’ VMs running on different ESXi hosts, segmented networks are required to test firewalls, run malware, etc.; as a result, such infrastructures often include port groups. Even though they are required only for labs, in reality, they communicate with each other and with the Internet via the production infrastructure. When an engineer quits, such ‘personal’ virtual machines are simply killed together with all ‘accumulated experience’. Therefore, this approach seemed to be ineffective to me, especially considering that the VMware platform doesn’t provide some of the features and flexibility. So, I decided to standardize the process, and concurrently test a modern emulation platform.
Cyberpolygon? But why?
As you probably know, a cyberpolygon is a kind of virtual environment whose primary purpose is training. Unlike classic CTF competitions, cyberpolygons are used to train not only ‘attackers’, but also ‘defenders’. In addition to free cyberpolygons designed for competitions, there are plenty of expensive vendor solutions with ready-made attack and defense scenarios that enable you to effectively train both ‘blue’ and ‘red’ teams, either in the cloud (subscription-based) or on-premise. In this particular case, our team needed a platform able to implement the following functions:
- efficient internal/external training of engineers; and
- a fully featured hands-on demonstration stand for customers.
Selecting a platform
EVE-NG Community Edition was chosen as the base platform; this is a fork of well-known UnetLab that is no longer supported. The solution is very popular among networking specialists – just look at these network topology examples with clusters and BGP!
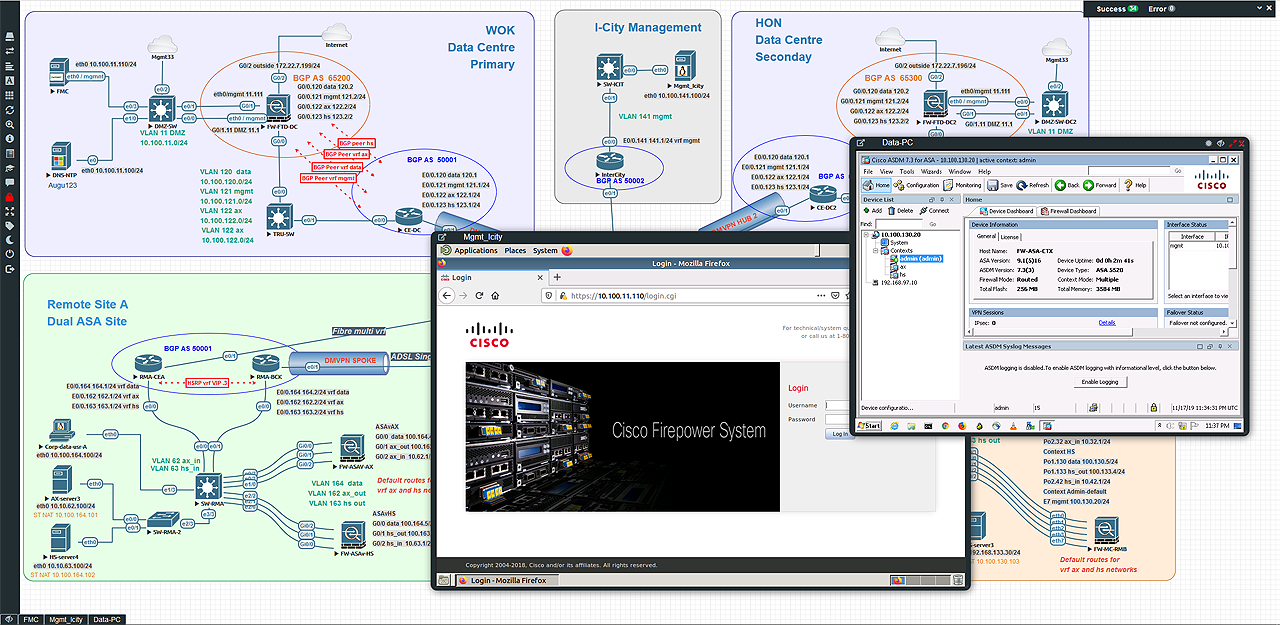
However, it was created not only for networking professionals: the functionality of this platform is virtually endless and limited only by your imagination and knowledge. Our purposes required a web interface; aside from EVE-NG, it was available at that time only in the GNS3 beta version. Detailed information on all EVE-NG features, including the Professional and Learning Center versions that support Docker and clustering, is available on its official website; in this article, I will discuss only the key functions.
- QEMU/KVM. In this combination, QEMU acts as a hardware emulator; it’s flexible enough and can run code written for one processor architecture on another architecture (ARM on x86 or PPC on ARM). KVM with its hardware-based virtualization (Intel VT-x and AMD-V) ensures high performance;
- IOU/IOL and Dynamips. Support of old but still workable Cisco switches and routers;
- Memory optimization UKSM in the kernel. When similar VMs are used simultaneously, this function allows to deduplicate the memory, thus, significantly reducing RAM consumption;
- Fully featured HTML5 web interface;
- Multiuser mode for simultaneous operation of various virtual labs; and
- Interaction with ‘real’ networks.
Deployment
We deployed EVE-NG on bare metal. For this type of installation, the system requirements are as follows: Intel Xeon CPU supporting Intel® VT-x with Extended Page Tables (EPT) and Ubuntu Server 16.04.4 LTS x64.
The specific configuration depends on the expected load: the more the better, especially for RAM. If you are confused by the old OS version, don’t worry, it will be supported until 2024. Note that the Community version is not updated as frequently as the Professional one that requires 18.04 LTS to be installed on hardware. If you use clouds, then keep in mind that EVE-NG officially supports GCP.
info
Did you know that a new user can get 300 USD in GCP (Azure, Yandex) in the form of free credits to test services (e.g. to run a VM)? And that GCP has preemptible VM instances? These virtual machines cost 3-4 times less than ‘regular’ ones, but live a maximum of 24 hours or less: if the cloud needs resources used by such a VM, it will kill the VM.
Unfortunately, Google’s policy has changed, and free credits cannot be spent on preemptible VMs; but if you ever need a cheap, short-time lived VM with 128 RAM in the cloud, you know what to do! 😉
To familiarize you with the platform, I will show how to deploy it on a laptop with VMware Workstation. Only VMware, including Player and ESXi, is supported. Note that nested virtualization (i.e. a virtual machine running inside another virtual machine) can affect performance. Also, your CPU must support hardware virtualization technologies such as Intel VT-x or AMD-V. Make sure to check whether they are enabled in the BIOS.
Interestingly, it was never announced officially that the Community version supports AMD, while the documentation for the Professional version states that it supports all latest processor versions. Anyway, I deployed the Community version on an AMD Ryzen 5 4600H processor without any problems.
If you use Windows as the host OS, keep in mind the role of Hyper-V, especially on Windows 10. According to the Microsoft website:
We introduced a number of features that utilize the Windows Hypervisior. These include security enhancements like Windows Defender Credential Guard, Windows Defender Application Guard, and Virtualization Based Security as well as developer features like Windows Containers and WSL 2.
In addition to the OS and its features, this service can also be used by Docker Desktop. Therefore, up to and including version 15.5, VMware Workstation (similar to VirtualBox) could not be run on a host with the Hyper-V role enabled. The collaboration between Microsoft and VMware ultimately made it possible to integrate Workstation with WHP via an API; thus, providing a workable solution. Too bad, not only does this bundle work slower, but also has a main limitation: Intel VT-x/AMD-V functions are not available to guest VMs. The Hyper-V service exclusively uses VT-x and restricts access to it for other hypervisors.
Therefore, if the Hyper-V role is enabled on your host, find out what it is used for and disable it if possible. If it’s not possible, use a different PC, server, or cloud.
I recommend downloading EVE-NG Community Cookbook in the PDF format. It provides comprehensive guidance for the entire project, from A to Z.
For quick deployment, download the ZIP archive containing the OVF image, unpack it, and double-click on EVE-COMM-VM. to import it into Workstation.
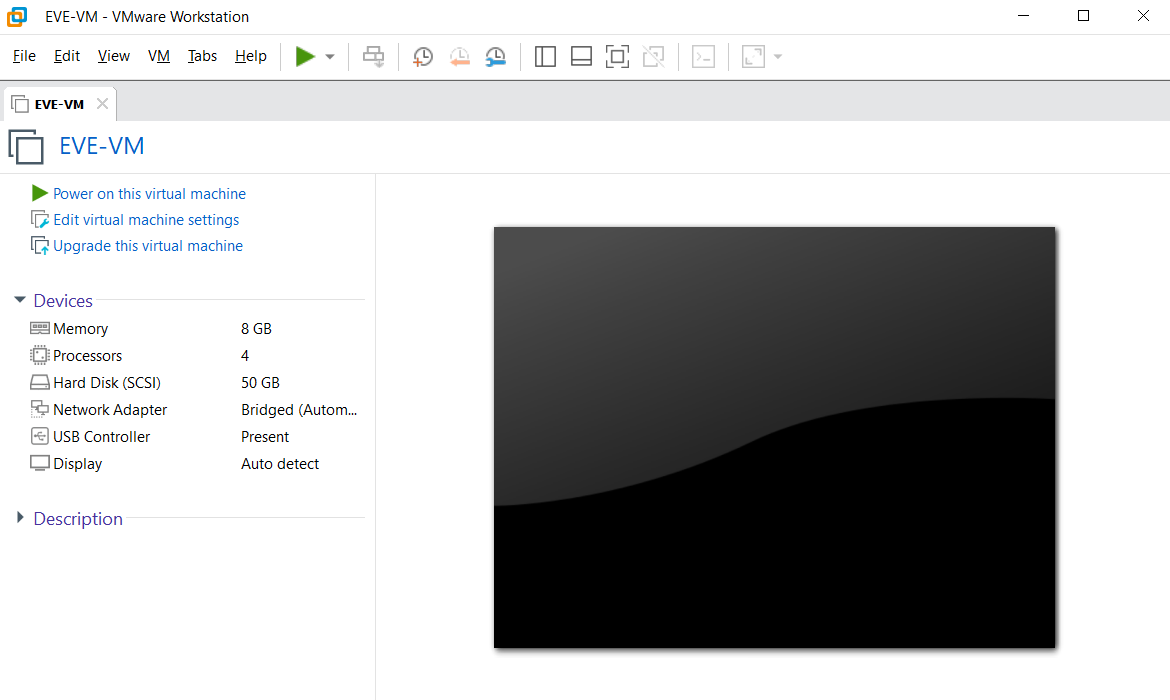
Open the settings and add memory and processors if necessary. Make sure to check the Virtualize checkbox in theVirtualization settings group. Without it, EVE-NG will boot, you can open and create labs, but you won’t be able to run VMs inside a lab.
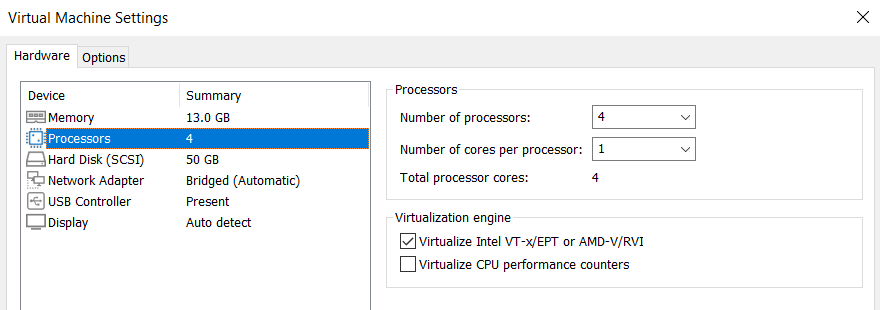
For clarity purposes, select the Bridged mode for the network adapter so that your VMs inside the lab will be available directly on the local network.
Using the platform
Run EVE-VM in Workstation. After a successful boot-up, you will be prompted to enter the password.

Log in using the standard root/ account for the console.
Then answer standard questions about the OS settings, including:
- New root password;
- Hostname;
- DNS domain name;
- DHCP/Static IP address;
- NTP Server; and
- Proxy Server configuration.
Answer the questions, and the system will automatically reboot. After the reboot, open the web interface using the IP address specified in the VM console and log in using the admin/ account.
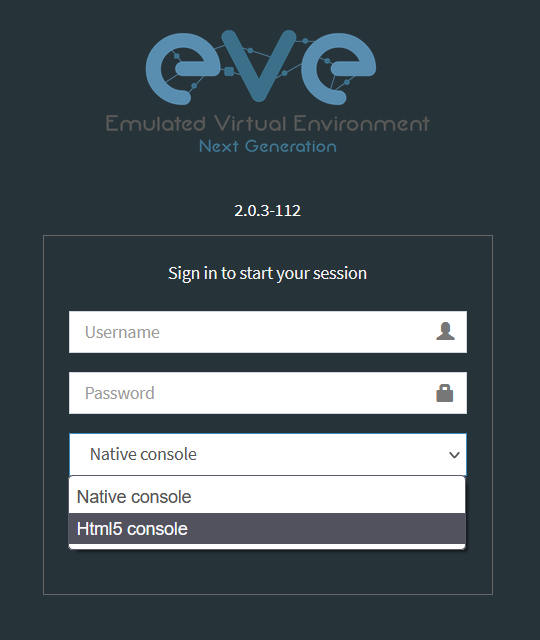
You interact with the platform mostly via the web interface. The need to connect to EVE over SSH arises only occasionally (e.g. to prepare images). There are two ways to connect to a VM monitor: using native applications or using the HTML5 console. If you use a native console, remote access apps and Wireshark must be installed on the PC from where you open the web interface. The list of required software differs depending on the OS; some registry tuning is required as well; so, I suggest to use the Windows/Linux/Apple Client Side Integration Pack: it contains everything you need, including configuration scripts.
If you use the HTML5 console, all control is exercised via the browser. Similar to many modern vendor labs, the console uses Apache Guacamole.
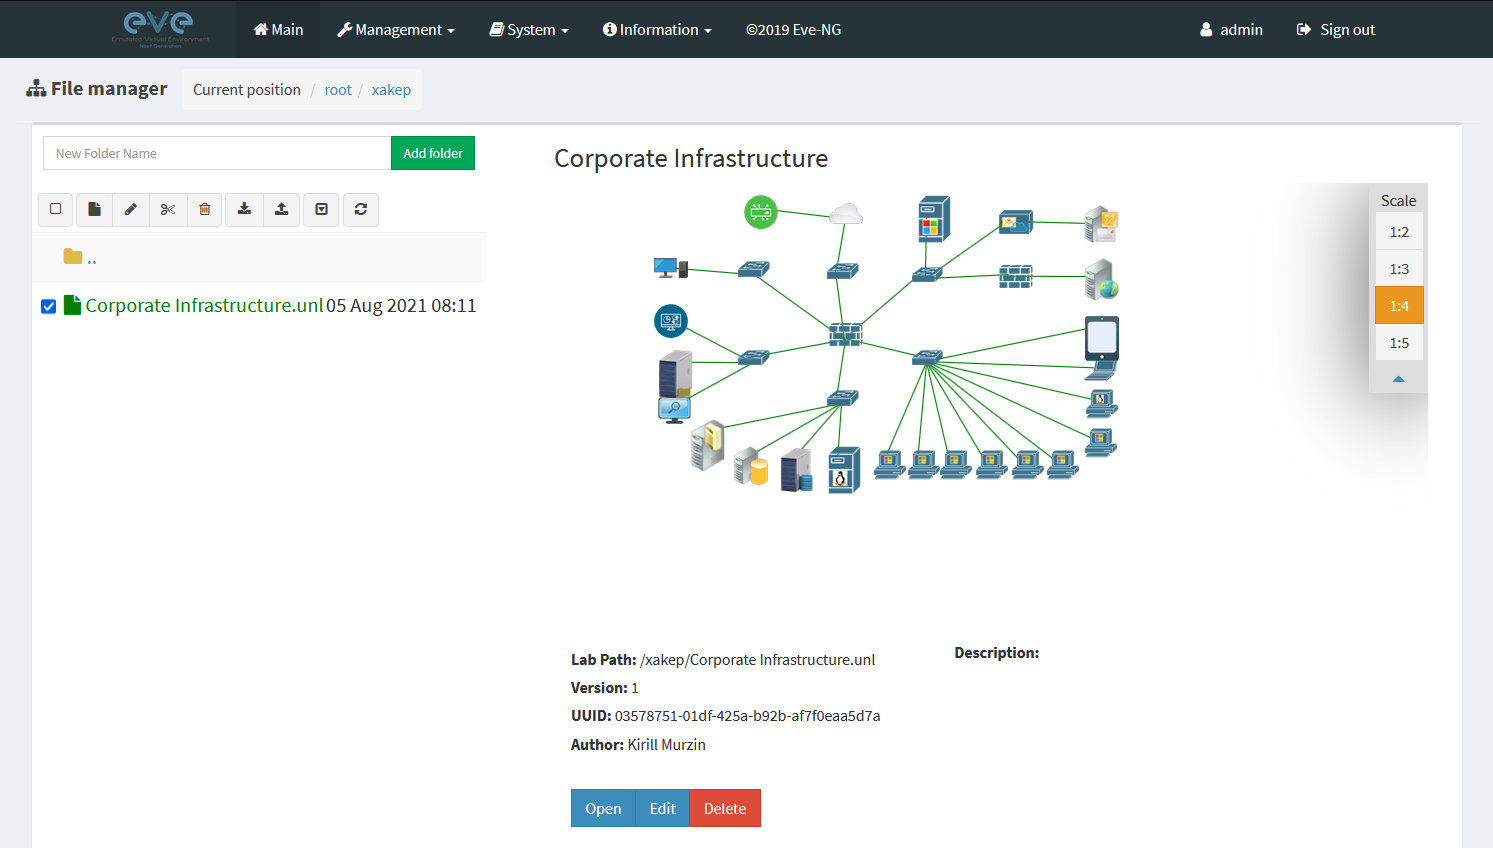
After logging in, you will see a file manager that stores lab files. First, I am going to show you a ready-made corporate lab, and then you will create your own one for training purposes. Note that for better visualization, many of the connections in this diagram were altered or removed.
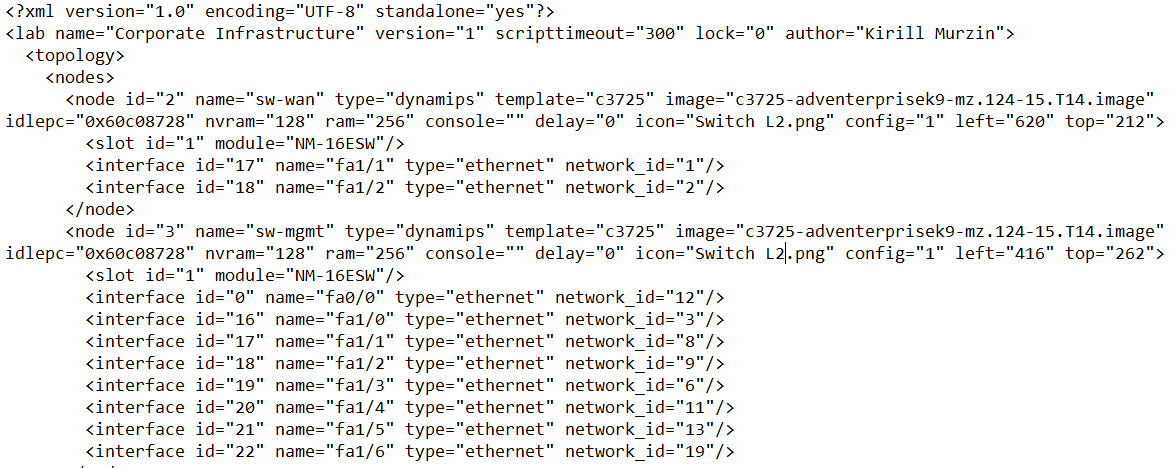
A lab file is essentially a config in the XML format that describes the configuration of nodes, their location in the field, connections, etc. Nodes are VM objects that can be represented by IOL/Dynamips/QEMU images. Labs can be cloned, exported, and imported using the web interface.
When you open a lab, a topology somewhat similar to Visio is demonstrated. This topology is used to add nodes and connect them to each other. The menu on the left side contains all the required functionality; you can either start all nodes at once or start them selectively.
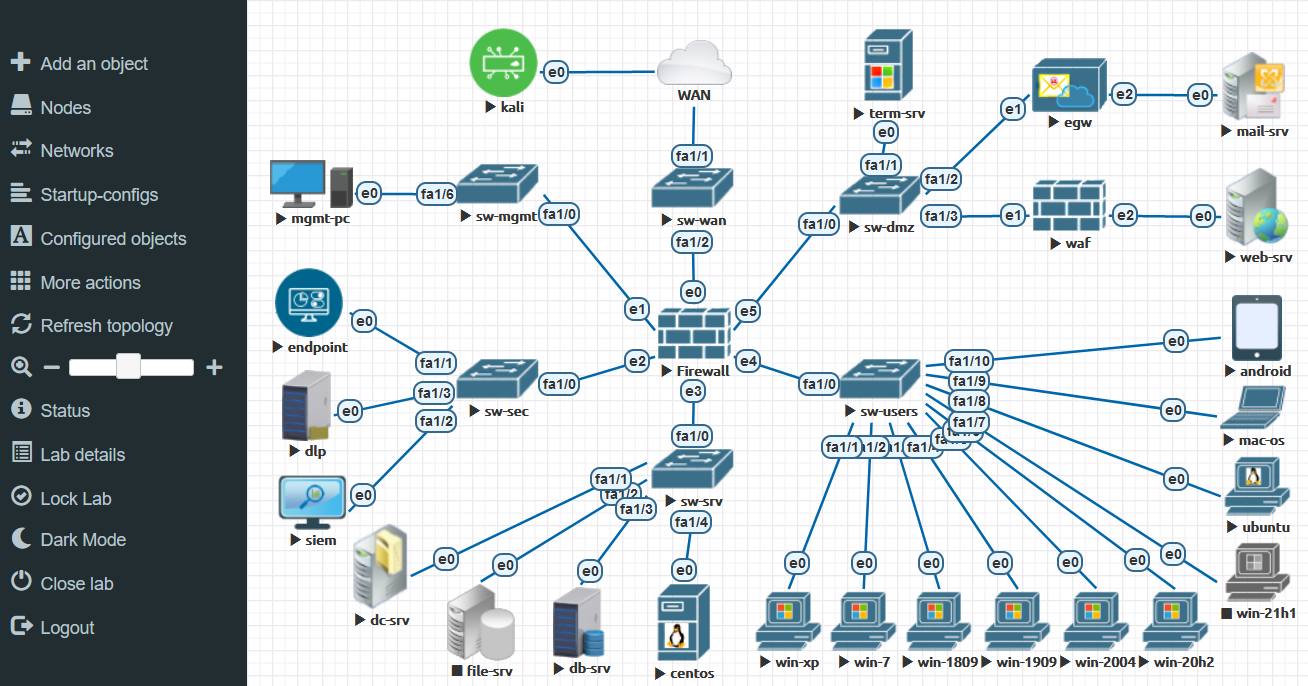
Unlike Visio, when you click on an icon, a remote connection to the node opens.
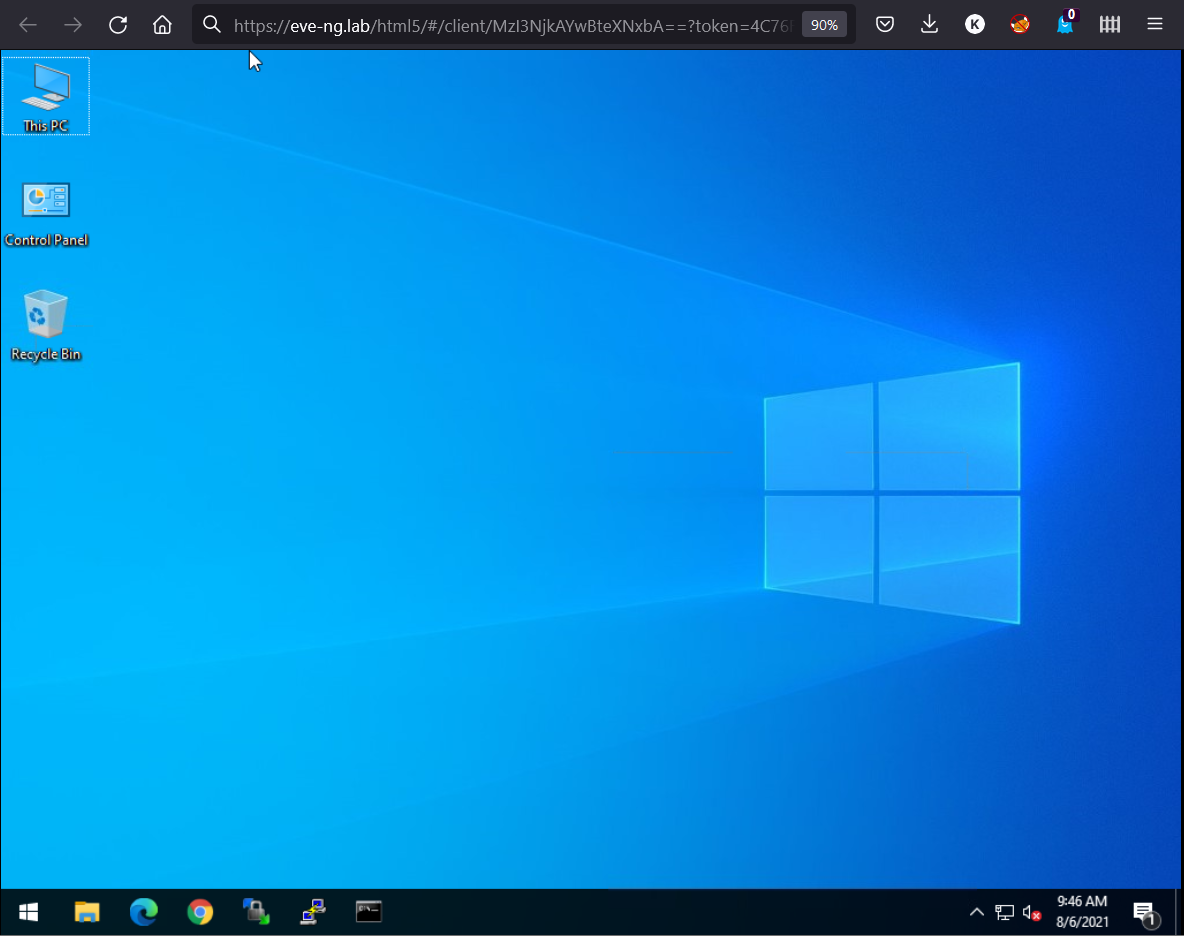
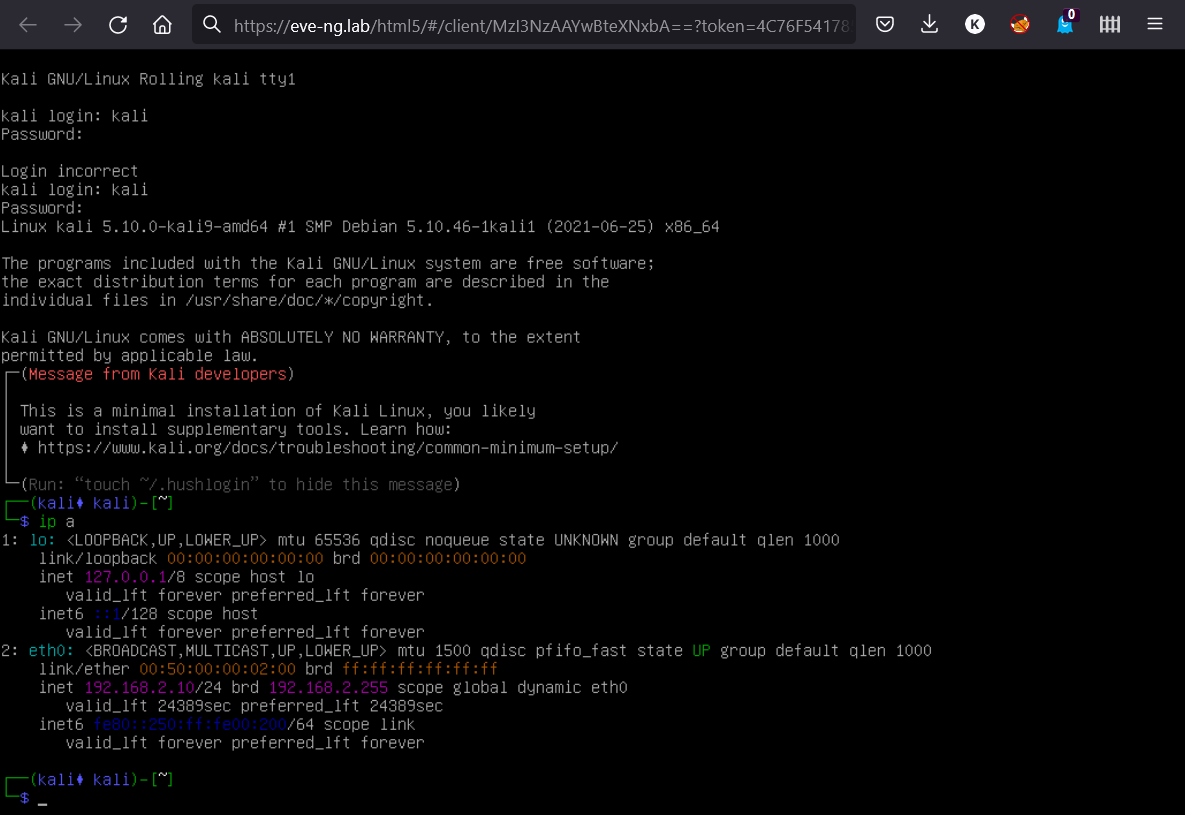
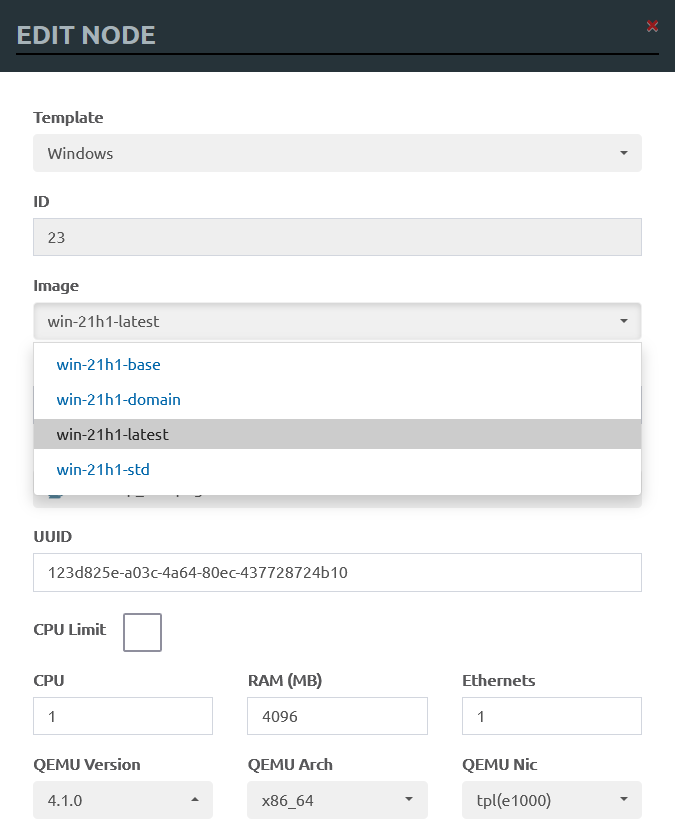
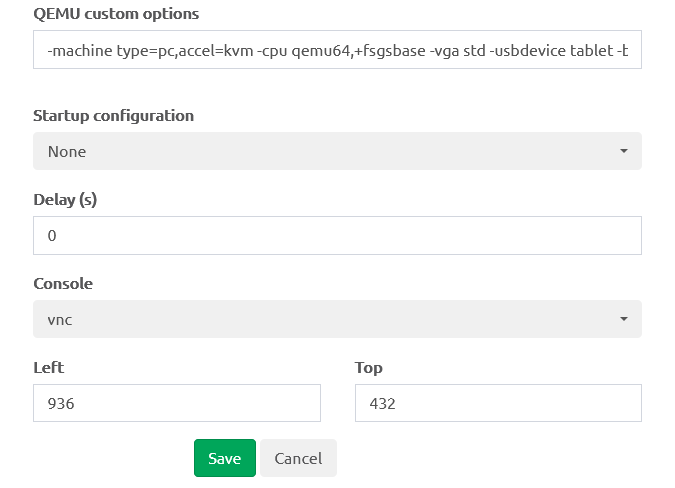
Each node has its own standard VM settings, including the boot-up image, number of CPUs, RAM size, number of Ethernet ports, hypervisor arguments, etc.
Networks
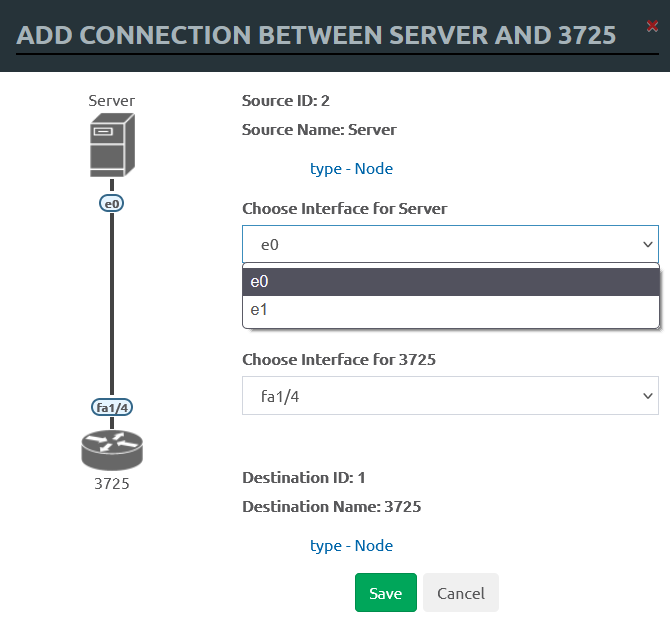
EVE supports two main types of networks: bridge and management interface. You just click on nodes and select the source and destination ports. This is one of the reasons why networking specialists like EVE so much (in ESXi, you have to create a separate vSwitch and port group for ‘clean’ point-to-point connections, which takes plenty of time and effort).
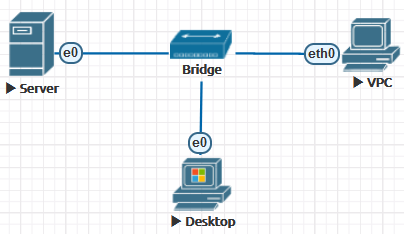
In the bridge mode, the network acts like an unmanaged switch. It supports the transmission of tagged dot1q packets. This may be required when you have to connect many nodes into a flat (dot1q) network without using a network device image. The result is a completely isolated virtual network.
The second network type is called “management” with the names Cloud0/. This interface is configured in the bridge mode with the first server’s network adapter. This allows you to make nodes available directly over the network, they will be located in the same network segment with the management interface, and can interact with other external networks.
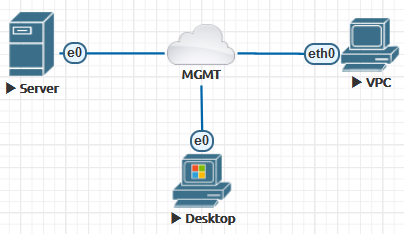
Other Cloud* interfaces can be linked to the second or higher Ethernet port for connection to another network or a device. You don’t have to configure the IP address. They will act as a transparent bridge between your external connection and the lab node.
Images
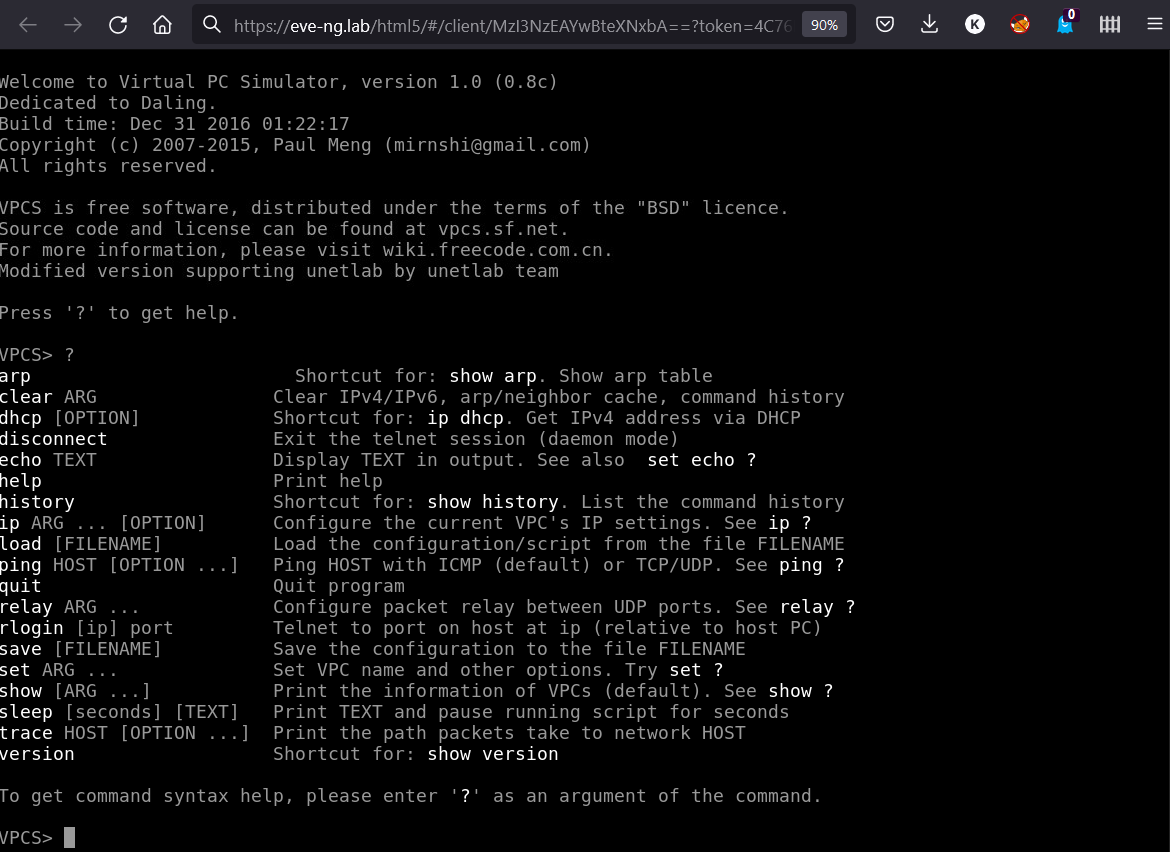
EVE is shipped without images; out of the box, it includes only Virtual PC with the basic networking functionality.
The list of supported images available on the website isn’t always up to date (this is noted in the documentation). Due to the licensing restrictions, the authors of the project cannot post direct links to images on their website, but in reality, any image can be found on the internet by using keywords. If you work in a systems integrator company, that’s not a problem at all.
Dynamips/IOL images
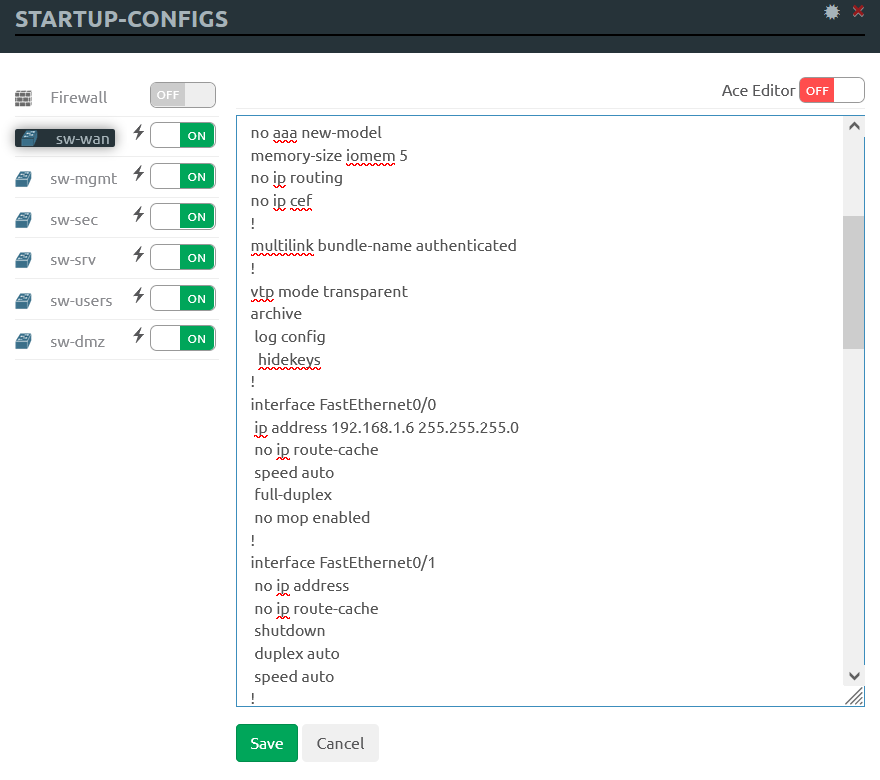
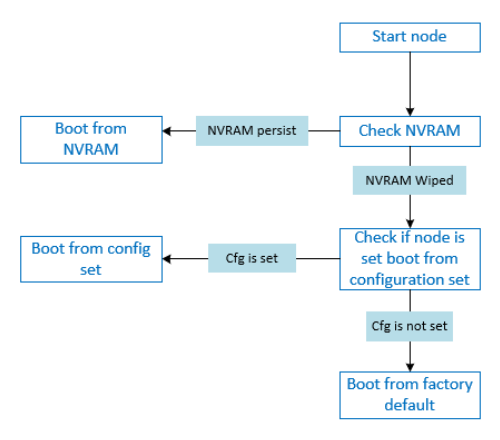
All you have to do with Dynamips/IOL network device images is find out the IDLE PC value and create a license file. Unfortunately not all features of these network devices are supported. Their configs are stored separately in the startup-configs menu and in NVRAM, not in the image file. At startup, the node always checks NVRAM for a saved configuration.
The loading order of such images is shown in the self-explanatory diagram below.
QEMU/KVM images
All other systems will run as QEMU images. In EVE, these images work as follows: first, a base image is created, then the VM is started and runs, and all changes are written to a separate file (like snapshots associated with individual users).
This mechanism is very convenient for group training when several engineers have to perform the same lab assignment in parallel: when a user makes changes in the image it works with, this doesn’t affect other images in any way. If an image becomes inoperable due to incorrect settings and there is no time to search for the problem, you can click the Wipe (Wipe all nodes) button, and the lab image will return to its basic state for a specific user.
Among other things, such a scheme solves the licensing problem since only one license is required. The parameters licenses are bound to don’t change (as it happens, for instance, when you use ESXi for cloning).
Large vendors usually offer images of their VMs in several variants: VMware, KVM, and Hyper-V. But if there is no ready-made image, you can create it or convert from an existing one.
Image conversion
To convert an image, use the qemu-img console utility embedded in EVE. Important: qemu-img and / have different versions; so, use the full path as noted in the documentation.
For instance, the following command converts an Vmware image into a QEMU image:
$ /opt/qemu/bin/qemu-img convert -f vmdk -O qcow2 image.vmdk image.qcow2For other conversion formats and arguments, see the table below:
| Image format | Argument |
|---|---|
| QCOW2 (KVM, Xen) | qcow2 |
| QED (KVM) | qed |
| raw | raw |
| VDI (VirtualBox) | vdi |
| VHD (Hyper-V) | vpc |
| VMDK (VMware) | vmdk |
Creating an image
When creating your own image, follow the rules for naming disk folders and images since the system is sensitive to this.
The root directory for images is /. As an example, I will show how to create an image on the basis of a Kali Linux distribution. First of all, download the installation image kali-linux-2021..
-
Create a directory on the EVE server:
$ mkdir /opt/unetlab/addons/qemu/linux-kali/ Transfer the installation image
kali-linux-2021.to the folder2-installer-netinst-amd64. iso /on the EVE server.opt/ unetlab/ addons/ qemu/ linux-kali/ -
Rename the installation image to
cdrom.:iso $ mv kali-linux-2021.2-installer-netinst-amd64.iso cdrom.iso -
Create a new HDD file in the same folder. In this example, its size is 30 GB, but you can set any size you want:
$ /opt/qemu/bin/qemu-img create -f qcow2 virtioa.qcow2 30G Create or open a lab using the web interface and add a new node; if you need the Internet for installation, connect it to the network.
Start the node, open it, and continue the installation as usual.
After the installation, reboot and turn off the node from the inside using standard OS tools; then delete the
cdrom.file.iso
If you check the size of the file /, you will see that it hasn’t changed and remains empty.

This is because all changes that occur during the node operation are written to a separate file located at /. If you need to make changes inside the node (e.g. install software or upload files) and add these changes to the base image, do this as shown below.
Adding changes to base image
-
Turn off the node from the inside using standard OS tools and right-click on the node in the Eve web interface. You will see a number in parentheses. This is the Node ID, write it down (in this example, it’s 2).
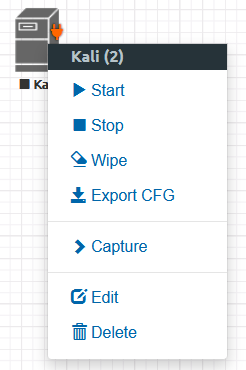
Node ID -
In the menu on the left side, open
Laband write down the lab ID (in this example, it’sDetails 6393e2df-501f-405c-b602-2e9a080f72f1).
Lab ID Close the lab and go to
Management/. Find your user and write down its POD value. By default, admin’s value is 0.User Management -
Substitute your values to the path
/and follow it:opt/ unetlab/ tmp/ PodID/ UUID/ NodeID $ cd /opt/unetlab/tmp/0/6393e2df-501f-405c-b602-2e9a080f72f1/2/As you can see, the disk file with changes occupies 3.1 GB in this folder.

Size of the temporary image -
Execute the command below specifying the disk file name:
$ /opt/qemu/bin/qemu-img commit virtioa.qcow2
If everything went well, you will receive the message Image . Check the files to make sure that the changes have been transferred from the temporary folder to the base image.
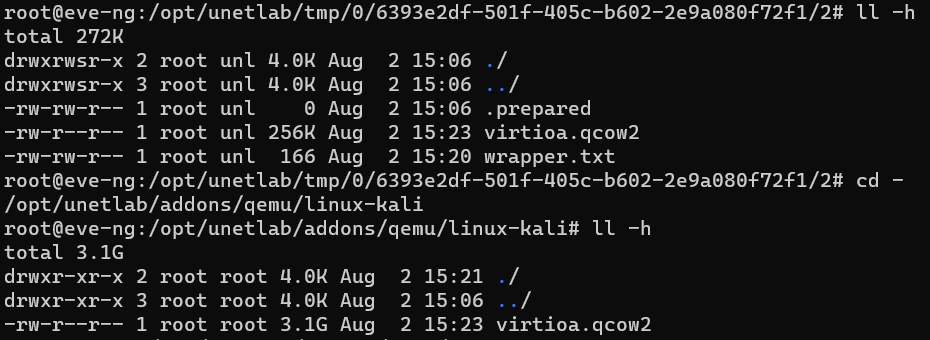
Now, when any of the users turns the linux-kali node on, the base disk image file will be loaded. The above instruction was taken from the official documentation, but in reality, its implementation causes some problems (see below in the troubleshooting section).
Creating a lab
Now let’s create a minilab using the newly-gained knowledge.
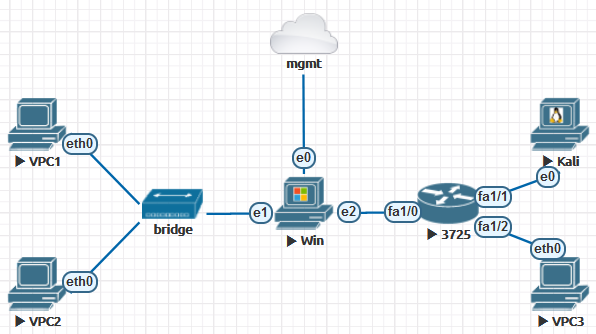
Your lab will include the following components.
Networks:
- mgmt (to access the Windows node from the ‘real’ network); and
- bridge (to set up an L2 network between three nodes).
Images:
- linux-kali;
- win-10-x86-20H2v4; and
- c3725-adventerprisek9-mz.124-15.T14.
The purpose of this lab is to demonstrate:
- how to run various operating systems (Windows/Linux/IOS);
- how different emulators (Dynamips and QEMU) work in parallel;
- how simple it is to connect a node to a ‘real’ network;
- how simple it is to create point-to-point connections; and
- how to create an L2 network using the ‘network’ object and using emulation.
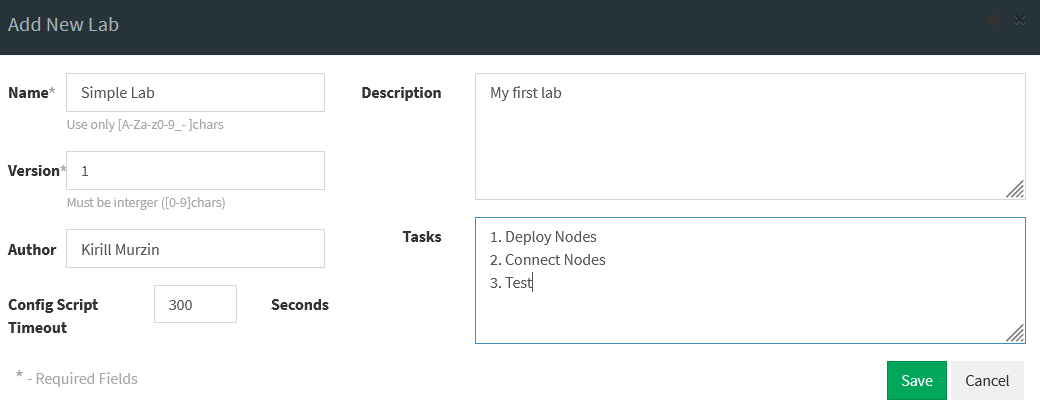
Open the web interface, create a new lab using the file manager menu, and enter the required information.
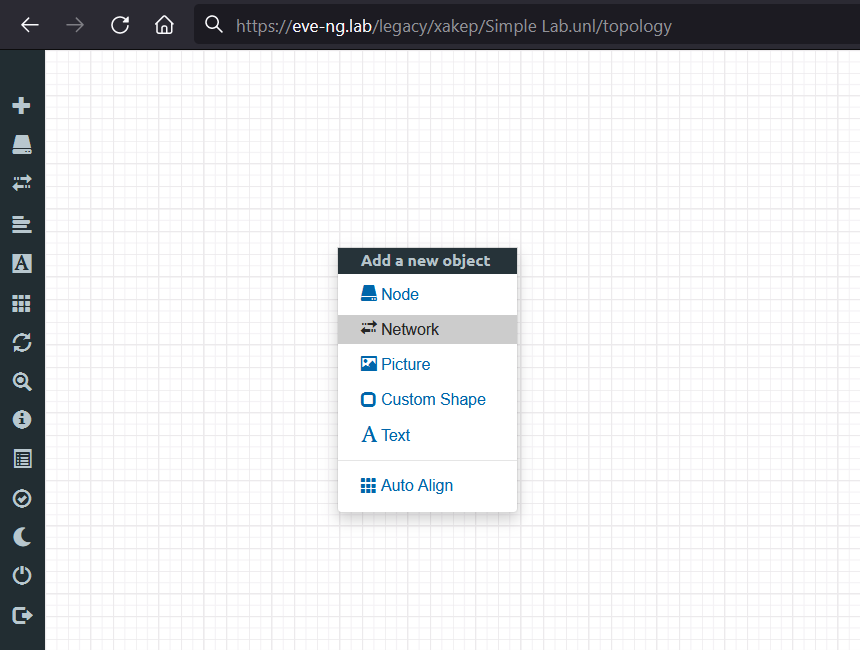
Right-click on the working area and select Add – Network.
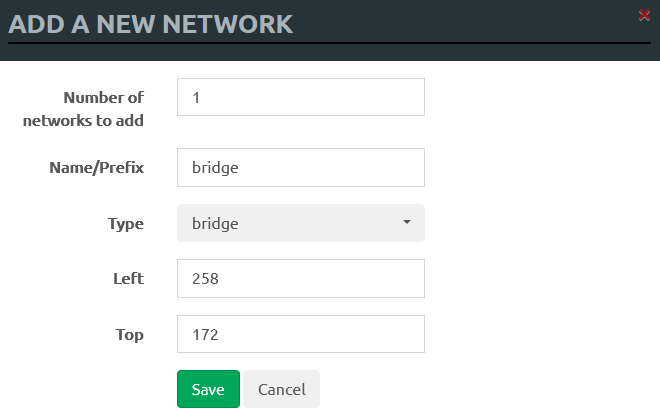
To add a network in the bridge mode, select: Type .
In a similar way, add a management network: Type .
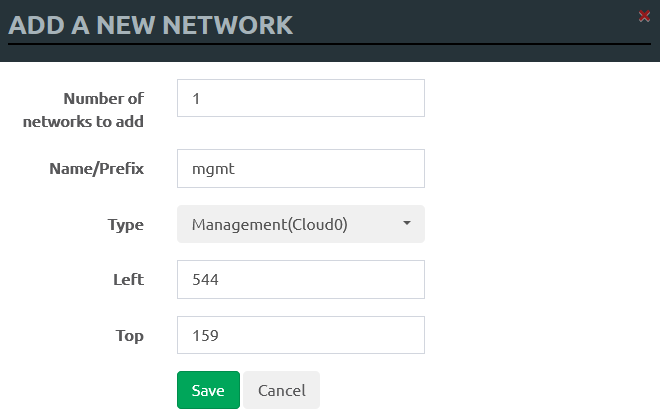
Next, you have to add nodes in the same way as networks, but instead of a network object, select node.
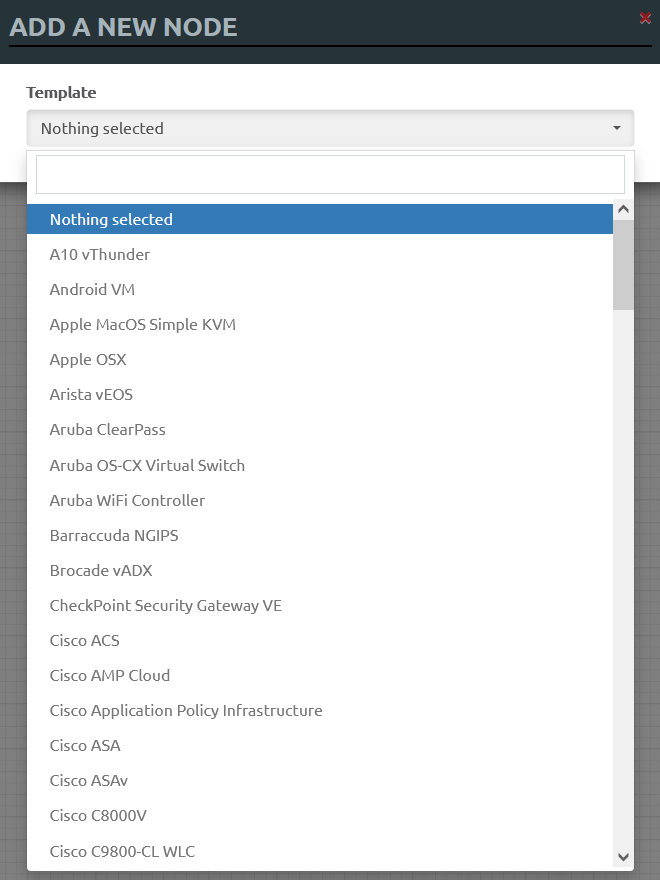
You can start typing the vendor name to narrow the search. I suggest hiding images that you don’t have in the system:
- Connect to EVE over SSH and go to the folder
/.opt/ unetlab/ html/ includes/ -
Rename
config.tophp. distributed config.:php mv config.php.distribution config.php -
If necessary, edit the
config.file:php <?php// TEMPLATE MODE .missing or .hidedDEFINE('TEMPLATE_DISABLED','.hided') ;?>
Now when you add a node, you will see only images available in your system.
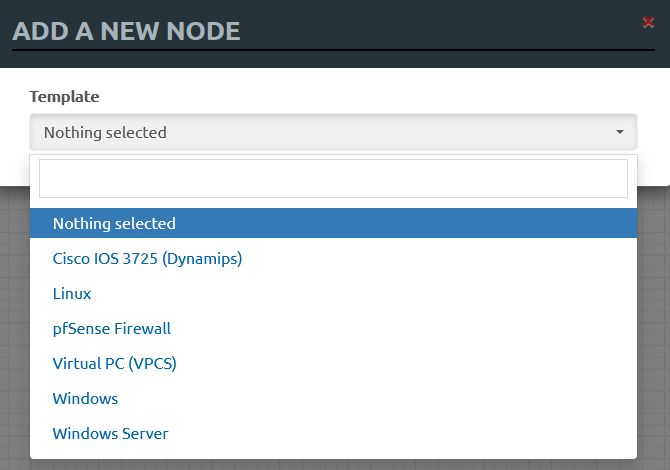
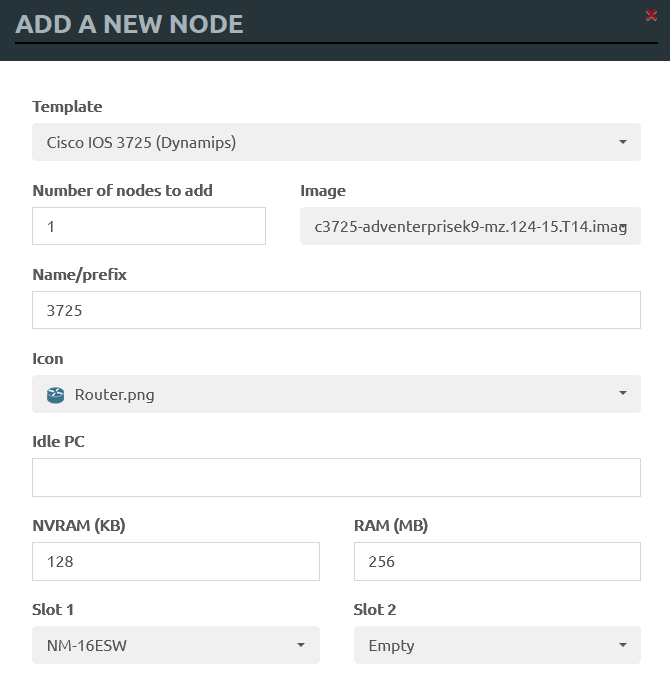
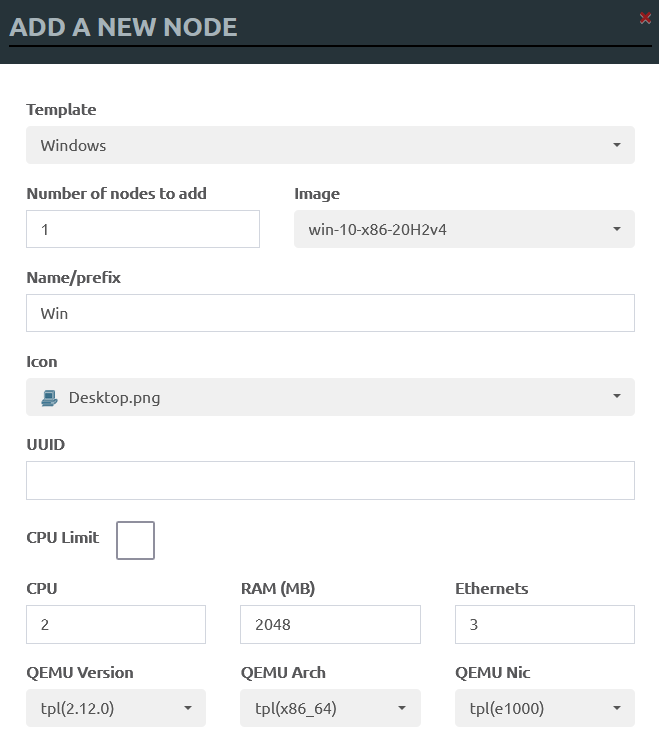
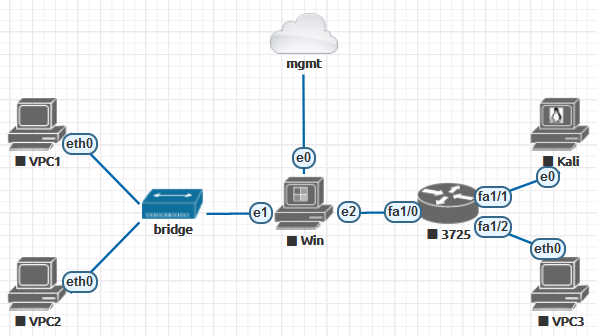
Add a Cisco IOS 3725 router (Dynamips) and place the NM-16ESW module in its first slot. This module is used to implement the switching principles on the router.
Now add Windows, Kali, and VPCS; the only difference is that the Windows node has three networking ports.
Connect the nodes in accordance with the selected topology. To do this, hover the cursor over the node, and a small ‘network plug’ icon will appear. By clicking it and moving the cursor to another node, you connect them with a virtual patch cord. There is a limitation in the Community version: the nodes you want to connect must be turned off first: the so-called ‘hot plug’ is disabled.
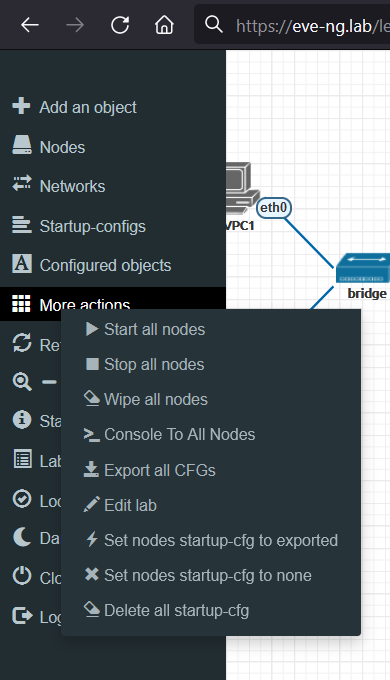
Start all your nodes by selecting More in the menu on the left side.
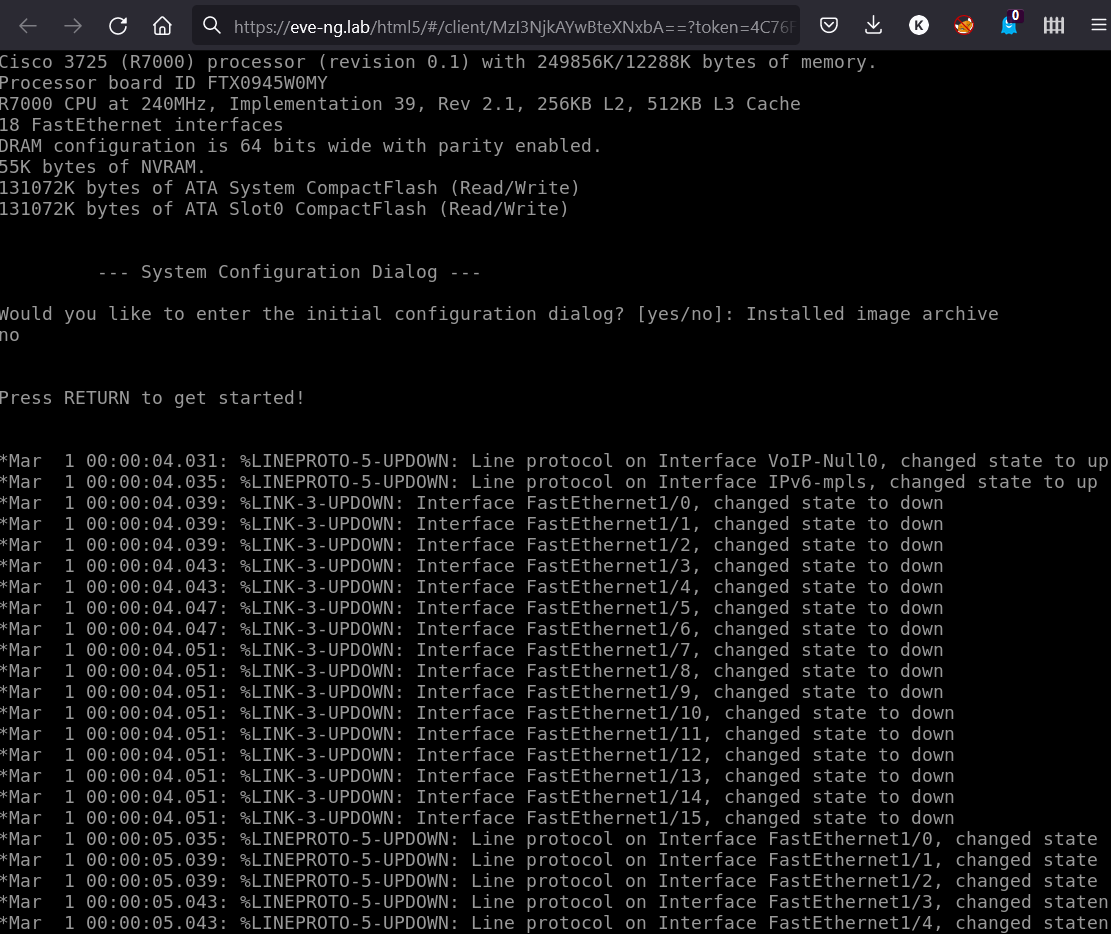
Click on the router icon, and its console will open. You only need the switching functionality; so, there is no need to configure it. Answer no to the question: “Would you like to enter the initial configuration dialog? [yes/no]:”. The router will boot up.
Now open the Windows system and configure the networking interfaces:
-
e0is your local network; its address will be assigned via DHCP; -
e1is an isolated subnet, 172.16.1.1/24; the gateway and DNS server aren’t specified; and -
e2is an isolated subnet, 10.0.0.1/24; the gateway and DNS server aren’t specified.
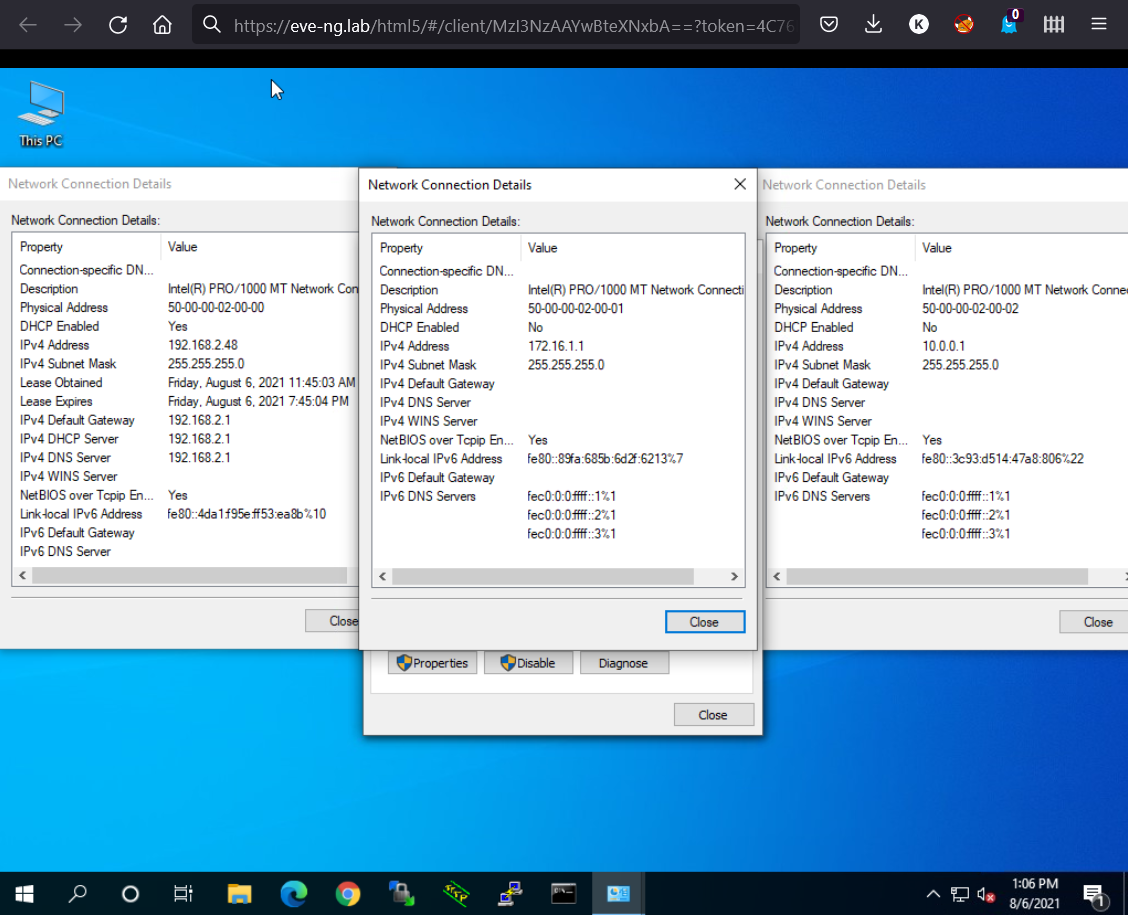
As you can see, the e0 interface has an address assigned over DHCP, and it’s from the ‘real’ network. Now all devices on your local network can communicate with this node.
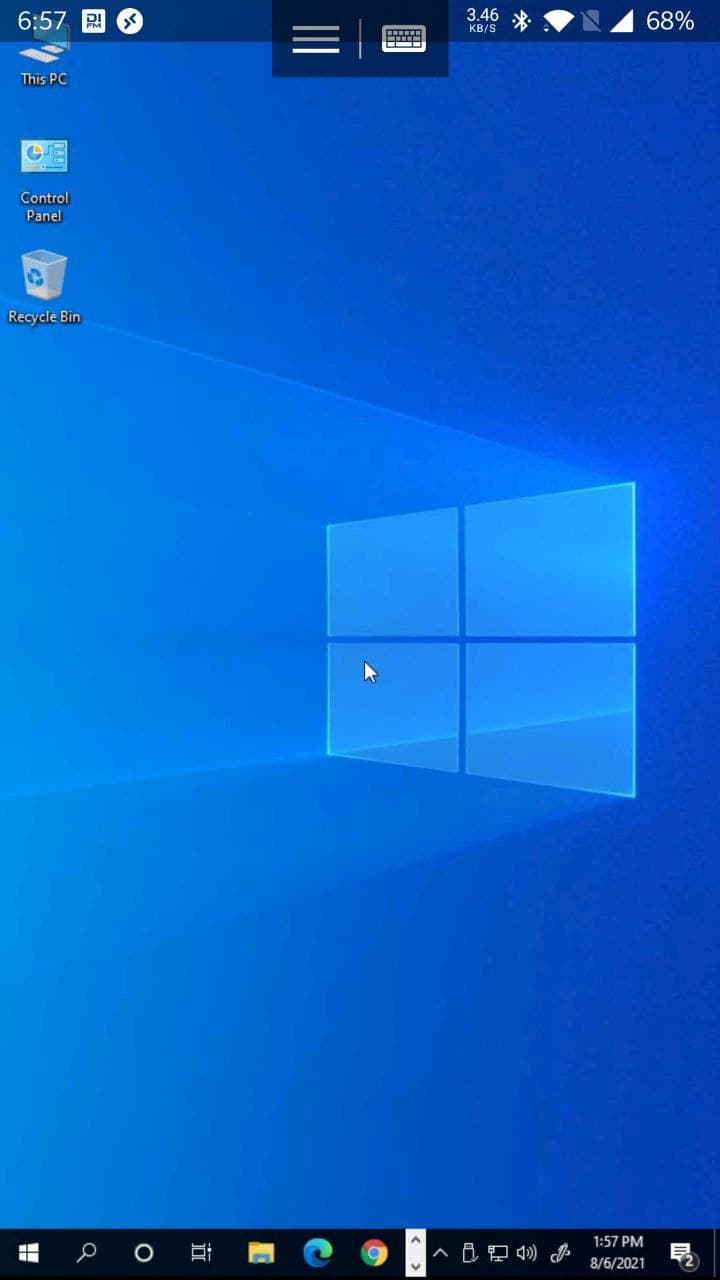
Let’s check this by connecting from a smartphone to your node over RDP.
Now click on the VPC1 icon and go to the management console. Configure the address with the ip command and then ping your Windows system using the ping command. For additional verification, display the ARP table using the arp command.
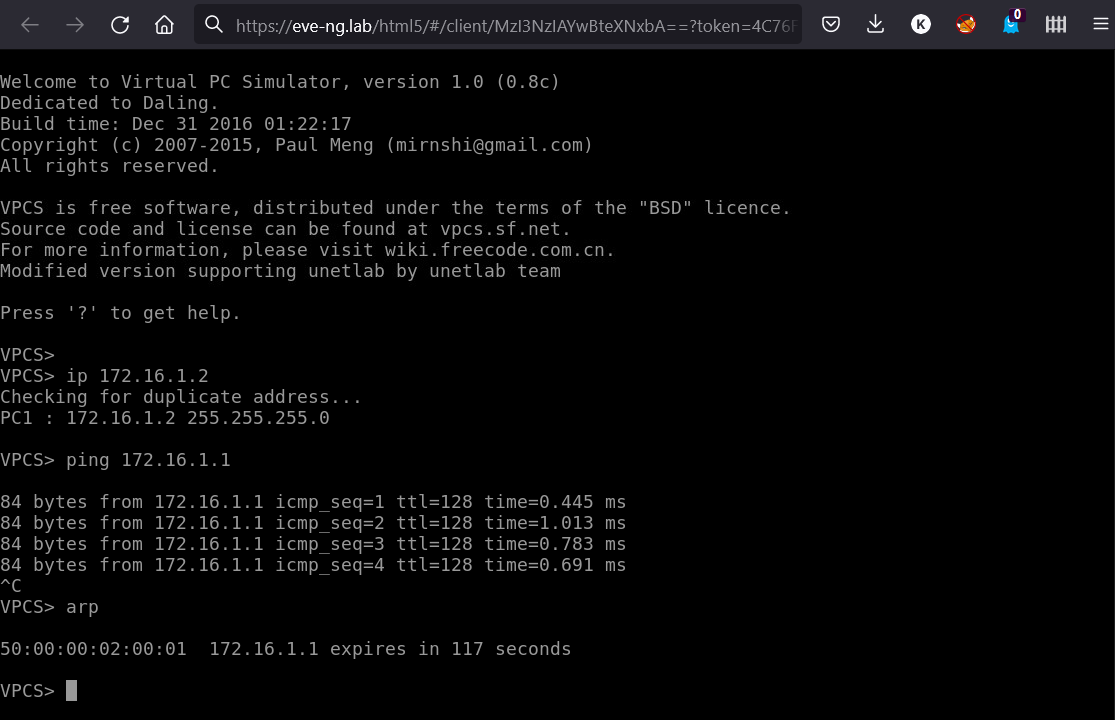
As you can see, there is a connection between Virtual PC and the Windows system in the isolated network; the MAC address is the same.
Now open Kali and perform the same operations: configure the network and check the node connectivity (this time, by scanning port 3389 with Nmap).
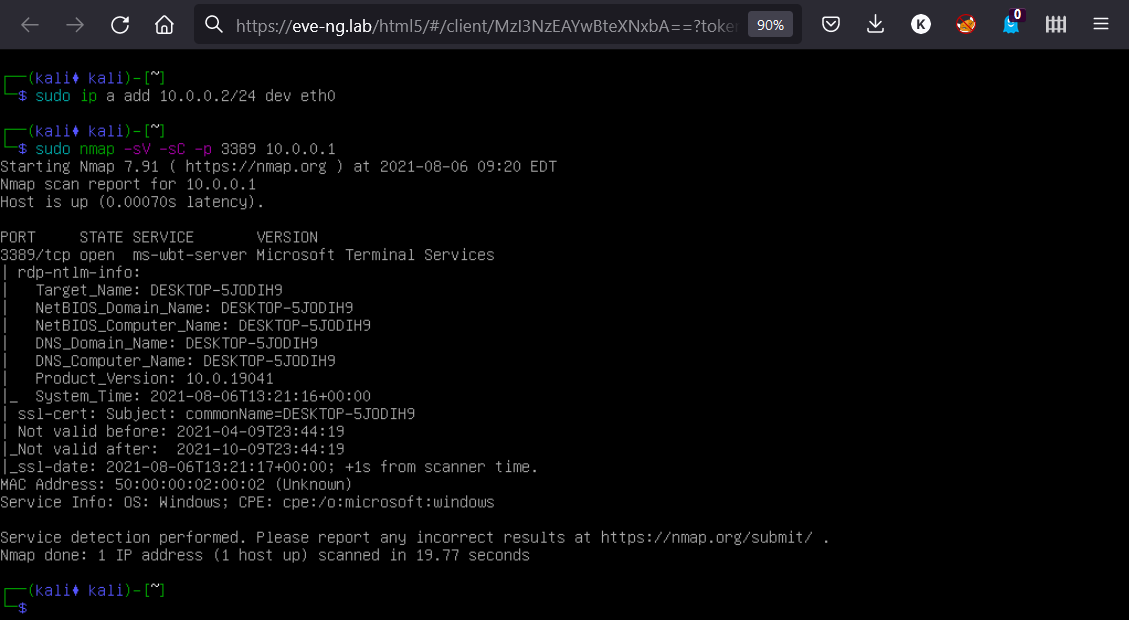
The port is open and detailed host information is available. There is no need to check the network connectivity with VPC2 and VPC3: they were needed only to demonstrate how to create an L2 network consisting of more than two nodes using the network object and emulation of networking equipment.
Problems, solutions, and useful commands
Errors associated with “commit: Co-routine re-entered recursively Aborted”
Execute the command several times and then check the created image for errors; alternatively, you can use the convert argument instead of commit.
Blue screen and disk errors in Windows images
According to the official documentation, you must use the commit argument to add changes to the base image. But in reality, even if you use a workable image with Windows and no errors occur during committing, the disk still crashes inside the VM: blue screen errors occur, and scans performed using the standard OS tools (sfc/) detect multiple errors. The solution is to convert your image into a new one instead of committing changes to the base image. Prior to doing this, go to the directory containing the temporary image and execute the following command:
$ /opt/qemu/bin/qemu-img convert -O qcow2 virtioa.qcow2 /path/virtioa.qcow2.newThen rename the new image to the base one.
“failed to start node (12)” error when you start a dynamips node (networking equipment)
This error occurs in the web interface when you start a node. In fact, the node starts and runs, but its status in the web interface doesn’t change. You can either continue working or you can forcibly kill these processes and restart them again. To do this, use the following commands.
-
Display all processes in the troubled
dynamipsnode; the figure invunl0is the user’s POD:$ ps waux | grep vunl0 | grep "nodename" -
Terminate the processes;
1314,, etc. are process numbers:1315, 1316, 1317 $ kill -9 1314 1315 1316 1317
QEMU platform not supported and other image boot-up errors
Our team encountered this problem while deploying McAfee DLP Prevent and Monitor. During the boot-up, the image runs a script that detects the environment using dmidecode and parses the output. You can modify information in DMI tables on x86_64 and aarch64 QEMU systems. Using the smbios QEMU option in the node settings, you can change many system parameters: from the BIOS manufacturer to the chassis serial number. The fields that most often have to be changed are provided in the table below; their full list can be found on GitHub.
-smbios type=<type>,field=value[,...]-smbios type=0,vendor=VMware,version=1.2.3| Type | SMBIOS field | Name |
|---|---|---|
| 0 | vendor | BIOS vendor |
| 1 | manufacturer | Manufacturer |
| 1 | product_name | Product name |
For a quick solution, you can try several values from the table below.
| BIOS vendor | Value |
|---|---|
| vmware | VMware |
| xen | < |
| qemu | QEMU BIOS или Bochs |
| ms hyper-v | Microsoft Corporation Virtual Machine |
If this doesn’t help, you have to find a script that defines the platform. Search for the error text in all files inside the ISO using the grep command. Sometimes vendors create their own initial ramdisks containing the required script; use 7-Zip to unpack them.
After that, you need to find the platform definition function in the script (e.g. call dmidecode or parse output) and the required parameters that can be either specific values or regular expressions. Then you just substitute these values into the smbios option. If the value contains a comma, use ,.
The second problem was the use of PVSCSI disks. Such disks are not supported by default, but this can be easily corrected in the file /. The code section that adds disks is located approximately at the 1000th string:
// Adding disksforeach(scandir('/opt/unetlab/addons/qemu/'.$this -> getImage()) as $filename) {if ($filename == 'cdrom.iso') {// CDROM$flags .= ' -cdrom /opt/unetlab/addons/qemu/'.$this -> getImage().'/cdrom.iso';} else if (preg_match('/^megasas[a-z]+.qcow2$/', $filename)) {...You have to add a new condition to this code section with a regular expression for PVSCSI and correct options:
else if (preg_match('/^pvscsi[a-z]+.qcow2$/', $filename))The processor can be changed, too (the cpu option). To see the available values, use the command:
$ qemu-system-x86-64 -cpu helpIn most cases, the -cpu directive enables you to use the host CPU in the VM.
Useful commands
Image info:
$ /opt/qemu/bin/qemu-img info virtioa.qcow2Check image for errors:
$ /opt/qemu/bin/qemu-img check virtioa.qcow2Repair image:
$ /opt/qemu/bin/qemu-img check -r all virtioa.qcow2In addition, you can reduce the image size, but it’s important to maintain the right balance. A compressed image occupies less space but requires more CPU resources than an uncompressed one:
$ virt-sparsify -compress virtioa.qcow2 compressedvirtioa.qcow2Over time, disk images can start occupying more space inside the VM than they actually use. This happens because deleted data are only marked so, but in fact, aren’t deleted. Here is the solution for this problem.
For all other common problems and their solutions, see the FAQ or documentation on the EVE NG official website.
Running a service VM
Suppose you need to start a VM on the same EVE server, but without any labs. Such virtual machines are usually created for service purposes (e.g. as a VPN server for remote connection to EVE).
Below is an instruction on how to do this.
- Prepare the VM image (this can be done directly in the lab).
- Copy the ready-made image to a new folder (e.g.
/).opt/ svm/ * -
Create a service file using the path
/. Note that names likeetc/ systemd/ system/ qemu@. service qemu@.enable you to run multiple VMs using one service:service [Unit]Description=QEMU Service VM[Service]Environment="haltcmd=kill -INT $MAINPID"EnvironmentFile=/etc/conf.d/qemu.d/%iExecStart=/opt/qemu-2.12.0/bin/qemu-system-x86_64 -name %i $argsExecStop=/usr/bin/bash -c ${haltcmd}ExecStop=/usr/bin/bash -c 'while nc localhost 7100; do sleep 1; done'ExecStop=/bin/sh -c "echo system_powerdown | nc -U /run/qemu/%I-mon.sock"[Install]WantedBy=multi-user.target -
Now you have to create a new networking interface for the VM and add it to the bridge to make the VM directly accessible. First, check whether you already have any tap interfaces:
$ ip a | grep tapCreate a new
tap1interface (provided that it doesn’t exist yet):$ tunctl -t tap1 -u `whoami`Add the new
tap1interface to thepnet0bridge:$ brctl addif pnet0 tap1Display the bridge and interface table and review the list of interfaces supported by the
pnet0bridge:$ brctl showEnable the new interface:
$ ip link set dev tap1 up -
Create a file describing the VM; the path to it must be
/:etc/ conf. d/ qemu. d/ svm args="-device e1000,netdev=net0,mac=50:00:00:22:22:22 -netdev tap,id=net0,ifname=tap1,script=no -smp 1 -m 2048 -drive file=/opt/svm/virtioa.qcow2,if=virtio,bus=0,unit=0,cache=none -machine type=pc,accel=kvm -cpu qemu64,+fsgsbase -vga std -usbdevice tablet -monitor telnet:localhost:7100,server,nowait,nodelay -vnc :0"haltcmd="echo 'system_powerdown' | nc localhost 7100" -
Execute the command
$ systemctl daemon-reload -
Now you can start the VM, stop it, and add to startup using standard
systemctl:$ systemctl enable qemu@svm$ systemctl start qemu@svm$ systemctl status qemu@svm$ systemctl stop qemu@svm
If you need to create another VM, adjust the respective values and repeat steps 4 and 5.
info
QEMU options and settings can differ depending on the OS, but the most important ones that must be adjusted are as follows:
-
mac(the unique MAC address of the VM network card; note that its first half must be50:);00: 00 -
ifname(the interface created at step 4); -
smp(the number of cores); -
m(the memory size); and -
drive(the path to the image).file
Record keeping
To ensure that the processes associated with the polygon deployment are understandable and manageable, it’s imperative to keep records from the very beginning. The documentation of images is the most important element; it includes the following components:
- list of all images and their configurations;
- OS configuration;
- list of used software; and
- list of ISO images.

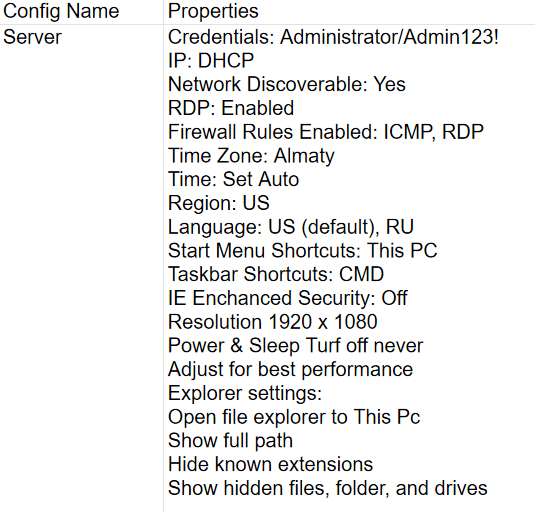
In addition, you have to maintain an internal knowledge base on the identified problems and their solutions (many of them were described above). For some vendor solutions, you may need to create custom labs and hands-on fasttrack deployment and configuration guides for internal use.
Conclusions
Using the EVE-NG platform, our team managed to achieve its goals. Now the training of engineers is much more efficient, while the design of all labs is modular: you open a ready-made lab and change only vendors. In the past, it was problematic to provide access to solutions to curious customers who like to experiment with virtual machines on their own. Now access can be provided without worries: the web interface flexibility enables customers to analyze any scenario in the ready-made infrastructure.
