So what’s the difference between a microcontroller and a single-board computer?

In my view, the main difference between a microcontroller and a single-board computer (SBC) is the presence of an operating system. A microcontroller runs a single program—the firmware. Yes, some firmware, such as MicroPython, offers OS-like capabilities—file I/O, a user interface, and so on—but that still doesn’t make those boards full-fledged computers.
Since the Omega2 runs a lightweight Linux distribution — LEDE (Linux Embedded Development Environment) based on OpenWrt — it’s a single‑board computer despite its compact form factor. The manufacturer even markets it as “the world’s smallest Linux computer.”
Let’s see what it can do
There are two versions of the Onion Omega on sale: 2 and 2+. This article focuses on the Onion Omega 2. The board used in this review was kindly provided by iarduino.ru.

So, our computer has:
- 580 MHz CPU
- 64 MB RAM
- 16 MB flash memory
- USB 2.0
- Wi‑Fi
- 15 GPIO pins
- 2 PWM
- 2 UART
- 1 I2C
- 1 SPI
- 1 I2S
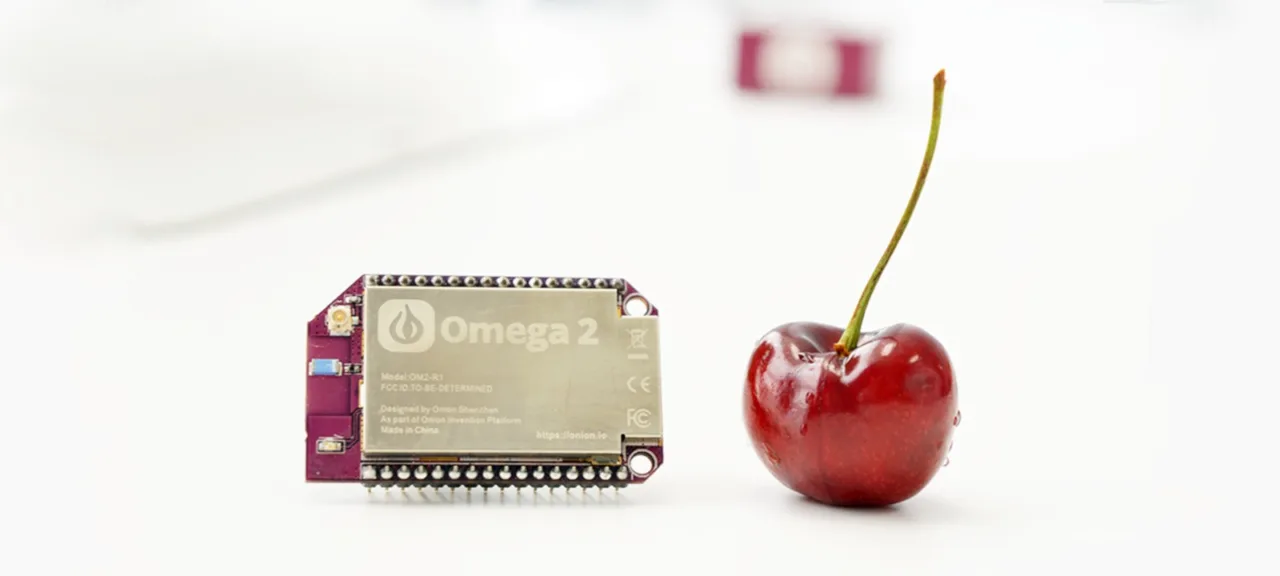
As you can see in the picture, the board itself only has pin headers—there isn’t even a power input. To get started, you’ll need to spring for a dock. There are five of them, each suited to its own use case. I’ll be using the Expansion dock. It provides GPIO, a USB port, an RGB LED, a Reset button, a power switch, and a microUSB port to power the device.

info
In addition to docks, Omega supports a range of standard modules: a BLE module, an Ethernet module, a GPS module, and an OLED display module. There are also various shields—for working with RFID tags and for controlling relays and servos.
Getting Started
Plenty of examples for this board have already been covered on the Russian-language forum, so I’ll just skim the key setup steps and then we’ll dive into some more realistic projects.
Plug the board into the shield, connect power, and you’re ready to go!
Once the device is powered up, you should soon see a Wi‑Fi network named Omega-XXXX, where XXXX is a fragment of the MAC address (the default password is 12345678). Connect to this network and, using any browser, go to 192.168.3.1. Then, following the board developers’ setup guide, complete the initial configuration: connect the board to your own Wi‑Fi (so you don’t have to keep switching networks), register with the cloud service, and install the console. The default username and password are root and onioneer, respectively.
")
Once setup is complete, we can access the Omega control panel. For some reason it’s called a console, but it’s pretty far from the command-line interface we’re used to :). To me, this control panel looks most like the Launchpad on macOS. Let’s figure out what each utility is for.
- GPIO Tool — lets you set each pin as Input or Output and define its default level (0 or 1).
- OLED Control — if you’ve also got the display module, this app lets you show text or images on it.
- Settings — view and edit configuration; you can update the firmware or factory‑reset the board.
- Relay Control — a utility for driving relays on the add‑on module.
- PWM Control — similar to Relay Control, but for controlling PWM-driven servos.
These programs come bundled with the firmware, while the others must be installed separately.
- Terminal — the command-line interface every Linux user knows.
- Editor — a minimalist text editor and file manager.
- Webcam — a streaming utility for a standard USB webcam.
Before we get started, we need to address what I see as the main issue: insufficient storage space. 16 MB isn’t enough. So we plug in a USB flash drive and move the system partition onto it.
- Open a terminal and update the package index with:
- Then install the required packages:
- Unmount the USB drive. If it throws an error, don’t worry:
- Format the USB drive as ext4:
- Wait for the formatting to complete.
- Create a mount point and mount the USB drive there:
- Move the /overlay directory to the USB drive:
- And enable automatic mounting at boot:
Open the /etc/config/fstab file and replace in it
- Change
optiontotarget '/ mnt/< device name> ' option.target '/ overlay' - Change
optiontoenabled '0' option.enabled '1'
Save and reboot. Phew! Now we’ve got enough memory. Now we’re really getting started!
Hello RGB & Node.js
One of this board’s biggest advantages is that you can program it in multiple languages—for example, Node.js. Let’s install it along with a few additional packages:
opkg install nodejs
opkg install npm
opkg install blynk-library
npm install --save rgb-hex
As a demo, let’s walk through controlling the Omega2 with Blynk. Recall that Blynk is a cloud service with iOS and Android apps for controlling microcontrollers (Arduino, ESP8266, Raspberry Pi, and similar) over the internet. We’ll control the RGB LED built into my shield. There’s a built-in utility called expled for this. It takes a color value as a hex argument.
First, create a project in Blynk. From the list of available boards, select Onion Omega.
Next, add the zeRGBa (color picker) and Styled Button widgets. Configure the zeRGBa widget by selecting the virtual pins to bind (I used 15 for red, 16 for green, and 17 for blue) and setting the color range to 0–255. Connect the Styled Button to virtual pin 0.
And now the most important part: open your project settings and either copy your AUTH TOKEN or email it to yourself.

Now let’s get back to Omega. Open the Editor, create a folder called Scripts, and inside it a file named main.js with the following contents:
const exec = require('child_process').exec;const rgbHex = require('rgb-hex');var BlynkLib = require('/usr/bin/blynk-library');var blynk = new BlynkLib.Blynk("<YOUR AUTH TOKEN>");var v15 = new blynk.VirtualPin(15);var v16 = new blynk.VirtualPin(16);var v17 = new blynk.VirtualPin(17);var v0 = new blynk.VirtualPin(0);var R = 0;var G = 0;var B = 0;v15.on('write', function(param) { R = parseInt(param);});v16.on('write', function(param) { B = parseInt(param);});v17.on('write', function(param) { B = parseInt(param);});v0.on('write', function(param) { exec("expled 0x"+rgbHex(R,G,B));});Let’s break down what’s going on.
First, the required modules are imported. The exec variable is assigned a function that runs a utility from the console, rgbHex is a function that converts an RGB color to hex, and blynk is the connection to our Blynk project.
Next, the virtual pins are declared: 15, 16, and 17 for receiving RGB, and 0 for handling the button. The three variables, R, G, and B, will store the respective color components.
It then explains what happens when data is sent to each virtual pin. The functions for the three RGB channels are identical; the only difference is which variable they write the value to. When the user presses the button, the function expled is called, with the color passed in as a hexadecimal value.
Let’s Put Messages on the Screen
While voice playback for incoming messages—via Siri or Yandex’s Alice—has been around for quite a while, many people still find it faster to read them. Great if you’ve got a display shield, but what if you don’t? We’ll improvise! Enter one of the most common Arduino modules: the I2C LCD Display.
Since we’ve already worked with Node.js, we’ll write this project in Python. To install it, just run the familiar opkg . You’ll often see a suggestion to install the so‑called python-light — a lightweight build. Yes, you can install Python 3, but some libraries needed to work directly with the Omega 2+ won’t install on it. So we’ll stick with version 2.7.
Don’t forget to install pip, the package manager familiar to any Python developer: opkg , as well as everything needed for I2C support: opkg .
So let’s print everything our Telegram bot receives to the screen—fortunately, despite the threatened ban, it’s still working.
Install PyTelegramBotApi via pip, then clone the Omega2 I2C LCD library: git . Connect the display’s pins to the corresponding pins on the board.
import lcdDriverimport telebotbot = telebot.TeleBot("TOKEN")lcdAddress = 0x3flcd = lcdDriver.Lcd(lcdAddress)lcd.backlightOn()@bot.message_handler(func=lambda message: True)def echo_all(message): lcd.lcdDisplayStringList([message.chat.first_name,message.text]))if __name__ == '__main__': bot.polling(none_stop=True)It’s straightforward: import the necessary libraries, and when a message arrives, display it on the screen along with the sender’s name.
Closing thoughts and takeaways
Omega 2 is actually a pretty solid device, but like any Linux‑based device, it’s not without its drawbacks.
First, only the official expansion modules really work well; I never managed to get an external OLED display running over I2C. Second, despite fairly extensive documentation in three languages, everything still feels rough. You often end up installing additional libraries and digging through forums. Also, the board used to cost around 20.75 to get started with the Omega2, which, given the exchange rate, is getting pricey.
So what is this board good for? For small home projects where you’d rather not solder and it’s easier to buy a module—definitely yes. You get a solid set of programming languages and a familiar command-line interface. As a small server—if the Omega2 has enough horsepower—there’s no reason to buy a pricier Raspberry Pi.