warning
According to section 4.1.1 of the PCI DSS v.2 standard, it is required to regularly conduct a security audit of Wi-Fi access points. This can be effectively achieved only by using the same tools that are used in real attacks. The article is informational and aimed at cybersecurity professionals and those intending to enter the field.
Introduction
Since Android is based on the Linux kernel, it is capable of running utilities from traditional Linux distributions, including specialized programs for penetration testing. You just need to run a familiar distribution, like Kali Linux ARM, in an isolated environment.
This issue is addressed using the system utility chroot and applications that leverage its capabilities. It creates a separate root directory, allowing you to run two operating systems simultaneously—such as Android and Kali Linux—each in its own environment. However, penetration testers will face some unpleasant surprises. Any programs that require access to external devices or kernel-level patches will not work. For instance, while you can easily run Aircrack-ng, Reaver, or Wifite on your smartphone via Linux Deploy, you won’t be able to operate them “live”—only analyze previously captured handshakes at a snail’s pace.
This happens because there are usually no open specifications for the Wi-Fi module built into smartphones, making it extremely difficult to write a driver that supports monitor mode. Even using an external adapter (even one known to be compatible) is unlikely to work on a Linux distribution running on a smartphone via chroot. Various issues hinder this, such as the lack of drivers and firmware for the necessary chipset, lack of USB OTG support, or the inability to load third-party drivers into the kernel.

Therefore, if you want to use Kali Linux on just any smartphone, simply mounting the image in Linux Deploy won’t be enough. You will also need to find drivers, cross-compile them, patch the kernel, and perform other intricate tasks that require a fair amount of technical expertise.
I suggest taking a simpler approach by using a pre-built version of Kali Linux specifically designed for mobile devices. It’s called NetHunter and it already includes all the necessary components.
NetHunter
Kali NetHunter is a lightweight version of Kali Linux designed for smartphones. It can be installed on top of a device’s standard firmware. In addition to the standard Kali utilities, NetHunter includes a set of drivers for wireless adapters and a modified Linux kernel that supports kernel modules and includes patches for the proper functioning of Aircrack-ng.

NetHunter officially supports the following devices:
- Nexus series smartphones and tablets (Nexus 4 (mako), 5 (hammerhead), 5x (bullhead), 6 (shamu), 6P (angler), 7 2013 (flo), 9 (flounder), 10 (manta));
- OnePlus smartphones (OnePlus One (oneplusl), 2 (oneplus2), 3 and 3T (oneplus3), X (oneplusx));
- Samsung Galaxy series smartphones (Note 3 (hlte), S5 (kite), S7 (herolte), S7 edge (hero2lte));
- LG smartphones (G5 T-Mobile (h830), G5 International (h850), V20 T-Mobile (h918), V20 US Unlocked (us996));
- HTC smartphones (HTC One M7GPE (onem7gpe) and HTC 10 (htc.pmewl));
- Sony smartphones (Xperia ZR (dogo) and Xperia Z (yuga));
- Nvidia tablets (SHIELD (shieldtablet) and SHIELD tablet K1);
- ZTE smartphone (Axon 7 (ailsa_ii)).
Amateur ports of NetHunter can also be found on xda-developers.com. They can be easily searched for with a typical query in Google:
[device_model] kali nethunter site:forum.xda-developers.com
However, be cautious with unofficial ports. For example, the build for the Samsung I9300 turned out to be faulty. NetHunter installed and launched but inexplicably became unstable. In theory, you could debug and fix the issues or create a more successful port of NetHunter yourself, but this can be an unpredictably time-consuming process.
Therefore, it’s best to get a reliable smartphone with official support for Kali NetHunter. For example, the Nexus 5 is an excellent choice, priced around 5,000–8,000 rubles. I used this particular model, so I’ll be discussing my experience with the Nexus 5, but the steps will be similar for other models.
Installation
NetHunter should be installed on top of the smartphone’s standard firmware or CyanogenMod. Currently, NetHunter supports stock Android 5.1.1 and 6.0.1 firmware as well as various versions of CyanogenMod/LineageOS. To find out if the situation has changed since the publication of the article, you can check the wiki.
You can find NetHunter builds for various smartphones and tablets on this page.
You will also need the fastboot tool and ADB drivers. On Windows, both can be installed easily using a simple installer. On Linux, you can install the android-platform-tools package.
An even easier option is to use the Nexus Rootkit Tool. This tool will automatically download everything you need and perform most of the tedious operations itself. If it encounters any issues, it will provide a detailed guide on what to do next.

There are two other essential components:
- Custom TWRP recovery for your smartphone, which can be found on the twrp.me website.
- SuperSU, it should be in ZIP archive format, specifically the Recovery Flashable.zip.
Once you have all the necessary files, you can proceed with installing a custom recovery and rooting your device. Keep in mind that this process will erase all data on the device, so make sure to back up your data beforehand.
First, turn off your smartphone and power it back on while holding the volume up button. This will boot your device into fastboot mode. Connect the smartphone to your computer using a cable and run the following command in ADB:
$ fastboot oem unlock
This command will unlock the bootloader, wiping all data from the smartphone in the process. Now, let’s install TWRP:
$ fastboot flash recovery twrp-image.img
If the operation was successful, turn off the smartphone and turn it back on while holding the volume down button. After rebooting, the TWRP interface should appear. Use ADB to transfer SuperSU to the smartphone:
$ adb push path\\to\\SuperSU.zip /sdcard/
After clicking the Install button, flash SuperSU. Once the installation is complete, reboot the smartphone, perform the initial setup, and install BusyBox in / (the installation path is important!).
Next, reboot into TWRP again and transfer the NetHunter archive to your smartphone.
$ adb push path\\to\\nethunter.zip /sdcard/
Flash the firmware and reboot.

The installation might appear to hang at 90%, but it is actually proceeding correctly. Just make sure there’s a line in the on-screen log indicating successful detection of BusyBox, and then wait another ten minutes. After that, if the smartphone doesn’t reboot automatically, you can reboot it manually.
During the installation of NetHunter, you’ll be prompted to install a few additional applications. Don’t skip the installation of Hacker’s Keyboard. This keyboard includes keys like Ctrl, Alt, Shift, Break, F1–F12, and others, which are indispensable for console work. While you can theoretically use the built-in keyboard and simulate pressing function keys with the volume control buttons, it’s not as convenient, and sometimes they just don’t work.
 и выбор Hacker’s Keyboard (справа)") |
 и выбор Hacker’s Keyboard (справа)") |
| Эмуляция дополнительных клавиш в стандартной клавиатуре (слева) и выбор Hacker’s Keyboard (справа) | |
Initial Setup
When you first launch NetHunter, it will request superuser rights and various permissions multiple times. If you made a mistake and didn’t grant any of them, open the app permissions in SuperSU and add them manually. Otherwise, NetHunter simply won’t function.
Next, check for updates. Then go to the Kali Chroot Manager section and download the kalifs-minimal. disk image (the full version will fit on a Nexus 5, but the minimal version is sufficient for wardriving). NetHunter will automatically extract and mount it.
, установка Kali в chroot (справа)") |
, установка Kali в chroot (справа)") |
| Обновление сразу после установки (слева), установка Kali в chroot (справа) | |
In the final step, either tap “Update Kali metapackages” from the Custom commands menu or simply enter apt-get in the terminal.
That’s it! Just connect an external USB Wi-Fi adapter, and you can start the audit.
Fine-Tuning and Custom Adjustments
There are currently two versions of Kali NetHunter available:
- Sana (with kernel 3.1) for very old devices running Android 5.1 (such as the Nexus 7 2012).
- Kali Rolling (with kernel 3.2 and above) for more recent devices.
They use different repositories. The update sites for Kali Sana are currently unavailable. Therefore, if you have Kali Sana, add the following line to your repository list (/):
deb http://old.kali.org/kali-security sana/updates main contrib non-free
In the new version of Kali Rolling, you should also add the following line:
deb http://http.kali.org/kali kali-rolling main contrib non-free
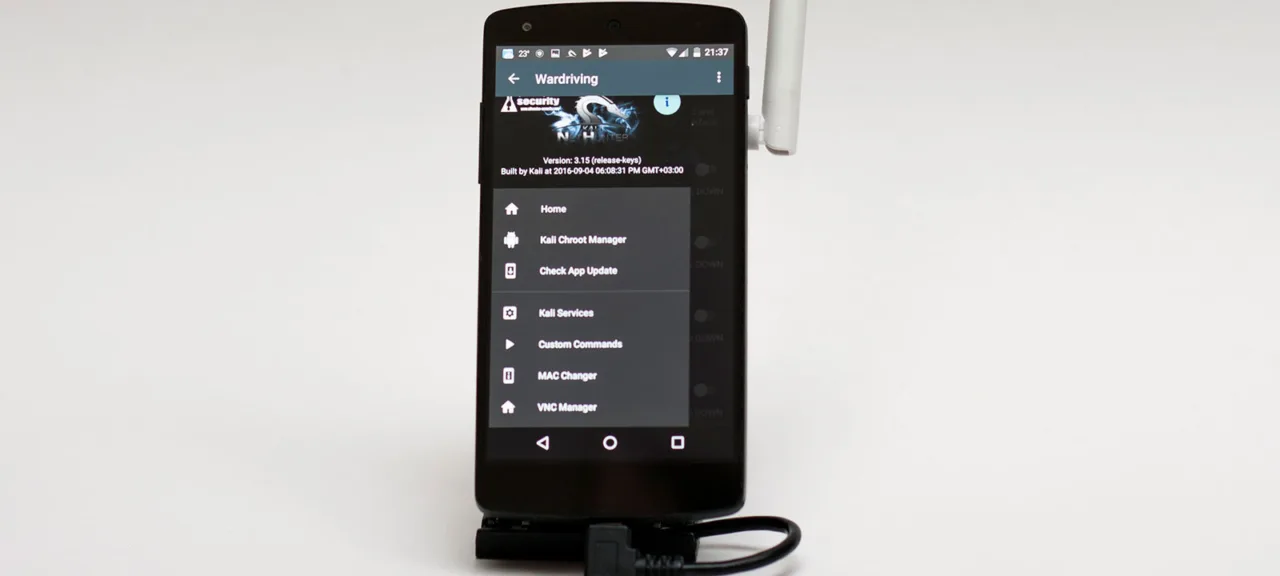
To find out which kernel your Kali NetHunter is using, simply open the terminal and read the first lines.
 |
 |
| Версия приложения NetHunter и версия ядра | |
Wi-Fi Dongles and Other Gear
Just as any fishing expedition begins with choosing the right gear, wardriving starts with selecting the appropriate equipment. Our primary tool will be a smartphone (which is the main focus of this article) along with a Wi-Fi adapter (dongle) with a USB interface. This setup can easily fit into your pocket or a small bag, making it inconspicuous.
We have previously covered how to choose the right dongle in the article “Choosing a Budget Adapter for Hacking Wi-Fi”. Note that it describes a universal method for selecting adapters—whether they are old, new, or not yet on the market. If you’re looking for a straightforward answer to “what to get?”, here’s a list of trusted options:
- Alfa AWUS036H (Realtek 8187L, 802.11b/g, 2.4 GHz, long-range);
- Alfa AWUS036NH (Ralink RT3070);
- Alfa AWUS036NEH (RT3070);
- Alfa AWUS036NHA (AR9271, 802.11b/g/n, 2.4 GHz, recommended for WPS attacks);
- Alfa AWUS051NH (Rev. 1 and Rev. 2; 2.4/5 GHz);
- Alfa AWUS052NH (RT3572).
More affordable options:
- TP-LINK TL-WN722N (AR9271);
- Netsys 9000WN (RT3070, with a panel antenna).
The NetHunter validated chipsets include: Realtek 8187L, Ralink RT2070, RT2571W, RT2671, RT2770, RT2870, RT3070, RT3071, RT3072, RT3370, RT3572, and Atheros AR7010, AR9170, AR9271.
Note that the recommended dongles are all from the “Alfa” brand. This is not by chance. They not only offer higher power (read about the clever way this is achieved in the following article) but also feature high-quality shielding and good interference filters. As a result, with “Alfa,” you’re not just getting a powerful transmitter but also a highly sensitive receiver, which is more important for wardriving. Not all adapters from Alfa Networks are suitable, only those listed. The performance of others is not guaranteed.
In addition to a smartphone and a Wi-Fi adapter, you’ll need a USB OTG cable. It’s advisable to use a Y-shaped one (like this) so you can connect an external battery to the second port. During wardriving, the smartphone’s built-in battery will deplete very quickly, so for a prolonged audit, a power bank with a capacity of 5000 mAh or greater is necessary.
Getting Started with Auditing
We are finally ready to use Kali NetHunter and start attacking access points. The NetHunter app menu features quick access buttons for popular commands and even includes a dedicated Wardriving section, though it is rather sparse. It is expected that experienced pentesters will customize it with shortcuts to suit their preferences.
For now, we won’t do this because shortcuts are simply buttons that send pre-recorded commands to the terminal. You can skip opening the NetHunter app altogether and directly launch a terminal emulator to select Kali.
Setting Up the Dongle
The first step is to identify and activate the dongle. Typically, an external Wi-Fi adapter is assigned the interface name wlan1, but this name can vary. Be sure to verify (and change if necessary) its name before proceeding.
First, let’s find out the list of available network interfaces:
# iw dev
To view detailed information about network adapters and their parameters, we use another command:
# iw list
It returns a rather bulky list, so it’s usually more convenient to use more targeted queries. For example, the following query lets you find out which frequency bands your Wi-Fi adapter supports:
# iwlist wlan1 frequency
 |
 |
| Определяем название интерфейса донгла и поддерживаемые донглом частоты | |
Before starting any wireless exploration, you need to switch the Wi-Fi module to monitoring mode. It is also advisable to change its MAC address to reduce visibility in logs. Changing the MAC address will also be necessary if you plan to execute the “Evil Twin” attack, which we will examine in detail in one of the upcoming articles.
There are several ways to activate monitoring mode. For example:
# iwconfig wlan1 mode monitor
or using the Airmon-ng utility:
# airmon-ng start wlan1
You can change the MAC address using the ifconfig command:
# ifconfig wlan1 hw ether XX:XX:XX:XX:XX:XX
(here, instead of the question marks, you need to input the desired MAC address in hexadecimal format).
If you want to check the current MAC address of your Wi-Fi module (for instance, to see if it has changed), enter the following command:
# macchanger -s wlan1
This utility can also change the MAC address to a random one (useful for automation):
# macchanger -r wlan1
Before modifying the dongle’s operation mode and changing its MAC address, you need to disable the network interface and then re-enable it. Therefore, the complete command sequence for changing the MAC address and enabling monitoring is as follows:
# ifconfig wlan1 down
# ifconfig wlan1 hw ether XX:XX:XX:XX:XX:XX
# iwconfig wlan1 mode monitor
# ifconfig wlan1 up
Scanning the Airwaves
Every attack begins with information gathering. The easiest way to scan the airwaves from the console is by using Airodump-ng.
# airodump-ng wlan1
It’s much more convenient to use the Wifite script for this purpose. Some may not consider it a “true” hacker tool, but at blackMORE Ops, it’s well-regarded. They point out that the best tool is the one that delivers results quickly. Don’t overlook “beginner” programs if they are informative and save time.
To start scanning, simply type wifite into the terminal. The tool will launch in interactive mode and prompt you to select which network interface to switch to monitoring mode.
 |
 |
| Список AP и их параметров | |
Next, you need to choose an access point and note its parameters, such as ESSID and/or MAC address, channel number, type of encryption, and the presence or absence of WPS. Then, select the most effective attack strategy.
Note that NetHunter comes with Wifite r87 pre-installed. The second version is available on GitHub, which supports 5 GHz mode, performs deauthentication more efficiently, and constantly displays the current signal strength of the selected access point. To install Wifite 2.00 on Kali NetHunter, use the following command:
# git clone https://github.com/derv82/wifite2.git
Next, navigate to the wifite2 directory and run the Wifite. script. Be mindful of the case sensitivity.
# cd wifite2
# ./Wifite.py
Universal Attack Technique
We have already covered simple attacks using default WPS PINs in a previous article. These methods yield almost instant results but only work on vulnerable access points. Now, we will explore a highly versatile method that operates with any type of authentication (WEP/WPA/WPA2) and is not related to WPS.
The attack is called a “handshake capture,” which involves intercepting the authentication sessions of client devices on a Wi-Fi access point. This can be executed in both passive and active modes.
When you choose the first option, your actions remain completely unnoticed. You don’t transmit anything; you simply listen to the selected channel, waiting for any device to authenticate with the target access point. Once a handshake occurs, you capture it and save it to a file:
# airodump-ng wlan1 --channel 5 -w captured.cap
This is an example for the fifth channel number and the filename with the handshake captured.. For reliability, it’s better to capture several handshakes and analyze them on a desktop computer (or even upload them to specialized online password cracking services for handshakes, which will be discussed later).
New “clients” may take a long time to connect to the access point. If you get tired of waiting, you can speed up the process by switching to active mode. This will significantly increase your speed at the expense of losing stealth.
For this, you’ll need the utility aireplay-ng, which, among other features, can forcibly disconnect wireless clients from a selected access point.
# aireplay-ng -0 1 -a XX:XX:XX:XX:XX:XX -c XX:XX:XX:XX:XX:XX wlan1
The -0 parameter sets the deauthentication mode, and the number specifies how many deauthentication commands are sent consecutively. Typically, one to five packets are used depending on the signal strength and response speed (hint: don’t rush to set it to five right away; while you are DDoSing the access point with a flood of deauths, you might miss the handshake, and all efforts will be wasted). The -a parameter specifies the MAC address of the access point, and the -c parameter specifies the client connected to it. If the client’s MAC address is not provided, a broadcast request will be sent, and the deauthentication command will be received by all clients of the selected access point.
Instead of using the AP’s MAC address, you can specify its name with the -e key (ESSID). Example:
# aireplay-ng -0 1 -e MarsHotel wlan1
Aireplay will use your Wi-Fi dongle to send deauthentication commands to all devices connected to the access point named MarsHotel. This will disconnect them, prompting the devices to quickly reconnect. As a result, the airwaves will soon be filled with fresh handshake data.
Note: You won’t be able to forcibly disconnect the device from the Access Point (AP) if your signal is too weak or if the administrator has enabled the frame encryption option (IEEE 802.11w-2009). The latter is often found in corporate networks, especially with Cisco Enterprise-level routers.
A more forceful disconnection can sometimes be achieved using the utility MDK3:
# mdk3 wlan1 d -c 1,2,3,4,5,6,7,8,9,10,11
Here, wlan1 is the name of the wireless interface, d is the deauthentication command, and -c specifies the sending of deauth packets on all major channels in the 2.4 GHz range.
The Wifite script also performs deauthentication of detected clients (unless you disable it with a specific command). The second version automates this attack entirely and executes it very swiftly.
 |
 |
| Скоростной захват хендшейка в Wifite 2.00 | |
The average wait time for intercepting a “handshake” in active mode is just a few minutes, while in passive mode, you could be waiting for several hours. The downside is that you completely lose stealth and become visible in the logs. If it’s an access point in a company, the admin will likely receive alert messages from intrusion detection systems.
If MAC address filtering is enabled on the access point and there are no legitimate clients connected, you can use the MDK3 utility to brute-force a MAC address from the “whitelist.”
# mdk3 wlan1 f -t XX:XX:XX:XX:XX:XX
Replace the question marks with the MAC address of the target access point.
Cracking Passwords from Captured Handshakes
The file containing intercepted client authorization packets was captured from a specific channel, so it may include radio exchange data with various access points. Software for analyzing .cap files typically identifies the stored ESSIDs and allows you to select the desired identifier. One of the first tools for cracking passwords from captured handshakes is Aircrack-ng. The command for dictionary-based password cracking looks like this:
# aircrack-ng -w [path_to_dictionary].lst [path_to_handshake_file].cap
Optimized dictionaries for Kali NetHunter can be found here. You can use any other dictionaries as well. The main requirement is that each word in the dictionary file should start on a new line.
Dictionary and Rainbow Table Attacks
The WPA2 standard requires passwords to be at least eight characters long. As a result, many recommend refining a dictionary file by removing shorter words, which seem to just waste time. However, passwords often include repetitions and various permutations that cannot be tested without a shorter base. For instance, while test cannot be a password, combinations like testtest or test1234 are entirely possible.
If a password cannot be cracked using a dictionary attack or is initially assumed to be non-dictionary, rainbow tables (databases of hash-password pairs) can be utilized. These can be generated using the airolib-ng tool or you can find pre-generated ones. You can then feed them to Aircrack-ng using the same command, substituting the -w flag with -r.
# aircrack-ng -r rainbow_table.db captured_hs.pcap
Here, rainbow_table. is the rainbow table file, and captured_hs. is the saved handshake.
There are many other utilities for deriving passwords from handshake data files. The most popular ones are Pyrit (which is already included in NetHunter) and Hashcat, specifically oclHashcat. This program supports accelerated password cracking on multiple CPUs and GPUs, with support for both AMD and Nvidia GPUs. Hashcat uses its own format files, .. The utility cap2hccapx, part of the hashcat-utils, can be used to convert the original .cap file into this format.
There are also online services for converting and analyzing .cap/.pcap files. For example, Hash.co.uk.
Hack Tip
There are small bags with a transparent window for a smartphone. You can wear one on your wrist (cosplaying Fallout) or attach it to a bicycle handlebar to scout the airwaves while simply walking around. The smartphone remains in the bag, showing regular Android apps on the screen, while a log of all detected access points and their parameters is recorded into a file with a command.
# wifite -i wlan1 -mac > ListOfAPs.txt
We enable monitoring mode on the network interface wlan1, change its MAC address to a random value, and redirect the output to a text file with a random name.
Active auditing is also possible without taking the smartphone out of your bag. The touch screen can easily recognize commands through a protective film.

Why a bicycle? It doesn’t have registration plates, and it doesn’t attract attention. During my experiment, I easily rode past barriers and security guards. They simply don’t perceive a cyclist as a potential intruder. Old-school security guards grew up watching equally old movies, where the heroes always conducted surveillance from a large van with numerous antennas and a disguise reading “Pizza Delivery.”
What’s Next?
NetHunter offers a wide array of tools, and it’s impossible to cover them all in a single article. In the upcoming articles, we will explore accelerated techniques for hacking access points, uncover the secrets of “Alpha,” boost the power of our dongles, learn how to attack hidden networks, bypass MAC address filtering, and tackle corporate APs that encrypt frames.