Who is it for?
The goal of this article is to walk through the basic techniques for using Ansible to tackle a simple, concrete task. Covering production-grade use of Ansible for full-scale infrastructure deployments is, of course, beyond the scope here. But I’m confident that after reading, you’ll know how to adapt this great tool to your own workflow—or at least give it a look if you’ve been avoiding it.
Why Orchestrate Your Local Machine?
First, let’s decide why we want to manage your computer with an orchestrator. By “orchestrating your computer,” we mean:
- Automated software installation
- Deploying configuration files
- Running one-time commands (e.g., installing plugins)
- Cloning project repositories
- Configuring the development environment
And so on. In this article, we’ll learn how to automate everything from installing the base OS to ending up with a computer that’s ready to use.
Why might you need this? Even though most people go years without reinstalling their OS, there are plenty of reasons to be disciplined about keeping your configuration files organized. Here are the ones I’ve identified for myself.
Reproducibility
It’s important for me to be able to quickly spin up my usual work environment on a new machine. There are different scenarios:
- The drive failed unexpectedly
- We suddenly needed to switch to different hardware
- Linux experiments led to inexplicable glitches—and the clock is ticking
In situations like this, you often end up rebuilding the operating system from scratch, installing all the necessary tools, and—worst of all—trying to remember all the arcane tweaks you applied during the last setup. To elaborate: in my case that means installing Arch Linux (tedious on its own), fine-tuning the i3 window manager, dialing in hardware settings (down to Bluetooth mouse sensitivity), and taking care of the usual stuff like locales, fonts, systemd units, and shell scripts. And that’s before you even get to installing and configuring the actual work software.
There’s nothing inherently difficult about this procedure, but it eats up almost a whole day. And you’ll still end up forgetting something, only to realize it when you find it doesn’t work, isn’t configured, or wasn’t installed.
Predictability
It’s extremely helpful to know what’s installed on a system and how it’s configured. When you have the config in front of you, it’s much easier to understand why the OS behaves the way it does (or doesn’t).
If you don’t have a clear grasp of what you configured, how, and when (and in Linux it’s impossible to remember everything, even with ArchWiki at hand), you’ll soon find yourself wondering why a program behaves one way now when it used to behave differently. Maybe you installed a plugin or tweaked a config and forgot about it?
With a single, comprehensive reference for all settings at hand, you’re less likely to run into these issues.
Declarative approach and maintainability
A declarative approach to configuration (read: describing what the desired state is, not how to implement it) makes the settings much easier to understand. Making the necessary changes becomes far simpler, whereas maintaining your own ad‑hoc hacks ultimately proves harder than using a third‑party, battle‑tested solution.

By the way, if you’re into the declarative approach to OS configuration, check out the NixOS distribution.
Alternatives
Of course, you can press other tools into service for rapid deployment—image-based systems like Apple’s Time Machine or Norton Ghost. You can take a more radical approach and run software in Docker containers or even AppVM-based virtual machines. The problem is that keeping them maintained, managed, and regularly updated is hard. In short, these tools are built for somewhat different use cases and don’t integrate seamlessly into everyday life unless it’s your full-time job.
How Ansible Can Help
Ansible is an orchestration system. It’s written in Python, ships with many popular distributions, and doesn’t require an agent on target machines. The tool is under active development with a large ecosystem of plugins. It’s relatively new but already popular alongside Puppet and Chef.
To use Ansible, you just provide a playbook—a configuration that lists the actions to run on the target machine. Let’s look at how to write such playbooks.
An Ansible configuration is called a playbook. It’s written in YAML. The core building block is a task. A playbook is a list of nested task blocks, each describing a single action. Tasks can be atomic, or they can include a block of subtasks—recursively forming a tree of subtasks. Examples of tasks:
- update the system;
- install the package(s);
- copy the configuration file;
- run the command.
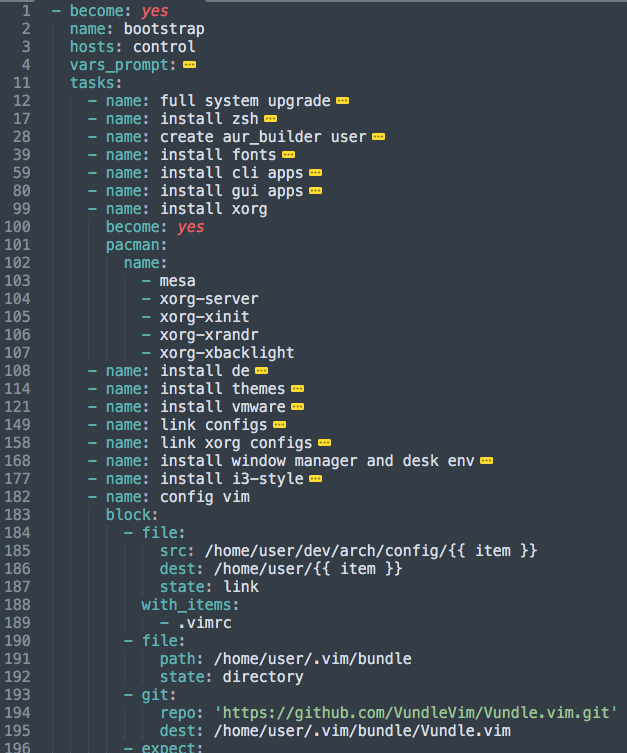
You can have as many tasks as you want, and Ansible will go through them and execute each one in order. Here’s a simple config example—it’s all in a single file (some blocks are collapsed for readability). Of course, for production-sized configs it’s convenient to split them into multiple files and use tags, but for our purposes one big file is enough. 🙂

Each task has its own parameters—for example, the list of packages to install or the file paths to copy. See below for details on how to write different types of tasks.
Hands-on with Ansible
What you need to get started with Ansible
Linux, Python, and in some cases SSH. Let’s define a few terms up front:
- master — the machine we operate from; in other words, the one where we run Ansible with the script (playbook). It issues commands to the remote (target) host.
- target — the machine we operate on; in other words, the target host where the script (playbook) deploys the working environment.
Strictly speaking, unlike other orchestration systems, you don’t have to install Ansible on the target host. If you have another machine (I’ve done this with a Raspberry Pi 3, for example), that’s where you install Ansible.
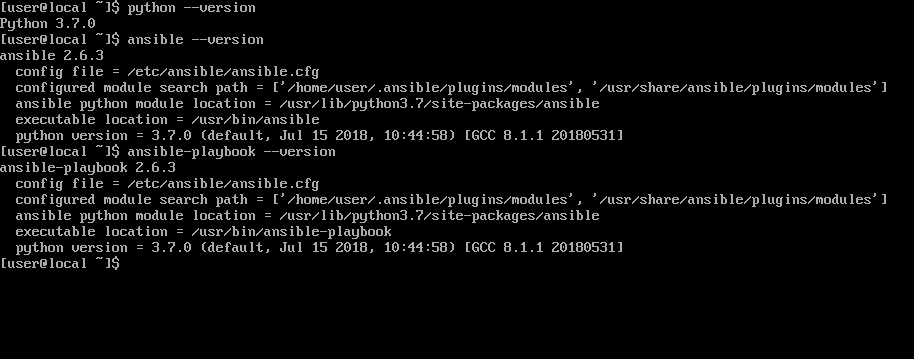
We’ll do a little trick: use the same machine as both the target host and the control (master) host. So just install Ansible with pip .

Specify the hosts and run the playbook
From this point on, we’ll assume there’s no separation between the master and target machines and perform all actions on a single host. For remote hosts, the procedure is almost the same.
Before running the script, tell Ansible which hosts it should operate on. Typically, the inventory is grouped in the /etc/ansible/hosts file. Create this file and put the following in it:
[control]localhost ansible_connection=localWith these lines, we:
- Created a group named
control. - Added a single host with the address
localhost(you can use any reachable IP). - For the
localhosthost, explicitly set the connection type tolocal.
A bit of clarification. Normally, when working with remote hosts, Ansible connects over SSH and runs the tasks defined in the playbook. But since we’re acting on the control machine itself, it would be overkill to run the sshd daemon just to connect to ourselves. For such cases, Ansible lets you set the ansible_connection parameter to specify the connection type. In our case, it’s local.
Let’s try pinging the hosts to check for a response (in our case, there’s only one host):
$ ansible all -m ping
localhost | SUCCESS => {    "changed": false,
    "ping": "pong"}
The response on localhost is working.
Building your own playbook
We already know that, for the most part, a playbook is a collection of tasks organized at different levels. Now let’s learn how to write those tasks.
The key thing to understand is that each task requires a module to execute it. A module is an actor that can perform a specific type of action. For example:
- install and update packages
- create and delete files
- clone repositories
- ping hosts
- send messages to Slack
For each task, we specify a module along with its runtime parameters—for example, a list of packages to install. There are many modules; you can find the full list here. For now, let’s focus on the ones we’ll need.
System updates and package installation
The pacman, apt, and brew modules, along with other package management modules for various languages and systems.
To update the system and install baseline packages, we’ll write a couple of tasks using the pacman module. Here’s an example of such a task:
- name: full system upgrade become: yes pacman: update_cache: yes upgrade: yes- name: install cli apps become: yes pacman: name: - xterm - tmux - neovim - ranger - mutt - rsync state: presentHere we define two tasks: the first updates the system; the second passes the pacman module a list of packages to install and, using the become directive, tells Ansible to elevate privileges to the superuser.
By the way, we can also pass the username to run as for this command, just like we would with su. For example, this way you can change the shell for yourself when installing zsh in a task that uses the command module:
- name: install zsh become: yes block: - pacman: name: - ... - zsh - command: chsh -s /usr/bin/zsh become_user: userNote the block-style config for the “install zsh” task: it’s a convenient (though optional) way to group several actions that don’t need to be split into separate (sub)tasks.
You can use yaourt to install from the AUR (though it’s now largely superseded by the newer yay). Since you shouldn’t install from the AUR as root, and we’ve enabled privilege escalation in the root task, we’ll create a dedicated user, aur_builder, and switch to it for AUR installation tasks:
- name: create aur_builder user become: yes block: - user: name: aur_builder group: wheel - lineinfile: path: /etc/sudoers.d/11-install-aur_builder line: 'aur_builder ALL=(ALL) NOPASSWD: /usr/bin/pacman' create: yes validate: 'visudo -cf %s'Now, when installing packages, we can enable the AUR installation block:
- aur: name=yaourt skip_installed=true become: yes become_user: aur_builder2. Symlink configuration files
Module: file.
The next step I usually take is creating symlinks to the configuration files stored in my dotfiles repository.
- name: link configs file: src: /home/user/dev/arch/config/{{ item }} dest: /home/user/.config/{{ item }} state: link with_items: - i3 - alacritty - nvim- name: link xorg, tmux configs file: src: /home/user/dev/arch/config/{{ item }} dest: /home/user/{{ item }} state: link with_items: - .xinitrc - .Xresources - .tmux.confWhat’s happening: we iterate over the provided items list and, for each element, run the file module to create a symlink, substituting the current element from with_items in place of the {{ item }} placeholder.
3. Interactive subtasks for Vim
Modules: expect for handling interactive input, and git for working with repositories.
The next step is configuring Vim. Clone the plugin manager, symlink the main .vimrc, and install the plugins.
- name: config vim block: - file: src: /home/user/dev/arch/config/{{ item }} dest: /home/user/{{ item }} state: link with_items: - .vimrc - file: path: /home/user/.vim/bundle state: directory - git: repo: 'https://github.com/VundleVim/Vundle.vim.git' dest: /home/user/.vim/bundle/Vundle.vim - expect: command: nvim +PluginInstall +qall timeout: 600 responses: (?i)ENTER: ""The git module, as you might expect, is used to clone repositories. You can find the full list of options in the documentation.
The expect module is used to run the Vim plugin installation command. Since the process can take a while, I set timeout: so Ansible doesn’t error out before the installation finishes. The responses block lets us send an empty line (i.e., press Enter) in response to any interactive prompt that contains the word ENTER. That’s exactly what Vundle asks for during plugin installation, requiring a confirmation.
4. Using Variables
Sometimes an operation requires user input. This could be additional options, package names, or credentials. Variables can be pre-set or entered interactively by the user.
For example, before cloning private repositories, you can prompt for a username and password. Using private keys is the right way to do it, of course, but if you need a quick and easy solution, you can have users enter a few variables manually. Here’s how:
vars_prompt:- name: "githubuser" prompt: "Enter your github username" private: no- name: "githubpassword" prompt: "Enter your github password" private: yesYou’ll be prompted to enter variables before the tasks start. These variables are used in many places, so it’s worth getting familiar with them.
www
For more details on storing secrets for configurations, see the documentation section Using Vault in playbooks.
5. Tags — for selective runs
Sometimes when debugging Ansible configurations, you need to run tasks repeatedly to verify they work correctly. On a re-run, Ansible checks whether those tasks have already been executed and, in most cases, won’t repeat the same actions. Even so, it’s more convenient to tag all the tasks so you can run only them. Doing this is very simple:
- name: install vmware become: yes block: - pacman: name: - fuse2 - gtkmm - linux-headers - libcanberra - pcsclite — ... state: present - aur: name: - ncurses5-compat-libs skip_installed: yes skip_pgp_check: yes become_user: aur_builder tags: - vmwareNext, run only the ones tagged as vmware. You can pass a single tag or multiple tags:
ansible-playbook --tags=vmware playbook.yml
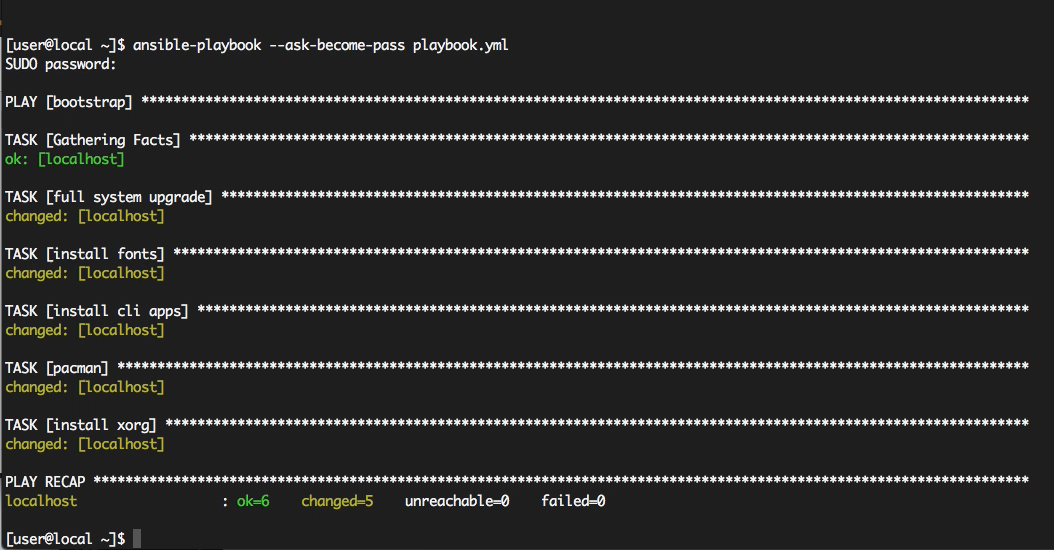
Let’s run our playbook with the command
ansible-playbook --ask-become-pass playbook.yml
and after a short while, we’ll see the results.

Conclusion
Obviously, we’ve only covered the basics of working with Ansible. The web is full of tutorials on this excellent tool. It has a ton of options, extensive documentation, and enough tricks to surprise even a seasoned sysadmin. But even after this brief intro, you can probably already think of ways Ansible could be useful to you.
