At this point, you should already have a basic i3 setup with the SLiM login manager, the LilyTerm terminal, the devmon automount daemon, the twmnd notification daemon, the gxkb keyboard layout switcher applet, and the Compton compositing manager. That’s a fully functional desktop you can use without any trouble. But there are plenty of smaller pieces we didn’t cover in the previous article. For example, we still don’t have a screen locker—the thing that prompts for a password after idle time or when the machine wakes from sleep.
www
If you’re missing anything from the list above, be sure to check out the first part of our adventures.
The slock screen locker
Slock is an extremely minimal screen locker—so minimal it doesn’t even have a password input field. It simply shows a black screen that turns blue while you enter your password, and red if the password is incorrect.
Slock is available in many distributions as a standard package. On Arch Linux, you can install it like this:
$ sudo pacman -S slock
Then run the slock command to lock the screen. To have the screen lock before the computer goes to sleep, create a systemd unit with the following content:
[Unit]
Description=Lock X session using slock for user %i
Before=sleep.target
[Service]
User=%i
Environment=DISPLAY=:0
ExecStartPre=/usr/bin/xset dpms force suspend
ExecStart=/usr/bin/slock
[Install]
WantedBy=sleep.target
Place these lines in the file /, then enable the unit for the current user:
$ sudo systemctl enable slock@USERNAME.service
slock will now be automatically activated when the laptop goes to sleep.
Configuring the Status Bar
Many i3 users suggest replacing the default i3status with something more modern, feature-rich, and visually appealing. That makes sense, but keep in mind that unlike the lean i3status, many alternatives are written in Bash or Python, which makes them less efficient and more resource‑hungry.
That’s why I recommend using i3status, but with a few enhancements. First, have the bar show not only the time, but also the current date and the day of the week. To do this, just update the tztime directive in ~/. so it looks like this:
tztime local {
    format = "%a %Y-%m-%d %H:%M:%S"
}
You can also disable any status bar sections you don’t need by simply commenting out the lines that start with order:
#order += "run_watch DHCP"
This line disables displaying the DHCP status information. By reordering the entries in the order line, you can change the position of items in the status bar.
You may find that the status bar doesn’t show any network information. This is usually caused by incorrect network interface names in the config. Run the command ifconfig to find the correct names, then add them to your i3status config. Interfaces starting with “en” are Ethernet adapters; those starting with “wl” are Wi‑Fi.
Here’s an example i3status configuration for my laptop:
wireless wlp3s0 {
    format_up = "W: (%quality at %essid) %ip"
    format_down = "W: down"
}
ethernet enp0s25 {
    format_up = "E: %ip (%speed)"
    format_down = "E: down"
}
In addition to the network, battery, and time status, you may also want information about the current volume level. You can easily add it with the following block:
volume master {
    format = "♪ %volume"
    format_muted = "♪ muted (%volume)"
    device = "default"
    mixer = "Master"
    mixer_idx = 0
}
and the corresponding line at the start of the config:
order += "volume master"
Weather in the Status Bar
The status bar can display a wide range of information. What it doesn’t have, though, is a built-in way to show the weather. Fortunately, you can solve that with scripts.
First, let’s download the weather.py script:
$ mkdir ~/bin
$ cd ~/bin
$ wget https://raw.githubusercontent.com/calzoneman/i3-weather/master/weather.py
$ chmod +x weather.py
Install the dependencies required for it to run:
$ sudo pacman -S python-requests python-beautifulsoup4
Next, open the i3 config (~/.) and locate the following lines:
bar {
    status_command i3status
}
Replace them with the following:
bar {
    status_command i3status | /home/USERNAME/bin/weather.py 2122265 --wrap-i3-status --unit c --format "{text}, {temp}°{unit_tem+perature}"
}
The number 2,122,265 in the line is the WOEID, a unique identifier assigned to every location on Earth. You can find your city’s WOEID here or on any of many similar sites.

Translating Selected Text
Not all of us can boast perfect command of English, even at a basic level. Documentation is full of words and phrases that are hard to understand without a translator. You end up opening Google Translate, copying and pasting a line, then going back—and repeating this over and over.
Fortunately, you can make the process much simpler by using the translate-shell script. Just install it:
$ mkdir ~/bin
$ wget git.io/trans
$ chmod +x ./trans
And output the translation directly in the console:
$ trans :ru "Hello, world"
It’s easier than opening Google Translate in a browser, but still not very convenient. Let’s take it a step further and make the translation of the selected text appear on screen when you press a keyboard shortcut.
First, let’s create the script ~/:
#!/bin/sh
text=`xclip -selection primary -o`
trans=`~/bin/trans :ru -brief "$text"`
notify-send "$trans"
It uses the xclip utility to grab the currently selected text, translates it with trans, and then displays a notification containing the translated text.
You can run this script directly from the terminal, but it’s better to bind it to an i3 hotkey, for example Win+T. To do this, open the config at ~/. and add the following line:
bindsym $mod+t exec trans-notify.sh
Save and reload the config with Win + Shift + R. Now try selecting some text and press Win + T. A translation should appear on the screen.
info
If any of the scripts or commands in the article don’t work, make sure your ~/.xsession file contains the line export . If it doesn’t, add it and then either reboot the machine or restart Xorg.
Dmenu
In a previous article we talked about dmenu. It’s a dynamic, command-line–style menu with autocomplete. By default, i3 uses dmenu to launch applications with Win+D. But there are far more interesting ways to put it to use.
dmenu is a very simple utility, built according to the Unix philosophy. It doesn’t launch anything itself; it just lets you pick a line from a list of lines fed to its input. If you run the following command:
$ echo "Один\nДва\nТри" | dmenu
you’ll see dmenu on the screen with the options: One, Two, and Three. After you select one of them, the command will exit and print the chosen option.
Let’s make the example a bit more complex:
$ ls /bin /sbin /usr/bin /usr/sbin | dmenu | sh
We’ve got an app launcher that’s almost the same as the one built into i3. “Almost,” because the font isn’t right. It’s better to change it:
$ ls /bin /sbin /usr/bin /usr/sbin | dmenu -fn 'xos4 Terminus-8' | sh
You can take it a step further and repurpose dmenu for completely different uses.
Volume control
dmenu is handy for controlling volume. Just create the following script (~/):
!/bin/sh
percent=`echo -e "0n10n20n30n40n50n60n70n80n90n100" | dmenu -fn 'xos4 Terminus-8' -p volume`
amixer -q set Master ${percent}% unmute
Set the executable bit on it.
$ chmod +x ~/bin/volume_menu.sh
Bind it to a hotkey (let’s use Win+N) by adding the following line to your i3 config (~/.):
bindsym $mod+n exec volume_menu.sh
Voilà: press Win + N and you’ll get a menu to choose the volume level. And you don’t have to stick to my steps (0–100 in increments of 10); you can set your own.
Brightness control
You can control the brightness in the same way. Script ~/:
#!/bin/sh
percent=`echo -e "0n10n20n30n40n50n60n70n80n90n100" | dmenu -fn 'xos4 Terminus-8' -p backlight`
xbacklight -set $percent
Line for the i3 config:
bindsym $mod+b exec backlight_menu.sh
Quick SSH connections
In practice, you can use dmenu to run any action or command that involves selecting from multiple options. For example, here’s a script for connecting to SSH hosts your machine already knows about:
#!/bin/sh
cmd=$1
result=`sed "s/[, ].*//" ~/.ssh/known_hosts | sort -u | dmenu -fn 'xos4 Terminus-8' -p ssh`
exec $cmd $result
i3 config line:
bindsym $mod+Control+Return exec ssh_menu.sh 'lilyterm -s -e ssh'

The Pass Password Manager
On Linux, there’s a wide range of password managers—from the built‑ins in Chrome and Firefox to the standalone KeePass, which stores everything locally. Most of them are graphical apps that don’t fit a minimalist, terminal‑centric setup, but there are more hacker‑friendly options too, like pass.
The pass password manager is a simple command-line utility that lets you add encrypted passwords to a local store, retrieve them, quickly copy them to the clipboard, or generate new ones.
Pass is available in all popular distributions. For example, on Arch Linux you can install it like this:
$ sudo pacman -S pass
Next, generate a PGP key if you don’t already have one:
$ gpg2 --gen-key
The command will prompt you to enter a name (yours or the key’s) and an email address, then move your mouse around and press some keys to gather entropy.
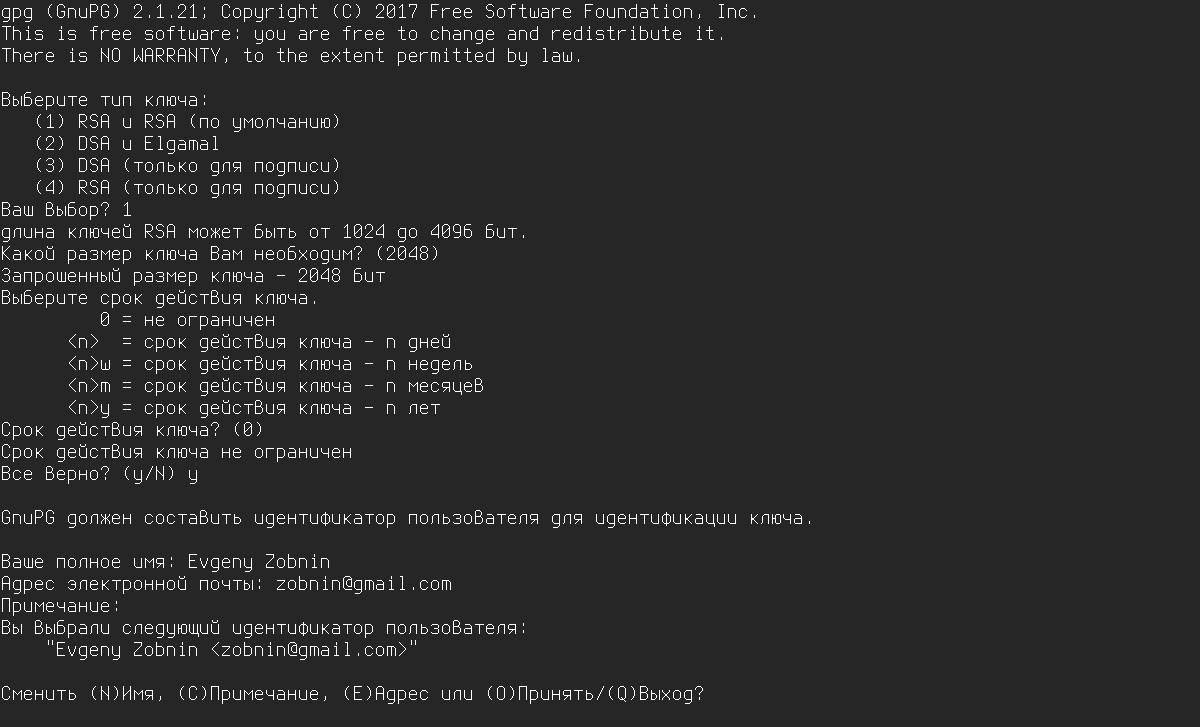
Once the key has been generated, you can initialize the pass store by specifying the key name:
$ pass init 'NAME'
Next, you can start adding passwords—ideally generate them on the spot, for example:
$ pass generate xakep.ru 15
This command generates a 15‑character password for a website.
You can view the password with the following command:
$ pass xakep.ru
Copy the following to the clipboard:
$ pass -c xakep.ru
And to remove it, use the following:
$ pass rm xakep.ru
To view the entire password store, run pass with no arguments:
$ pass

Pass stores its password database in ~/., with each password in its own file. You can create subdirectories in the store and move password files into them for easier organization. Deleting a password file removes that password from the pass database.
You can also put the ~/. directory in Dropbox so you can work with it from any machine.
For those who prefer graphical tools, there’s a GUI frontend for pass called QtPass.
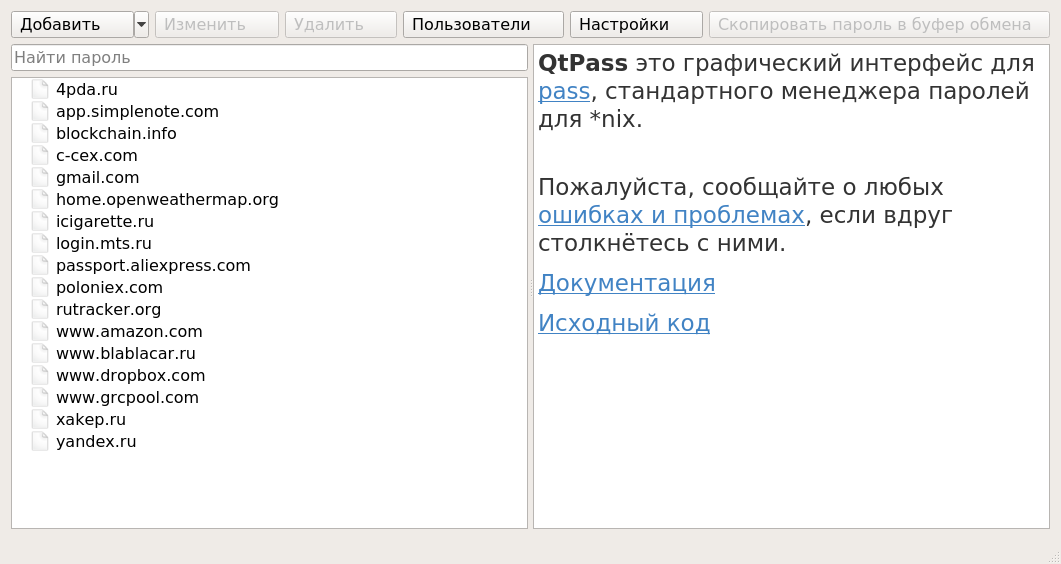
Importing Passwords from KeePass
There are many different tools for importing passwords into pass from other applications (links to them are listed at the bottom of the official site’s main page). For example, you can import passwords from KeePass using keepass2pass.py:
$ wget https://git.zx2c4.com/password-store/plain/contrib/importers/keepass2pass.py
$ chmod +x keepass2pass.py
$ ./keepass2pass.py -f database.xml
Here, database. is a password database exported from KeePass.
Quickly copy passwords with dmenu
Thanks to pass’s simplicity, it’s very easy to integrate it with our desktop and dmenu. A dmenu script already exists; just download it and bind it to an i3 key combo:
$ cd ~/bin
$ wget https://git.zx2c4.com/password-store/plain/contrib/dmenu/passmenu
$ chmod +x passmenu
In the ~/.config/i3/config configuration file, add the following line:
bindsym $mod+p exec passmenu
Now, pressing Win+P will open dmenu with a list of passwords. When you select one, the password will be copied to the clipboard for 45 seconds.
Browser integration
For added convenience, you can integrate pass with your browser. To do this, install the browserpass extension:
$ yaourt -S browserpass
And a Chrome or Firefox extension.
Next, just go to the target site’s login page and click the extension button. The fields will be filled in automatically—but only if the database stores the username along with the password in the format “login:
When importing from KeePass, the script will automatically add these fields; you can also add them using the following command:
$ pass edit xakep.ru
Just insert the line username: right after the password.
Mobile app
There are pass-compatible password managers for iOS and Android. To use them, you need to export the key used to encrypt your password store:
$ gpg --export-secret-key -a "NAME" > private.key
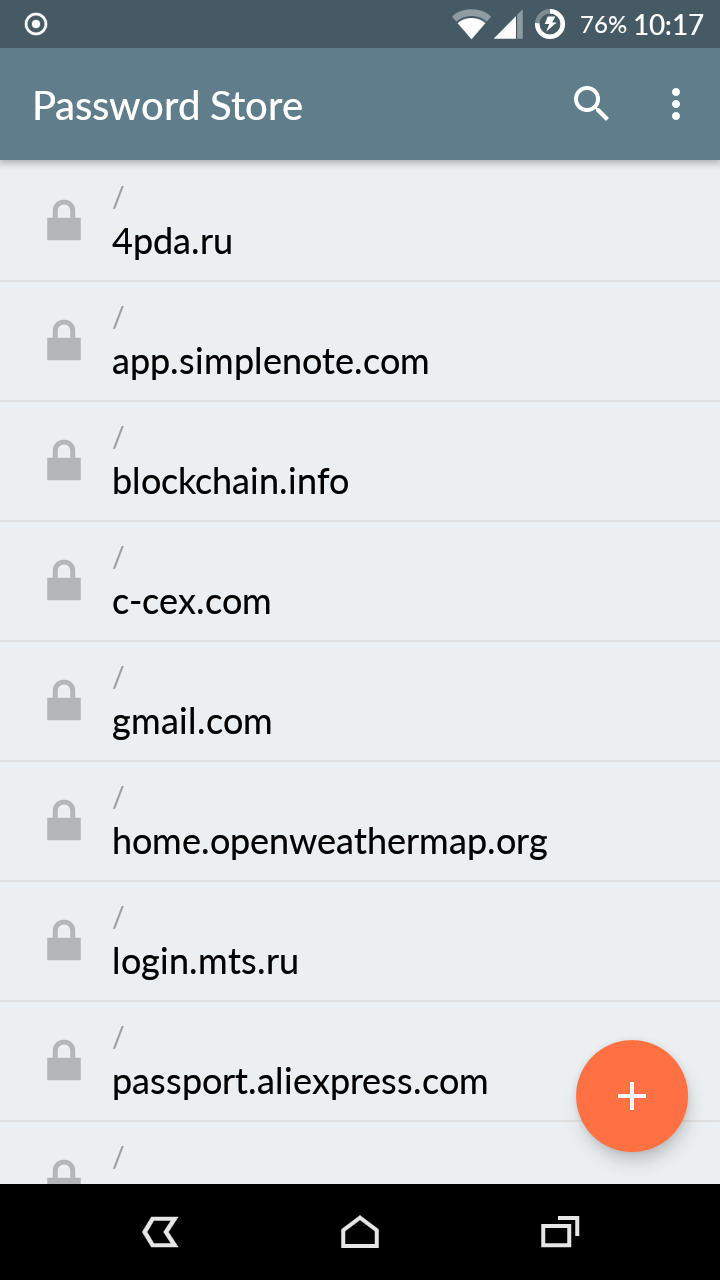
and copy them, along with the password database, to the device’s storage. For the Android app, you’ll also need to install OpenKeychain. That’s the app you’ll use to import your GPG key.
 |
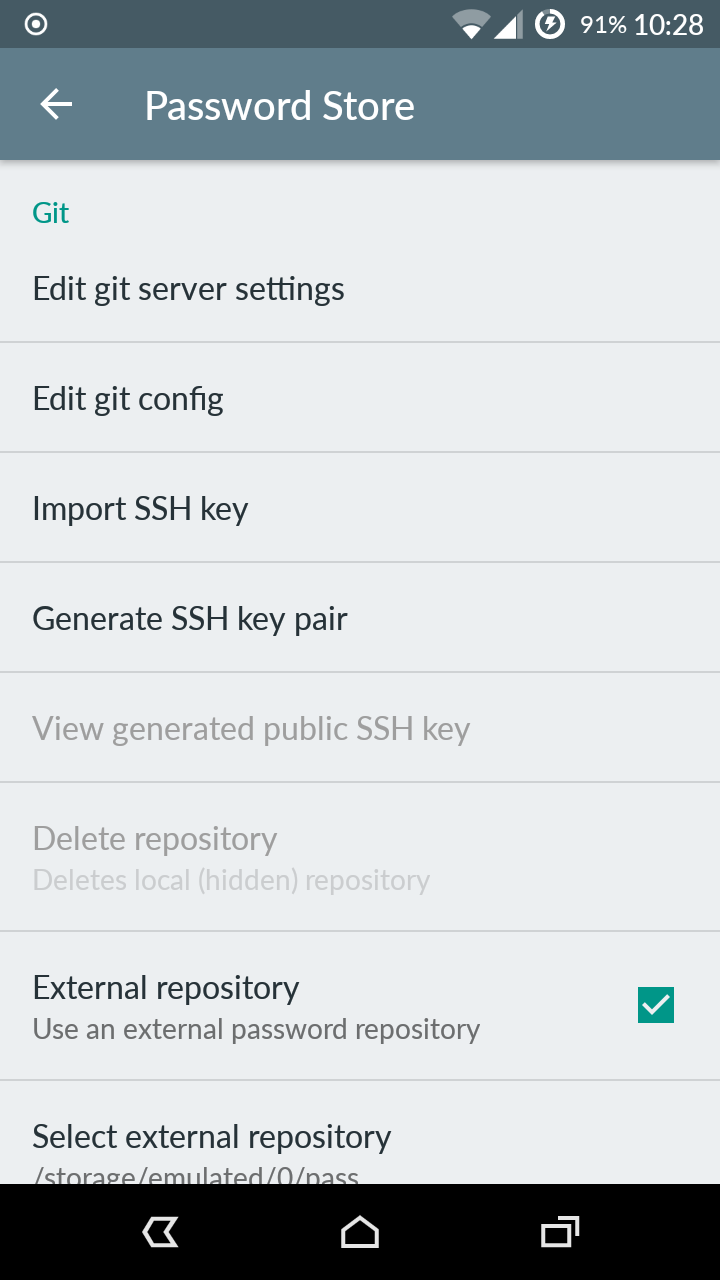 |
| Pass for Android | |
The surf browser
Anyone who’s been online knows how heavy and resource-hungry modern browsers are. Our desktop is a model of lightness and simplicity, so a typical browser just doesn’t fit—we need something different. And we’ve got three options:
- ELinks (http://elinks.or.cz) — a highly capable text-based (!) browser with JavaScript support. About 10–15 years ago it was popular among geeks, hackers, and other oddballs, but today, with no CSS support, it’s really only usable for very simple sites.
- NetSurf (http://www.netsurf-browser.org) — a very fast graphical browser that supports HTML 4 and CSS 2.1 (but not HTML5 or CSS3) and has partial JavaScript support. Not great for Gmail or Facebook, but it lets you browse a good half of the web fairly comfortably.
- surf (http://surf.suckless.org) — a minimalist browser from the Suckless project. It’s essentially a bare WebKit window. No buttons, no menus, no address bar—nothing but the page. Fully keyboard-driven.
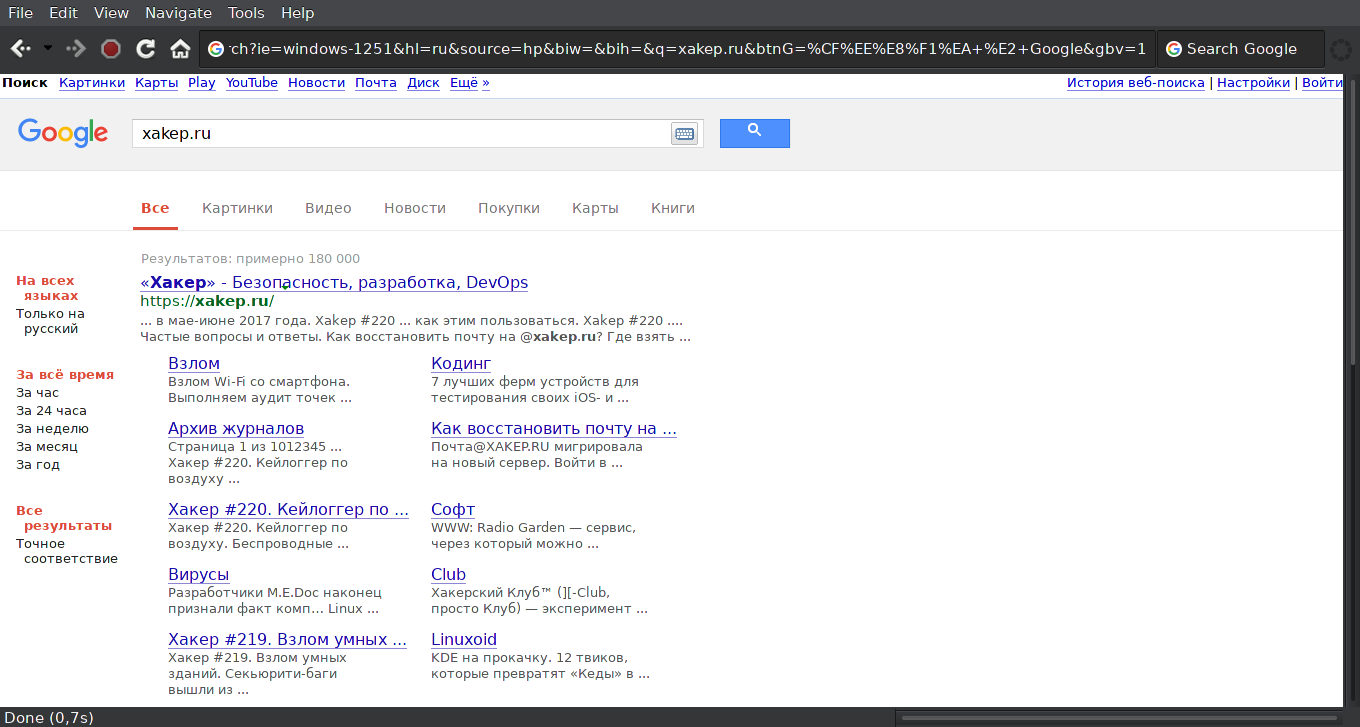
Surf is the best fit for our desktop setup. It renders any site correctly while being as minimalist as possible.
The best way to use surf in an i3 setup is to run it on a dedicated workspace and switch that workspace to the tabbed layout (Win + W). Switch to a new workspace with Win + number, press Win + W, then Win + D to open dmenu, type surf —the site will appear. Open dmenu again, type surf , and google.com will appear. The window title bar will list both windows, so you can flip between surf windows much like switching between tabs.
Surf is fully keyboard-driven, so it’s best to memorize the most useful shortcuts right away:
- Ctrl + h / Ctrl + l — navigate back/forward in history;
- Ctrl + + / Ctrl + – — zoom in/out;
- Ctrl + / — search bar;
- Ctrl + n — next search result;
- Ctrl + g — address bar (via dmenu);
- Ctrl + p — open the URL from the clipboard;
- Ctrl + Shift + a — accept cookies;
- Ctrl + Shift + o — Developer Tools;
- Ctrl + Shift + s — toggle scripts on/off.
Surf supports cookies and lacks many of the features you’d expect in a standard browser, but there are alternatives for all of them:
- Tabs — use i3’s capabilities as shown above, or launch surf via tabbed: http://tools.suckless.org/tabbed/
- Passwords and forms — use pass plus a dmenu script
- Bookmarks — write a script or a Bash alias that opens the desired site with surf
- Quick search from the address bar — use a script like this:
Name it google, put it in ~/, and make it executable. To quickly search with Google, just open dmenu and type google .

Another neat feature of surf is that you can disable specific browser features right at startup using command-line flags:
- -d — disable caching
- -g — disable location sharing
- -i — disable image loading
- -n — disable Developer Tools
- -p — disable plugins
- -s — disable JavaScript
Final thoughts
I could talk about geek-friendly desktops for ages. There’s a huge range of solutions that make life easier for anyone who prefers the UNIX way and lean, simple software—especially in an era of complex, bloated, and downright awkward applications that clog up most users’ machines. If there’s a topic you want me to cover next, drop it in the comments.
