As everybody knows, Android has the foundation of the Linux kernel. This implies that in theory you can run on a smartphone all the applications that are available on desktop Linux. In practice, everything is more difficult. Since the set of Native libraries in Android differs from that on the desktop (not to speak of the platform architecture), the applications need to be compiled statically. And sometimes to be patched, as well. But in this case too, the application operation is not always guaranteed.
As for the kernel modules that can be very useful on a smartphone (for example, NTFS support), the situation is even more interesting. Module load function is disabled in many kernels from the vendor (starting with Android 4.3, it is actually the requirement of Google. — editor’s note). Thus, you will not only have to choose the correct kernel version to build the modules, but, probably, also to rebuild the kernel itself enabling such support, or simply to add the module to the kernel image.
Further in this article we will look at how to overcome these problems and try to build Linux kernel modules and several applications.
Preparation
To build the modules (kernel) and applications, you need a toolchain, that is the binding of a cross-compiler and a linker, plus a set of standard building tools that can be installed from the repository (the example for Ubuntu):
$ sudo apt-get install git-core gnupg flex bison gperf build-essential zip curl libc6-dev lib32ncurses5-dev x11proto-core-dev libx11-dev:i386 libreadline6-dev:i386 libgl1-mesa-glx:i386 libgl1-mesa-dev g++-multilib mingw32 openjdk-6-jdk tofrodos python-markdown libxml2-utils xsltproc zlib1g-dev:i386 git libtool
Now, you can install the toolchain. There are at least two of them — the standard Google NDK and Linaro toolchain, which optimizes the code much better. They also differ in the set of target libraries — while NDK contains the libraries that are available in Android and, hence, may not be suitable to build standard POSIX-compliant applications, Linaro includes the minimum set of standard POSIX libraries for ARM, whose use in Google OS needs static linking.
For compatibility reasons, we will use the first one to build the kernel. Go to the page https://developer.android.com/tools/sdk/ndk/index.html, select the required version of NDK and download it. Then, assign the execution right to the downloaded file and unpack it:
$ chmod u+x android-ndk-r10c-linux-x86_64.bin
$ ./android-ndk-r10c-linux-x86_64.bin
To build programs, you will need Linaro toolchain. The easiest way to get it is to go to forum.xda-developers.com/showthread.php?t=2098133 and select the build. I chose Linaro GCC 4.6.4-2013.05 (since my processor is not Cortex, I downloaded arm-unknown-linux-gnueabi-linaro_4.6.4-2013.05-build_2013_05_18.tar.bz2). Unpack and rename it, for convenience:
$ tar xjvf arm-unknown-linux-gnueabi-linaro_4.6.4-2013.05-build_2013_05_18.tar.bz2
$ mv arm-unknown-linux-gnueabi-linaro_4.6.4-2013.05 linaro-toolchain-4.6
Add the toolchain path to ~/.bashrc (therewith define individual variables, which at the time of the kernel compilation may not be necessary, but later can be very useful):
export PATH=$PATH:${HOME}/android-ndk-r10c/toolchains/arm-linux-androideabi-4.6/prebuilt/linux-x86_64/bin:${HOME}/linaro-toolchain-4.6/bin
export NDKPATH=${HOME}/android-ndk-r10c
export ANDROID_SYSROOT=${HOME}/android-ndk-r10c/platforms/android-18/arch-arm
export LINARO_SYSROOT=${HOME}/linaro-toolchain-4.6/arm-unknown-linux-gnueabi/sysroot
export ARCH=arm
export CROSS_COMPILE_NDK=arm-linux-androideabi-
export CROSS_COMPILE_LINARO=arm-unknown-linux-gnueabi-
export CROSS_COMPILE=$CROSS_COMPILE_NDK
export CCOMPILE=$CROSS_COMPILE
Compilation of the kernel and modules
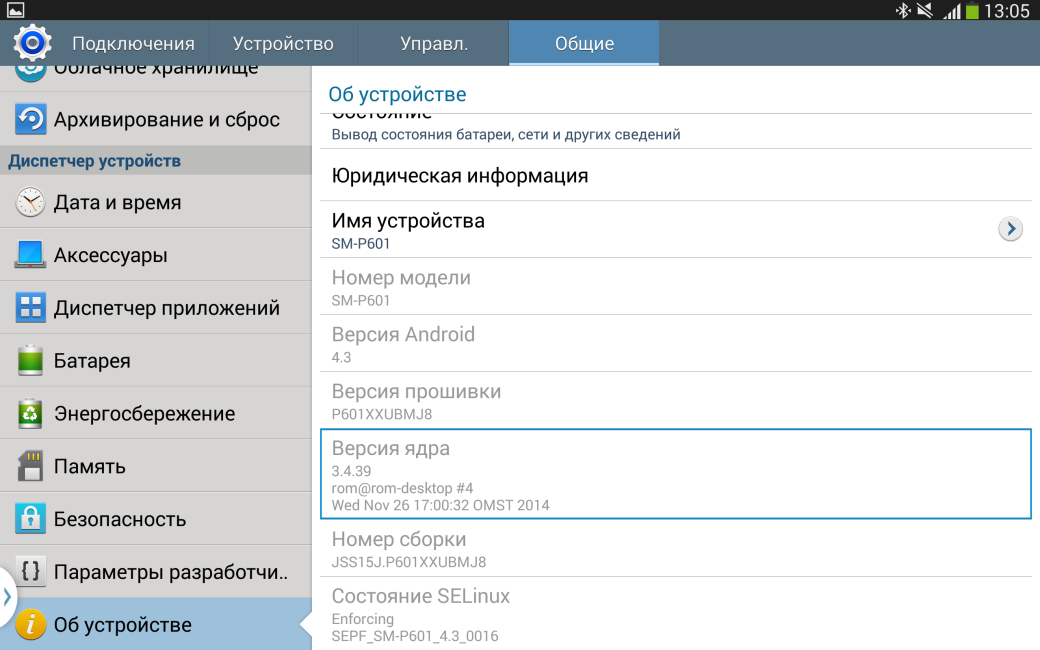
At first determine whether the stock kernel supports the modules. For this, check if the device holds the file /proc/modules. Depending on this, it will be clear what to do next. If the modules are supported, take the vanilla kernel of the same version (of course, it is better to take it from the vendor), configure it, compile only the modules, place them into /system/lib/modules and load them using the command “insmod” on the device. If the kernel does not support the module, you can either take the finished custom kernel with module support (read about it in the article “Choosing the custom kernel for your Android-device“, or Build your own including the required modules in the kernel image.
In the case of Samsung devices (which is exactly my case) the source codes of the kernel are published at opensource.samsung.com. To build the kernel, you will need its config. In some devices, it is located in the file /proc/config.gz, but, unfortunately, not in all of them, so let’s look at another method to get it. After downloading and unpacking it, go to the appropriate directory, look at the files in arch/arm/configs/ and select the one appropriate by the architecture. In my case, there was only one file — n1a_00_defconfig. Return to the directory in which you initially unpacked the kernel, and type the following command:
$ make n1a_00_defconfig
Next, configure the kernel using the standard command “make menuconfig”, to include the necessary modules. Then build:
$ make -j9 CFLAGS_MODULE=-fno-pic
After building, copy all resulting files in a single directory:
$ mkdir final
$ cp arch/arm/boot/zImage final
$ find . -name '*ko' -exec cp '{}' final \;
Then, in the case of the full compilation, you need to gather all files in a ZIP archive. Not in any archive, but in the one built in a certain way (what is meant here is the update file for the custom recovery console. — editor’s note). For this, clone with the template for this file from GitHub:
$ cd final
$ git clone https://github.com/koush/AnyKernel.git
$ cp ./*.ko ./AnyKernel/system/lib/modules/
$ cp ./zImage ./AnyKernel/kernel/
Since the utilities available in the automatic updater are a bit outdated (at least, on my tablet they terminated with segmentation fault), they have to be replaced with the working ones from dh.st/RgI by unpacking them and replacing the files having the same names in the directory AnyKernel/kernel/. Additionally, you need to modify the script for the auto-updater located in AnyKernel/META-INF/com/google/android/updater-script. The final result should be as follows:
ui_print("Extracting System Files...");
set_progress(1.000000);
mount("ext4","MTD", "system", "/system");
package_extract_dir("system", "/system");
unmount("/system");
ui_print("Extracting Kernel files...");
package_extract_dir("kernel", "/tmp");
ui_print("Installing kernel...");
set_perm(0, 0, 0777, "/tmp/dump_image");
set_perm(0, 0, 0777, "/tmp/mkbootimg.sh");
set_perm(0, 0, 0777, "/tmp/mkbootimg");
set_perm(0, 0, 0777, "/tmp/unpackbootimg");
run_program("/sbin/busybox", "dd", "if=/dev/block/mmcblk0p9", "of=/tmp/boot.img");
run_program("/tmp/unpackbootimg", "-i", "/tmp/boot.img", "-o", "/tmp/");
run_program("/tmp/mkbootimg.sh");
run_program("/sbin/busybox", "dd", "if=/tmp/newboot.img", "of=/dev/block/mmcblk0p9");
ui_print("Done!");
The path /dev/block/mmcblk0p9 here is the part which has to be changed. It is the boot section, and almost in all devices it will be presented by different files. To find out the name of the file on your device, run the following command:
$ for i in /dev/block/platform/*/by-name/boot; \
do ls -l $i; done
After modifying, pack the catalog:
$ cd AnyKernel && zip -r AnyKernel.zip *
Next, upload the file to the device and install it using the custom recovery (TWRP or CWM).
Building the applications
The kernel modules allow adding only low-level functionality, which in general cannot be directly used. In order to add the functionality which can be used directly, it is necessary to build the programs, and further we will try to build several applications. Before assembling almost any application, you need to export a number of variables:
$ export CROSS_COMPILE=$CROSS_COMPILE_LINARO
$ export CC=arm-unknown-linux-gnueabi-gcc
$ export CPP=arm-unknown-linux-gnueabi-cpp
$ export CXX=arm-unknown-linux-gnueabi-g++
$ export LD=arm-unknown-linux-gnueabi-ld
$ export AS=arm-unknown-linux-gnueabi-as
$ export AR=arm-unknown-linux-gnueabi-ar
$ export RANLIB=arm-unknown-linux-gnueabi-ranlib
$ export CPPFLAGS="--sysroot=$LINARO_SYSROOT"
$ export CFLAGS="--static --sysroot=$LINARO_SYSROOT"
$ export CXXFLAGS="--sysroot=$LINARO_SYSROOT"
$ export LDFLAGS="--sysroot=$LINARO_SYSROOT"
And only after that you can proceed.
Bash
It is very easy to build Bash using Linaro toolchain — just download the source code from the official FTP and unpack it:
$ wget http://ftp.gnu.org/gnu/bash/bash-4.3.30.tar.gz
$ tar xzvf bash-4.2.53.tar.gz && cd bash-4.3.30
Execute the configure script and build:
$ ./configure --host=arm-linux --enable-static-link --without-bash-malloc --disable-rpath --disable-nls
$ make
After building, the file “bash” will appear, which should be copied to /system/xbin on the device.
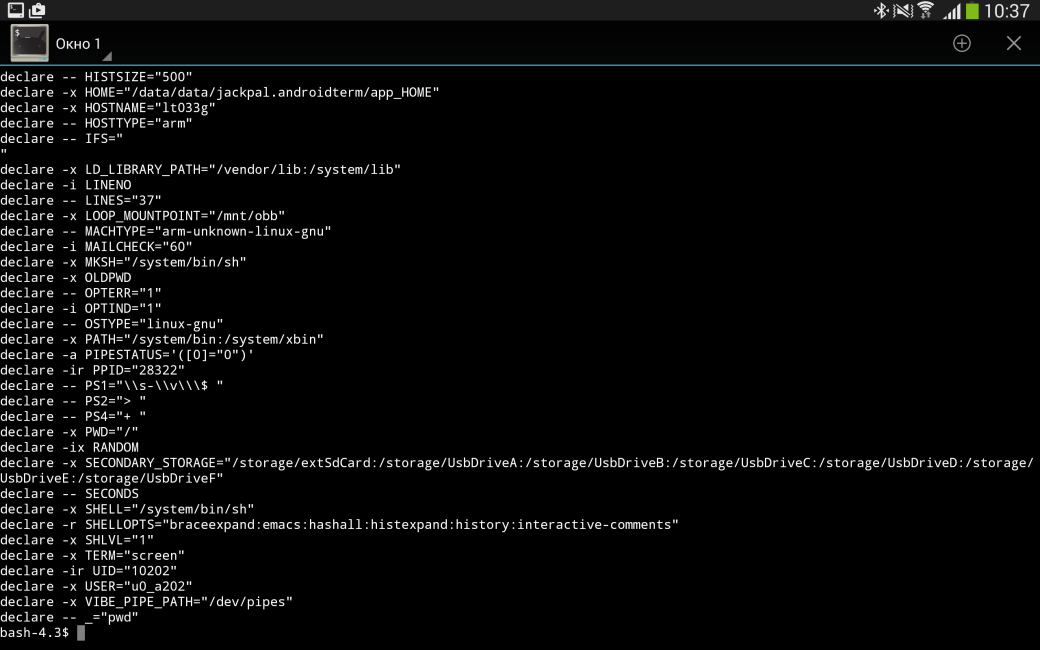
It is worth commenting on why bash needs compilation using Linaro toolchain. Bionic, libc standard library implementation in Android, has no some POSIX-compliant functions used by bash (for example, such as mkfifo() or wctomb()). Hence, building bash using this library will be impossible without rain dance. On the contrary, Linaro uses the standard POSIX-compliant library “glibc”. Since we build bash statically, it does not matter what is used in Android — the most important is that the version of glibc which is used when building matches the kernel. Today, however, the contrary is unlikely.
Lshw
Lshw is a handy command line utility which enables quick collection of information about the available hardware. It is quite simple to compile it (again using Linaro). Download the latest version, unpack it and replace C ++ compiler in the files src/Makefile and src/core/ Makefile with Linaro compiler (assign the value “arm-unknown-linux-gnueabi-g ++” to the variable “CXX”), adding the option “–static” to CXXFLAGS. Then build in the usual way.
Htop
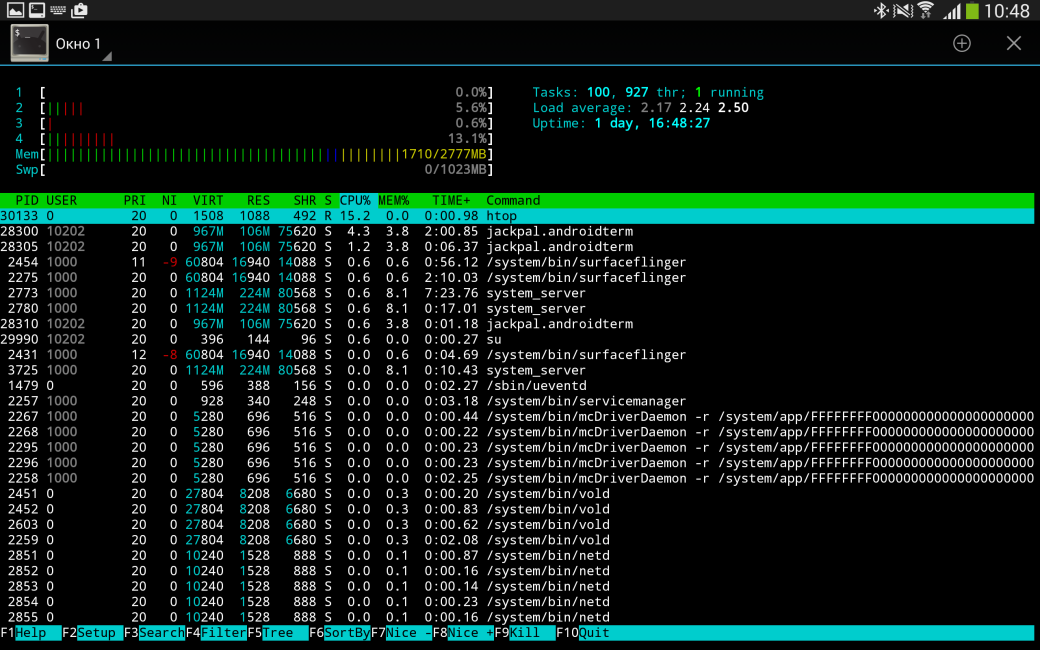
This is a quite handy command line process manager for Linux. To output the information it uses the ncurses library, so its compilation takes a little more time. Create the directory “htop”, go into it and download ncurses:
$ mkdir htop && cd $_
$ wget http://ftp.gnu.org/pub/gnu/ncurses/ncurses-5.9.tar.gz
$ tar xzvf ncurses-5.9.tar.gz
$ cd ncurses-5.9
Define the variable “$ SYSROOT_ADDITIONS”, run “configure” with the necessary parameters and assemble:
$ export SYSROOT_ADDITIONS=${HOME}/htop/rootdir
$ ./configure --with-normal --without-shared --without-cxx-binding --enable-root-environ --disable-widec --disable-GPM --without-ada --without-tests --host=arm-linux --prefix=$SYSROOT_ADDITIONS
$ make && make install
Since it makes no sense to include Unicode and mouse support and we are not going to make this library dynamic, disable these options (and disable Ada language support, as well).
After going to the higher level, download and unpack htop itself:
$ cd ..
$ wget http://hisham.hm/htop/releases/1.0.3/htop-1.0.3.tar.gz
$ tar xzvf htop-1.0.3.tar.gz
$ cd htop-1.0.3
Redefine the environment variables for building again:
$ export CPPFLAGS="--sysroot=$LINARO_SYSROOT"
$ export CFLAGS="--static -I${SYSROOT_ADDITIONS}/include --sysroot=$LINARO_SYSROOT"
$ export CXXFLAGS="--sysroot=$LINARO_SYSROOT"
$ export LDFLAGS="-L${SYSROOT_ADDITIONS}/ncurses-5.9/lib --sysroot=$LINARO_SYSROOT"
$ export LIBS="${SYSROOT_ADDITIONS}/lib/libncurses.a"
Configure and build:
$ ./configure --host=arm --enable-static --disable-unicode
$ make
Everything seems to be OK, but after trying to run it on the device the error “Error opening terminal: screen” occurs. It is corrected rather simply — get the directory “terminfo” from anywhere (I took it from Terminal IDE, simply because it was at hand), copy it to /system/etc and execute the following command in the terminal on the gadget:
# export TERMINFO=/system/etc/terminfo
After that htop will start without problems.
Tmux
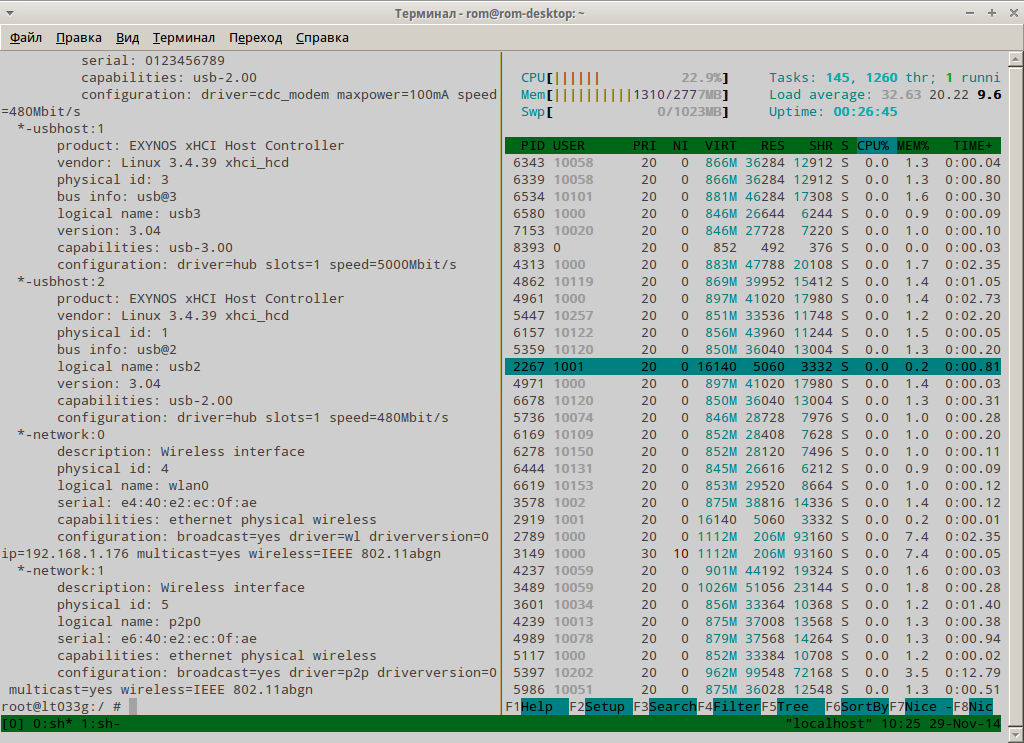
Tmux is a terminal manager, a more advanced alternative to the terminal manager “screen”, well-known to all administrators, created by OpenBSD developers. In the case of Android, it can be effectively used to work with the device via adb shell or SSH (for example, to go to TV Box or HDMI stick under the control of Android. — editor’s note).
To compile tmux you will need the same old ncurses — you can take it from the previous build by copying the directory “rootdir”. In addition to ncurses, you will need the library “libevent”. Create the directory “tmux”, define the variable “$ SYSROOT_ADDITIONS” and download libevent and tmux:
$ export SYSROOT_ADDITIONS=${HOME}/tmux/rootdir
$ git clone https://github.com/libevent/libevent.git
$ git clone git://git.code.sf.net/p/tmux/tmux-code
Build libevent:
$ cd ../libevent
$ ./autogen.sh
$ ./configure --host=arm-linux --disable-shared --disable-openssl --disable-samples -prefix=$SYSROOT_ADDITIONS
$ make && make install
Prepare to build tmux:
$ export CFLAGS="--static -I${SYSROOT_ADDITIONS}/include -I/${SYSROOT_ADDITIONS}/include/ncurses --sysroot=$LINARO_SYSROOT"
$ export LDFLAGS=" -L${SYSROOT_ADDITIONS}/lib -L${SYSROOT_ADDITIONS}/include -L${SYSROOT_ADDITIONS}/include/ncurses --sysroot=$LINARO_SYSROOT"
$ export LIBEVENT_CFLAGS="-I${SYSROOT_ADDITIONS}/include --sysroot=$LINARO_SYSROOT"
$ export LIBEVENT_LIBS="-L${SYSROOT_ADDITIONS}/lib -levent --sysroot=$LINARO_SYSROOT"
And finally, build tmux:
$ ./configure --enable-static --host=arm-linux && make
After building and uploading the executable file, before starting tmux, in addition to the TERMINFO variable, you need to define the TMPDIR variable — I used /data/local/tmp.
# export TERMINFO=/system/etc/terminfo
# export TMPDIR=/data/local/tmp
It is worth noting that tmux works only from root, because the access rights do not allow writing to the above folder to any Tom, Dick or Harry.
Ngrep
It is a very useful utility which allows capturing the packets with the specified pattern (it can be useful, for example, to debug RESTful applications). Its building also requires to build libpcap. In the usual way, create the directory, download libpcap to it, then unpack and build it:
$ mkdir htop && cd $_
$ wget http://www.tcpdump.org/release/libpcap-1.6.2.tar.gz
$ tar xzvf libpcap-1.6.2.tar.gz
$ cd libpcap-1.6.2
$ export SYSROOT_ADDITIONS=${HOME}/ngrep/rootdir
$ ./configure --host=arm-linux --disable-shared --with-pcap=linux --disable-dbus --prefix=$SYSROOT_ADDITIONS
$ make && make install
Download ngrep, then unpack and build it:
$ export CFLAGS="--static -I${SYSROOT_ADDITIONS}/include -I${SYSROOT_ADDITIONS}/include/pcap --sysroot=$LINARO_SYSROOT"
$ export LDFLAGS=" -L${SYSROOT_ADDITIONS}/lib -L${SYSROOT_ADDITIONS}/include -L${SYSROOT_ADDITIONS}/include/pcap --sysroot=$LINARO_SYSROOT"
$ ./configure --enable-static --disable-dropprivs --host=arm-linux --with-pcap-includes=${SYSROOT_ADDITIONS}/include/pcap
$ make
Let’s look at the options of both configures. In the case of libpcap we have disabled DBUS support because it just does not present in Android and have specified the type of packet capture (since ultimately we compile for Linux, the capture type should be appropriate). As for ngrep, we have set the path to the header files of libpcap and have disabled lowering of privileges due to absence of the file /etc/passwd in Android, where this functionality is oriented to.
Linux Deploy
Compilation of the programs can take a long time, and not every application can be easily built (for example, rtorrent text torrent client requires building libtorrent, and this library in turn involves Boost). If for a couple of applications this is not so critical, when building more applications labor costs become too high. And in the case of the static building, the applications themselves can expand to unimaginable sizes. However, there is a solution to this problem — Linux Deploy, which can easily be found in Google Play.
Since Android is based on the Linux kernel and changes in it are not strong enough to interfere the launch of standard POSIX applications (as demonstrated above), it is possible to deploy chroot environment (with forwarding of the relevant pseudo-file systems) and to install userland parts of the distributives in it that support ARM architecture. Linux Deploy does just that, creating the image and mounting it as a loop device.
The following distributives are supported:
- Ubuntu;
- OpenSUSE;
- Fedora;
- Arch Linux;
- Gentoo;
- and finally, Kali Linux (its presence will undoubtedly appeal to penetration testers).
After deploying and starting the system, you need to login somehow. There are two methods to do it: via SSH or VNC. If SSH server is present in Android in Linux Deploy, either disable it, or redefine the port. If you use VNC, install VNC client on Android (I recommend bVNC). The standard username and password are “android” and “changeme”, respectively.
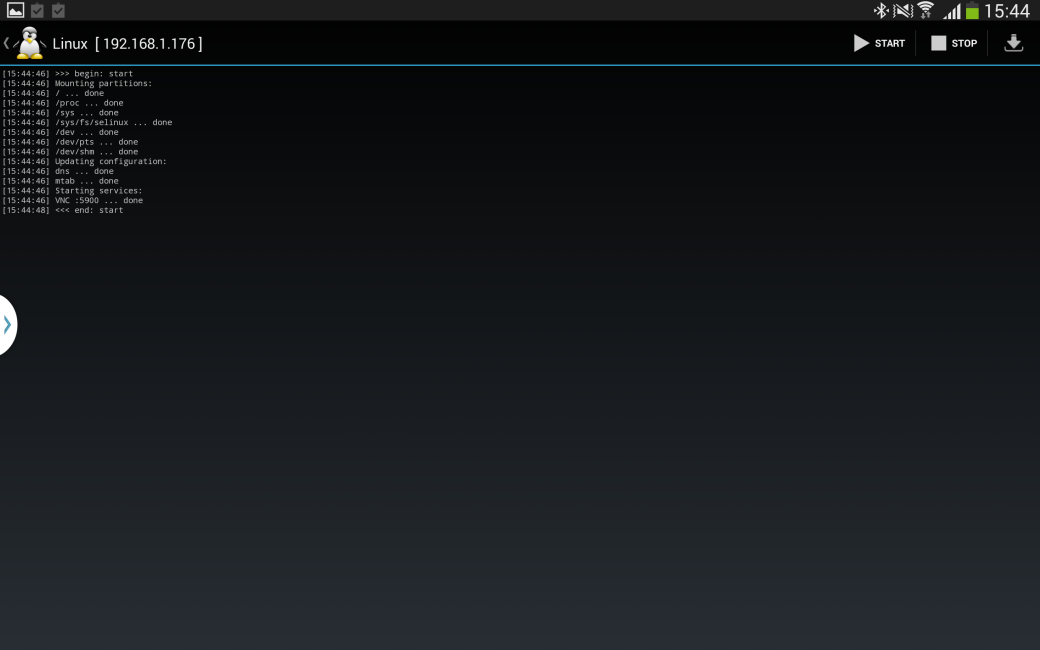
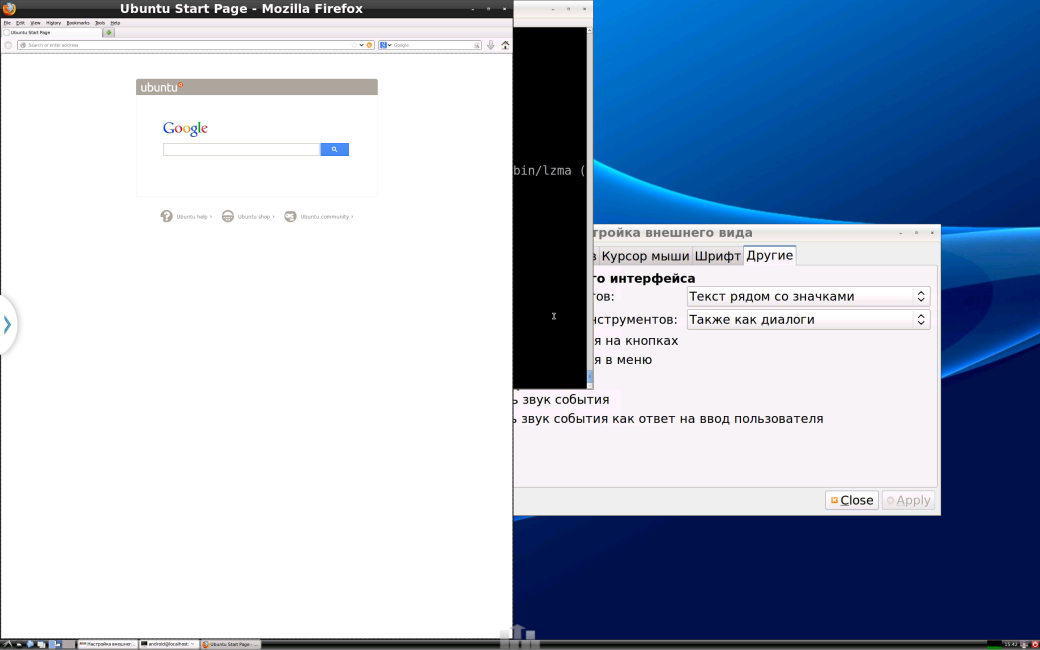
In this container you can make almost the same actions as in the standard desktop Linux distributive, making allowance for the functionality supported by the kernel. Note that the container is not isolated from the main system, and running the services in some distributives is not supported because they use modern initialization systems. In addition, keep in mind that the applications in the container are native and this greatly flattens the battery.
Conclusion
The article described two (if counting the compilation of the kernel modules, then even three) methods to extend Android functionality. Let’s summarize.
Compiling the kernel and modules makes sense only when you need low-level functionality — whether FS support, or, for example, the iptables module. In modern stock kernels, the support for module loading is mostly disabled, so to add functionality you will need to compile the entire kernel, anyway.
In case of compiling small POSIX applications, you can either try to use Google NDK, compatible with Bionic and almost incompatible with POSIX, or use the third-party toolchain for ARM architecture, which usually includes the glibc library, and then statically compile the applications. However, keep in mind that the size of the statically linked application is quite big, so it will be useful to emphasize once again that this method is effective only for small applications.
To run big applications you can use Linux Deploy, which allows deploying the full-featured userland part of the popular distributives on Android. However, it also has some disadvantages. Firstly, it greatly flattens the battery and, secondly, the size of the image with this userland part cannot be bigger than 4GB, so if you feel your mouth watering for multiple applications, just swallow.
In general, running POSIX applications in Android is quite possible and this was demonstrated in the article. And the way in which you will do things is up to you. Stay freedom.