warning
Before you start tinkering with the registry and services, we recommend creating a restore point—or better yet, making a full image backup of the system partition.
Back Up the Registry
One way to back up the registry is to run the REG EXPORT command in a console.
reg export HKLM hklm_backup.reg
This command creates the file hklm_backup. with all data from the HKEY_LOCAL_MACHINE hive. Repeat the same command for the other registry hives (see screenshot).

You can also back up individual registry keys before changing them. If anything goes wrong, you can roll back the changes simply by running the .reg file.
Accessing the Registry
Developers have cranked out dozens of system tweakers. They all promise miracles and operate as opaque black boxes, but in reality everything they do boils down to three simple things:
- Modifying specific registry keys
- Stopping unnecessary services
- Removing or adding scheduled tasks
These procedures are often interconnected. For example, a running service won’t let you delete its registry key, or it may automatically restore a deleted scheduled task. That’s why we’ll walk through each task in detail, going beyond the usual guidelines.
Let’s start with getting access to the Registry. That’s a separate headache in newer versions of Windows, especially Windows 10. By default, even an administrator can’t change key values across many parts of the Registry or delete files at will. They’re nominally the owner, but not quite.
Windows’ typical privilege model often surprises Linux users: the system account has higher privileges than any member of the Administrators group. By default, SYSTEM can do anything, while Administrators can only do what policy permits.
You can fix this issue in various “hacker” ways, but most of them leave a hole in the system and reduce security rather than improving it. So let’s look at safer methods instead. Regardless of the target (a registry key, file, or directory), you first need to take ownership of it and only then grant yourself permissions.
Method 1: Using Registry Editor (regedit)
The upside of this method is that it doesn’t require installing any additional software. The downside is having to set permissions for each individual key through the GUI—though some might actually find that more convenient.

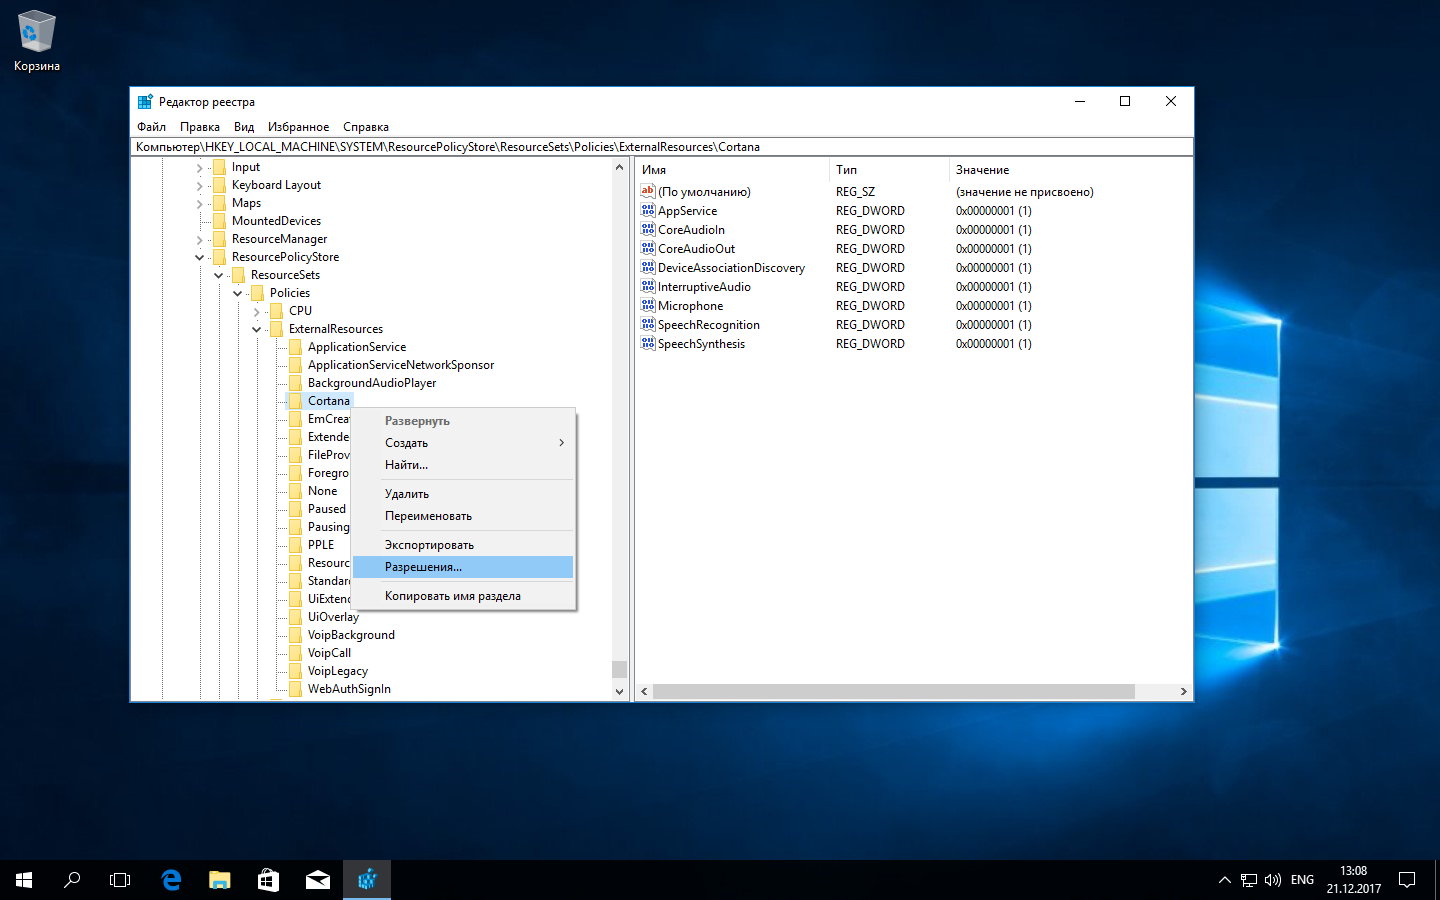
Just run regedit as administrator, select the target key, and from the context menu (right-click) choose “Permissions,” change the owner, and then set whatever permissions you need.

Method 2 — Using Microsoft’s SubInACL Utility
Download the SubInACL utility from Microsoft’s website. Windows 10 isn’t listed among the supported OSes, but don’t let that bother you—we’ve tested it and it works. Just remember to run it from an elevated console (Run as Administrator). For convenience, copy SubInACL. to the Windows system directory (%Windir%\) so you don’t have to type the full path every time.

Next, for SubInACL you need to specify the name of the object to modify, its type, and the desired action. The object can be one of the following types: a file (file), a folder (folder), a specific registry key (keyreg), or a registry key including all of its subkeys (subkeyreg).
As usual, before you can assign permissions to an object, you need to take ownership of it. You can chain these two steps into a single command by separating them with a space. For example, the following command first makes the Administrators group the owner of the AutoLogger key (it controls tracing of events that occur in the early stages of OS boot), and then grants admins full access to it.
SUBINACL /keyreg "HKEY_LOCAL_MACHINE\SYSTEM\ControlSet001\Control\WMI\AutoLogger" /setowner=XTester /grant=XTester=f
Replace XTester with your own account name everywhere it appears.
Using objects of type subkeyreg, it’s easy to fully unlock the Registry. Just enumerate its root hives following the pattern below:
subinacl /subkeyreg HKEY_LOCAL_MACHINE /grant=XTester=f
subinacl /subkeyreg HKEY_CURRENT_USER /grant=XTester=f
And so on.

Likewise, you can take ownership of every file and directory on the specified drive with a single command.
subinacl /subdirectories %SystemDrive% /grant=XTester=f
Method 3: Using the free third‑party SetACL utility
Overall, the approach is similar to using the standard SubInACL utility; the differences are minimal.
First, download the freeware utility.
Extract the archive and copy SetACL. to %Windir%\ (on 64‑bit Windows, use the appropriate system folder). Then open an elevated command prompt and run SetACL. The full command-line syntax is covered in the documentation. A brief help screen is available by launching it with the help switch.
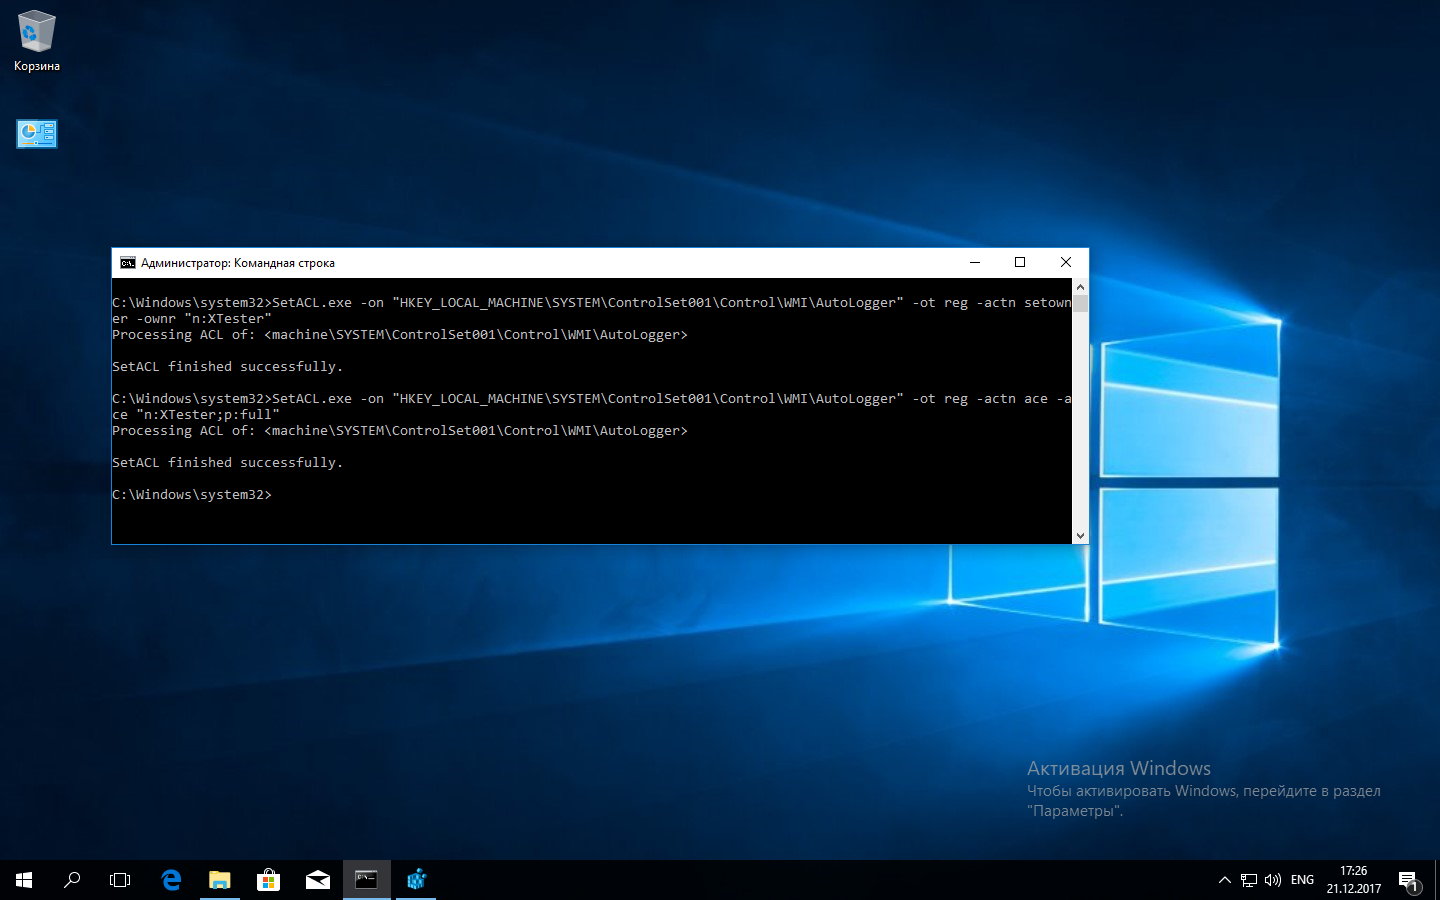
The utility works the same way as SubInACL: you need to specify the object’s name, its type, and the action. With SetACL, however, it’s better to do this as separate commands. For example, the command below will make the specified user (XTester) the owner of the autologger key.
SetACL.exe -on "HKEY_LOCAL_MACHINE\SYSTEM\ControlSet001\Control\WMI\AutoLogger" -ot reg -actn setowner -ownr "n:XTester"
The next command will grant the specified account full access to this registry key, allowing it to modify it.
SetACL.exe -on "HKEY_LOCAL_MACHINE\SYSTEM\ControlSet001\Control\WMI\AutoLogger" -ot reg -actn ace -ace "n:XTester;p:full"

Once you’ve gained the ability to edit any registry keys, it’s time to start modifying the registry.
Disable Cortana
Cortana is tightly integrated with the system. It’s tied into the Search service, privacy policies, and more. As a result, there are numerous registry entries related to it, and with each new Windows 10 build, that number keeps growing.
Once the registry is “unlocked,” you can easily edit any key via regedit. If you have many to change, it’s more convenient to write a batch script and update them all at once from the console.
reg add "HKLM\SOFTWARE\Policies\Microsoft\Windows\Windows Search" /v "AllowCortana" /t REG_DWORD /d 0 /f
reg add "HKLM\SOFTWARE\Microsoft\PolicyManager\default\Experience\AllowCortana" /v "value" /t REG_DWORD /d 0 /f
reg add "HKLM\SOFTWARE\Microsoft\Windows\CurrentVersion\Search" /v "CortanaEnabled" /t REG_DWORD /d 0 /f
reg add "HKCU\SOFTWARE\Microsoft\Windows\CurrentVersion\Search" /v "CortanaEnabled" /t REG_DWORD /d 0 /f
reg add "HKCU\SOFTWARE\Microsoft\Windows\CurrentVersion\Search" /v "CanCortanaBeEnabled" /t REG_DWORD /d 0 /f
Disable telemetry
Under the guise of collecting “diagnostic” data, Windows 10 sends Microsoft gigabytes of information, which may include sensitive content. In effect, it’s akin to a built-in keylogger.
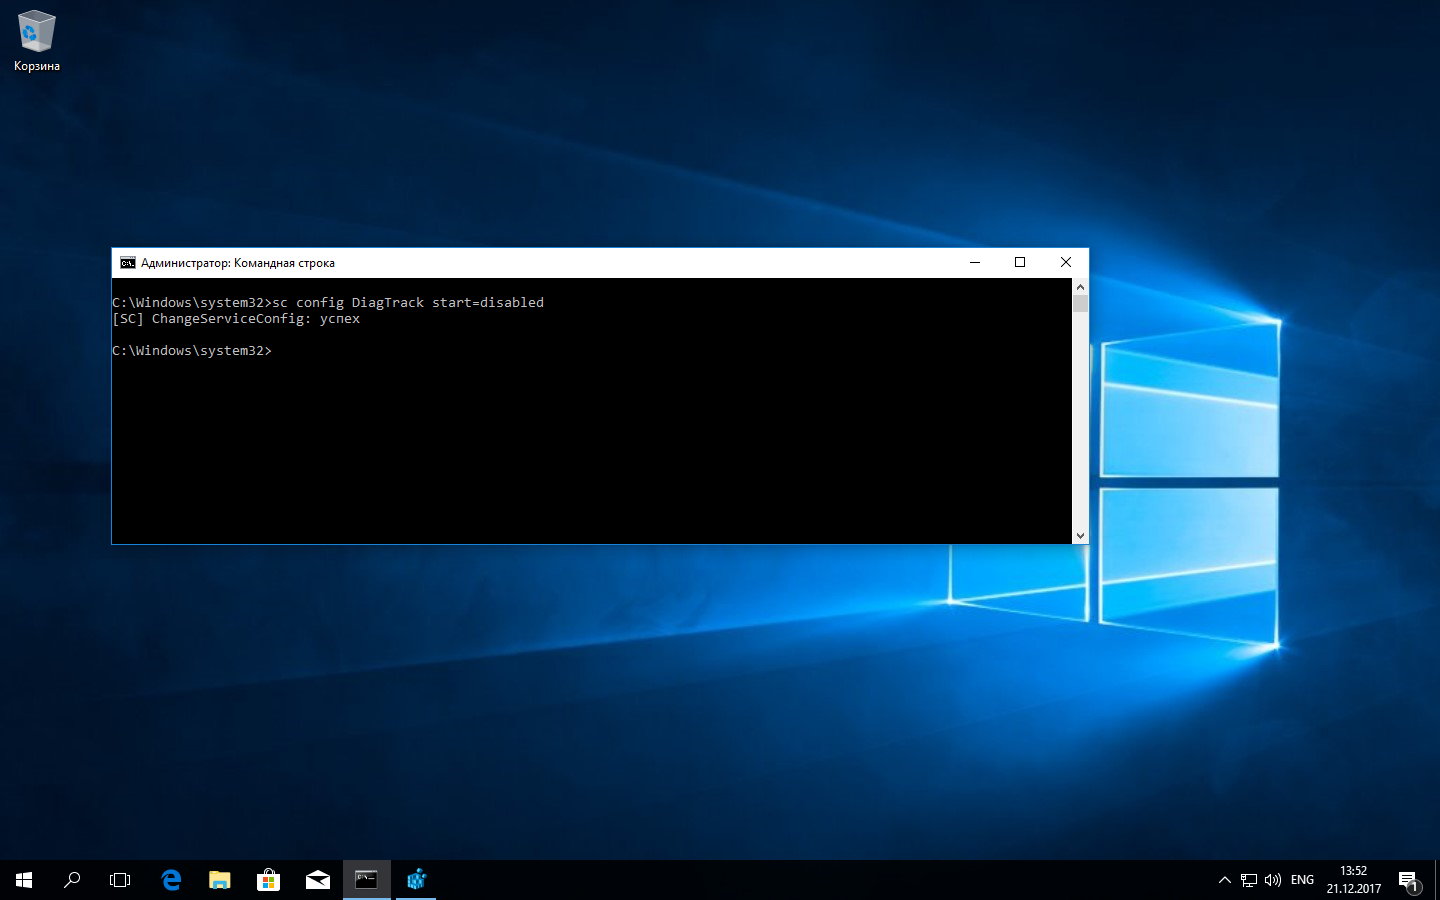
To get rid of this nuisance, first stop the background services. You can do this via the services.msc snap-in or directly from the console.
net stop DiagTrack

sc config DiagTrack start=disabled

net stop dmwappushservice
sc config dmwappushservice start=disabled

Next, in the same manner, stop the services and disable their automatic startup:
- diagnosticshub.standardcollector.service;
- DcpSvc;
- WerSvc;
- PcaSvc;
- DoSvc;
- WMPNetworkSvc.
The list of services is always selected case by case, but we start by disabling the following, in order:
- DiagTrack (service that sends “diagnostic”/telemetry data)
- Diagnostics Hub Standard Collector (Microsoft Diagnostics Hub Standard Collector service)
- dmwappushservice (WAP Push message routing service)
Now it’s time to edit the Registry.
reg add "HKLM\SOFTWARE\Policies\Microsoft\Windows\DataCollection" /v AllowTelemetry /t REG_DWORD /d 0 /f
reg add "HKLM\SYSTEM\CurrentControlSet\Services\diagnosticshub.standardcollector.service" /v "Start" /t REG_DWORD /d 4 /f
reg add "HKCU\SOFTWARE\Microsoft\Personalization\Settings" /v "AcceptedPrivacyPolicy" /t REG_DWORD /d 0 /f
reg add "HKLM\SYSTEM\ControlSet001\Control\WMI\AutoLogger\AutoLogger-Diagtrack-Listener" /v "Start" /t REG_DWORD /d 0 /f
reg add "HKLM\SYSTEM\CurrentControlSet\Control\WMI\AutoLogger\AutoLogger-Diagtrack-Listener" /v "Start" /t REG_DWORD /d 0 /f
reg add "HKLM\SYSTEM\CurrentControlSet\Control\WMI\AutoLogger\SQMLogger" /v "Start" /t REG_DWORD /d 0 /f
reg add "HKLM\SOFTWARE\Policies\Microsoft\Windows\AppCompat" /v "AITEnable" /t REG_DWORD /d 0 /f
reg add "HKLM\SOFTWARE\Policies\Microsoft\Windows\AppCompat" /v "DisableUAR" /t REG_DWORD /d 1 /f
reg add "HKCU\SOFTWARE\Microsoft\InputPersonalization" /v "RestrictImplicitInkCollection" /t REG_DWORD /d 1 /f
reg add "HKCU\SOFTWARE\Microsoft\InputPersonalization" /v "RestrictImplicitTextCollection" /t REG_DWORD /d 1 /f
reg add "HKCU\SOFTWARE\Microsoft\InputPersonalization\TrainedDataStore" /v "HarvestContacts" /t REG_DWORD /d 0 /f
reg add "HKLM\SOFTWARE\Policies\Microsoft\Windows\TabletPC" /v "PreventHandwritingDataSharing" /t REG_DWORD /d 1 /f
reg add "HKLM\SOFTWARE\Policies\Microsoft\Windows\HandwritingErrorReports" /v "PreventHandwritingErrorReports" /t REG_DWORD /d 1
reg add "HKLM\SOFTWARE\Policies\Microsoft\SQMClient\Windows" /v "CEIPEnable" /t REG_DWORD /d 0 /f
reg add "HKLM\SOFTWARE\Policies\Microsoft\SQMClient" /v "CorporateSQMURL" /t REG_SZ /d "0.0.0.0" /f
reg add "HKCU\SOFTWARE\Policies\Microsoft\Office\16.0\osm" /v "Enablelogging" /t REG_DWORD /d 0 /f
reg add "HKCU\SOFTWARE\Policies\Microsoft\Office\16.0\osm" /v "EnableUpload" /t REG_DWORD /d 0 /f
reg add "HKCU\SOFTWARE\Microsoft\MediaPlayer\Preferences" /v "UsageTracking" /t REG_DWORD /d 0 /f
reg add "HKCU\SOFTWARE\Microsoft\Siuf\Rules" /v "NumberOfSIUFInPeriod" /t REG_DWORD /d 0 /f
reg add "HKCU\SOFTWARE\Microsoft\Siuf\Rules" /v "PeriodInNanoSeconds" /t REG_DWORD /d 0 /f
reg add "HKLM\SOFTWARE\Policies\Microsoft\Windows\DataCollection" /v "DoNotShowFeedbackNotifications" /t REG_DWORD /d 1 /f
reg add "HKCU\SOFTWARE\Policies\Microsoft\Assistance\Client\1.0" /v "NoExplicitFeedback" /t REG_DWORD /d 1 /f
reg add "HKLM\SOFTWARE\Microsoft\Input\TIPC" /v "Enabled" /t REG_DWORD /d 0 /f
reg add "HKCU\SOFTWARE\Microsoft\Input\TIPC" /v "Enabled" /t REG_DWORD /d 0 /f
Just save it all as a script (.bat or .cmd) and comment out the lines you don’t need on that particular machine.
WWW
If you want to learn more about Windows 10’s snooping, read these articles:
- – [The Secret Life of Windows 10: What It Phones Home to Microsoft About—and How to Make It Stop
- – Windows 10 Anniversary Update Review: Once Again, How to Stop Windows 10 from Tracking and Spying
Disabling Insecure Services
Any service is theoretically unsafe, but there’s a known set of services that leave gaping holes in Windows 10. You can stop them and disable their autostart with net and sc . I’ll just list them here so we don’t clutter the article with repetitive command syntax:
- RemoteRegistry;
- TermService;
- TrkWks;
- DPS.
If you’re using Windows 10 on a PC, you should also disable the unnecessary collection of data from mobile device sensors:
- SensorDataService;
- SensorService;
- SensrSvc.
If you don’t use Xbox, you should also disable the related Xbox services:
- XblAuthManager;
- XblGameSave;
- XboxNetApiSvc.
Optionally, disable Remote Assistance through the Registry:
reg add "HKLM\SYSTEM\CurrentControlSet\Control\Remote Assistance" /v "fAllowToGetHelp" /t REG_DWORD /d 0 /f
reg add "HKLM\SYSTEM\CurrentControlSet\Control\Remote Assistance" /v "fAllowFullControl" /t REG_DWORD /d 0 /f
Disable administrative shares if necessary.
reg add "HKLM\SYSTEM\CurrentControlSet\Services\LanmanServer\Parameters" /v "AutoShareWks" /t REG_DWORD /d 0 /f
Configure automatic paging file cleanup
To prevent passwords and other sensitive data from leaking, it’s best to wipe the swap file on reboot and shutdown.
reg add "HKLM\SYSTEM\CurrentControlSet\Control\Session Manager\Memory Management" /v " ClearPageFileAtShutdown " /t REG_DWORD /d 1 /f
Disable AutoRun on removable media
reg add "HKLM\SOFTWARE\Microsoft\Windows\CurrentVersion\Policies\Explorer" /v "NoDriveTypeAutoRun" /t REG_DWORD /d 255 /f
reg add "HKLM\SOFTWARE\Microsoft\Windows\CurrentVersion\Policies\Explorer" /v "NoAutorun" /t REG_DWORD /d 1 /f
Clear history
Disable saving of recently opened files lists:
reg add "HKCU\SOFTWARE\Microsoft\Windows\CurrentVersion\Explorer" /v "ShowRecent" /t REG_DWORD /d 0 /f
reg add "HKLM\SOFTWARE\Policies\Microsoft\Windows\FileHistory" /v "Disabled" /t REG_DWORD /d 1 /f
Disable search query history logging:
reg add "HKCU\SOFTWARE\Microsoft\Windows\CurrentVersion\Search" /v "DeviceHistoryEnabled" /t REG_DWORD /d 0 /f
Turning off app history:
reg add "HKLM\SOFTWARE\Policies\Microsoft\Windows\AppPrivacy" /v "LetAppsAccessCallHistory" /t REG_DWORD
Uninstalling preinstalled apps
Removing built‑in components in Windows 10 isn’t always straightforward, but you can handle everything from the command line. First, kill the process of the app you don’t need, then uninstall it. Using OneDrive as an example, it looks like this:
taskkill /f /im OneDrive.exe
start %SystemRoot%\System32\OneDriveSetup.exe /uninstall

Configuring automatic restore point creation
You can automate the creation of restore points using the WMI (Windows Management Instrumentation) command-line utility.
Just configure System Restore once, then create a batch file with the following line:
Wmic.exe /Namespace:\\root\default Path SystemRestore Call CreateRestorePoint "%DATE%", 100, 1
Add it to the Task Scheduler, and it will run on the specified schedule and automatically create new restore points according to the settings you configured in the first step.
God Mode (quick access to all settings)
Many Windows 10 settings are buried so deep you can spend half a day clicking through menus. It’s much more convenient to summon them all with a single click via one shortcut. This trick is called “God Mode,” and it’s dead simple: as an administrator, create a new folder on the desktop named
WriteAnythingHere.{ED7BA470-8E54-465E-825C-99712043E01C}
That’s all!

After you press Enter, the folder icon will switch to the system icon and its name will be hidden. Clicking it opens an alphabetized list of more than two hundred settings. Nice!
Disable Automatic Updates
You can also rein in Windows’ habit of downloading and installing updates whenever it feels like it—by tweaking the registry.
reg add "HKEY_LOCAL_MACHINE\SOFTWARE\Policies\Microsoft\Windows\WindowsUpdate\AU" /v " AUOptions" /t REG_DWORD /d 2 /f
After that, you can still install updates manually.
reg add "HKEY_LOCAL_MACHINE\SOFTWARE\Microsoft\Windows\CurrentVersion\DeliveryOptimization\Config" /v "DODownloadMode" /t REG_DWORD /d 0 /f

Remove Telemetry Tasks from Task Scheduler
They include sections like “Customer Experience,” “Cloud Experience,” “Application Statistics,” “File Statistics,” “Disk Diagnostics,” “Power Efficiency Diagnostics,” “Family Safety Monitor,” “Network Data Collection,” and many others.
You can manage all of them via the schtasks command-line tool. First, run it with the / switch to stop the task. Then run it again with /, specifying the task name with / (task name).
For example, the command
schtasks /end /tn "\Microsoft\Windows\FileHistory\File History (maintenance mode)"
will stop the “File Usage Statistics Collection” task, and the next command will disable it:
schtasks /change /tn "\Microsoft\Windows\FileHistory\File History (maintenance mode)" /disable
Here’s the list of the remaining telemetry tasks:
- Microsoft\Windows\AppID\SmartScreenSpecific
- Microsoft\Windows\Application Experience\AitAgent
- Microsoft\Windows\Application Experience\Microsoft Compatibility Appraiser
- Microsoft\Windows\Application Experience\ProgramDataUpdater
- Microsoft\Windows\Application Experience\StartupAppTask
- Microsoft\Windows\Autochk\Proxy
- Microsoft\Windows\CloudExperienceHost\CreateObjectTask
- Microsoft\Windows\Customer Experience Improvement Program\Consolidator
- Microsoft\Windows\Customer Experience Improvement Program\BthSQM
- Microsoft\Windows\Customer Experience Improvement Program\KernelCeipTask
- Microsoft\Windows\Customer Experience Improvement Program\UsbCeip
- Microsoft\Windows\Customer Experience Improvement Program\Uploader
- Microsoft\Windows\DiskDiagnostic\Microsoft-Windows-DiskDiagnosticDataCollector
- Microsoft\Windows\DiskDiagnostic\Microsoft-Windows-DiskDiagnosticResolver
- Microsoft\Windows\DiskFootprint\Diagnostics
- Microsoft\Windows\FileHistory\File History (maintenance mode)
- Microsoft\Windows\Maintenance\WinSAT
- Microsoft\Windows\NetTrace\GatherNetworkInfo
- Microsoft\Windows\PI\Sqm-Tasks
- Microsoft\Windows\Power Efficiency Diagnostics\AnalyzeSystem
- Microsoft\Windows\Shell\FamilySafetyMonitor
- Microsoft\Windows\Shell\FamilySafetyRefresh
- Microsoft\Windows\Shell\FamilySafetyUpload
- Microsoft\Windows\Windows Error Reporting\QueueReporting
Conclusion
You’ll find plenty of programs online whose authors promise to “speed up Windows.” Most of them are black boxes that do who-knows-what under the hood. You can replace all of their functionality with a set of batch scripts, and this article explains how to create them.
Creating your own set of scripts takes a bit of upfront effort, but only once. After that, everything runs on a schedule (via the scheduler) or on‑demand with a single click.
The key benefit is that you’ll always know exactly what’s changing in the registry and in how system services operate. And by working in the console, you’ll deepen your Windows 10 knowledge and be able to perform similar tasks manually anywhere.
