1. Clearing lists of recent places and programs
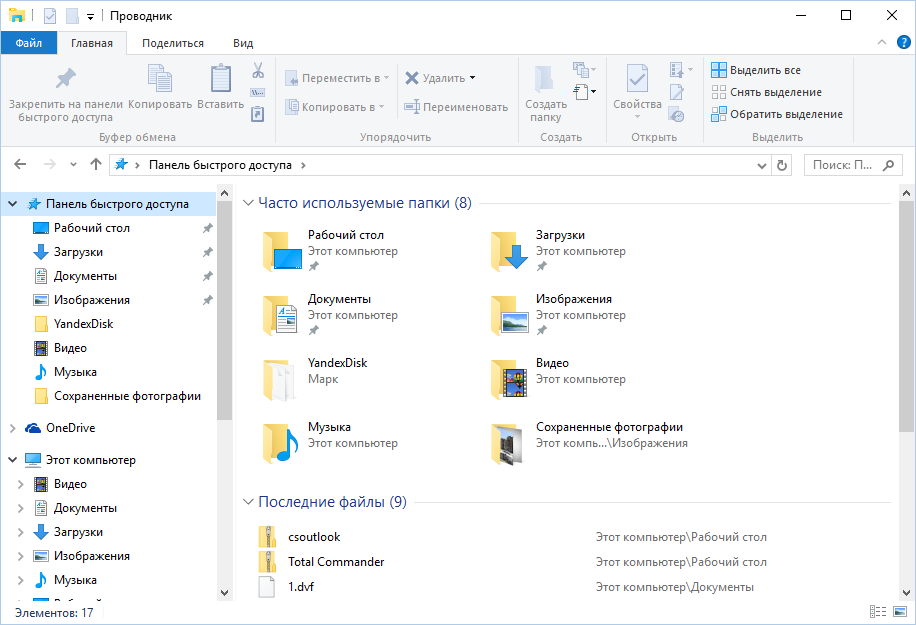
Lets start cleaning up with lists of recent places and programs. The list of recent (in Windows 10 – frequently used) programs is in the main menu, and the list of recent places is in the explorer.
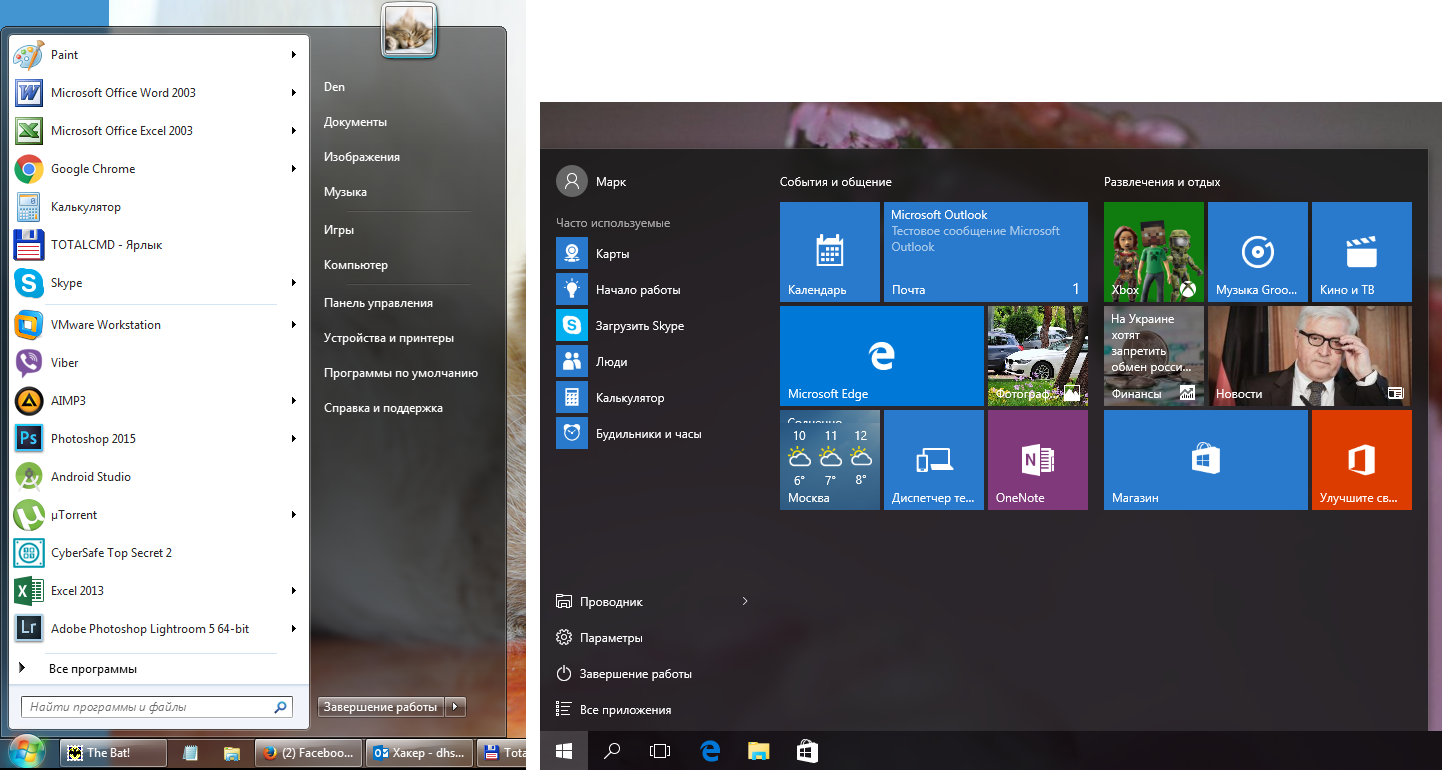
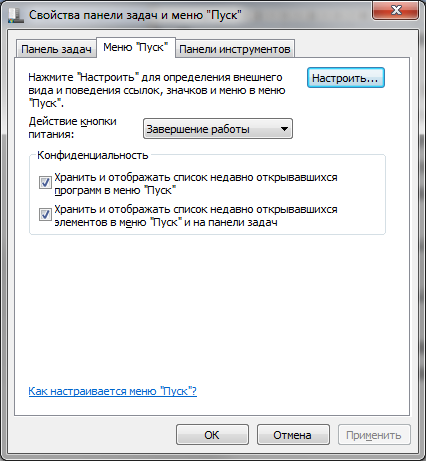
How to turn off this disgrace? In Windows 7, right-click on the Start button, select Properties, and in the window that appears, uncheck both boxes in the Privacy section.
To clear the list of recent places and documents, you need to delete the contents of the directory %appdata%\. To do this, open the command line and run two commands:
cd %appdata%\Microsoft\Windows\Recentecho y | del *.*It also would not hurt to delete the contents of the directory %appdata%\. It stores the latest files that appear in the jump list:
cd %appdata%\microsoft\windows\recent\automaticdestinations\
echo y | del *.*
These lines will be useful to us later when we write our own script to clean the system from traces of our presence in it.
To ensure that recent files are cleared automatically when you exit, you need to enable the “Clear recently opened documents history on exit” policy, which is located in the “User Configuration\Administrative Templates\Start Menu and Taskbar” section.
Now lets move on to Windows 10. You can disable the list of recently added and frequently used applications through the Settings window. Open it and go to the “Personalization” section, “Start” item. Turn off everything there.
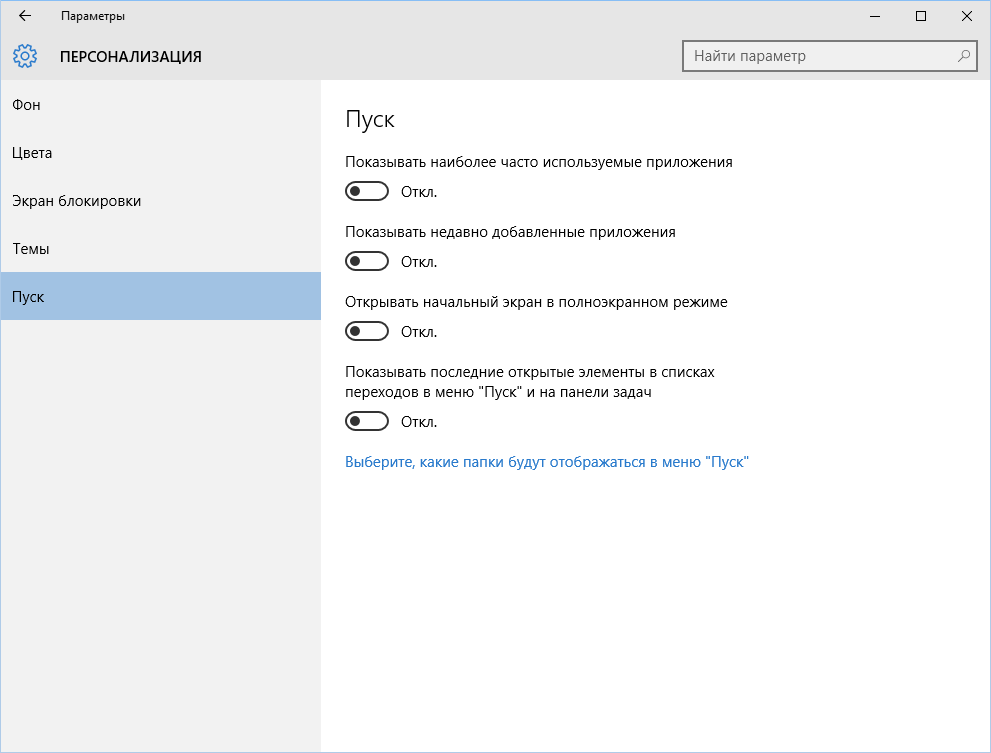
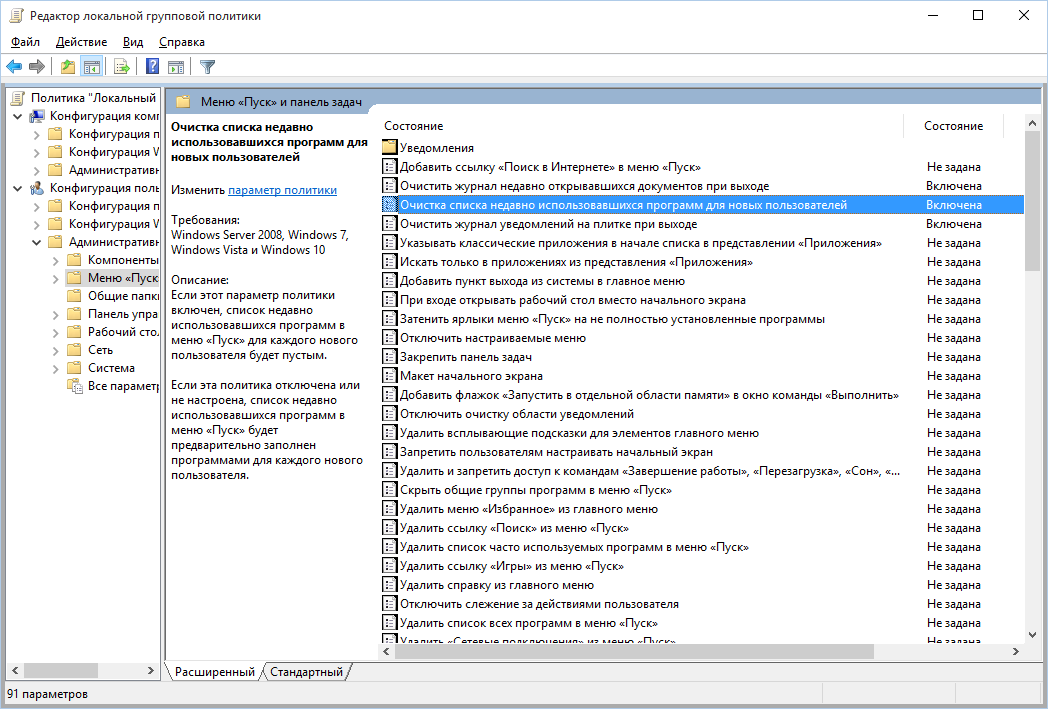
It seems that the problem is solved, but, alas, this is not entirely true. If you enable these options again, all lists in the same composition will appear again. Therefore, you will have to disable this feature via group policy. Open gpedit.msc and go to User ConfigurationAdministrative TemplatesStart Menu and Taskbar. Enable the following policies:
- “Clearing the list of recently used programs for new users”;
- “Clear recently opened documents history on exit”;
- “Clear tile notification history on exit”;
- “Remove the list of programs pinned to the Start menu.”
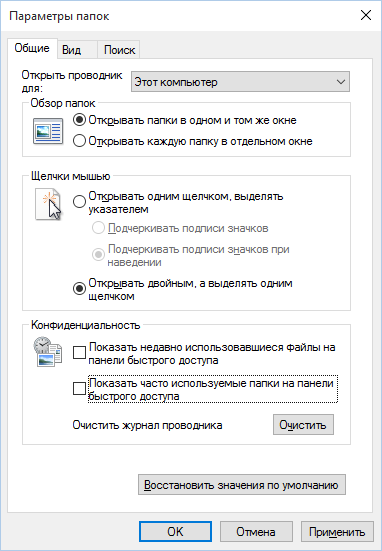
Clearing recent places in Windows 10 is easier than in “seven”. Open Explorer, go to the View tab and click the Options button. In the window that appears, disable the options “Show recently used files in the Quick Access Toolbar” and “Show frequently used folders in the Quick Access Toolbar”. Do not forget to click the “Clear” button.
As you can see, such a simple task as cleaning up the last objects has a rather complicated solution. You can not get anywhere without editing group policies.
2. Clearing the USB storage list
At some restricted areas, only flash drives registered in the log are allowed to be connected to the computer. Moreover, as usual, the magazine is the most ordinary one – paper. That is, the computer itself does not in any way restrict the connection of unregistered storage devices. It does not limit, but it does record! And if during the check they find that the user has connected unregistered drives, he will have problems.
We are not advising you to try to steal military secrets, but the ability to clear the list of recently connected drives can come in handy in other life situations. To do this, look in the following registry sections:
HKEY_LOCAL_MACHINESYSTEMCurrentControlSetEnumUSBSTORHKEY_LOCAL_MACHINESYSTEMCurrentControlSetEnumUSBHere they are – all the storage devices that you connected to your computer.
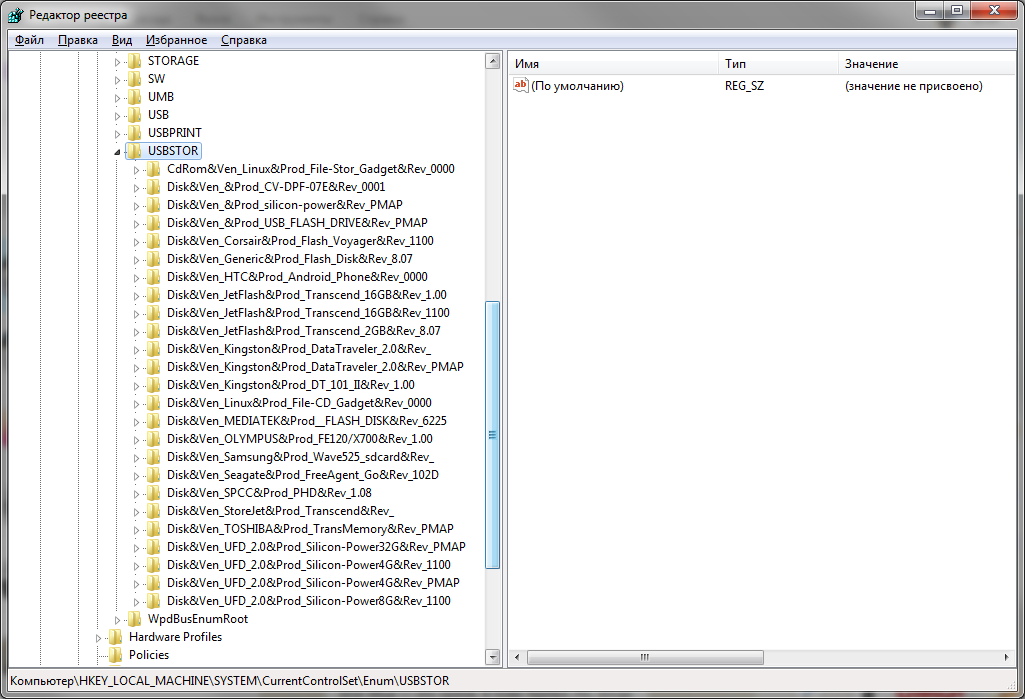
It would seem that you just need to take and clean everything. But it was not to be! Firstly, the permissions on these registry branches are set in such a way that you won’t be able to delete anything even in Windows 7, let alone Windows 10.

Secondly, assigning rights and permissions manually takes a long time, especially if there are a lot of drives. Thirdly, admin rights will not help. The screenshot above was created when I performed the delete operation with admin rights. Fourth, in addition to these two sections, there is a long list of sections that need to be cleaned. Moreover, they need to be not just deleted, but edited correctly.
If for some reason you need to do everything manually, then search for the keywords MountPoints, MountedDevices DeviceClasses and RemovableMedia. But it’s much easier to use a ready-made program that will do everything for you. Some forums recommend USBDeview for this. However, I tested it and I can say that it does not clean information from all the necessary sections. USBSTOR and USB continue to contain information about connected media.
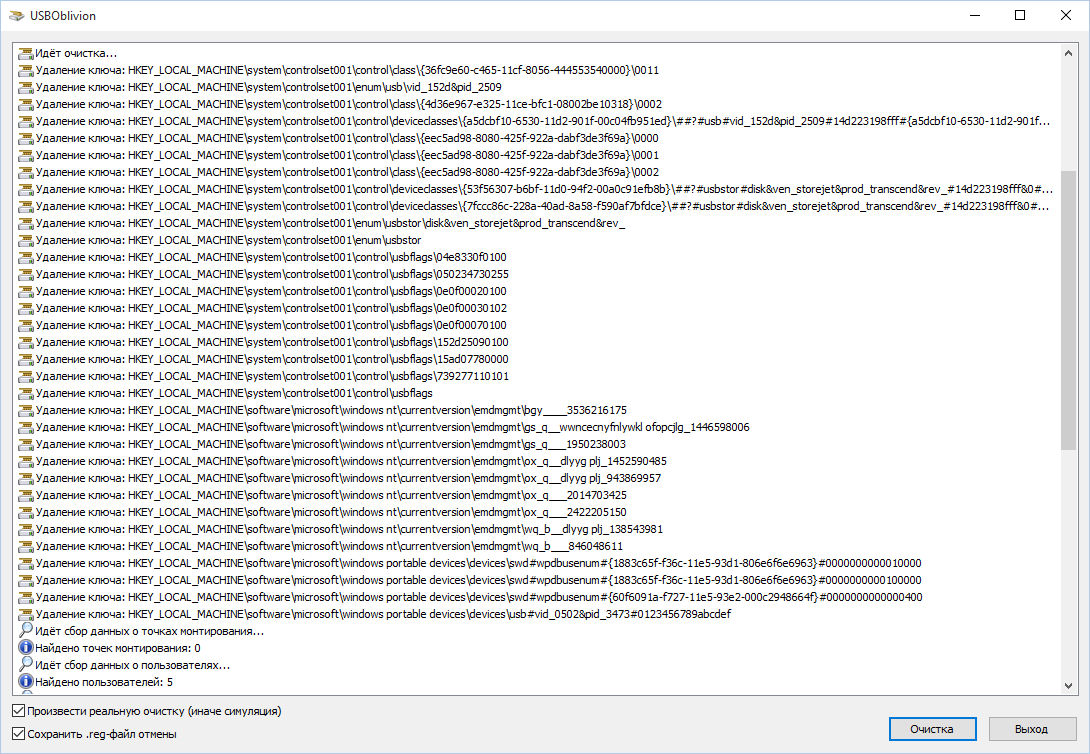
I can recommend the program USB Oblivion. Launch it, check the box “Perform a real cleaning”. You can enable or disable the “Save Undo .reg file” option, but if the goal is not to test the program, but to prepare for the upcoming computer inspection, then it is better to disable it.
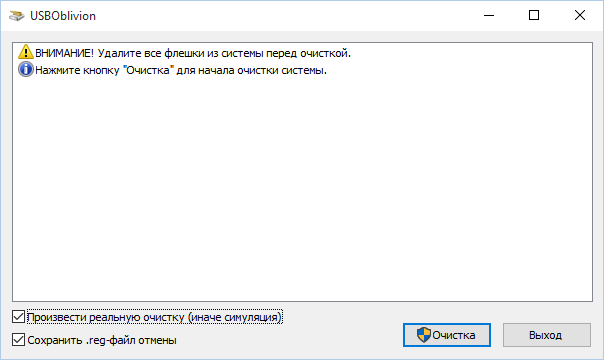
The program not only cleans the registry, but also displays a detailed log of its actions (see below). Once its finished, there will be no mention of any drives being connected to the computer.
3. Clearing cache and browser history
The third point in our to-do list is clearing the cache and browser history. There are no difficulties here – each browser allows you to reset the list of recently visited sites.
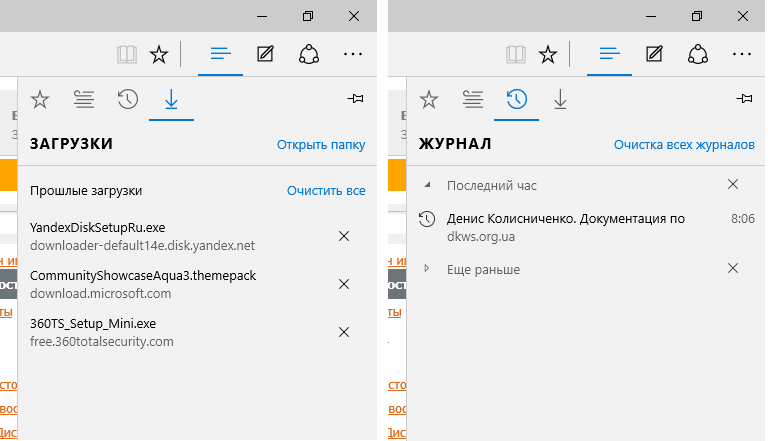
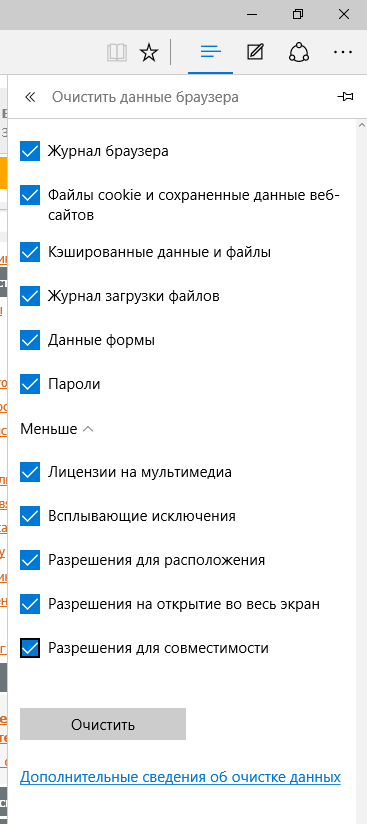
Edge. You can clear the list of downloaded files and all logs using the “Hub”. Just click on the appropriate links. When clearing the log, you need to select all the checkboxes and click the “Clear” button.
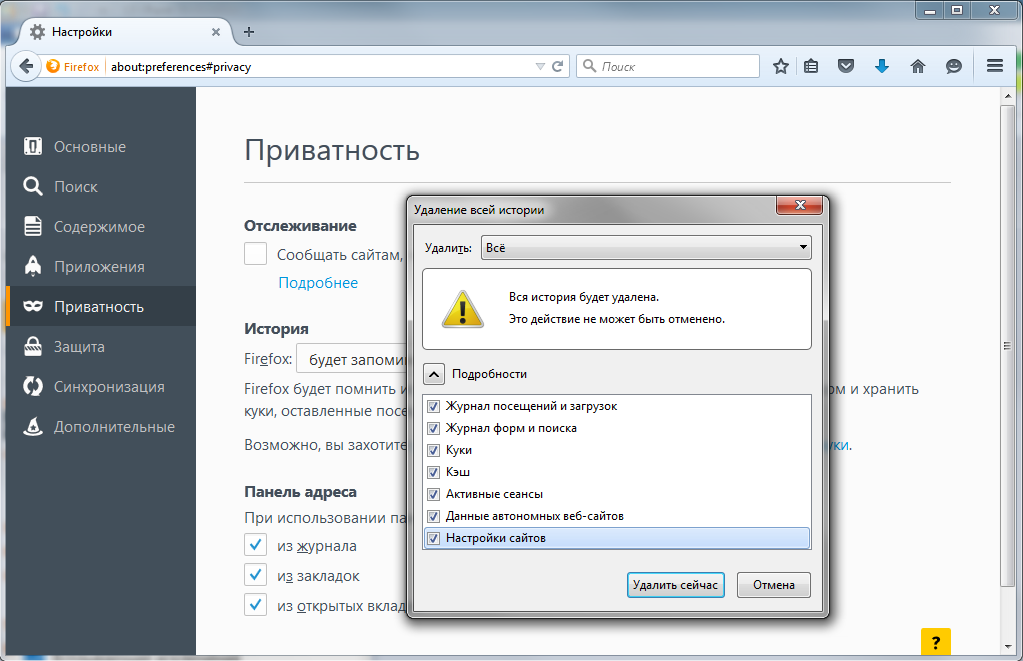
Firefox. Open the settings, go to the “Privacy” section, click the “Delete your recent history” link, select “All”, click the “Delete now” button.
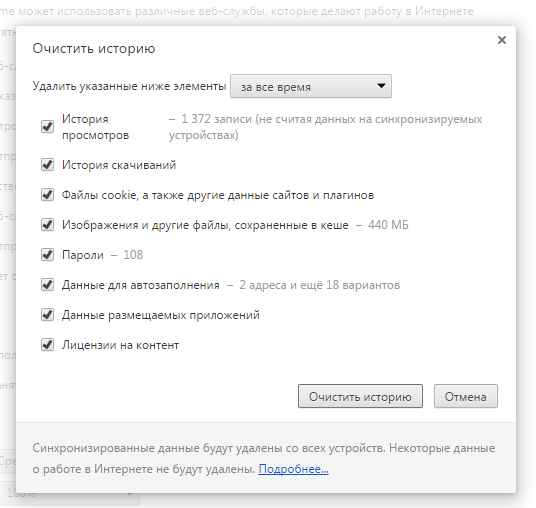
Chrome. Press Ctrl + Shift + Del, on the page that appears, select clear for all time, check all the checkboxes and click the “Clear history” button.
Opera. Select “Menu (Opera) → Settings → Clear private data”. The principle is the same – select everything, click the “Delete” button.
IE. Who uses it? If anything, you can find recommendations on the Microsoft website.
As a result, you will not only erase the traces, but also free up the disk a little. To avoid clearing everything again, you can continue using the browser in incognito mode. Of course, the admin will notice the log on the gateway if he wants, but on your computer everything will be clean. The optimal solution is to use Tor. In this case, even the admin will not see what sites you visit (provided that there is no surveillance camera behind you).
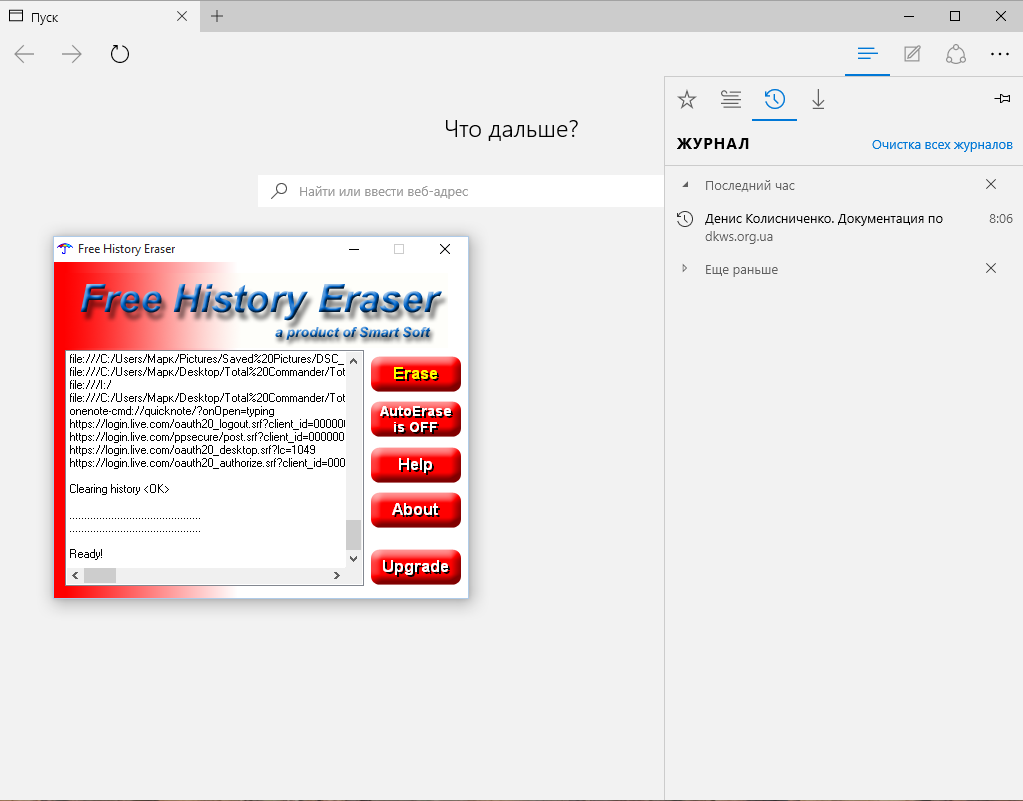
If you use more than one browser and need to clean them periodically, you can use one of the specialized utilities. I tested Free History Eraser and the result was average: some things were cleared, some were not (the Edge log, for example, remained intact). So in important cases, do not forget to check manually.
4. Removing DNS records
You can find out which sites you visited not only from the browser log, but also from the DNS cache. When you type a website address into your browser, your computer contacts DNS to turn the website name into an IP address. The cache of previously received names is stored locally. You can view it using the command ipconfig /. I will not show the conclusion, its too long. To clear this cache, use another command – ipconfig /.
5. Clear Flash Cookies
Everyone and their dog is watching you. Even Flash tracks your visits. Flash Cookies are collected in the %appdata%\Macromedia\Flash Player#SharedObjects directory. You have already guessed what to do with him – send him away to hell. To script this process, these two lines will come in handy:
cd %appdata%\Macromedia\Flash Player\#SharedObjectsecho y | del *.*6. Delete Microsoft Office Recent Documents List
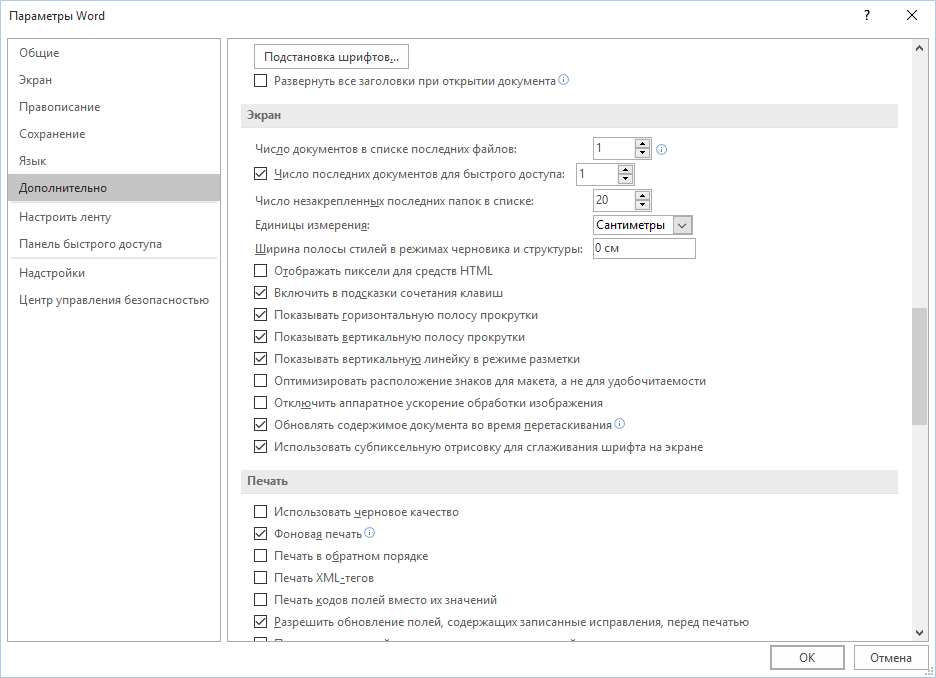
For the convenience of users, all office suite programs store a list of recent documents. To stop this mess, in new versions of Office you need to go to the “Advanced” section in the settings, set the number of recent documents to one (note that in the screenshot there are two parameters that need to be changed to one). The program will not allow you to set the value to 0, so the latter will need to open some harmless file.
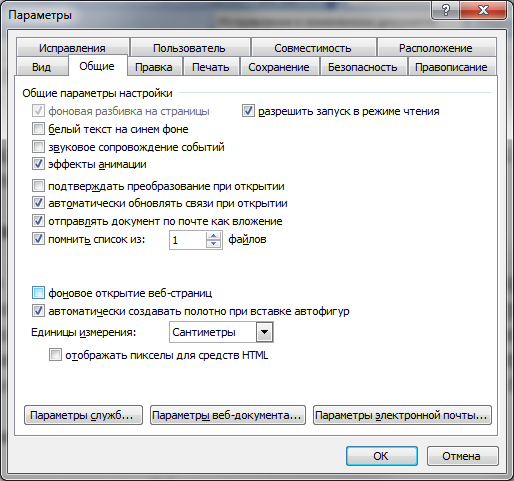
In older versions, on the General tab of the Options window, you can either also set the value to 1, or disable the Remember list of N files option altogether.
7. We automate cleaning with the help of special software
Please note that we need the CCleaner Desktop version, not CCleaner Cloud. The latter costs money and has a much wider range of functions than we need. Follow the link and select the Free version.
What I like about CCleaner is that it:
- supports the latest versions of Windows, the latest versions of browsers, including Edge (unlike Free History Eraser);
- can clean not only the system, but also applications;
- can work in batch processing mode – I will show you how this is implemented below.
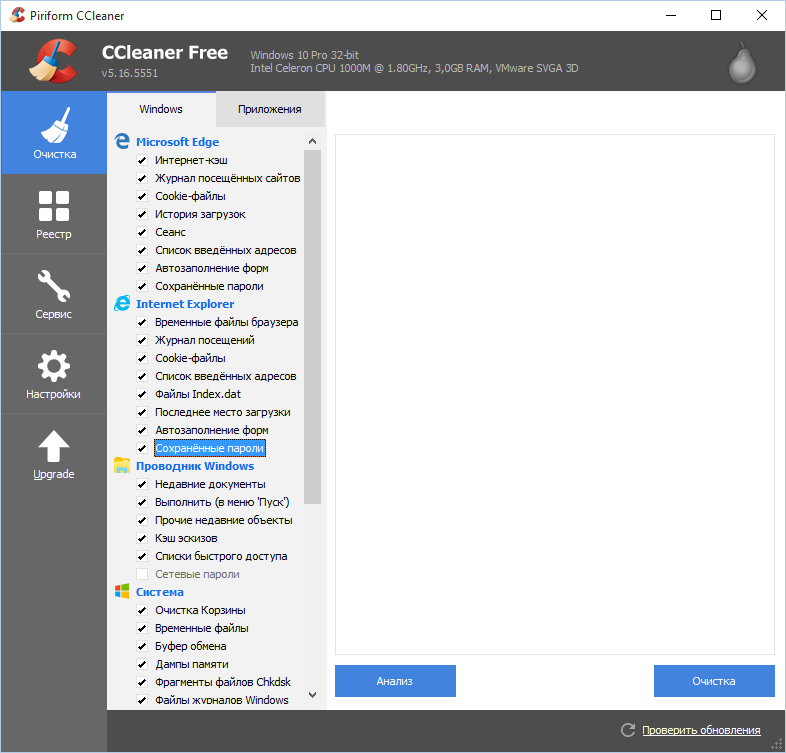
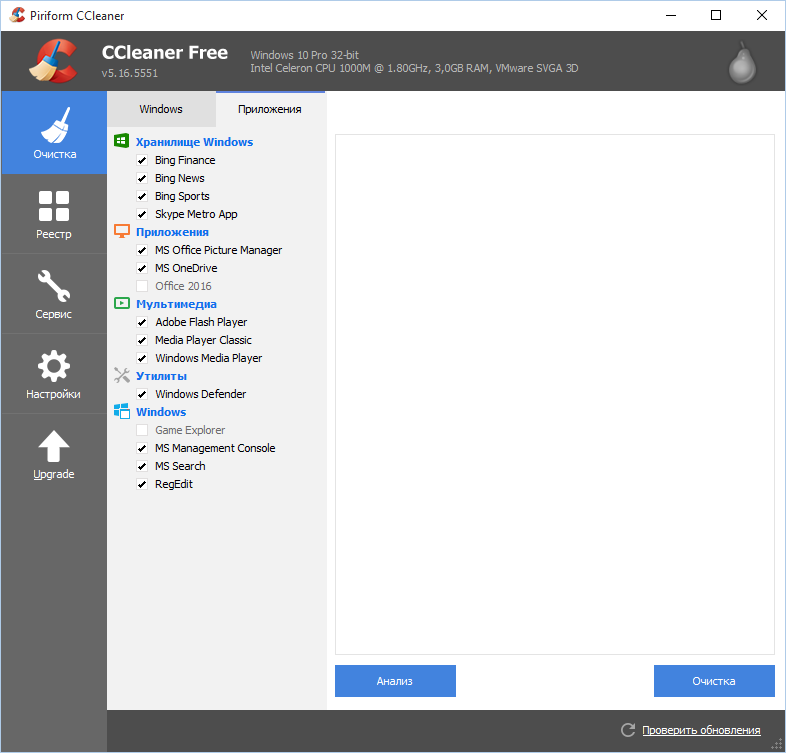
Using the program is easy – select the items you want to clear and click the “Clean” button.
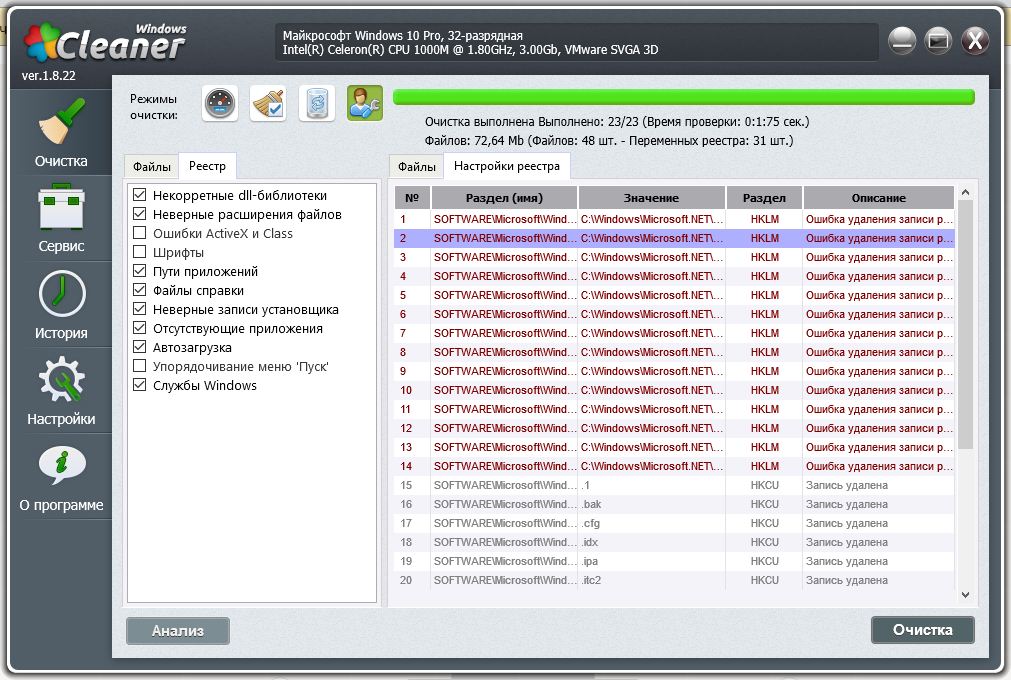
There is another program for cleaning the entire system – Windows Cleaner. However, its website states that it only supports systems up to and including Windows 8. Indeed, in Windows 10 the program did not work as it should (at least it did not cope with clearing the Edge history). But on older “Windows” it has every right to exist.
8. Real file deletion
We all know that when you delete a file, it is not actually erased. Only the record about it is deleted, but the data itself still continues to exist somewhere on the disk. Therefore, to completely delete information, you need to use special utilities that erase the free space of the disk with zeros or random data. After this, it will not be possible to restore files. We have already deleted a lot of things in the previous steps, so now is the time to wipe the free space so that nothing can be recovered at all.
There are many utilities for erasing information. But we will use what we already have, namely CCleaner. Go to “Service → Disk erasing”, select the disk you want to clear from unfinished files, select “Only free space” to erase and set the erasing method. The application supports several erasing standards – from the simplest, which implies one rewrite, to the Gutmann method (35 passes).
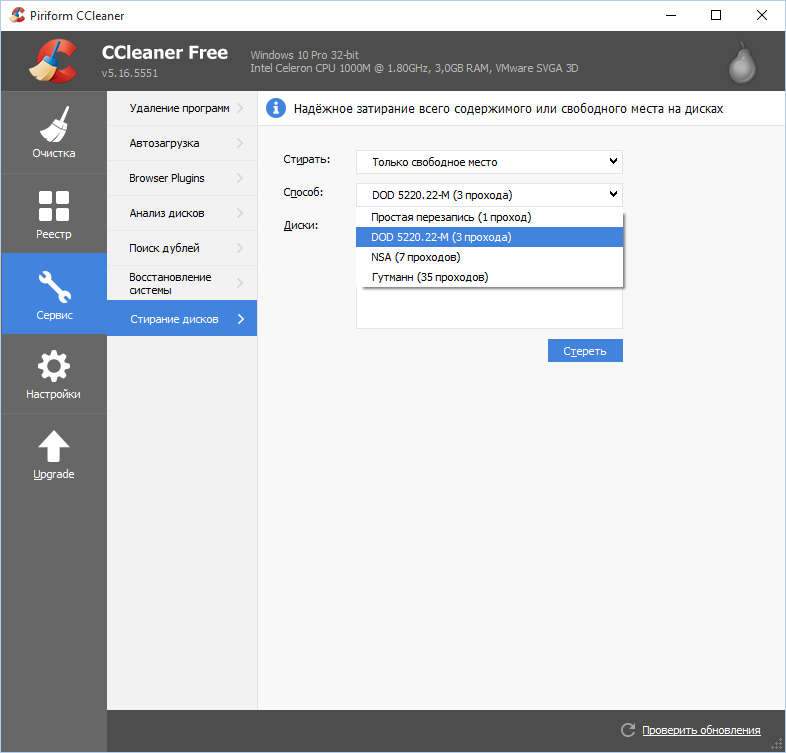
Among competitors of CCleaner, the BCWipe program is interesting, for example – it can not only erase free space, but also delete the swap file, which may also contain confidential information. BCWipe costs money, but the trial version is suitable for a one-time wipe.
9. Create a bat file to clean everything
Now lets try to automate some of the operations described earlier. Lets start by deleting files from the Recent directory. You can delete using the del command, as shown above, but it is better to immediately use CCleaner for safe deletion.
\path\CCleaner.exe /delete "%appdata%\Microsoft\Windows\Recent\*" 1\path\CCleaner.exe /delete %appdata%\microsoft\windows\recent\automaticdestinations\*" 1\path\CCleaner.exe /delete "%appdata%\Macromedia\Flash Player\#SharedObjects" 1Unfortunately, CCleaner cannot be called to clean all free space in command line mode, so you will have to delete files through it instead of using the del command, or use the del command and then manually run it and call it to clean free space. The last parameter (1) means three-pass deletion. This is the optimal mode, since one pass (0) is too easy, and all the others are too long. A full list of CCleaner command line parameters can be found on [the developers website].(http://myccleaner.net/ccleaner-ndash-parametryi-komandnoy-stroki/).
You can also clean the list of USB drives from the command line using USB Oblivion:
\path\USBOblivion.exe -enable -auto -nosave -silentThe first parameter starts the actual cleaning, not a simulation. The second one is to work in automatic mode (you don’t have to press a button), .reg files won’t be saved (-nosave), and the -silent parameter means to work in silent mode – just right for the command line.
Next, you need to run CCleaner with the / parameter for automatic cleaning by default. This will not clear the DNS cache, so you will have to do it manually:
\path\CCleaner.exe /AUTOipconfig /flushdnsAs a result, we got the following scenario:
\path\CCleaner.exe /delete "%appdata%\Microsoft\Windows\Recent\*" 1\path\CCleaner.exe /delete %appdata%\microsoft\windows\recent\automaticdestinations\*" 1\path\CCleaner.exe /delete "%appdata%\Macromedia\Flash Player\#SharedObjects" 1\path\USBOblivion.exe -enable -auto -nosave -silent\path\CCleaner.exe /AUTOipconfig /flushdns10. Create an AutoHotkey Script to Clean Everything
Now lets write another script. It will open the Chrome browser in incognito mode, and after the session ends (WinWaitClose will be set) it will launch CCleaner for automatic cleaning – the browser cache and temporary files will be deleted. After this, we will also clear the DNS cache.
Run, C:\path\to\chrome.exe –incognitoWinWait, – Google ChromeWinWaitCloseRun, C:\path\ccleaner.exe /AUTORun, cmd /c "ipconfig /flushdns"MsgBox, Browsing Session is Cleaned.If you use Firefox, change the first line to include the path to Firefox and the -private parameter instead of –incognito. You can use AutoHotkey to run the script.
