Why Not Just Buy a Powerful Laptop?
First of all, laptops use mobile processors with reduced TDP (thermal design power).
info
TDP (Thermal Design Power) refers to the thermal design requirements for heat dissipation. It indicates the maximum amount of heat that the chip’s cooling system must be able to dissipate.
Manufacturers define TDP as the maximum power a chip can consume. Measuring power consumption is more straightforward, and ultimately, all of the power consumed will be dissipated as heat.
The TDP rating isn’t exactly the same as power consumption, although they are related. Generally, a processor with a higher TDP will consume more power (and generate more heat) than one with a lower number, but this is mostly true within the same brand, like comparing between Intel or AMD products. Sometimes, an AMD chip with a stated power of 95W can be more power-efficient than an Intel chip with 90W.
Let’s compare the specifications of several Intel mobile and desktop processors. We’ll look at the i5-2500 processor, which is used in desktop computers, and the i5-2557M designed for laptops.
We’ll be making comparisons on Intel’s official website. As you can see, the Thermal Design Power (TDP) of these processors varies significantly. The mobile i5-2557M is rated at 17 watts, while the desktop i5-2500 has a TDP of a whopping 95 watts.
Engineers intentionally understate key processor specifications, such as the number of cores and clock speed, and for good reason. This helps reduce the Thermal Design Power (TDP), making it much easier to cool the processor in a slim laptop chassis.
In factory-made laptops, I’m not just dissatisfied with the weak processors, but also with the limited ability to upgrade the hardware. Sure, in more expensive gaming laptops, you can upgrade the processor, solid-state drive, RAM, and even the discrete graphics card, but usually only within the same generation of processors. It’s likely that in a few years, your laptop will become obsolete, and there will be nothing you can do about it.
Another drawback of factory-made laptops is that the screen is positioned at a fixed distance from the keyboard, which can only be adjusted by connecting an external monitor or keyboard.
All of this led me to the idea of building my own laptop. It doesn’t have to be particularly thin, just portable enough to easily move from one place to another.
Selection of Components
I set three main goals for myself.
- Capability for full upgrade of all components.
- Utilization of desktop-grade components.
- Support for standard parts (motherboards, display panels).
Let’s discuss the selection of each component.
Matrix
Since the gadget is intended to be quite portable, I decided that the screen should be similar to those used in laptops. Laptops utilize screens with different types of connectors. Let’s take a look at the main ones.
- LVDS Interface – A commonly used interface for desktop monitors and laptop screens, LVDS (Low Voltage Differential Signaling) provides higher bandwidth compared to TMDS, making it the de facto standard for external interfaces on modern LCD panels.
- eDP (Embedded DisplayPort) – Recognized by VESA as the standard, eDP is an internal display interface that, while fully compatible with the external DisplayPort in terms of digital signals, comes with additional features for internal device use, such as display power management, refresh rates, backlight control, and Panel Self-refresh buffer management.
info
Panel Self-refresh is a technology that allows a display to maintain an image when there is no video signal, updating the image only when instructed by the graphics processor.
eDP also supports the integration of additional digital packets into the video signal, which allows other interfaces to be implemented on the display board. For instance, you can add a microphone, webcam, touch surface, or USB hub. This reduces the number of conductors needed in the cable to connect to the mainboard and helps lower the cost of parts and maintenance.
Unlike LVDS, eDP reduces the overall number of data transmission lines needed—without compromising quality or clarity!
In the coming years, I believe the eDP standard will replace the outdated LVDS on the market. To illustrate this, I will provide a comparison table of the technical specifications of these interfaces.

Full HD panels with an eDP interface are priced significantly lower than those that support LVDS. This is something that needs to be considered, but for me, the choice wasn’t straightforward.
Right now, I’ve settled on a 15.6-inch diagonal for the matrix.
Motherboard
Now it’s time to choose a motherboard. It will determine the compatibility and support (or lack thereof) for various important interfaces and connectors.

To choose a motherboard, you need to decide on its form factor. For a fifteen-inch screen, the best fits are the mini-ITX, Mini-STX, and thin mini-ITX formats.
Mini-ITX: Refers to a motherboard with dimensions of 170 × 170 mm, capable of supporting desktop RAM. These boards include a 24-pin power connector from a standard ATX power supply, and the height of the interface connectors is around 4 cm.
Mini-STX: A relatively new motherboard form factor. Significantly smaller than mini-ITX, measuring 147 × 140 mm. Its advantages include being powered by an external 19V power supply. A drawback is that the memory slots are oriented vertically relative to the board, and the rear panel connectors are arranged in two rows, increasing its overall dimensions. While the connectors can technically be removed, doing so contradicts the original intent of versatility.
Thin mini-ITX: Shares the 170 × 170 mm size with mini-ITX but has only the height of a single interface connector. Additionally, this type of board can be powered by an external 19V power supply. My particular choice is the ASRock H110TM-ITX R2.0 motherboard.

One of the most important features is the presence of an LVDS connector for connecting a display panel.
Everything Else
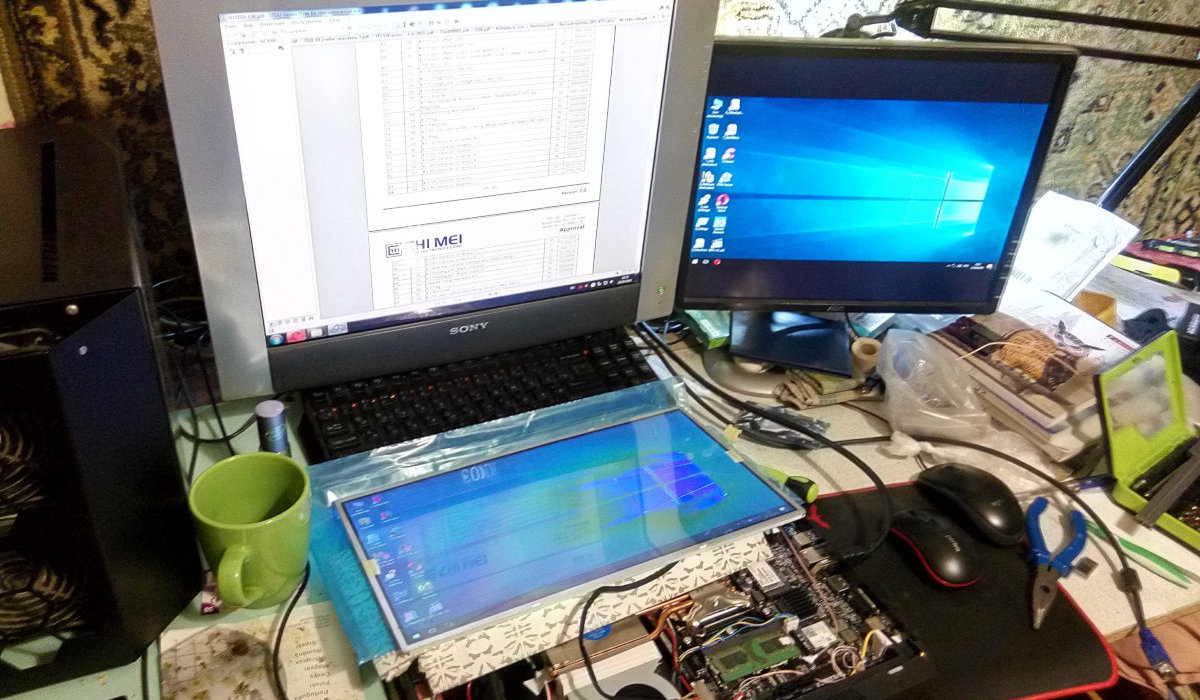
Since the chosen motherboard only had a 40-pin LVDS connector, I decided to get a display with the same connector. I went with the Innolux N156B6-L0B display, which has a 15.6-inch screen.
I had fewer requirements for the processor: it just needed to work and be more powerful than mobile ones.
The memory is a SO-DIMM DDR4 module, and the storage is a 120 GB SSD in M.2 SATA format.
This was sufficient for the initial test build.
CPU Cooler
I first explored options in local stores and later checked on AliExpress, but still couldn’t find anything suitable.
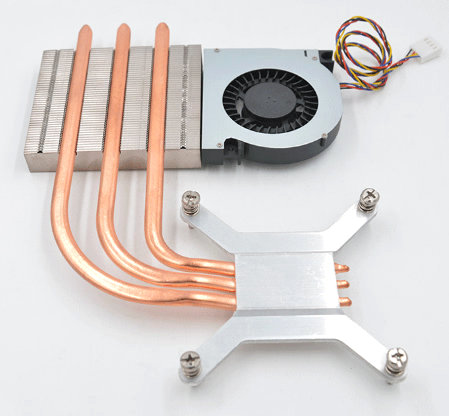
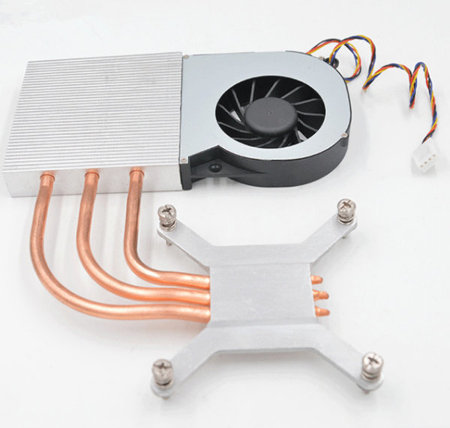
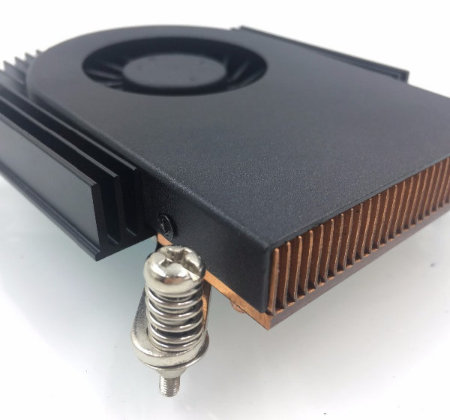
In the options I found, I wasn’t satisfied with the placement of the radiator and the bend of the heat pipes—I intended to position the motherboard in the case so that, firstly, the connectors would be on the right side of the user, and secondly, the processor would be closer to the top edge of the device. This setup would result in more efficient cooling.
Ultimately, I decided to go with the Intel CPU cooler, model BXHTS1155LP.

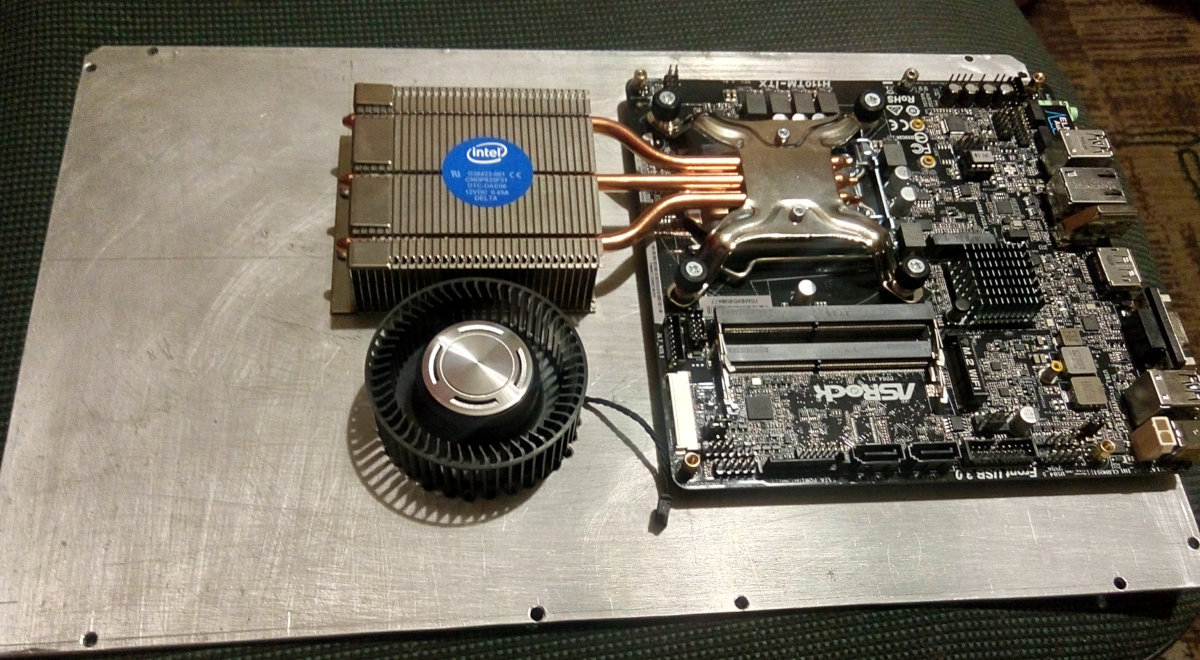
LVDS Cable for Connecting Laptop Display and Motherboard
Initially, I assumed I could borrow the LVDS cable from a laptop with an identical connector. Working in a service center, I handled many laptops daily, but I was disappointed. It took three years before I found an LVDS cable with the pinout that matched my needs.
Once I had all the components, I started designing the case.
Creating a Layout
The design was originally conceived in the form of a classic laptop: the bottom part containing the keyboard and main components – the motherboard, storage, and so on, while the top part housed the display and webcam. The two parts would be connected by hinges.
Next, we created and prepared 3D models for this version of the casing. My plan was to make it out of metal.
The design of the lower chassis is made from sheet metal and includes holes at the base for mounting the motherboard, as well as perforated openings on the front side for ventilation. The back features mounting areas for securing the display hinges.
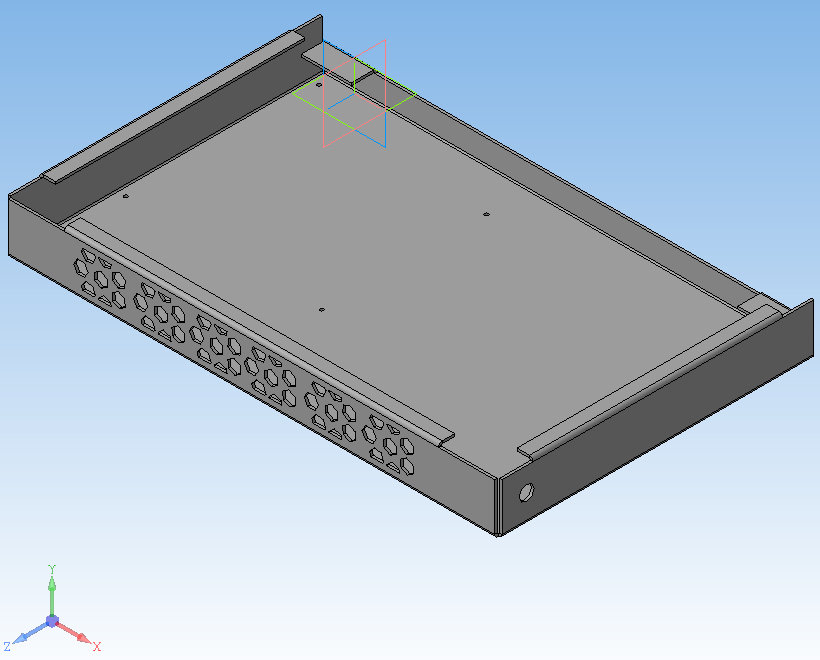
Another assembly model of the lower chassis features ventilation perforations on the front edge for air intake and a bracket for the screen hinges on the back.
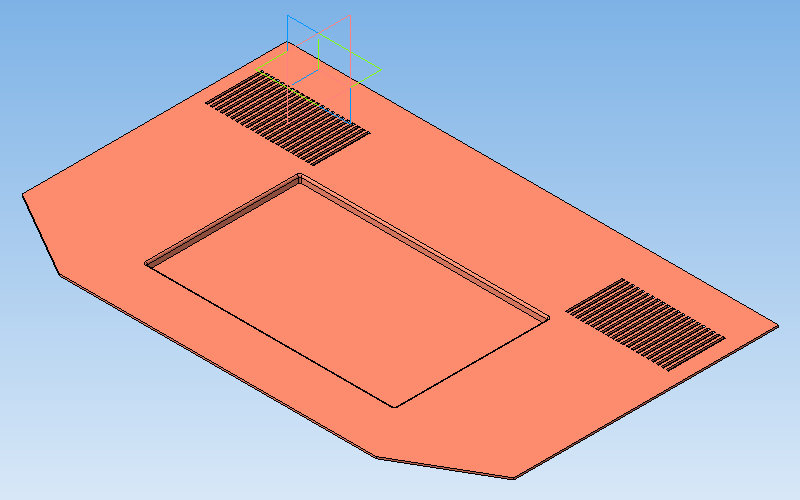
The top cover model for the bottom part of the case is made of sheet metal with perforations for built-in speakers and an indentation for a detachable wireless keyboard.
In the process, I realized the need to completely redesign and simplify the framework: reduce the size of the structural components and minimize the number of moving parts.
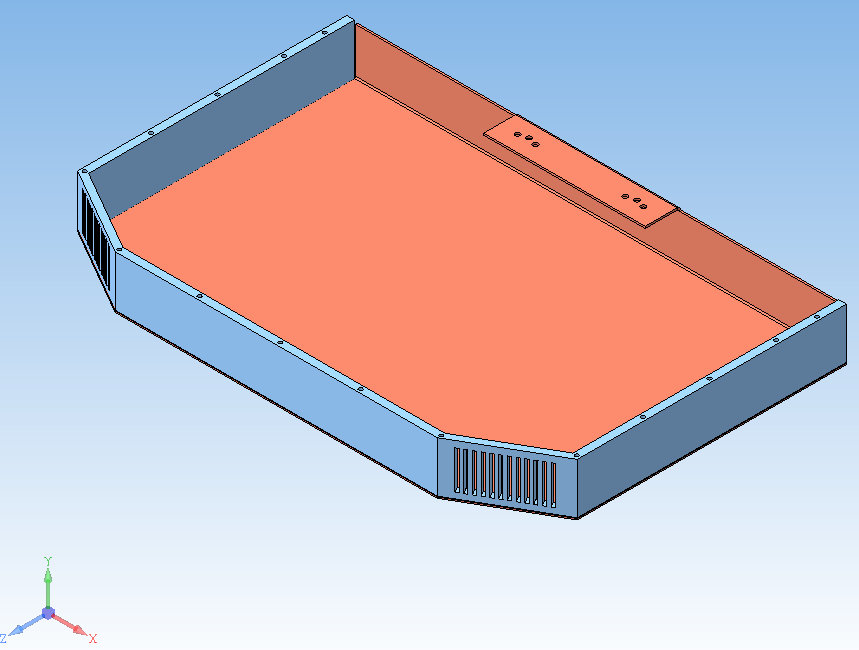
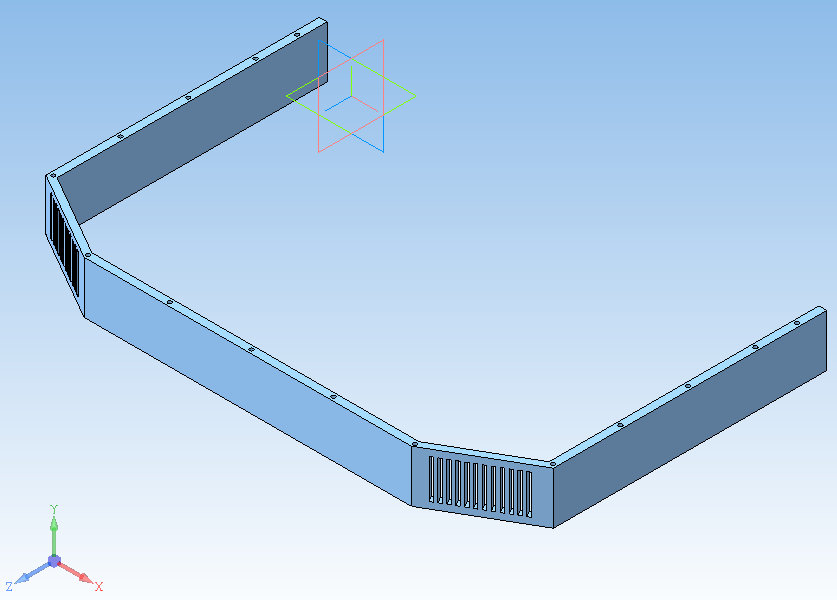
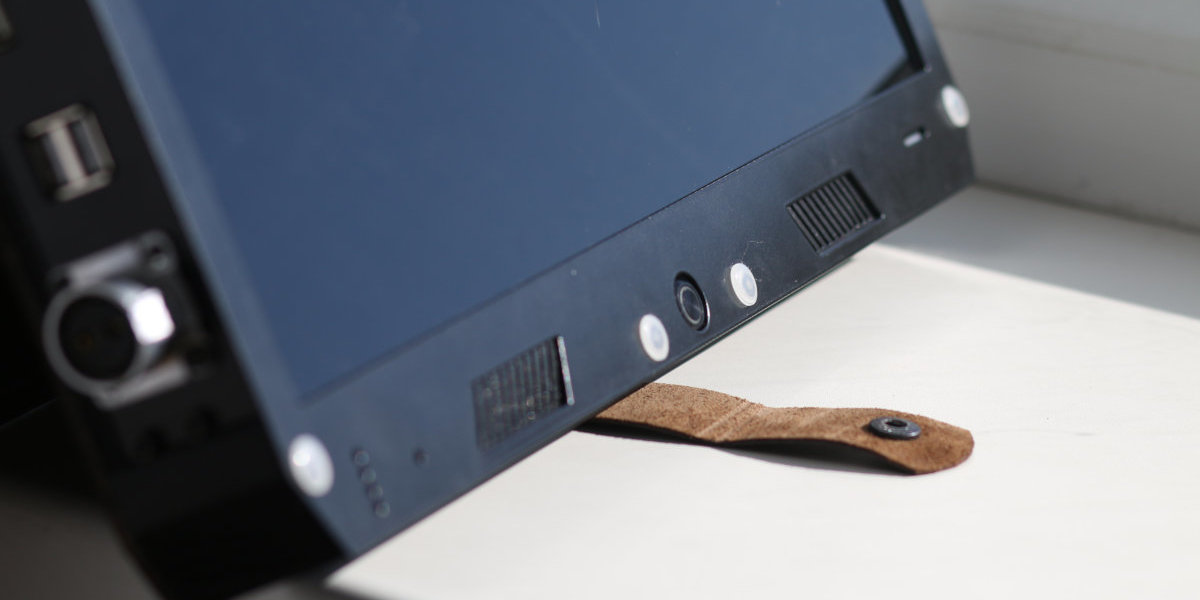
The new design is quite simple and easy to manufacture: two main plastic parts, the top and bottom, are attached to an aluminum base, which also holds all the key components. The matrix is placed into grooves on top, covered with a sheet metal lid. Interface connectors are positioned on both the left and right sides and are covered with panels.

The upper plastic section should have perforation covering 80% of the rear panel, with the remaining 20% housing two holes for detachable Wi-Fi antennas. This design allows for easy installation of a directional antenna.
Perforations are positioned along the edges on the bottom side for fresh air intake. On the top edge, there are perforations and mounts for two speakers, and in the center, there is a 12mm hole for a button that turns the screen on and off.
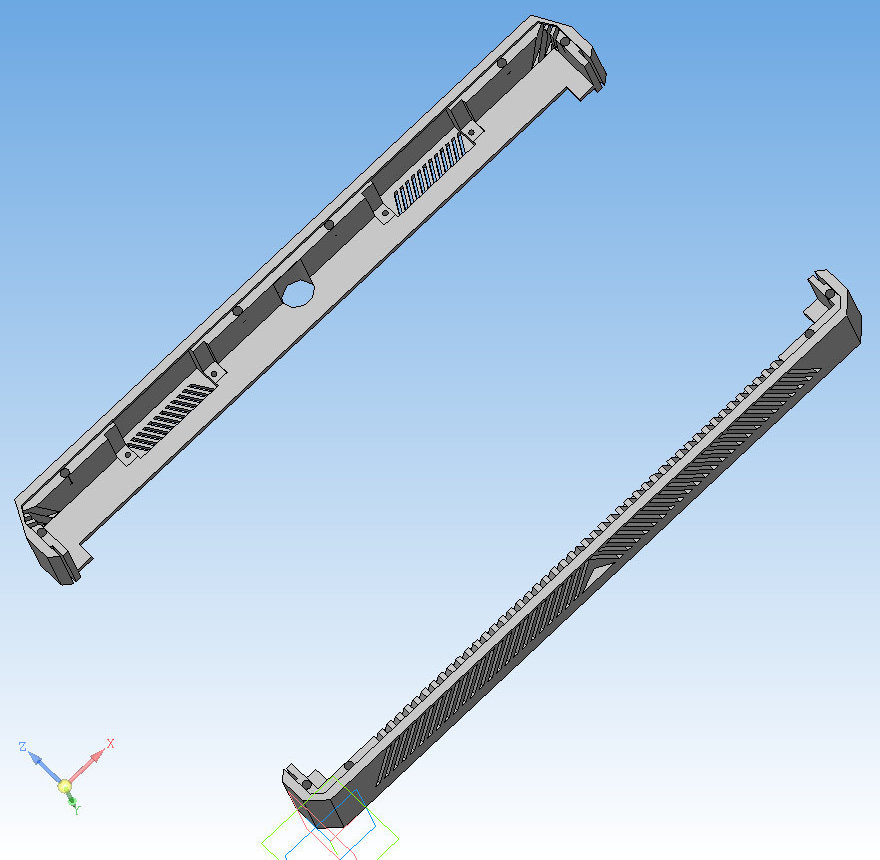


I made the plastic parts using a 3D printer, and cut the metal components from sheet steel and aluminum.
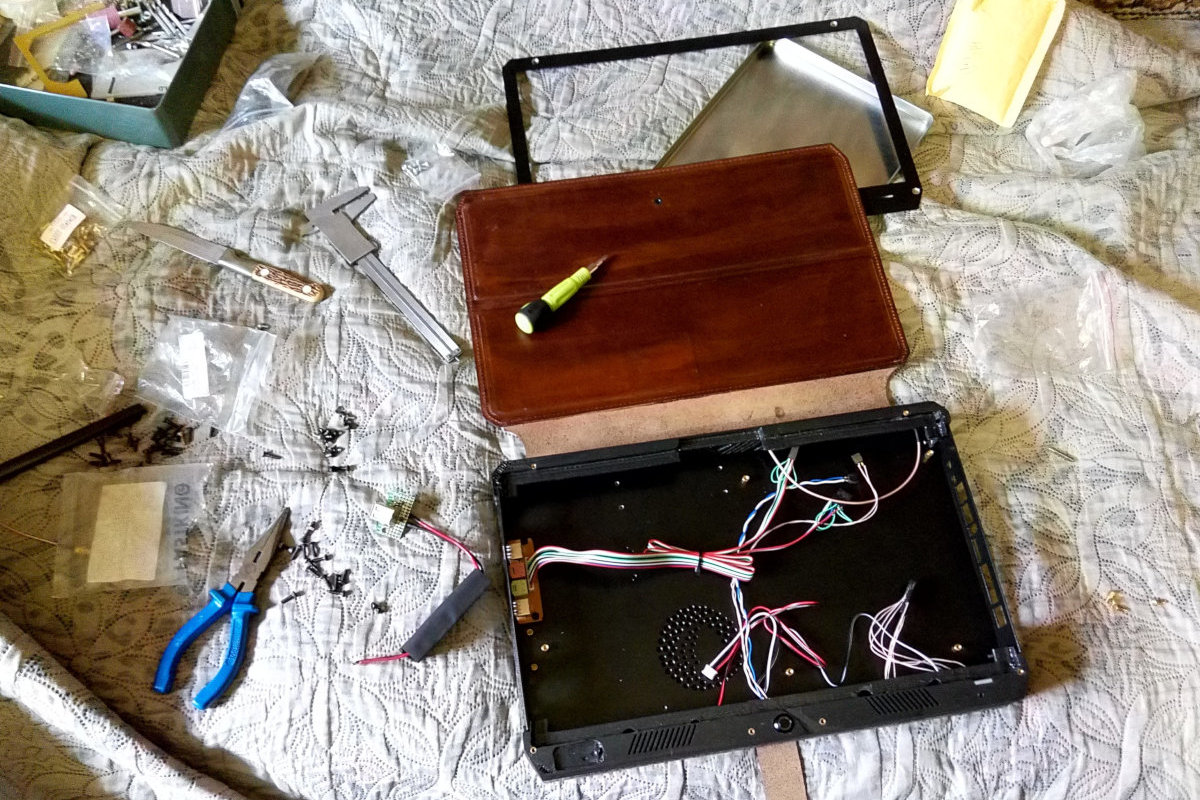
Assembly
Next came the most tedious part: putting this “puzzle” together.
Enclosure
Once I had the plastic casing parts in hand, I needed to finish them manually: remove the supports, smooth out the edges, and glue in M3 threaded inserts to secure the other parts of the casing. Then, I systematically test-fitted the components and used a file to adjust anything that didn’t fit well.


After confirming full compatibility of all the case components and parts, the case was sent out for powder coating.

Hardware
Next, the initial assembly of the hardware into the case took about nine hours.
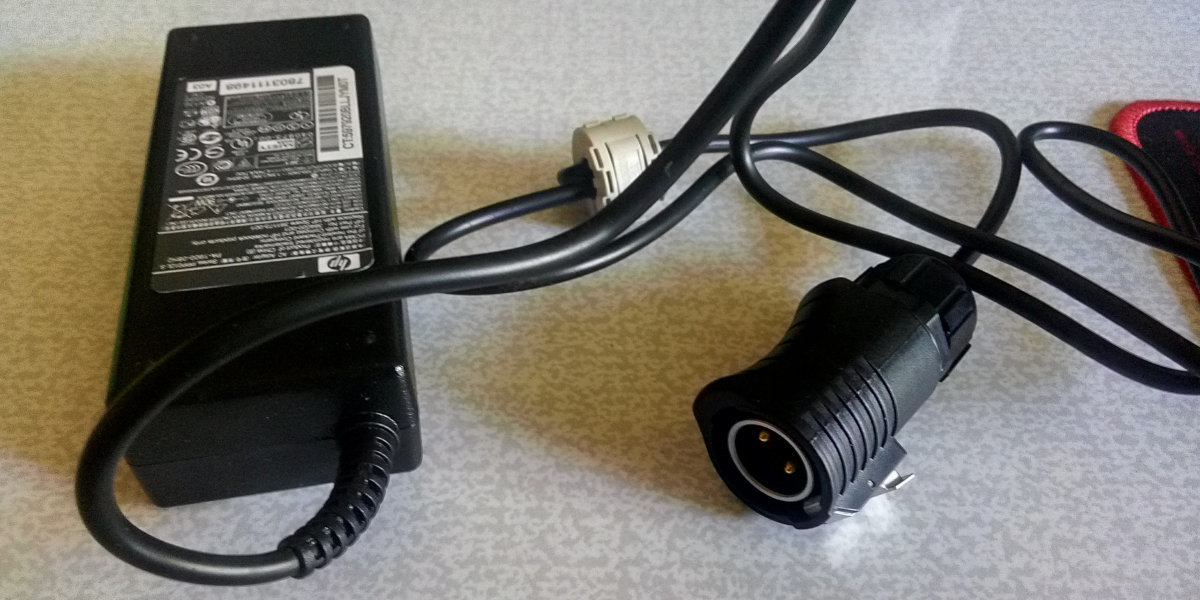
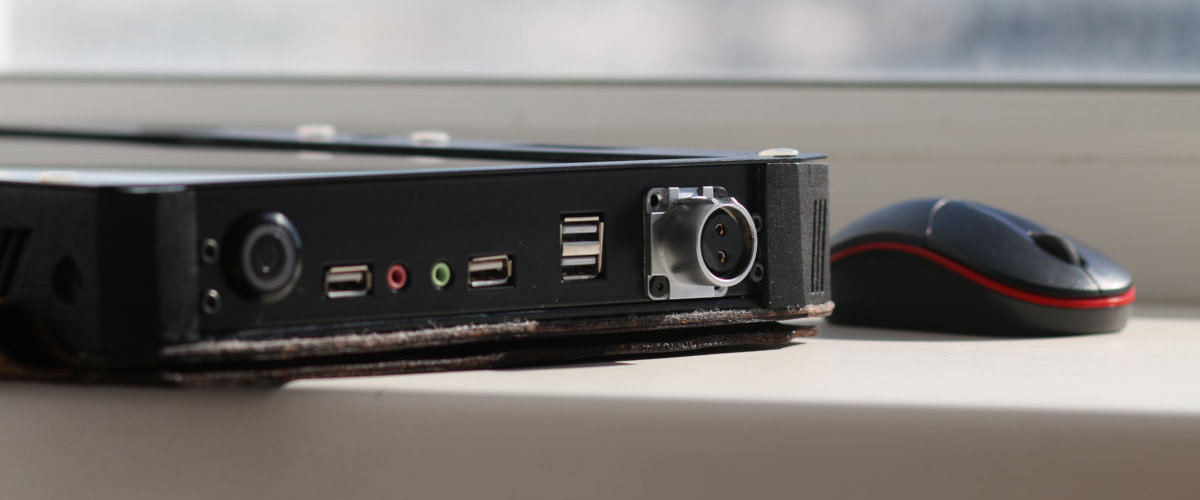
To power the device, I chose a moisture-resistant plug with a latch, which I soldered to a laptop power adapter.
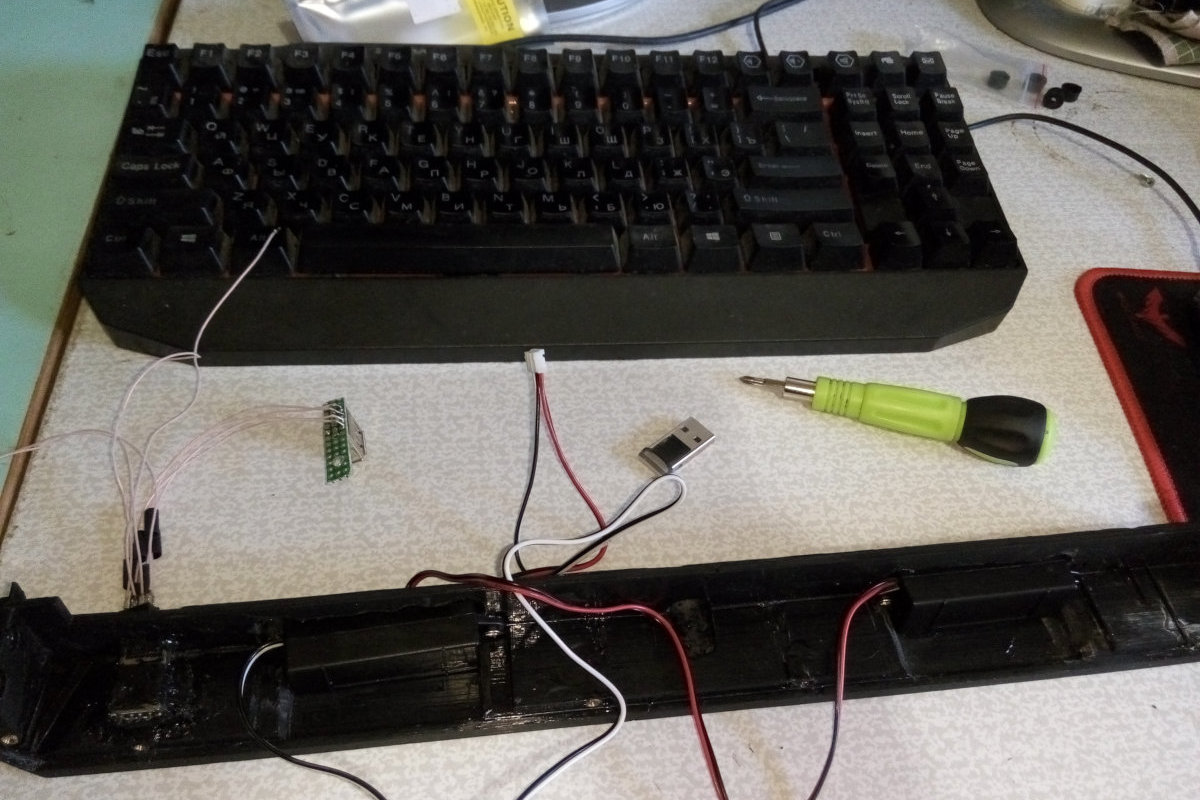
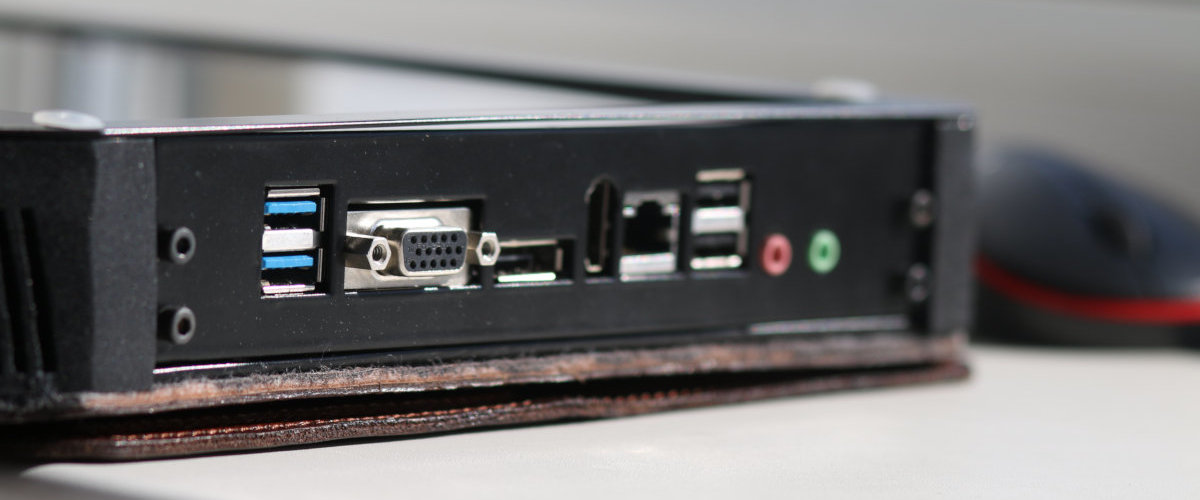
The next step is soldering the wires for the buttons and USB ports. I’ve also connected a card reader for microSD memory cards.
Here is the result.

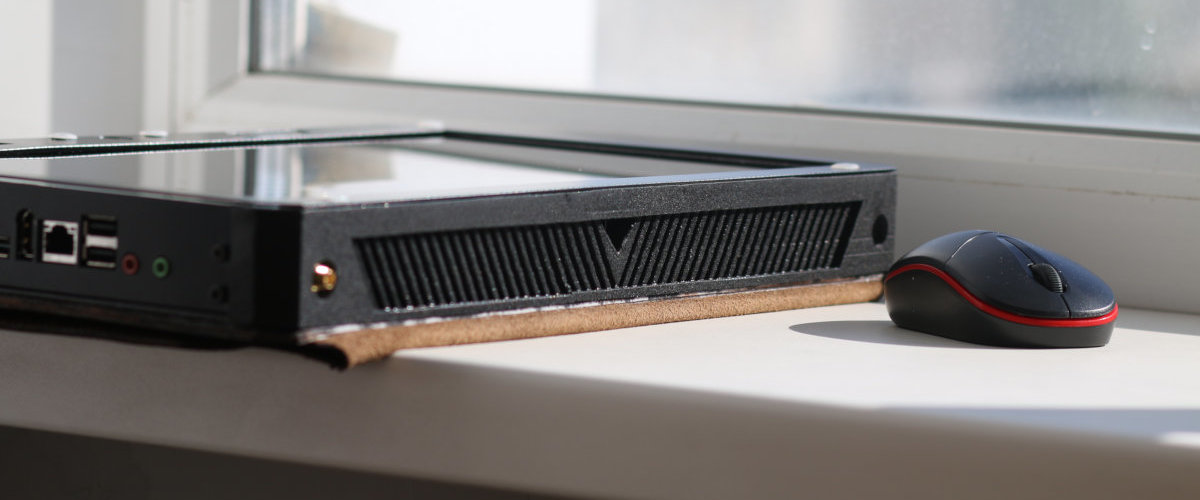
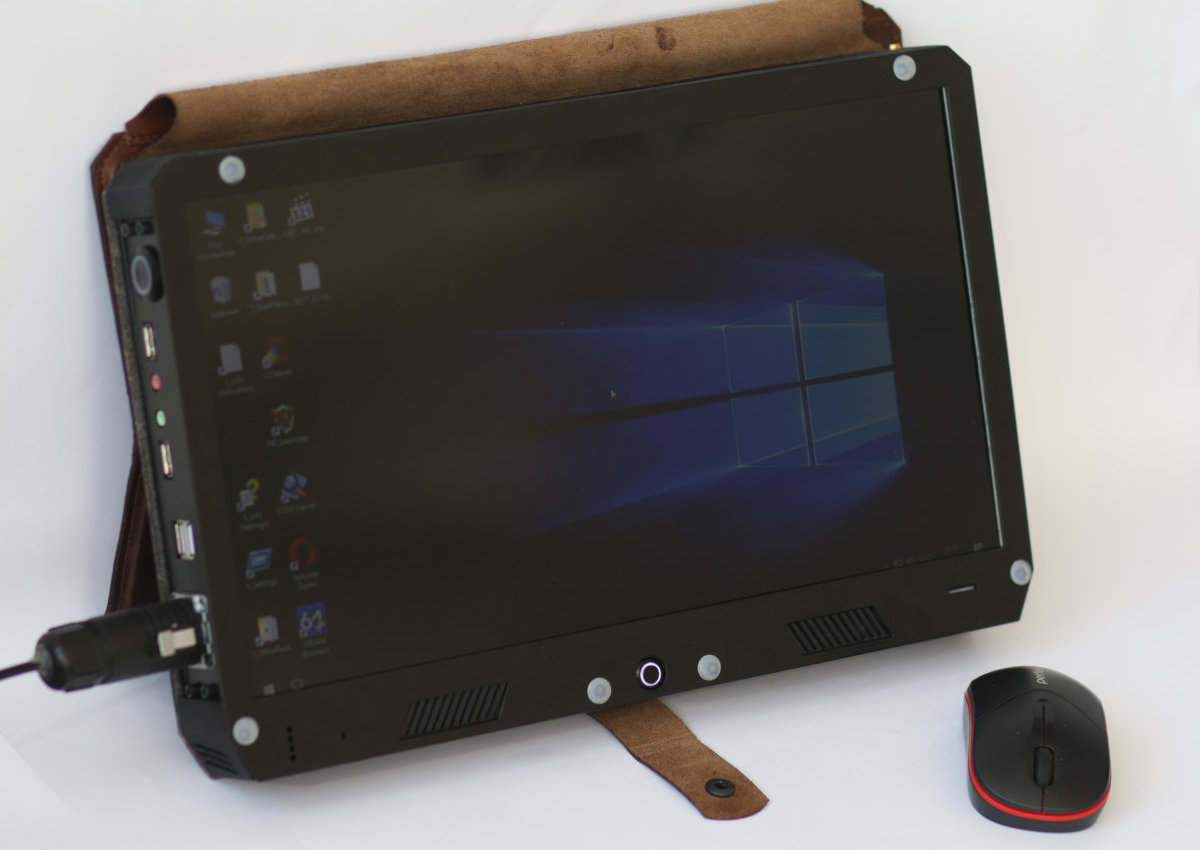
Final Device Configuration
- Processor: Intel Pentium G4400
- Screen Size: 15.6 inches
- Memory: 4 GB DDR4 RAM
- Storage: 128 GB SSD
- Wireless Adapters: AC 9260NGW 802.11a/b/g/n/ac, Bluetooth 5.0
- Card Reader: microSD
- Weight: 3 kg
- Dimensions: 380 × 240 × 38 mm
Conclusions
For now, the work is completed, but there is still immense room for improvement.
Firstly, in my “TrueBook” concept, almost everything is upgradeable, from the display to the Wi-Fi antenna or battery. If you wish, you can even completely change the platform by replacing the motherboard and processor.
Secondly, improvements can be made to the design without altering the core components. For example, the size of the case can be reduced by using a slim display and a more compact arrangement of the components.
If you want to replicate or upgrade my project, you can download the 3D models, blueprints, and components from this link. Most of the components are available on AliExpress.
www
- Wi-Fi Adapter
- 15.6″ Touchscreen
- Slim Wireless Bluetooth Keyboard
- Power Button
- Wireless Mechanical Bluetooth Keyboard
- Webcam
- Battery Charge Controller
- 18650 Batteries
- LVDS Cable
- Speakers
- Power Connector
- 12mm Button
- USB and Audio Connectors
- Advanced Battery Charge Controller OpenUPS
- Interesting Motherboards