So, what’s stopping you from simply installing VirtualBox on Tails the same way you would on any other Linux distribution? There are several reasons.
First. Tails is an amnesic distribution: any changes you make to the system (including installing packages) are erased when you power off. You can work around this by creating Persistent Storage and adding the required packages to its preservation list. On the next boot, Tails will reinstall those packages. But that’s just the beginning.
Second. Tails has an odd quirk: a 64-bit kernel with a 32-bit userland. All packages in this distro are 32-bit, which means that using the usual installation methods you can only install the 32-bit VirtualBox—and that limits each VM to 3 GB of RAM. Worse, you can’t run that build on a 64-bit kernel: the 32-bit VirtualBox requires 32-bit kernel modules and a matching 32-bit kernel.
You can work around this by booting Tails with the 32-bit kernel (it’s included). But then the system itself will be capped at about 3 GB of RAM. Given that Tails is fairly memory-hungry—because it uses a RAM disk for the root filesystem (standard practice for Live CD/Live USB setups)—there will be practically nothing left for virtual machines.
Third. Even if you manage to work around the first two issues, your VMs still won’t be able to reach the Internet. That’s because Tails only permits connections to network hosts via Tor. You’ll need to tweak the firewall rules and a few other configs to funnel the VM’s traffic through Tor — and you’ll have to redo this after every reboot.
In short, it’s complicated. But we’ll sort out all these problems.
Step 1. Mount the Persistent Storage
For the next steps, we’ll need a so‑called persistent partition. This is a dedicated ext4 partition you can create on the USB drive alongside the main one. Its purpose is to store user data, application configs, and the package cache, which enables quick reinstallation of the “saved” packages on the next boot.
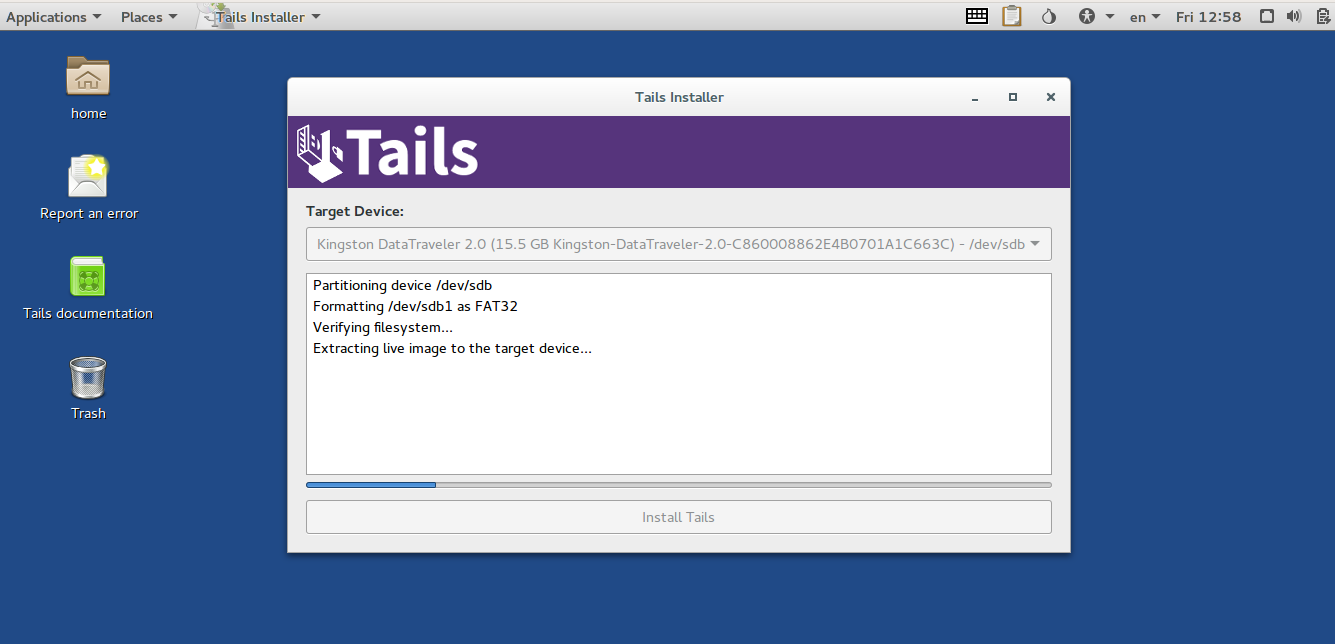
To create a Persistent Storage, you need to actually install Tails—not just write the ISO to a USB stick, but boot from that USB and install Tails onto a second USB using the installer: Menu → Tails → Tails Installer. Then boot from that second USB and create the storage: Menu → Tails → Configure Persistent Storage. When Tails asks what to keep in the storage, feel free to select all options.
Once the process completes, you’ll see a Persistent subdirectory under /. You can copy any data there to keep it across reboots.

Step 2: Install 64-bit VirtualBox in a chroot
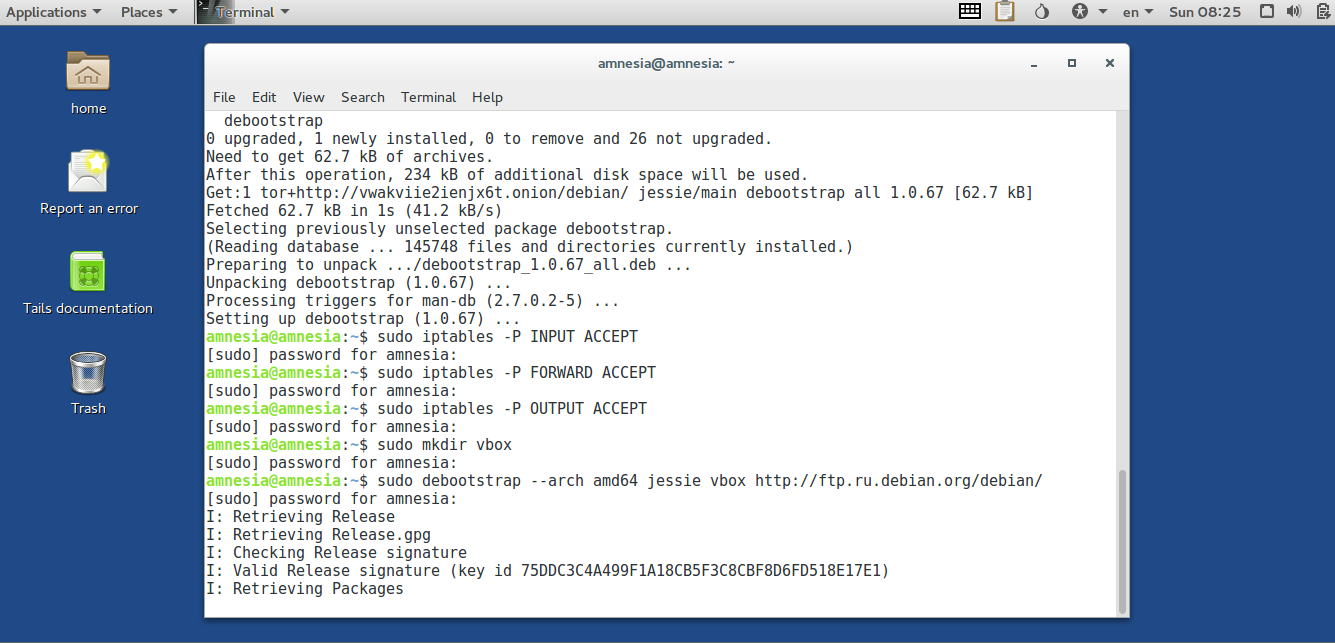
The 64-bit version of VirtualBox can’t run in a 32-bit runtime environment. However, we can create a dedicated 64-bit environment just for VirtualBox, isolated from the main system and placed on the Persistent partition. Debian (and therefore Tails) includes a tool called debootstrap that can bootstrap a full Debian system into a specified directory.
Setting Up a 64‑Bit Runtime Environment
So, boot into Tails. In the Welcome screen (More options?), click Yes and set a root password (any value). Then open a terminal and switch to the Persistent directory:
$ cd ~/Persistent
Installing debootstrap:
$ sudo apt-get update
$ sudo apt-get install debootstrap
Disable the firewall so it won’t force all traffic through Tor and interfere with the rest of our work:
$ sudo iptables -F
$ sudo iptables -I INPUT -j ACCEPT
$ sudo iptables -I OUTPUT -j ACCEPT
$ sudo iptables -I FORWARD -j ACCEPT
Create a vbox directory for our 64-bit environment and unpack it:
$ sudo mkdir vbox
$ sudo debootstrap --arch amd64 jessie vbox http://ftp.ru.debian.org/debian/
This will give us a bare-bones 64-bit Debian with nothing beyond the base system. The next step is to install VirtualBox, but first we need to add the required kernel modules to the environment.

Installing the VirtualBox kernel modules
VirtualBox kernel modules are shipped as source code and compiled for the specific kernel during installation. The simplest way to get them inside the guest is to install the official VirtualBox package in Tails itself, then copy the compiled modules into the 64-bit environment.
Let’s start by installing the compiler and kernel headers required to build kernel modules:
$ sudo apt-get install linux-headers-4.8.0-0.bpo.2-common linux-kbuild-4.8 linux-compiler-gcc-4.9-x86 gcc make
We’ll also need the AMD64 kernel headers. Apt-get won’t find them, so we’ll download them from the Debian server and then install them with dpkg:
$ wget http://ftp.us.debian.org/debian/pool/main/l/linux/linux-headers-4.8.0-0.bpo.2-amd64_4.8.15-2~bpo8+2_amd64.deb
$ sudo dpkg -i linux-headers-4.8.0-0.bpo.2-amd64_4.8.15-2~bpo8+2_amd64.deb
During installation, you’ll see a configuration error for the linux-headers-4. package. The same error will show up on subsequent apt-get invocations. Don’t worry—just continue; the package is actually installed.
warning
The linux-headers-4.8.0 package has been removed from the official Debian repositories. Use the alternative link or try installing a newer version from the repository (e.g., 4.9.0 or later).
Let’s begin installing VirtualBox. Add the required repository to /:
$ deb tor+http://download.virtualbox.org/virtualbox/debian jessie contrib
Import the Oracle keys:
$ wget -q https://www.virtualbox.org/download/oracle_vbox_2016.asc -O- | sudo apt-key add -
$ wget -q https://www.virtualbox.org/download/oracle_vbox.asc -O- | sudo apt-key add -
Once again, ignore any Wget errors. Finally, install VirtualBox:
$ sudo apt-get update
$ sudo apt-get install virtualbox-5.1
This command installs the 32‑bit VirtualBox but builds kernel modules for a 64‑bit kernel. As I mentioned earlier, that combo won’t run in the main system. But we don’t need it to—we only need the modules. Let’s copy them into the 64‑bit environment:
$ sudo cp -R /lib/modules ~/Persistent/vbox/lib/
After that, you can uninstall VirtualBox. Or just leave it—after a reboot, it will disappear.
Installing VirtualBox in a 64-bit Environment
To install VirtualBox into the prepared environment, chroot (change the root directory) into / and repeat the same installation steps. But first, you need to mount the virtual (and not-so-virtual) filesystems required for it to run inside that environment. To do this, create a file / with the following contents:
/sys /home/amnesia/Persistent/vbox/sys none bind 0 0/proc /home/amnesia/Persistent/vbox/proc none bind 0 0/dev /home/amnesia/Persistent/vbox/dev none bind 0 0/home /home/amnesia/Persistent/vbox/home none bind 0 0/tmp /home/amnesia/Persistent/vbox/tmp none bind 0 0/var/tmp /home/amnesia/Persistent/vbox/var/tmp none bind 0 0/usr/src /home/amnesia/Persistent/vbox/usr/src none bind 0 0And then we’ll mount all the file systems listed in it with the following command:
$ sudo mount -T ~/Persistent/vbox-fstab -a
Chroot into the environment:
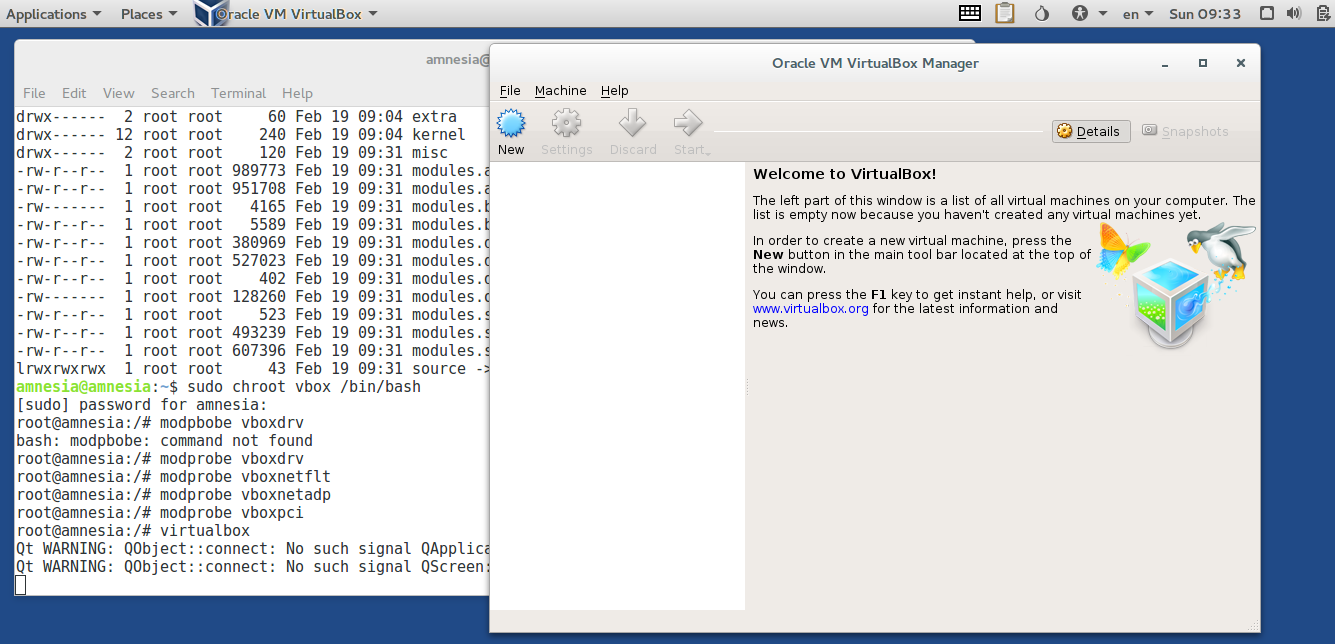
$ sudo chroot vbox /bin/bash
Configure DNS and install root certificates so Wget and apt-get work properly:
# echo nameserver 8.8.8.8 > /etc/resolv.conf
# apt-get install ca-certificates
Add the VirtualBox repository to /:
# echo 'deb http://download.virtualbox.org/virtualbox/debian jessie contrib' >> /etc/apt/sources.list
Import the Oracle keys:
# wget -q https://www.virtualbox.org/download/oracle_vbox_2016.asc -O- | apt-key add -
# wget -q https://www.virtualbox.org/download/oracle_vbox.asc -O- | apt-key add -
Installing VirtualBox:
# apt-get update
# apt-get install virtualbox-5.1
And finally, run it:
# modprobe vboxdrv
# modprobe vboxnetflt
# modprobe vboxnetadp
# modprobe vboxpci
# virtualbox
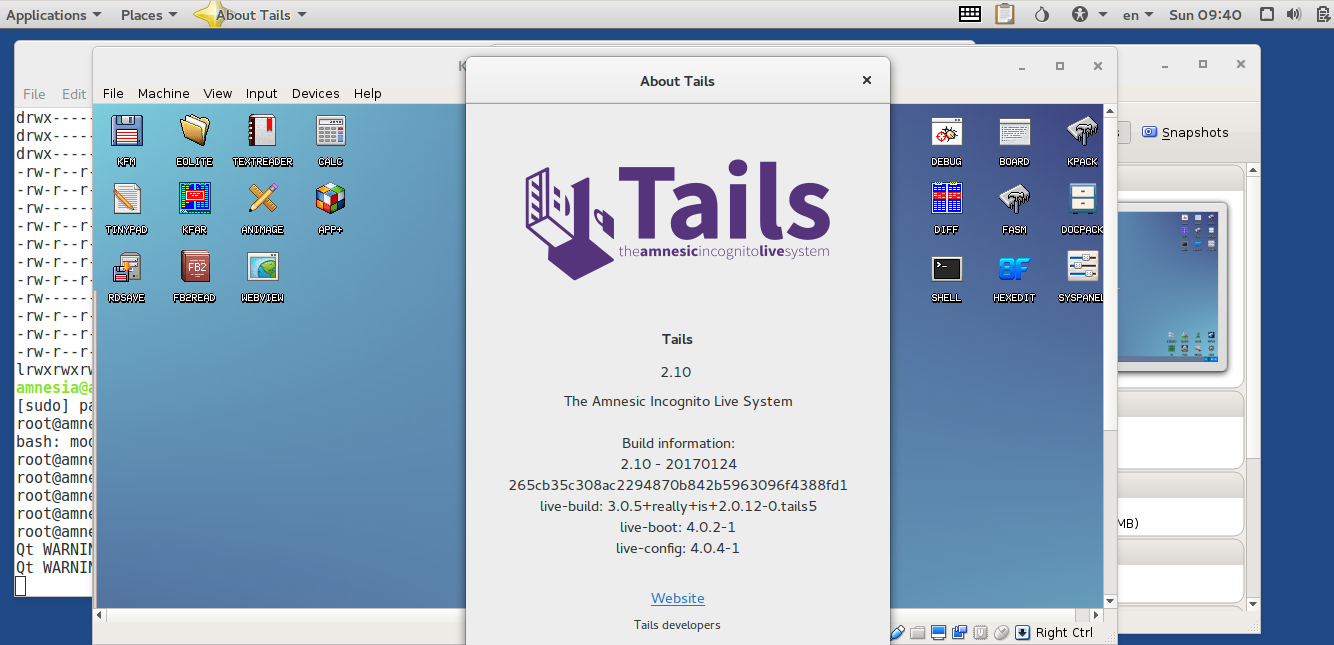
Congratulations—you’ve got a working 64-bit VirtualBox in Tails. But that’s not all: you still need to make sure your VMs can access the Internet through Tor. Right now they should have connectivity because the firewall is disabled, but after a reboot Tails will reconfigure it and block Internet access.

Step 3: Route Internet traffic through Tor
To let VMs connect to hosts over Tor, we can use Tor’s transparent proxying together with firewall rules that redirect the VMs’ traffic to 127.0.0.1 and the transparent proxy port (9040).
But what exactly is “VM traffic”? How do we distinguish the traffic coming from the VMs from the traffic of the host system itself? Simple: we’ll bring up a virtual network bridge with a static IP address and a predefined name. Setting up such a bridge is fairly straightforward:
$ sudo chroot vbox /usr/bin/vboxmanage hostonlyif create
$ sudo chroot vbox /usr/bin/vboxmanage hostonlyif ipconfig vboxnet0 --ip 192.168.56.1 --netmask 255.255.255.0
But don’t rush to run that command. Tails includes a special script that triggers whenever a new network interface appears (for example, when you plug in a USB Wi‑Fi adapter) and randomizes its MAC address.
The most interesting part is that if MAC randomization fails, Tails will completely cut off network access for all applications. We can’t allow that, so we’ll need to modify the script so that if it detects our network bridge, it exits.
Fortunately, this is easy. Just add a single line at the top of the / script:
if [ "$1" = "vboxnet0" ]; then exit; fi
Now we need to make Tor’s transparent proxying system listen on the bridge interface address. The transparent proxy itself is already enabled in Tor’s settings (Tails uses it to redirect requests to .onion domains into Tor), so all you have to do is add two lines to the Tor config (/):
DNSListenAddress 192.168.56.1
TransListenAddress 192.168.56.1
The last step is to route the network bridge’s traffic through Tor. You can do this with iptables:
$ sudo iptables -A INPUT -i vboxnet0 -j ACCEPT
$ sudo iptables -A FORWARD -i vboxnet0 -j ACCEPT
$ sudo iptables -t nat -A PREROUTING -i vboxnet0 -p udp --dport 53 -j REDIRECT --to-ports 5353
$ sudo iptables -t nat -A PREROUTING -i vboxnet0 -p tcp --syn -j REDIRECT --to-ports 9040
$ sudo iptables -t nat -I POSTROUTING -s 192.168.56.0/24 -j MASQUERADE
However, since Tails resets iptables when it detects a new network device, it’s more reliable to add your rules to /, the file used to rebuild the rules after a reset.
The ferm.conf configuration file belongs to the ferm utility, a layer on top of iptables that lets you define rules in a more readable, convenient way than raw iptables. Its format is fairly self-explanatory, so I won’t go into it; instead, I’ll just tell you which lines to add to which sections.
Section chain . Line:
interface vboxnet0 ACCEPT;
Section chain . Line:
interface vboxnet0 ACCEPT;
Section chain . Lines:
interface vboxnet0 proto udp dport 53 REDIRECT to-ports 5353;
interface vboxnet0 proto tcp syn REDIRECT to-ports 9040;
Section chain . Line:
saddr 192.168.56.0/24 MASQUERADE;
That’s it. Now we’re ready to create a virtual network interface and restart Tor:
$ sudo chroot vbox /usr/bin/vboxmanage hostonlyif create
$ sudo chroot vbox /usr/bin/vboxmanage hostonlyif ipconfig vboxnet0 --ip 192.168.56.1 --netmask 255.255.255.0
$ sudo systemctl restart tor
Once the network interface is created, Tails will reload the ferm rules and automatically apply our redirect settings. But that’s not all. For the VirtualBox VMs to auto-configure their networking (i.e., obtain their IP and DNS server addresses), we need a local DNS server.
The easiest way to run a DNS server on your local machine is to use dnsmasq. Let’s install it:
$ sudo apt-get install dnsmasq
Apply the required changes to the / configuration file:
port=53interface=vboxnet0bind-interfacesdhcp-range=192.168.56.2,192.168.56.254,1hLet’s restart:
$ sudo systemctl restart dnsmasq
All set. You can launch VirtualBox:
$ sudo chroot vbox /usr/bin/virtualbox
Keep in mind you’ll need to reconfigure each VM to use the vboxnet0 interface for network access. Open the VM’s settings, go to the Network tab, and for Adapter 1 select Host-only Adapter with Name: vboxnet0.
Put the virtual machines and ISO images in the / directory; otherwise, VirtualBox won’t detect them.

Step 4: Automating VirtualBox startup
We’ve got VirtualBox running properly with transparent proxying of VM traffic through Tor. But the catch with Tails, as I mentioned above, is that all our settings are lost after a reboot. The sandbox with VirtualBox and the kernel modules will remain, but changes to the MAC address spoofer, ferm, and so on will be wiped. And to be honest, starting it up isn’t very convenient either.
So we’ll create a script that automatically adjusts the system settings:
#!/bin/bashcopy_spoofer() {    cp tails-spoof-mac /usr/local/lib/tails-spoof-mac
    chown root:root /usr/local/lib/tails-spoof-mac
}copy_ferm() {    cp ferm.conf /etc/ferm/ferm.conf
    chown root:root /etc/ferm/ferm.conf
}setup_chroot() {    mount | grep vbox > /dev/null && return    mount -T vbox-fstab -a    chroot vbox /sbin/modprobe vboxdrv
    chroot vbox /sbin/modprobe vboxnetflt
    chroot vbox /sbin/modprobe vboxnetadp
    chroot vbox /sbin/modprobe vboxpci
}setup_bridge() {    ifconfig | grep vboxnet0 > /dev/null && return    chroot vbox /usr/bin/vboxmanage hostonlyif create
    chroot vbox /usr/bin/vboxmanage hostonlyif ipconfig vboxnet0 --ip 192.168.56.1 --netmask 255.255.255.0
}configure_tor() {    cat /etc/tor/torrc | grep 192.168.56.1 > /dev/null && return    echo DNSListenAddress 192.168.56.1 >> /etc/tor/torrc
    echo TransListenAddress 192.168.56.1 >> /etc/tor/torrc
    systemctl restart tor
}configure_dhcpd() {    cat /etc/dnsmasq.conf | grep vboxnet0 > /dev/null 2>&1 && return    apt-get -y install dnsmasq
    echo >> /etc/dnsmasq.conf
    echo port=53 >> /etc/dnsmasq.conf
    echo interface=vboxnet0 >> /etc/dnsmasq.conf
    echo bind-interfaces >> /etc/dnsmasq.conf
    echo dhcp-range=192.168.56.2,192.168.56.254,1h >> /etc/dnsmasq.conf
    systemctl restart dnsmasq
}copy_spoofer
copy_ferm
setup_chroot
setup_bridge
configure_tor
configure_dhcpd
chroot vbox /usr/bin/virtualbox
Name this script start., place it in the / directory next to the vbox directory, and make it executable:
$ chmod +x ~/Persistent/start.sh
Also copy the patched versions of / and / into the / directory:
$ sudo cp /usr/local/lib/tails-spoof-mac ~/Persistent
$ sudo cp /etc/ferm/ferm.conf ~/Persistent
You can now reboot the machine, and then, right after it boots, launch VirtualBox with the following command:
$ cd ~/Persistent
$ sudo ./start.sh
The system must operate like clockwork.
Conclusion
Running VirtualBox in Tails is tricky, but doable. Yes, it’s a rather unconventional setup, but it lets you carry a USB drive from which you can run almost any OS inside the fully anonymizing environment that Tails provides.
On top of that, you can install Whonix inside Tails, giving you two anonymizing systems nested one inside the other. In that setup, all traffic gets routed through Tor twice: a Tor tunnel inside a Tor tunnel. Pretty cool, right?
