Let’s start with choosing a distribution. Ubuntu, Mint, Debian, and Fedora are not suitable choices for a true geek’s distribution. There is nothing wrong with them, but if you pay attention to what system tinkerers are using, you’ll most likely see Arch Linux, Gentoo, or Slackware. These are straightforward distributions that allow for fine-grained control over the system.
Let’s focus on Arch Linux, currently the most popular distribution among tech enthusiasts. A freshly installed Arch Linux is a simple console-based distribution that doesn’t offer much out of the box. For the most conservative users who mastered UNIX back in the eighties, this might be sufficient, but you still need at least some form of graphical interface and a graphical browser (though there are text-based options like Lynx, w3m, Links, ELinks).
In UNIX-like systems (which, of course, includes Linux), the graphical interface is primarily managed by what is known as a Window Manager (WM). This is a specialized application whose main task is to manage windows, create window frames with buttons, and correctly handle overlapping windows. In some cases, it also creates panels and menus for launching and managing applications, though this task is usually handled by other applications that, together with the Window Manager, form a complete Desktop Environment (DE) such as GNOME, KDE, or Xfce.
We don’t need a desktop environment (DE); it’s a creation of troublemakers who brought it into the UNIX world from Windows. Furthermore, we don’t need a traditional window manager since dragging windows around with a mouse and overlapping them is counterproductive. Instead, we will install a tiling window manager, which does not allow windows to be dragged around the screen. Instead, it either opens all windows in full screen or divides the screen between windows proportionally (or non-proportionally), preventing them from overlapping.
Probably the best tiling window manager available today is i3. Let’s install it:
$ sudo pacman -S i3-wm
Let’s jump right in and set up i3status (which will display a status bar with various useful information and a tray at the bottom of the screen), as well as the tiny application dmenu, which allows for quick application launching, and of course, a terminal emulator:
$ sudo pacman -S i3status dmenu xterm
If this is a fresh installation of Arch Linux, you’ll also need the Xorg server, a graphics card driver, and a touchpad driver (if it’s a laptop):
$ sudo pacman -S xorg-server xf86-video-intel xf86-input-synaptics
Replace the xf86-video-intel package with the appropriate one based on your video chip manufacturer:
- Nvidia: xf86-video-nouveau;
- ATI/AMD: xf86-video-ati.
We’ll also need a login manager—the graphical window with fields for entering your username and password that you see when the system boots up. While you can use the login manager from KDE, GNOME, Xfce, or any other desktop environment, these are quite heavyweight applications that bring along a lot of unnecessary dependencies. Therefore, we’ll opt for a simple and fast login manager known as SLiM:
$ sudo pacman -S slim
First, let’s edit its configuration file / by adding the following line:
current_theme archlinux
Immediately after a successful login, SLiM will execute the contents of the ~/. file. This file is designed to perform some initial configuration of the user environment and to launch the window manager. Let’s stick with tradition and add the following lines to the file:
# Specify the preferred language for system and application interfaces# Delete these lines if you prefer Englishexport LANG=ru_RU.utf8
export LC_ALL=ru_RU.utf8
# Configure layout switch between Russian and English using Caps Locksetxkbmap "us,ru" ",winkeys" "grp:caps_toggle,grp_led:caps"# Disable the annoying beep soundxset b off
# Launch i3exec i3
That’s it, now you can launch the graphical user interface:
$ sudo systemctl start slim
The SLiM login screen should appear.

i3 and dmenu
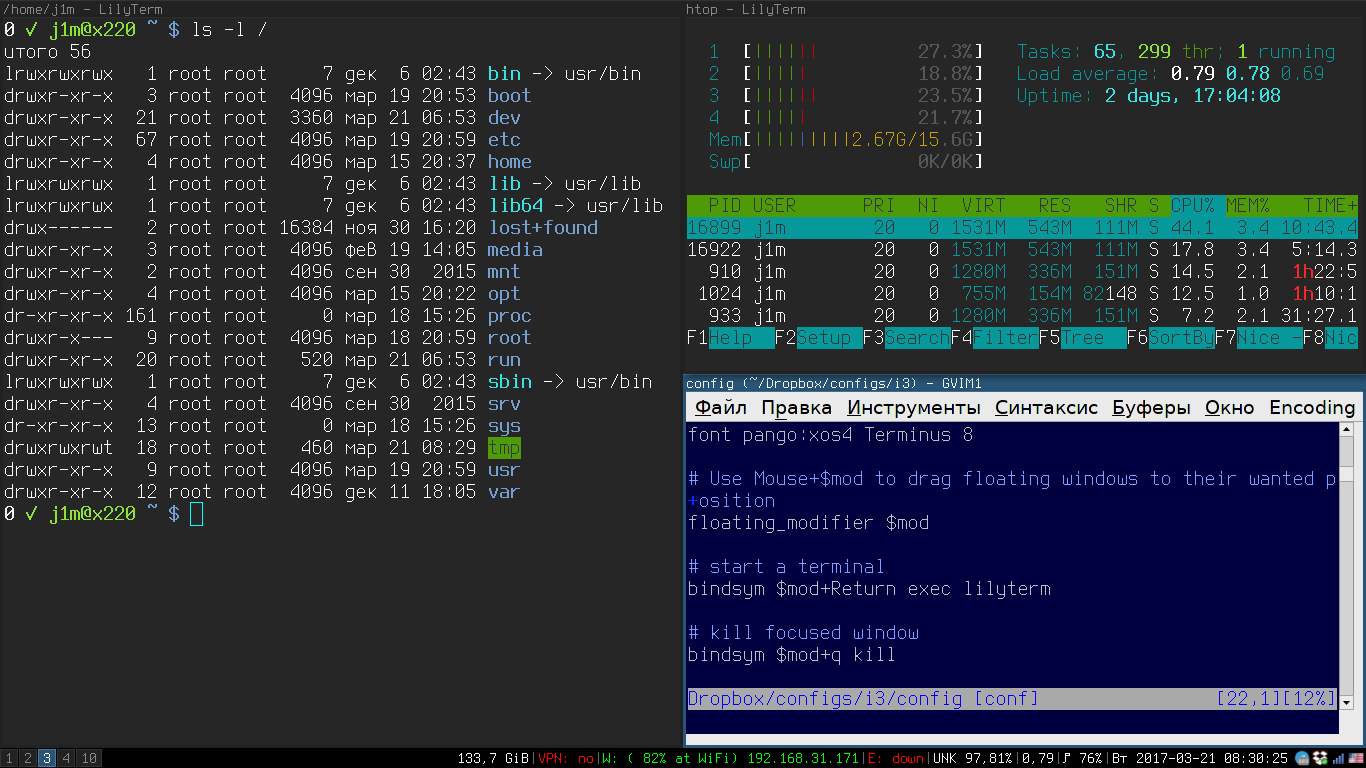
So, you are now facing i3. Specifically, you should only see a black screen with a status bar at the bottom. This bar shows current disk usage, connected network interfaces, battery level, date, and time. There’s no menu, “Start” button, or other unnecessary clutter.
i3 is entirely controlled via the keyboard. Pressing Win + Enter launches a terminal (currently it’s the basic xterm, but we can replace it). By default, windows occupy the entire screen, dividing it into two, three, four, or more sections vertically. This behavior can be disabled by pressing Win + w, allowing each window to open in full screen—this is an almost perfect setup for laptops with screen sizes of 10–13 inches.
Switching between windows can be done using Win + Arrow keys. For toggling between desktops, referred to as Workspaces, use Win + 1…0. To close a window, press Win + Shift + Q. At this stage, these shortcuts should be sufficient.
Win + d is a special combination. It opens dmenu—a command line interface at the top of the screen that allows you to quickly launch applications. Essentially, dmenu is quite similar to the universal search bar like Spotlight in macOS: you simply start typing the name of an application, and it suggests options. Autocompletion is also supported. In the i3 window manager, dmenu can be considered an equivalent to the application menu found in traditional desktop environments.
i3 offers a variety of ways to split the screen into workspaces, allowing you to organize different applications. A classic floating window mode is also available. You can switch the current application to this mode using the Win + Shift + Space key combination. To move the window, hold down the Win key and drag it with your mouse. To resize the window, use the right mouse button while holding the Win key.
Fonts, Terminal, and Scratchpad
By default, i3 uses a rather dull standard Xorg font, and for the terminal emulator, we’ve installed the outdated xterm, which both users and developers have long wanted to retire (I’m not kidding). This needs to be fixed.
Let’s start with the font. There’s a lot of debate about choosing a monospaced font for the console (which is precisely what we need, including for i3), but I suggest going with Terminus. It’s a clear sans-serif font with minimal rounded shapes, making it highly legible and perfect for non-Retina displays (and Retina as well). To install it:
$ sudo pacman -S terminus-font
The choice of a terminal emulator isn’t straightforward either. For many years, urxvt (rxvt-unicode) has been considered the standard. It’s lightweight, fast, and highly customizable. However, since we can’t dive into the detailed configuration of each component in this article (and without such configuration, urxvt can be quite unpleasant), we’ll focus on LilyTerm. It is fast, has minimal dependencies, and retains all the advantages of urxvt, with configuration made easy through the context menu.
$ sudo pacman -S lilyterm
Now, we need to make changes to the i3 configuration file so it recognizes our font and uses LilyTerm instead of the default terminal. Open the ~/. file, find the font option, and update its value:
font pango:xos4 Terminus 8
To launch LilyTerm using the Win + Enter keys, add the following option:
bindsym $mod+Return exec lilyterm
And here’s how to launch dmenu with our chosen font:
bindsym $mod+d exec dmenu_run -fn 'xos4 Terminus-8'
Plus, a couple of lines to enable what’s known as a scratchpad:
bindsym $mod+Shift+minus move scratchpad
bindsym $mod+minus scratchpad show
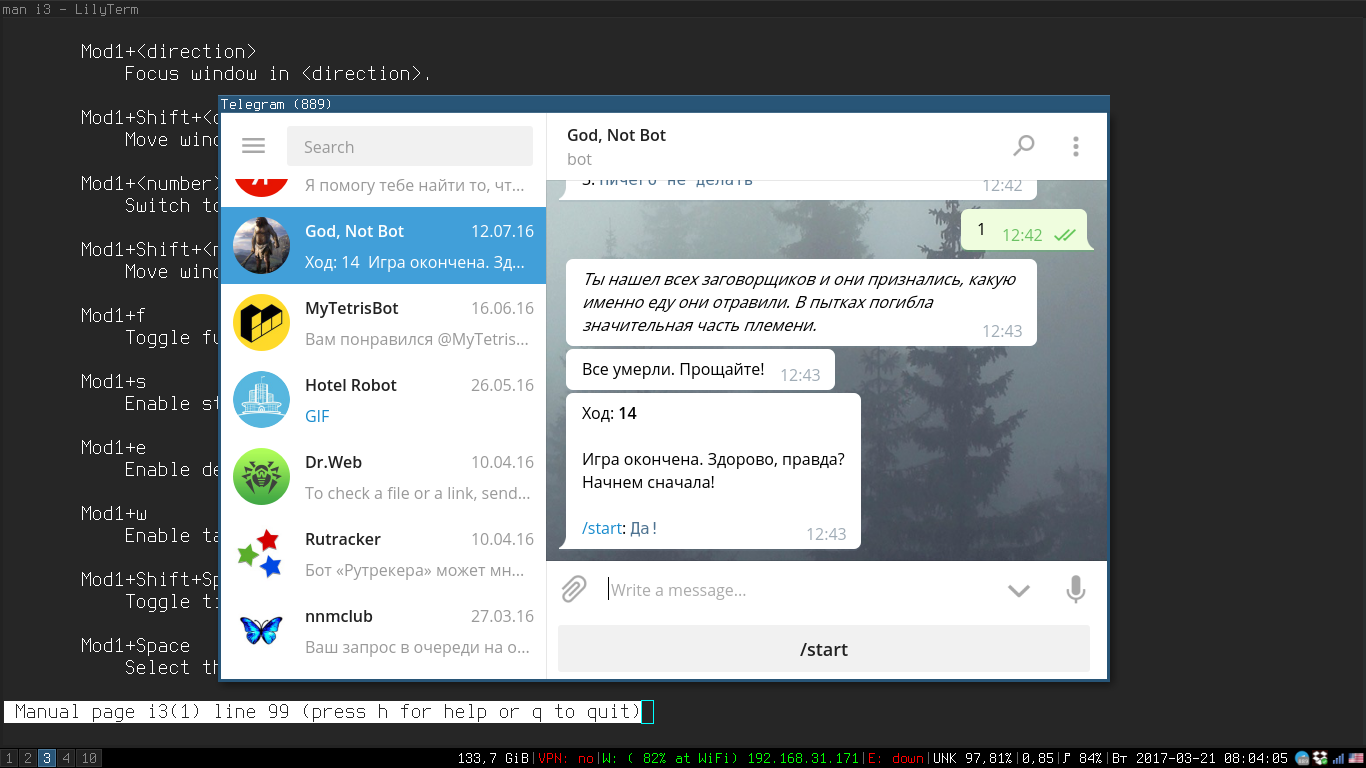
In i3 terminology, a Scratchpad is a small window that appears in the center of the screen and can be accessed with a hotkey. It works well for applications you need frequently but find distracting if constantly displayed, like messengers. Pressing Win + minus displays the scratchpad, and pressing it again hides it. Win + Shift + minus sends the current window to the scratchpad.
Once all the changes are made, save the file and press Win + Shift + R to restart i3.
Notifications, Layouts, and Effects
Unlike full desktop environments like KDE, GNOME, or Xfce, i3 does not have its own notification system. This means that applications will either remain silent when they need to display a message on the screen, or they will show notifications using their own methods, resulting in a variety of windows with differing styles.
Fortunately, this problem can be easily resolved with an external “notifier.” I recommend installing the minimalist twmn, which integrates seamlessly with the i3 interface and uses minimal resources. It’s not available in the standard package repository, so we’ll need to install twmn from the AUR (this requires yaourt to be installed on your system):
$ yaourt -S twmn-git
After installation, create the file ~/. and add the following content to it:
[gui]
absolute_position=
always_on_top=true
background_color=#000000
bounce=true
bounce_duration=500
font=xos4 Terminus 8
font_variant=medium
foreground_color=#00ffff
in_animation=38
in_animation_duration=1000
opacity=100
out_animation=13
out_animation_duration=1000
position=bottom_right
screen=
[icons]
critical_icon=
info_icon=
warning_icon=
[main]
activate_command=
duration=6000
enable_shortcuts=true
host=127.0.0.1
port=9797
sound_command=
In this configuration, notifications will appear in the bottom right corner of the screen, overlaying the status bar. The color will be cyan, and the font is Terminus.

Another feature of i3 is that it is not a composite window manager. In other words, it doesn’t utilize the graphics processor to create effects like transparency, shadows, or smooth window transitions. Additionally, you may encounter typical 2D rendering issues, such as black boxes appearing where windows should be during movement.
This issue can also be resolved. You’ll need an external composite manager called Compton. All you need to do is simply install it:
$ sudo pacman -S compton
The i3 window manager does not have a layout switch indicator. We can install a simple and lightweight indicator called gxkb:
$ yaourt -S gxkb
There’s no need to configure it manually, as it will automatically adopt the switching settings specified in ~/.. As a nice bonus, it allows you to switch the keyboard layout individually for each window.
Once we have completed the installation, we’ll add our applications to the startup sequence. To do this, insert the following lines into ~/. just before the line exec :
twmnd &
gxkb &
compton -b &
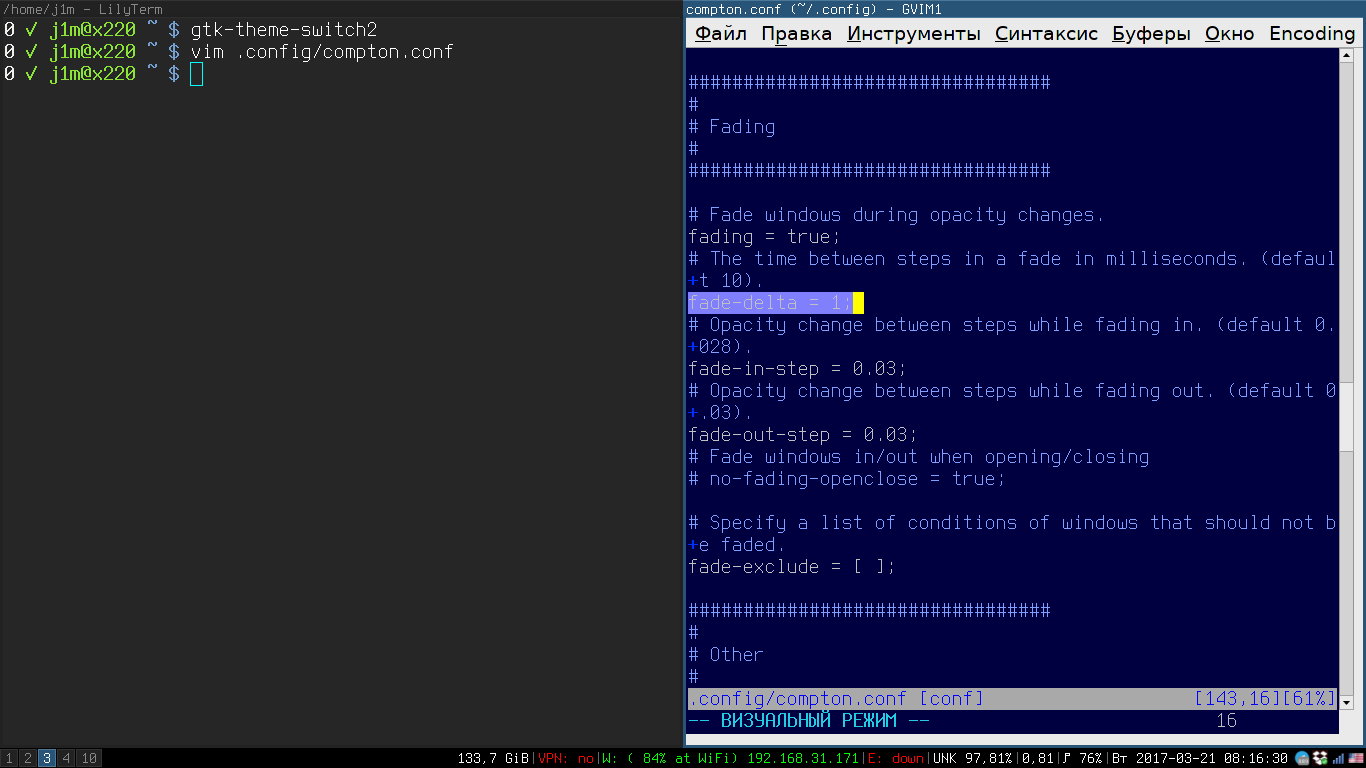
Tip: By default, Compton has an overly long fade duration when switching between windows (10 ms), which can interfere with workflow. You can fix this by modifying the configuration file ~/. and changing the line
fade-delta = 10;
на
fade-delta = 1;
The configuration will be created after the first launch of compton.
Networking and Auto-Mounting
We’ve covered the basics of the interface settings, now it’s time to think about more low-level components. We clearly need better tools for network configuration, and we have to mount connected USB drives manually.
Let’s start with networking. In Arch Linux, the standard method for configuring network connections, both wired and wireless, is netctl. This is a set of small scripts that allow you to activate and configure a network interface based on configuration files. Overall, netctl is convenient, but it is static, which means that if you take your laptop to a friend’s house, you’ll have to create a new configuration with the new Wi-Fi password and switch netctl to it, hoping you’ve correctly typed the network’s SSID.
Therefore, we will use the trusty NetworkManager. Although it can be a bit heavy and doesn’t quite fit our minimalist desktop setup, it performs well. To install it:
$ sudo pacman -S networkmanager
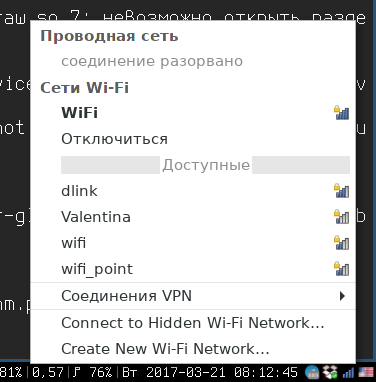
Additionally, we will install networkmanager-openvpn for OpenVPN support and network-manager-applet for managing connections via a system tray icon:
$ sudo pacman -S networkmanager-openvpn network-manager-applet
Activate and start NetworkManager:
$ sudo systemctl enable NetworkManager
$ sudo systemctl start NetworkManager
To ensure the NetworkManager applet (the icon in the system tray) starts when the desktop launches, add the following line to ~/.:
nm-applet &
Now for auto-mounting. This is even simpler, just install the devmon daemon:
$ sudo pacman -S devmon
And enter it in ~/.:
devmon &
Flash drives and various types of USB disks will appear in the / directory.
Final Touches
We already have a fully functional and rather geeky desktop, but we can take it a step further to make life a bit more comfortable. Let’s start with the appearance of the graphical software. By default, it looks unattractive, but you can easily change the default theme using the gtk-theme-switch2 application:
$ sudo pacman -S gtk-theme-switch2
Just launch the application, select the desired theme, and click the Apply button. This will change the graphical appearance of applications developed using the GTK+ toolkit (such as LilyTerm and GIMP), but Qt applications (like qBittorrent) will remain unattractive, and Java software will look quite unpleasant in its default state.
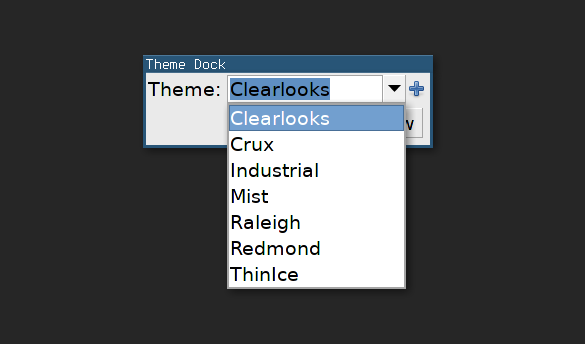
You can fix this as well—just add these lines to ~/., and after your next login, all applications will have a consistent look:
export QT_STYLE_OVERRIDE=gtk
export _JAVA_OPTIONS="-Dawt.useSystemAAFontSettings=on -Dswing.aatext=true -Dswing.defaultlaf=com.sun.java.swing.plaf.gtk.GTKLookAndFeel -Dswing.crossplatformlaf=com.sun.java.swing.plaf.gtk.GTKLookAndFeel"
Additionally, it’s a good idea to protect our eyes and make working on the computer in the evening more comfortable. An application for automatic screen color calibration can be helpful here. Redshift is perfect for this role (similar to f.lux for Windows and macOS). It adjusts the screen’s color temperature, making the image warmer in the evenings, which enhances reading comfort and reduces eye strain.
$ sudo pacman -S redshift
As usual, add the following to ~/.:
redshift &
Software
- surf — a minimalist browser based on WebKit;
- zathura — a simple, convenient, and lightning-fast PDF/DJVU reader;
- worker — a simple, fast, and highly functional dual-pane file manager;
- vim — an editor that’s a love-it-or-hate-it kind of tool;
- mpv — a command-line media player that can handle virtually anything;
- moc — a command-line audio player that’s all about functionality without the extras;
- rtorrent — a reliable command-line torrent client.
Conclusion
That’s about it. All that’s left is to learn how to manage i3, improve your console skills by getting used to keeping several terminals open, and you can consider yourself a true geek. You can go even further by mastering vim and starting to use the ELinks console browser. But that’s not a path for everyone.
