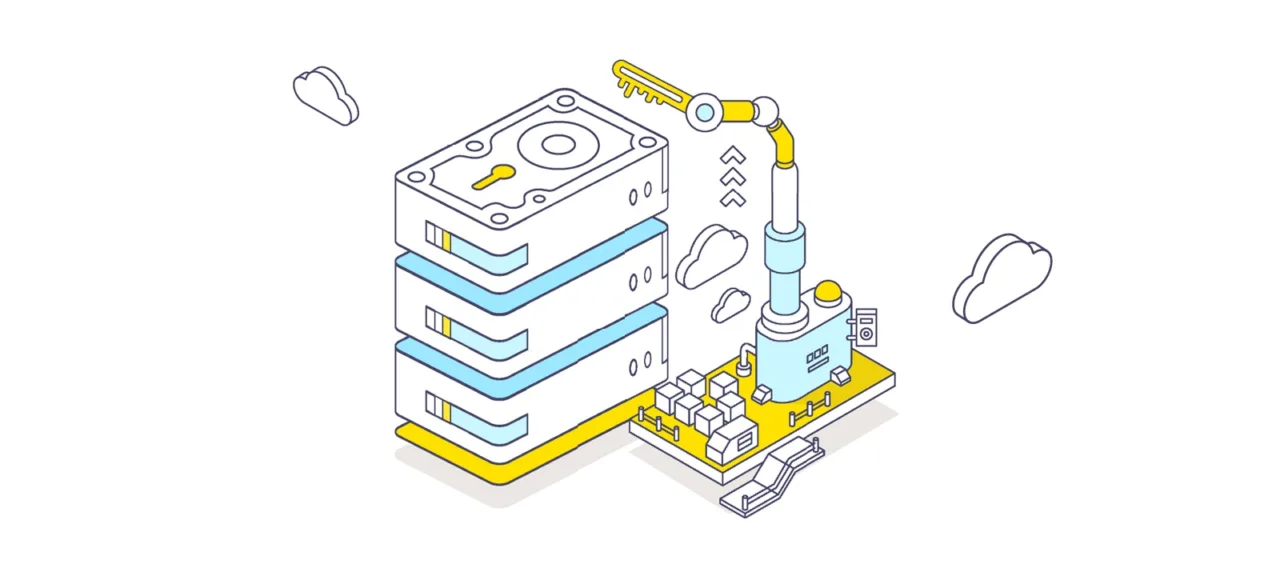
Offline Attacks
BitLocker technology was Microsoft’s response to the increasing number of offline attacks, particularly easy to execute against Windows computers. Anyone with a bootable flash drive might feel like a hacker. They could simply shut down the nearest computer and then reboot it with their own OS and a portable set of tools for searching passwords, confidential data, and dissecting the system.
At the end of the workday, with a Phillips screwdriver, you could embark on a small crusade—open the computers of departed employees and extract their drives. That same evening, in the comfort of your home, the contents of these drives can be analyzed (and even modified) in countless ways. The next day, it’s just a matter of arriving early to put everything back in its place.
It’s not always necessary to hack into computers right at the workplace. A lot of confidential data leaks when old computers are disposed of, and drives are replaced. In practice, secure deletion and low-level formatting of decommissioned disks are rarely performed. So, what might deter young hackers and digital scavengers?
As Bulat Okudzhava sang: “The whole world is made of limitations to keep us from going insane with happiness.” In Windows, the primary limitations are set at the level of NTFS access rights, which do not protect against offline attacks. Windows merely checks permissions for reading and writing before processing any commands that access files or directories. This method is quite effective as long as all users operate within a system configured by an administrator with restricted accounts. However, once users escalate their privileges or boot into a different operating system, this protection becomes ineffective. Users can make themselves an admin and reassign access rights or simply ignore them by using a different file system driver.
There are many complementary methods to counter offline attacks, including physical security and video surveillance, but the most effective ones require the use of robust cryptography. Digital signatures for bootloaders prevent unauthorized code from running, and the only true way to protect the data on a hard drive is to encrypt it. So why was full disk encryption absent from Windows for so long?
From Vista to Windows 10
Microsoft employs a diverse group of people, and not all of them are mediocre coders. Unfortunately, final decisions in software companies have long been made not by programmers, but by marketers and managers. The only real consideration when developing a new product is the sales volume. The easier the software is for a homemaker to understand, the more copies of it they will be able to sell.
“Who cares if half a percent of customers are worried about their security? An operating system is already a complex product, and now you want to scare the target audience with encryption. We’ll manage without it! We managed before!” This is likely how Microsoft’s top management thought until XP became popular in the corporate sector. By then, too many IT professionals were concerned about security to ignore their opinions. Consequently, the next version of Windows finally included the much-anticipated volume encryption, but only in the Enterprise and Ultimate editions aimed at the corporate market.
The new technology was named BitLocker, and it was arguably the only worthwhile component of Vista. BitLocker encrypted entire volumes, making both user and system files unreadable without going through the installed OS. Important documents, cat photos, the registry, SAM, and SECURITY—all become unreadable when an offline attack of any kind is attempted. In Microsoft’s terminology, a “volume” doesn’t necessarily mean a physical disk. A volume can be a virtual disk, a logical partition, or even a combination of multiple disks (such as a spanned or striped volume). Even a simple USB drive can be considered an attachable volume for which there is a separate implementation of full encryption starting with Windows 7—BitLocker To Go.
With the advent of BitLocker, booting a different operating system has become more challenging since all boot loaders now have digital signatures. However, a workaround remains possible through compatibility mode. By changing the BIOS boot mode from UEFI to Legacy and disabling the Secure Boot feature, the trusty old bootable USB drive becomes useful again.
How to Use BitLocker
Let’s go through the practical part using Windows 10 as an example. In version 1607, you can enable BitLocker through the Control Panel (under “System and Security,” then “BitLocker Drive Encryption”).

However, if your motherboard doesn’t have a TPM (Trusted Platform Module) version 1.2 or newer, you won’t be able to use BitLocker by default. To activate it, you’ll need to access the Local Group Policy Editor (gpedit.msc) and navigate to “Computer Configuration → Administrative Templates → Windows Components → BitLocker Drive Encryption → Operating System Drives.” Here, locate the setting “Require additional authentication at startup” and enable the option “Allow BitLocker without a compatible TPM…”

In neighboring sections of local policies, you can set additional BitLocker configurations, including key length and encryption mode following the AES standard.

After implementing the new policies, return to the control panel and follow the instructions of the encryption setup wizard. For added protection, you can choose to enter a password or connect a specific USB flash drive.

In the next step, you’ll be given the option to save a backup copy of your key for recovery purposes. By default, options include sending it to Microsoft servers, saving it to a file, or even printing it out.

Although BitLocker is considered a full disk encryption technology, it allows for partial encryption, targeting only occupied sectors. This approach is faster than encrypting the entire disk, but it is seen as less secure. This is because deleted, but not yet overwritten, files remain accessible for direct reading for some time.

After configuring all the settings, you’ll need to perform a reboot. Windows will prompt you to enter a password (or insert a USB flash drive), and then it will boot into its normal mode and begin the background process of encrypting the volume.

Depending on the chosen settings, disk size, processor speed, and its support for specific AES instructions, encryption can take anywhere from a few minutes to several hours.

After completing this process, new items will appear in the Explorer context menu: change password and quick access to BitLocker settings.

Note that all actions, except for changing the password, require administrator rights. The logic here is simple: if you’ve successfully logged into the system, it means you know the password and have the right to change it. How reasonable is this? We’ll find out soon!

Understanding BitLocker’s Architecture
You shouldn’t judge the reliability of BitLocker based solely on AES’s reputation. While the popular encryption standard might not have obvious weaknesses, its implementation in specific cryptographic products often brims with vulnerabilities. Microsoft does not disclose the full code for BitLocker technology. It is only known that different versions of Windows have used various schemes, with no comments on the changes. Furthermore, in build 10586 of Windows 10, it simply disappeared, only to reappear two builds later. But let’s start from the beginning.
The initial version of BitLocker used the Cipher Block Chaining (CBC) mode. Even at that time, its weaknesses were apparent: vulnerability to known plaintext attacks, susceptibility to tampering attacks, and so on. As a result, Microsoft decided to strengthen the protection. With Vista, the AES-CBC scheme was enhanced with the Elephant Diffuser algorithm, which made direct comparison of ciphertext blocks more difficult. This meant that the same content in two sectors would result in entirely different ciphertexts when encrypted with the same key, complicating pattern analysis. However, the default key length was short—128 bits. Through administrative policies, it could be extended to 256 bits, but is it worth doing?
For users, nothing will seem different after the key change—neither the length of passwords they enter nor the perceived speed of operations. Like most full disk encryption systems, BitLocker uses multiple keys… and none of them are visible to users. Here’s the basic BitLocker scheme.
- When BitLocker is activated, a main bit sequence is created using a pseudorandom number generator. This is the full volume encryption key (FVEK), which is used to encrypt the contents of each sector.
- FVEK, in turn, is encrypted with another key, the volume master key (VMK), and stored in encrypted form within the volume’s metadata.
- VMK itself can be encrypted using various methods chosen by the user.
- On newer motherboards, the VMK is encrypted by default using a storage root key (SRK) stored in a separate cryptoprocessor called a trusted platform module (TPM). Users do not have access to the contents of the TPM, and it is unique to each computer.
- If the motherboard does not have a separate TPM chip, a user-entered PIN or a USB flash drive with pre-recorded key information can be used to encrypt the VMK instead of the SRK.
- In addition to using a TPM or USB flash drive, the VMK can be further protected with a password.
The overall way BitLocker functions has remained consistent through subsequent Windows releases up to the present. However, methods for key generation and encryption modes in BitLocker have evolved. For instance, in October 2014, Microsoft quietly removed the additional Elephant Diffuser algorithm, leaving only the AES-CBC scheme with its known vulnerabilities. Initially, there were no official statements about this change. Users simply received a weakened encryption technology under the same name as part of an update. Vague explanations for this move came only after independent researchers noticed the simplifications in BitLocker.
The official reason for discontinuing the Elephant Diffuser was to ensure that Windows complied with U.S. Federal Information Processing Standards (FIPS). However, this rationale doesn’t hold up given that both Vista and Windows 7, which included the Elephant Diffuser, were sold in the U.S. without any issues.
Another perceived reason for rejecting the additional algorithm is the lack of hardware acceleration for the Elephant Diffuser, which could result in a loss of speed when using it. However, in earlier years, when processors were slower, encryption speeds seemed to be satisfactory. Moreover, AES was widely used even before dedicated instruction sets and specialized chips were introduced to accelerate it. Over time, hardware acceleration could have been developed for the Elephant Diffuser as well, or at the very least, clients could have been given a choice between speed and security.
A more plausible unofficial theory suggests that “Slon” was an obstacle for NSA employees who wanted to spend less effort decrypting yet another disk. Microsoft is known for cooperating with authorities, even when their requests aren’t entirely legal. This conspiracy theory is indirectly supported by the fact that up until Windows 8, the pseudorandom number generator used in BitLocker for creating encryption keys was built into Windows itself. In many (if not all) versions of Windows, this was the Dual_EC_DRBG—a “cryptographically secure PRNG” developed by the National Security Agency that contains some inherent vulnerabilities.
The covert weakening of built-in encryption naturally provoked a strong wave of criticism. In response, Microsoft revised BitLocker and replaced the random number generator in Windows releases with CTR_DRBG. Additionally, starting with build 1511, Windows 10 adopted AES-XTS as the default encryption scheme, which is resistant to ciphertext block manipulation. While the latest versions of Windows 10 have addressed other known issues with BitLocker, a critical problem remains. This issue, related to key management principles, is so fundamentally flawed that it undermines all other improvements.
The Los Alamos Principle
Decrypting BitLocker disks is made easier by Microsoft’s promotion of an alternative method for data access recovery through the Data Recovery Agent (DRA). The essence of the DRA is that it encrypts the encryption keys for all drives within a company’s network using a single access key. Once you have this key, you can decrypt any other key, and thus any disk used within the same organization. Convenient? Yes, especially if you’re aiming to breach security.
The idea of using one key for all locks has proven to be flawed many times, yet it is repeatedly revisited in various forms for the sake of convenience. Ralph Leighton recorded Richard Feynman’s recollection of a particular episode during his work on the Manhattan Project at the Los Alamos laboratory: “…I opened three safes—all with the same combination. <…> I beat them all: I opened the safes with all the secrets of the atomic bomb—technology for producing plutonium, descriptions of the purification process, information on how much material is needed, how the bomb works, how neutrons are generated, the bomb’s design, its dimensions—in short, everything known at Los Alamos, the entire workings!”.
BitLocker is somewhat reminiscent of a safe described in the book “Surely You’re Joking, Mr. Feynman!”. The most impressive safe in a top-secret laboratory had the same vulnerability as a simple filing cabinet. “…It was a colonel, and he had a much more sophisticated two-door safe with large handles that pulled out four steel bars, three-quarters of an inch thick, from the frame. <…> I examined the back of one of the impressive bronze doors and found that the combination dial was connected to a small lock that looked exactly like the lock on my cabinet in Los Alamos. <…> It was clear that the lever system relied on the same small pin that secured filing cabinets. <…>. Pretending to be busy, I began randomly turning the dial. <…> Within two minutes—click!—the safe opened. <…> When the safe door or top drawer of a filing cabinet is open, it’s very easy to find the combination. That’s exactly what I did while you were reading my report, just to demonstrate the risk to you.”
BitLocker encrypted containers are quite secure on their own. If you come across a USB drive encrypted with BitLocker To Go, it’s unlikely you’ll decrypt it within a reasonable time. However, in real-world scenarios involving encrypted disks and removable media, there are numerous vulnerabilities that can be easily exploited to bypass BitLocker.
Potential Vulnerabilities
You’ve likely noticed that the first time you activate BitLocker, you end up waiting for a long time. This isn’t surprising, as sector-by-sector encryption can take several hours, especially since reading all the blocks on terabyte-sized HDDs is a lengthy process. However, turning off BitLocker happens almost instantly—how is that possible?
When BitLocker is disabled, it does not decrypt the data. All sectors remain encrypted with the FVEK key. The only change is that access to this key is no longer restricted. All checks are disabled, and the VMK remains recorded in the metadata in an open form. Each time the computer is turned on, the OS loader reads the VMK (now without TPM checks, USB key requests, or password prompts), automatically decrypts the FVEK with it, and then decrypts files as they are accessed. For the user, this appears as if encryption is entirely absent, though the most observant might notice a minor decrease in disk subsystem performance. More specifically, there is no speed increase after disabling encryption.
What’s interesting about this approach is something else entirely. Despite its name (full disk encryption technology), when using BitLocker, some data remains unencrypted. The MBR and BS stay unencrypted (unless the disk is initialized in GPT), as do corrupted sectors and metadata. This unencrypted bootloader provides opportunities for exploitation. Faulty sectors can conveniently hide rootkits and other malware, while metadata contains a wealth of information, including key copies. If BitLocker is active, these are encrypted (though not as robustly as FVEK encrypts sector contents), and if deactivated, they remain unencrypted. These are all potential attack vectors. They are considered potential because there are simpler and more universal attack methods available.
Recovery Key
In addition to FVEK, VMK, and SRK, BitLocker uses another type of key designed as a contingency measure. These are recovery keys, which are associated with another common attack vector. Users fear forgetting their passwords and losing access to the system, and Windows itself recommends setting up an emergency entry. For this purpose, the BitLocker encryption wizard offers to create a recovery key at the final stage. Declining to create this key is not an option; you can only choose from various export methods, each of which is highly vulnerable.
By default, the key is exported as a plain text file with a recognizable name: “BitLocker Recovery Key #”, where “#” is replaced with the computer identifier (yes, right in the file name!). The key itself looks like this.

If you’ve forgotten (or never knew) the password set in BitLocker, simply look for the recovery key file. It’s likely saved among the current user’s documents or on their USB drive. It may even be printed out on a piece of paper, as Microsoft recommends doing. Just wait until your colleague steps out for a break (as usual, forgetting to lock their computer) and start your search.

To quickly find the recovery key, it’s convenient to narrow the search by file extension (txt), creation date (if you have an idea when BitLocker might have been enabled), and file size (1388 bytes, if the file hasn’t been edited). Once you locate the recovery key, copy it. With this key, you can bypass the standard BitLocker authorization at any time. Simply press Esc and enter the recovery key. You will log in without issue and can even change the BitLocker password to something new without needing the old one! This sounds like a trick straight out of the “hackery” playbook.

Uncovering BitLocker
A real cryptographic system is a compromise between convenience, speed, and reliability. It needs to include procedures for transparent encryption with on-the-fly decryption, methods for recovering forgotten passwords, and easy key management. All of these features can weaken any system, no matter how strong the algorithms it is based on are. Therefore, it’s not always necessary to look for vulnerabilities directly in the Rijndael algorithm or various AES standard schemes. It’s much easier to find them in the specifics of a particular implementation.
In the case of Microsoft, there are plenty of such “nuances.” For example, BitLocker keys are by default sent to SkyDrive and deposited in Active Directory. Why? Well, in case you lose them… or if Agent Smith asks. It would be inconvenient to keep a customer waiting, let alone an agent.
For this reason, comparing the cryptographic strength of AES-XTS and AES-CBC with Elephant Diffuser becomes secondary, as do recommendations to increase the key length. No matter how long the key is, an attacker can easily obtain it in an unencrypted form.
Retrieving escrowed keys from a Microsoft account or Active Directory is the primary method for unlocking BitLocker. However, if a user has not registered their account with Microsoft’s cloud and their computer is not part of a domain, there are still ways to extract encryption keys. During regular operations, their plaintext copies are consistently stored in RAM (otherwise, “transparent encryption” wouldn’t be possible). This means they can be accessed from a memory dump or a hibernation file.
Why are they stored there at all? Surprisingly, for convenience. BitLocker was designed to protect only against offline attacks, which always involve rebooting and connecting the disk to another OS, resulting in the clearing of RAM. However, by default, the OS performs a memory dump in case of a crash (which can be triggered) and writes its entire contents to the hibernation file whenever the computer enters deep sleep. Therefore, if there was a recent login to Windows with BitLocker activated, there’s a good chance to get a decrypted copy of the VMK key, which can then be used to decrypt the FVEK and subsequently the data itself. Shall we test it?
All the hacking methods for BitLocker mentioned above are integrated into one program — Forensic Disk Decryptor, developed by the Russian company “Elcomsoft.” It can automatically extract encryption keys and mount encrypted volumes as virtual disks, performing on-the-fly decryption.
EFDD also implements another sophisticated method for obtaining keys—an attack via the FireWire port. This method is particularly useful when it’s not possible to run your software on the target computer. The EFDD program is always installed on our own computer, and on the target system, we try to keep actions to a minimum.

For example, let’s run a test system with BitLocker active and “discreetly” perform a memory dump. This simulates a scenario where a colleague goes to lunch and forgets to lock their computer. We launch RAM Capture, and in less than a minute, we obtain a complete memory dump in a .mem file, matching the size of the RAM installed on the victim’s computer.

It doesn’t really matter what tool you use to create the dump. Regardless of the file extension, it will be a binary file that EFDD will automatically analyze to search for keys.
We save the dump onto a flash drive or transfer it over the network, then sit down at our computer and launch EFDD.

Select the “Extract keys” option and enter the path to the file containing the memory dump as the source of the keys.

BitLocker is a typical encryption container, similar to PGP Disk or TrueCrypt. These containers are quite reliable on their own, but client applications for using them on Windows tend to leave encryption keys scattered in the system’s memory. That’s why EFDD includes a universal attack scenario. The program quickly locates the encryption keys for all three types of popular encryption containers. Therefore, it’s advisable to select all options—just in case the target is secretly using TrueCrypt or PGP!

After a few seconds, Elcomsoft Forensic Disk Decryptor displays all the keys it has found in its window. For convenience, these can be saved to a file for future use.

Now BitLocker is no longer an obstacle! You can perform a classic offline attack, such as removing a colleague’s hard drive and copying its contents. To do this, simply connect it to your computer and run EFDD in the “decrypt or mount disk” mode.

After specifying the path to the files with saved EFDD keys, you can choose to either fully decrypt the volume or open it directly as a virtual disk. In the latter case, files are decrypted as they are accessed. In either scenario, no changes are made to the original volume, allowing it to be returned to its original state the next day as if nothing happened. The process with EFDD leaves no trace and works only with copies of the data, making it undetectable.
BitLocker To Go
Starting with Windows 7, the operating system introduced the ability to encrypt flash drives, USB-HDDs, and other external storage devices. This technology, known as BitLocker To Go, encrypts removable media just like local drives. You can enable encryption through the option in the context menu of File Explorer.

For new drives, you can use encryption only for the used space, since the free space is filled with zeros and there’s nothing to hide there. However, if the drive has already been used, it’s recommended to enable full encryption. Otherwise, the space marked as free will remain unencrypted. It may contain recently deleted files in plain text, which have not yet been overwritten.

Even quick encryption of only the used space can take from several minutes to several hours. This duration depends on the volume of data, interface bandwidth, storage characteristics, and the processor’s cryptographic computation speed. Since encryption is accompanied by compression, the free space on the encrypted disk typically increases slightly.
When you connect an encrypted flash drive to any computer running Windows 7 or later, the BitLocker wizard will automatically launch to unlock the drive. In File Explorer, it will appear as a locked drive until it is unlocked.

Here, you can use previously discussed methods to bypass BitLocker (such as searching for the VMK key in a memory dump or hibernation file), as well as new methods related to recovery keys.
If you don’t know the password but have managed to find one of the keys (either manually or using EFDD), there are two primary options for accessing the encrypted flash drive:
- Use the built-in BitLocker wizard for direct interaction with the USB drive.
- Use EFDD to fully decrypt the USB drive and create a sector-by-sector image.

The first option provides immediate access to the files stored on the flash drive, allowing you to copy or modify them, as well as write your own files. The second option takes much longer to execute (over half an hour), but it has its advantages. A decrypted sector-by-sector image allows for a more in-depth analysis of the file system at the level of a forensic lab. In this case, the flash drive itself is no longer needed and can be returned unchanged.

The created image can be opened directly in any program that supports the IMA format, or it can be converted to another format first (for example, using UltraISO).

In addition to finding the recovery key for BitLocker2Go, EFDD supports all other methods for bypassing BitLocker. You can systematically try all available options until you find a key of any type. The rest, including the Full Volume Encryption Key (FVEK), will be decrypted in sequence, granting you full access to the disk.
Conclusion
The BitLocker full-disk encryption technology varies across different versions of Windows. When properly configured, it allows the creation of cryptographic containers theoretically comparable in strength to TrueCrypt or PGP. However, the built-in Windows key management system undermines all algorithmic efforts. Specifically, the VMK key used to decrypt the main BitLocker key can be extracted in seconds using EFDD from a backup copy, memory dump, hibernation file, or via a FireWire port attack.
Once the key is obtained, it’s possible to carry out a classic offline attack, covertly copy, and automatically decrypt all data on the “protected” disk. Therefore, it is advisable to use BitLocker in conjunction with other security measures: an encrypted file system (EFS), rights management service (RMS), application launch control, device installation and connection control, as well as stricter local policies and general security measures.