Before you start
First of all, you need root privileges. Otherwise, some functions of the installed utilities won’t be available or may malfunction. This is especially actual for Android 10 and up.
The privilege escalation procedure is unique for each smartphone model and Android version. I use an oldie-goodie Samsung Galaxy S6 (SM-G920F) with Android 7.0 Nougat; this OS includes a special tool allowing users to gain root privileges. If your phone model and/or OS version are different, I suggest searching online for an instruction applicable to your device.
I am also going to use Termux, an easy-to-use and powerful terminal that supports many features of the Linux environment. Termux allows to execute commands in the proper environment and save time and effort on configuring this environment.
In addition, I recommend installing the tsu utility that grants the ability to execute commands on behalf of root. If, for some reason, it doesn’t work on your device, check this GitHub repository for the script that provides sudo for Termux. Note that Termux needs root privileges from the very beginning in order to perform required operations.
info
Important: if you use Magisk as the root method (too bad, there is no alternative for the majority of modern devices), make sure to allow root access for Termux in the settings and add Termux to exceptions for Magisk Hide.
Also, I strongly recommend to update the list of packages as you do with desktop versions of Kali.
$ apt-get update
Kali NetHunter
If you device is supported by Kali NetHunter, use this platform. Kali Linux developers created it specifically for Android phones. NetHunter includes many useful programs from the desktop version of Kali. The images are available on the official website. Overall, this toolkit is more powerful than the Termux-based one.
Installing Metasploit
As you are well aware, Metasploit Framework is a tool designed to create exploits and execute them on remote target machines.
You only need two commands to install Metasploit Framework (MSF) on Android 7 and up:
$ pkg install unstable-repo$ pkg install metasploitTo install MSF on Android 5.x.x-6.x.x, use the following commands:
$ curl -LO https://github.com/termux/termux-packages/files/3995119/metasploit_5.0.65-1_all.deb.gz$ gunzip metasploit_5.0.65-1_all.deb.gz$ dpkg -i metasploit_5.0.65-1_all.deb$ apt -f install
warning
If not specified otherwise, the above commands must be executed on behalf of an ordinary user; if you execute them on behalf of root, sever problems may occur.
For instance, if apt is run on behalf of root, SELinux contexts may become faulty, thus, making it impossible to install the required packages.
The MSF installation can take a while. Don’t close the Termux session until it is complete!
warning
Never update MSF manually by editing $PREFIX/: this may cause problems with dependencies.
To make sure that everything works properly, I run Metasploit:
$ msfconsole
As you can see, 2014 exploits are now at your disposal.
Installing ngrok
Ngrok is a crossplatform utility designed to create secure tunnels from publicly accessible points to local network services. In addition, ngrok intercepts traffic and saves it in logs for subsequent analysis.
Prior to continuing, make sure that your phone is connected to the Internet (i.e. Mobile Data is on) and Mobile Hotspot is active.
First of all, update the packages and install Python 2:
$ pkg update && pkg upgrade && pkg install python2Next, you have to register a ngrok account.
After the registration, you will be transferred to your account page where you have to find and copy your AuthToken as shown on the screenshot below.

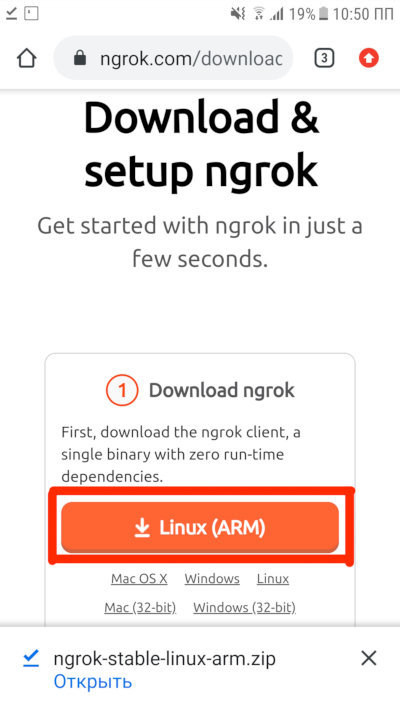
Then download ngrok for Linux systems with the ARM architecture.

Go to Termux and find the directory containing the downloaded ngrok archive, for instance:
$ cd /sdcard/DownloadsType ls to make sure that the archive is there. Then unpack it:
$ unzip ngrok-stable-linux-arm.zipAfter that, enter ls and check whether the ngrok executable file has appeared. If it’s not there, go to the directory containing it prior to making the next step:
$ cd ngrok-stable-linux-armand move the executable file to the Termux home directory:
$ mv -v ngrok /$HOMECheck the new file location and go to that folder using the cd and ls commands.
Now you have to set the flag that makes the file executable:
$ chmod +x ngrokand run it for the first time:
$ ./ngrokRemember the AuthToken you have copied earlier? Paste it into the command below so that ngrok knows who uses it:
$ ./ngrok authtoken <token>Then launch the server:
$ ./ngrok http 80You will see the Ngrok screen like the one shown below.

Terrific! Now you are ready to attack any target!
Installing sqlmap
According to its official website, sqlmap is an open-source penetration testing tool that automates the detection and exploitation of SQL injection flaws and takeover of database servers.
The installation is as easy as a piece of cake. You can either install the stable version (1.4.3) or the newest one (1.4.5.34). To install version 1.4.3, enter:
$ pkg install sqlmapTo run the utility, type the command:
$ sqlmap -u <URL>
To install the latest version that is still in development, clone the official sqlmap project on GitHub:
$ git clone https://github.com/sqlmapproject/sqlmap.gitThen go to the folder containing sqlmap:
$ cd sqlmapUsing python2, run sqlmap with the same mandatory parameter:
$ python2 sqlmap.py -u <URL>
Now your smartphone can access more than half of all databases present on the Internet! Use this powerful tool in a wise and ethical way; otherwise, you may get in trouble with the law!
Installing aircrack-ng
Aircrack-ng is a network software suite used to detect wireless networks, intercept their traffic, and audit WEP and WPA/WPA2-PSK encryption keys.
Its installation is not that simple. I suppose you are aware how difficult it is to switch the Wi-Fi adapter of your smartphone to the monitoring mode. Official Termux repositories include the iwconfig utility that manages wireless networks, and you have to install it:
First, install auxiliary utilities:
$ pkg install root-repoNow you can install iwconfig and other tools required to work with wireless networks:
$ pkg install wireless-toolsThe iw utility must be installed separately:
$ pkg install iwNow you have to log into the system with root privileges and create a monitor instance:
$ tsu$ iw phy0 interface add mon0 type monitorThen check your adapters and their statuses:
$ iwconfigIf anything is displayed incorrectly, check whether Wi-Fi is enabled and make sure that your device is not connected to a Wi-Fi network.
Deploy the monitor:
$ ifconfig mon0 upOf course, not all Android devices support the monitoring mode. Use the bcmon app to check whether your phone can do this or not. In addition, bcmon enables the monitoring mode on compatible Broadcom chips (Nexus and some other devices). For other phones, you have to buy a USB-OTG adapter and connect to it a Wi-Fi adapter supported by the desktop version of Kali. You will also have to rebuild the kernel to add the required drivers to it. If you are not skilled in kernel building, check the respective forums, for instance, XDA-developers. Chances are high that you find there a ready-to-use Kali build with the required kernel.
Then you can install aircrack-ng:
$ pkg install aircrack-ngTo review the short manual, type:
$ man aircrack-ng
Time to launch airodump-ng:
$ airodump-ng -i mon0Voila! Now you can intercept traffic of open access points, send to them deauth frames to disconnect annoying neighbors various devices from the Internet, and capture handshakes required to crack passwords.
Installing Nmap
Nmap is a network scanning utility that finds open ports, performs tracerouting, and checks for vulnerabilities using NSE scripts. More information on this topic can be found in the article Boost your Nmap! Empowering iconic network scanner with NSE scripts.
In my case, the Nmap capacity is slightly reduced because I use the version ported to Android. It is available in official Termux repositories:
$ pkg install nmapTo review the short manual, type:
$ nmap
For intense scanning, I use the following parameters:
$ nmap -T4 -A -v
Installing fully featured Kali Linux on your phone
Kali NetHunter can be installed on some phones, but this goes beyond the scope of this article. I am going to install an image of a fully featured Kali on my phone and connect to its desktop via VNC. This Kali Linux image allows to use programs that cannot be run in Termux (e.g. BeEF-XSS).
First of all, download from Google Play the following apps: LinuxDeploy (allows to install Linux distributions on Android devices), BusyBox (a suite of essential utilities), and VNC Viewer (the VNC client). It does not matter that, in reality, this machine will run at 127.0.0.1.
Next, download a Kali image for Android. I used the full version with the ext4 file system suitable for the ARM architecture (fifth file from the top). You have to extract the image 5.5 GB in size from the archive and place it into the / folder on your mobile device. Then rename it into linux..
Google Play offers plenty of BusyBox varieties from various manufacturers. Many devices require specific BusyBox versions; otherwise, some utilities won’t work properly on them. I used the most popular BusyBox Free package and installed its files to /. Remember this directory: you will need it to update the operating environment.
Now go to LinuxDeploy, press the distribution configuration icon in the lower right part of the screen, and select the Kali Linux distribution. The architecture should be configured automatically; if it’s not, try armhf.

Then change the user password (it’s located below).
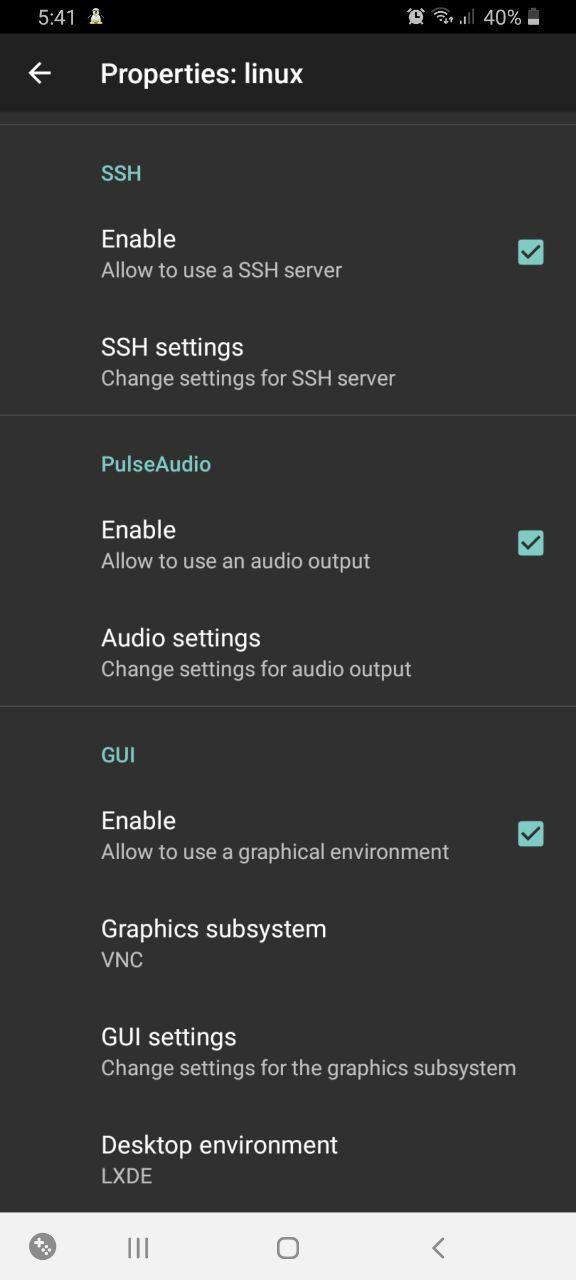
In the very end, you will find settings pertaining to the deployment of SSH and VNC servers; their boxes must be checked. If you don’t need graphics, SSH will suffice. Then download any SSH client and connect to your Kali machine located at the address 127.. To avoid downloading extra apps, you can use openssh-client directly in Termux: just open one more Termux tab for it.
If you need graphics, check the respective box; I am going to explain how to connect to the Kali desktop via VNC a bit later.

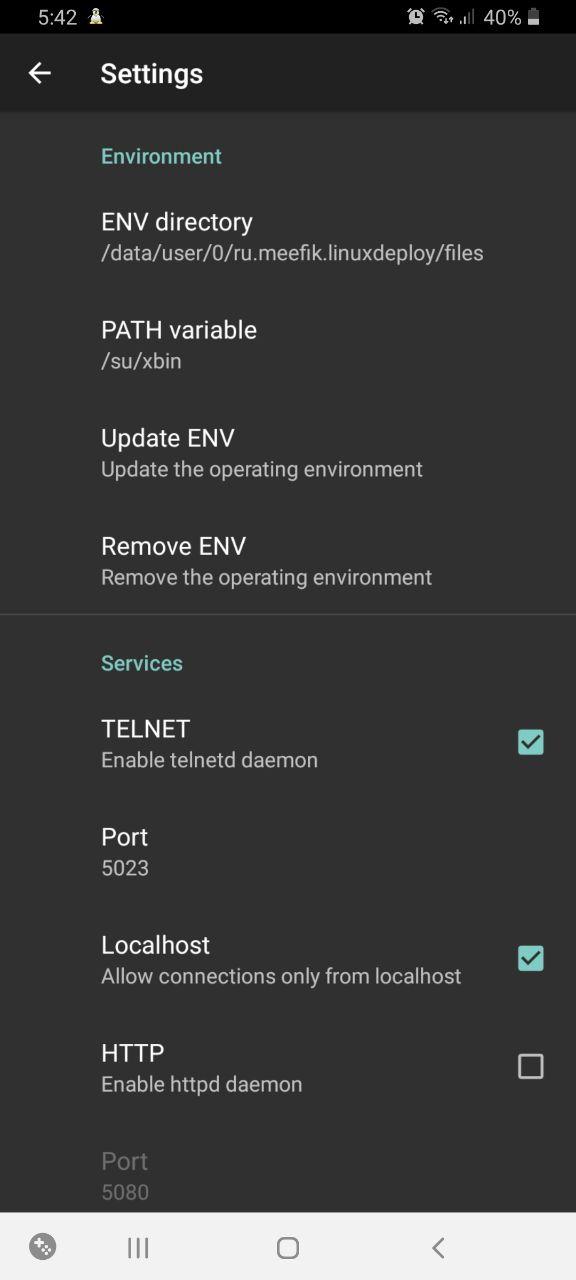
Time to set up the operating environment. In the settings of the PATH variable, specify the path to the folder where BusyBox has installed its packages.

And update the operating environment (the button below).
To configure the container, go to the main page, press the menu button in the upper right corner, and select “Configure”.
Now you can start the container by pressing the respective button below. Check whether any strings displayed at the start include the word “fail”. If such strings exist, make sure that you have correctly specified PATH of the operating environment and properly configured the container. If everything seems to be correct, try doing it all over again using the armhf architecture.
Open VNC Viewer or any other VNC client, add a connection to localhost (127.0.0.1) and give it a name. Then connect, confirm that you want to continue using the unencrypted connection and enter the user password you have earlier specified in LinuxDeploy.
Success! It’s up and running!

Of course, this distribution is pretty old, but its soft is still operational: as you can see, Nmap is running smoothly.
To test the system, I use the command:
$ nmap -A -v <IP>The -A parameter instructs Nmap to scan the OS, identify its version, use scripts, and perform tracerouting. The -v parameter is used to display more details in the output.
See scan results on the screenshot below.

Conclusions
Now your portable device can crack databases, scan networks, intercept traffic, and perform many other attacks. Use these powers only for ethical purposes and may the Force be with you!
