Background
Recently a friend approached me and said: “My flash drive is broken, can you look at it? I don’t have copies of some files stored on it.”
I took the flash drive and promised to do whatever I can. All information I got from my friend was: “Windows doesn’t see this USB drive anymore.”
A few days later, I had some spare time and started examining the memory stick in order to figure out how to recover data stored on it.
info
This article describes flash drive restoration in Linux. It’s also possible to do this in Windows using various utilities and proprietary products (e.g. R-Studio), but their analysis goes beyond the scope of this study.
After connecting the flash drive to a Linux laptop, I realized that the hardware part of the device is alive -only the data stored on it are corrupted.
Then I imaged the drive.
Safety precautions: imaging the drive
The main data recovery principle is not to destroy yet more data by your actions. All the operations described in this article were performed with the image of the bricked flash drive. To create an image, use the following commands (don’t forget to specify the path to your device):
$ dd if=/dev/sdc of=flash.img bs=512Alternatively, you can use the ddrescue command:
$ ddrescue /dev/sdc flash.img /tmp/flash.logI prefer the second method because ddrescue attempts to read the data in several passes. If you instruct it to keep a log, the utility can interrupt the reading and continue from where it stopped. In addition, the program generates a handy report stating how much data were read and how much were not, and estimates the time remaining until the image capture is completed.
It’s strongly recommended to work with a copy of the image: you may accidentally corrupt it, and if the flash drive is dying from hardware problems, you may not be able to create a new image. The same almighty dd utility can be used to create partial copies of the image and restore damaged sections to their initial state.
$ ddrescue flash.img backup_part.img bs=10M count=1$ ddrescue backup_part.img flash.img conv=notruncThe notrunc parameter instructs dd not to truncate the destination file after reading all data contained in the source file.
After imaging the flash drive, I examined its content and was somewhat surprised.
$
00000000 ff ff ff ff ff ff ff ff ff ff ff ff ff ff ff ff |…………….|*
00400000 01 76 0a 00 02 76 0a 00 03 76 0a 00 04 76 0a 00 |.v…v…v…v..|
00400010 05 76 0a 00 06 76 0a 00 07 76 0a 00 08 76 0a 00 |.v…v…v…v..|
00400020 09 76 0a 00 0a 76 0a 00 0b 76 0a 00 0c 76 0a 00 |.v…v…v…v..|
00400030 0d 76 0a 00 0e 76 0a 00 0f 76 0a 00 10 76 0a 00 |.v…v…v…v..|
00400040 11 76 0a 00 12 76 0a 00 13 76 0a 00 14 76 0a 00 |.v…v…v…v..|
…
The first 4 MB of data in the image are filled with 0xFF. Is the flash memory block damaged? Or was someone trying to erase the data? Or was it an application crash? But in fact, it doesn’t matter why the area is overwritten. What does matter is that both the partition table and the file system structure are destroyed. Still, some pattern can be distinguished. I see a sequence of 32-bit numbers increasing by one (i.e. in the LittleEndian format): 0x000a7601, 0x000a7602, 0x000a7603… Therefore, the file system on the flash drive likely was FAT32.
To restore the data, I try the TestDisk utility first.
TestDisk
TestDisk is a powerful data recovery program.
About TestDisk
The utility was developed by Christophe Grenier and is distributed under the terms of the GNU General Public License (GPL v2). Its primary purpose is to recover lost partitions and restore the boot sector.
TestDisk performs the following functions:
- Fix partition table, recover deleted partitions;
- Recover FAT32 boot sector from its backup;
- Rebuild FAT12/FAT16/FAT32 boot sector;
- Fix FAT tables;
- Rebuild NTFS boot sector;
- Recover NTFS boot sector from its backup;
- Fix MFT using MFT mirror;
- Locate ext2/ext3/ext4 Backup SuperBlock;
- Undelete files from FAT, exFAT, NTFS and ext2 filesystem; and
- Copy files from deleted FAT, exFAT, NTFS and ext2/ext3/ext4 partitions.
I run TestDisk using the command below:
$ testdisk flash.imgThe main menu looks as follows.
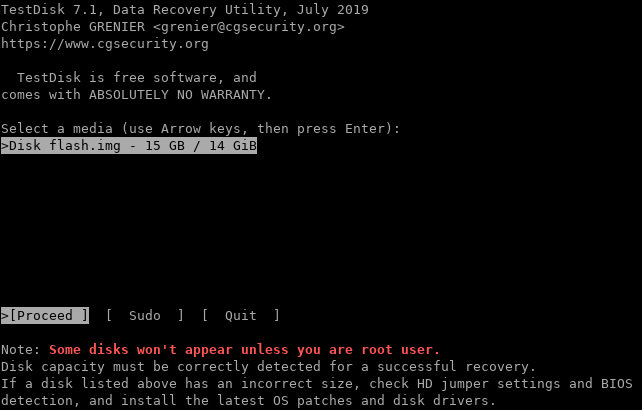
I select menu items Proceed →Intel →Analyse and see the following screens.
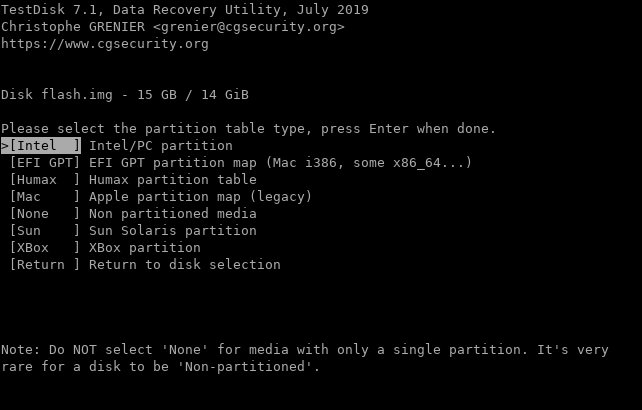


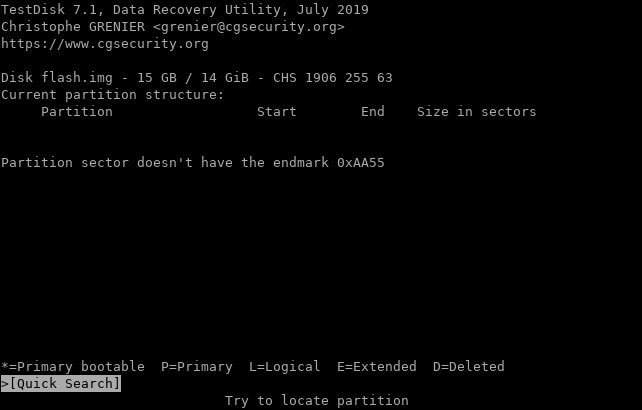
Expectedly, TestDisk fails to locate the partition table since it’s overwritten. I try to restore it by quick-searching the disk for partitions. For that purpose, I select the Quick Search function.
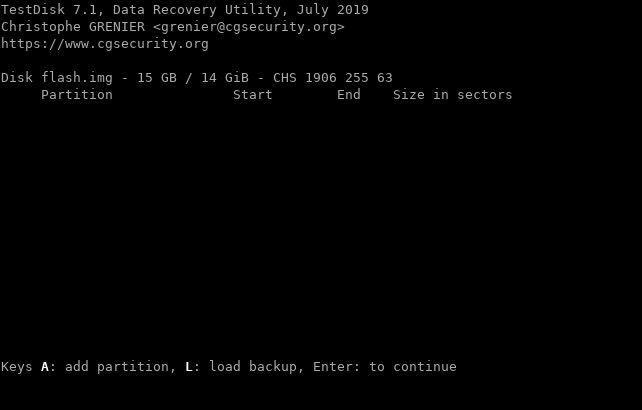
TestDisk finds nothing, and this is also expectable because the FAT32 partition is damaged. TestDisk suggests me to set partitions manually, but I have no idea of what was where… So, I put this utility aside for now. To exit, press q several times.
Time to try another creation of the same programmer: PhotoRec.
PhotoRec
PhotoRec is a program designed to recover lost and deleted files. Initially, it was developed to restore pictures from digital camera memory (thus the *PHOTO REC*overy name). Over time, the utility learned how to restore other types of data, but retained its original name.
About PhotoRec
PhotoRec searches for known file headers. If there is no data fragmentation, which is often the case, it can recover the whole file. PhotoRec recognizes numerous file formats, including ZIP, Office, PDF, HTML, JPEG, and various graphics file formats. The full list of file formats recovered by PhotoRec contains more than 390 file extensions (some 225 file families).
If the data aren’t fragmented, the recovered file should be either identical to or larger than the original file in size. In some cases, PhotoRec can learn the original file size from the file header; if so, the recovered file is truncated to the correct size. If, however, the recovered file is smaller than its header specifies, it’s discarded. Some files, such as *.MP3 types, are data streams. In this case, PhotoRec parses the recovered data and stops the recovery when the stream ends.
I apply the utility to the flash drive image and see what happens.
$ photorec flash.img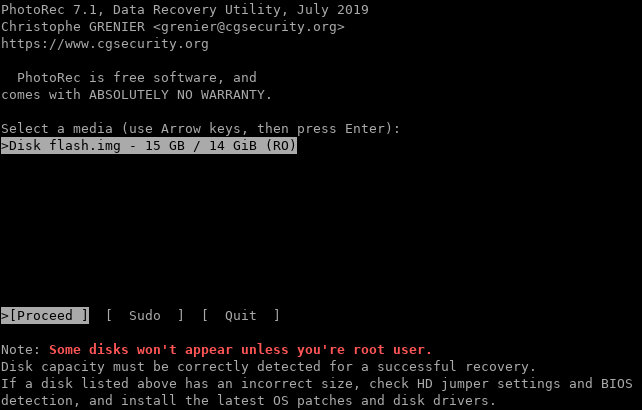
I see a familiar interface, select Proceed →Search →Other, specify the folder to save the recovered files (better to create it in advance), press the c button, and wait.
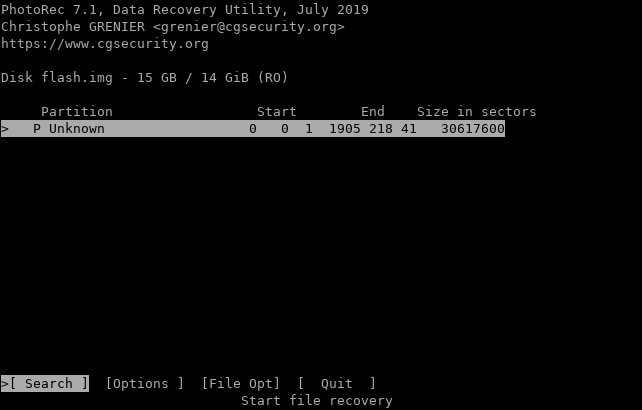

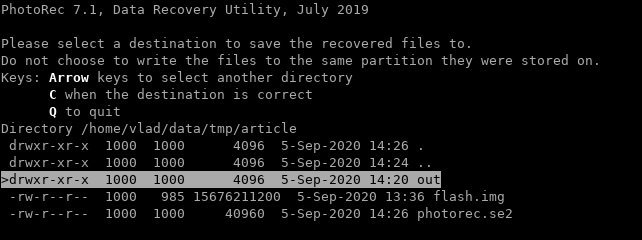
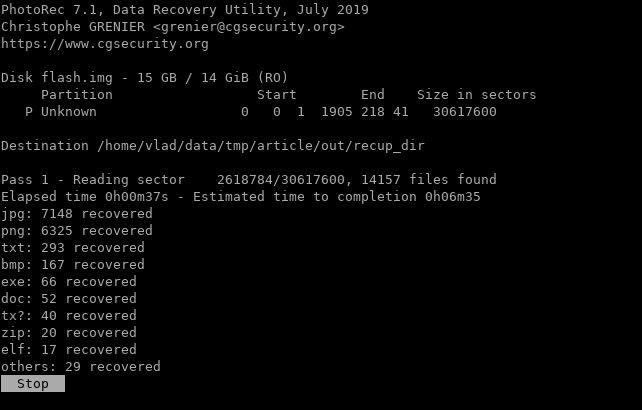
Finally, I get several folders with thousands of files inside them.

A quick examination shows that some files have been restored: documents, pictures, and sources. But there are neither file names, nor their creation dates, nor folder structure. In addition, it turns out that the flash drive had stored some kind of documentation in the form of HTML pages with a bunch of small pictures. Therefore, a search for valuable files can take hours…
To make things even worse, fragmented files either weren’t recovered or were damaged (truncated).
It seems that I have no choice but to restore the FAT32 structure manually.
Repairing FAT32
To restore the FAT32 structure, one must thoroughly review the documentation, compute values of the key parameters, and then write them to the FAT32 boot record. Schematically, the FAT32 structure looks as follows.

It includes the boot sector, the FSInfo structure, two copies of the FAT tables and the data region. The boot sector (also known as the Boot Parameter Block (BPB)) contains the data describing the partition characteristics and the bootloader code.
The FAT table stores records with numbers of the next clusters in a file/directory chain, the mark of the last cluster in the chain (the 0xFFFFFFFF value), or the mark of a free cluster (the 0 value). The data region begins with the root directory; the content of the other areas depends on the data contained in the root directory entries and in respective chains of the FAT table. For more information on the file system, see the sources below.
www
- FAT32 File System Specification (Microsoft, DOC)
- Understanding FAT32 Filesystems (GitHub, PDF)
- Design of the FAT file system (GitHub, PDF)
A Hex editor is required analyze and edit the image. Personally, I prefer 010 Editor: it allows to specify structure templates using a C-like language and highlights structure fields in the editor.
So, I open the flash drive image in 010 Editor.
Searching for offsets
First of all, I have to compute addresses where the FAT32 partition and the first copy of the FAT table begin.
Also, I have to find out whether only the first FAT table copy is damaged or damages affect both copies. I know from the documentation that the FAT table begins with the sequence F8 FF FF FF (0xFFFFFFF8 in Little Endian) and search for it.
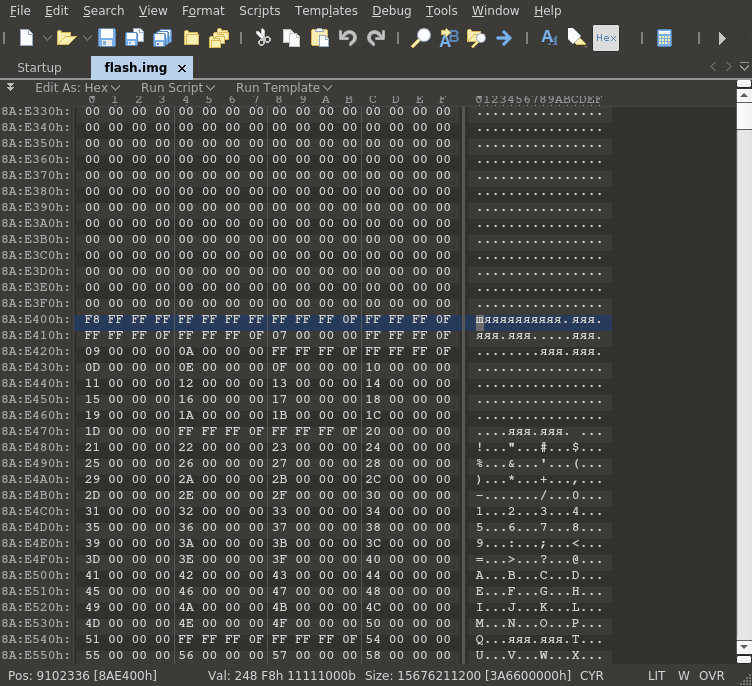
I am lucky: such a signature exists. Therefore, only the first copy of the table is damaged, and I can copy the data from the second table to the first one. It’s necessary to keep in mind that the flash drive could be disconnected abruptly, and the second copy might be not identical to the first one (there could be not enough time to save changes). Still, this method allows to recover more data than PhotoRec. At least, I will get additional file names, their creation dates, correct chains for fragmented files, and even the folder structure.
I check the address: it’s 0x8AE400. So, this is the beginning of the second copy of the table. Now I have to compute the length of the table. Of course, I could manually browse through the dump until I see the root directory data. But there is an easier way. Because I deal with two copies of the same table, the record from where the remaining part of the first copy begins must be also present in the second copy of the table. And the difference between them is the table size!
I search for the sequence 01 76 0A 00 seen earlier in the output of the hexdump command. The program quickly finds matching variants, but I stop the search by pressing ESC: only the first two occurrences are of interest to me.
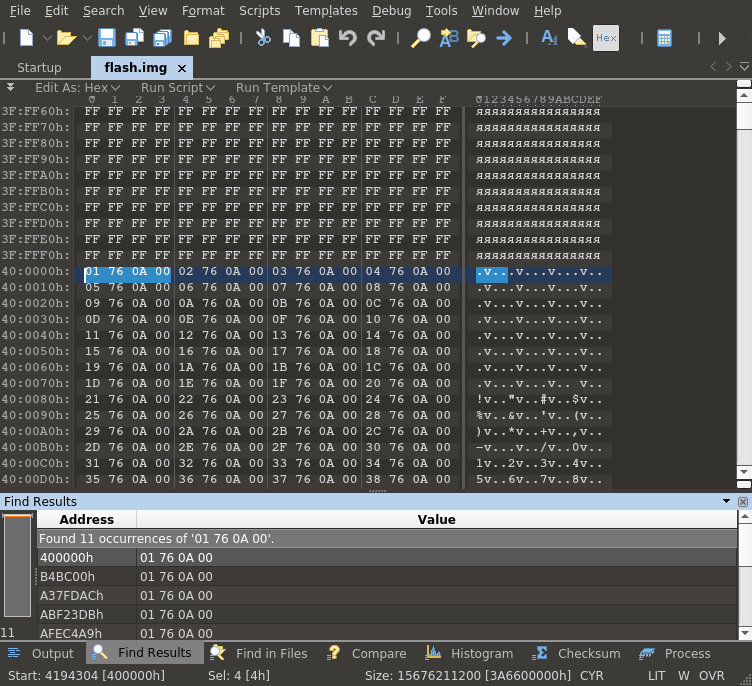
The first occurrence (its address is 0x400000) is the first undestroyed record in the first FAT table copy. All the space before it is overwritten.
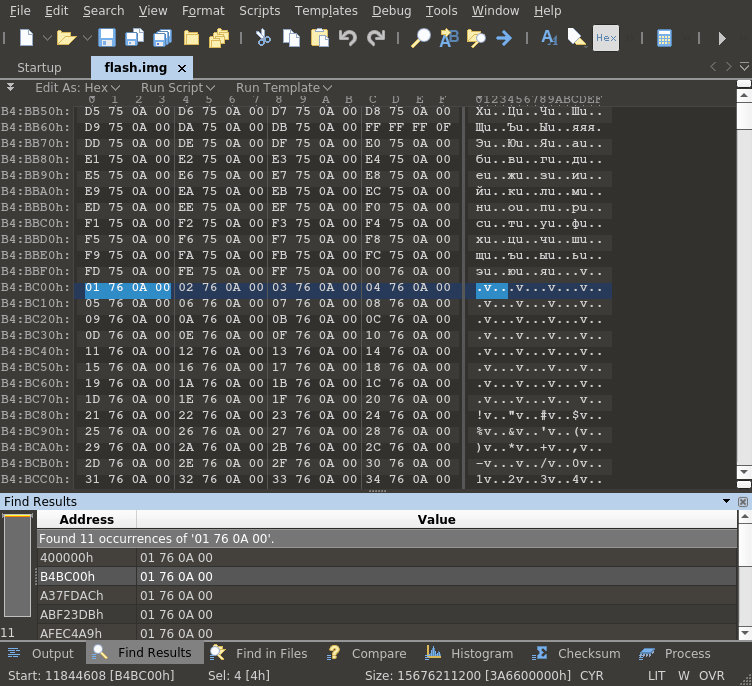
The second occurrence (its address is 0xB4BC00) pertains to the same record in the second FAT table copy. Prior to it, I see the intact chain data.
I calculate the size of the FAT table: 0xB4BC00 – 0x400000 = 0x74BC00 bytes. Then I deduct this size from the starting address of the second copy of the table and get the starting address of the first copy: 0x8AE400 – 0x74BC00 = 0x162800.
Now I have the offset of the first FAT table (and, accordingly, of the second one). Time to find out the starting address of the partition. According to the official documentation and above-listed articles, the first copy of the table normally begins from sector 32. Each sector is 512 bytes in size; so, I can calculate the starting address of the partition: 0x162800 – 32×512 = 0x15E800.
Also, if I know the size of the tables and offsets of their starting addresses, I can calculate the starting address of the root directory.
The root directory offset is: 0x15E800 + 32×512 + 2×0x74BC00 = 0xFFA000; it begins with the Transcend record; apparently this is the FAT32 label.
Terrific! I know the offsets of the tables, the offset of the root directory, and the starting address of the partition. Now I have to find out what to write to the boot record. Of course, I could dig into the documentation and compute each and every value. But instead, I am going to make a knight’s move! I will create an empty file whose size matches the partition size, format it into FAT32, copy the first 32 sectors, paste them into the flash drive image, and voila!
Creating boot record
First, I have to find out the partition size.
$
-rw-r–r– 1 user users 15676211200 Sep 5 13:36 flash.img
The partition size equals the flash drive size less the partition offset: 15 676 211 200 – 0x15E800 = 15 674 775 552 bytes.
To reduce the disk space occupied by my empty image, I use a handy feature of the ext2 file system: sparse files.
$ dd if=/dev/zero of=test.img bs=1 seek=15674775552 count=0$ mkfs.vfat -f 2 -F32 -n TEST test.imgI open the file in 010 Editor and use the Drive template (you might have to install it, see the Templates Repository menu). If a window pops-up warning that this may take a while, just tell the program to continue executing the script.
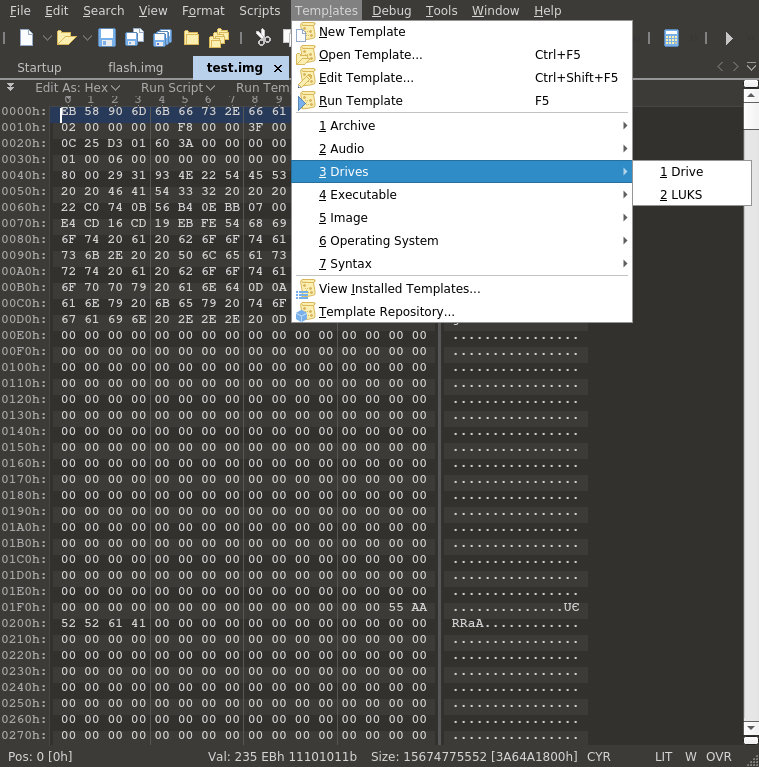
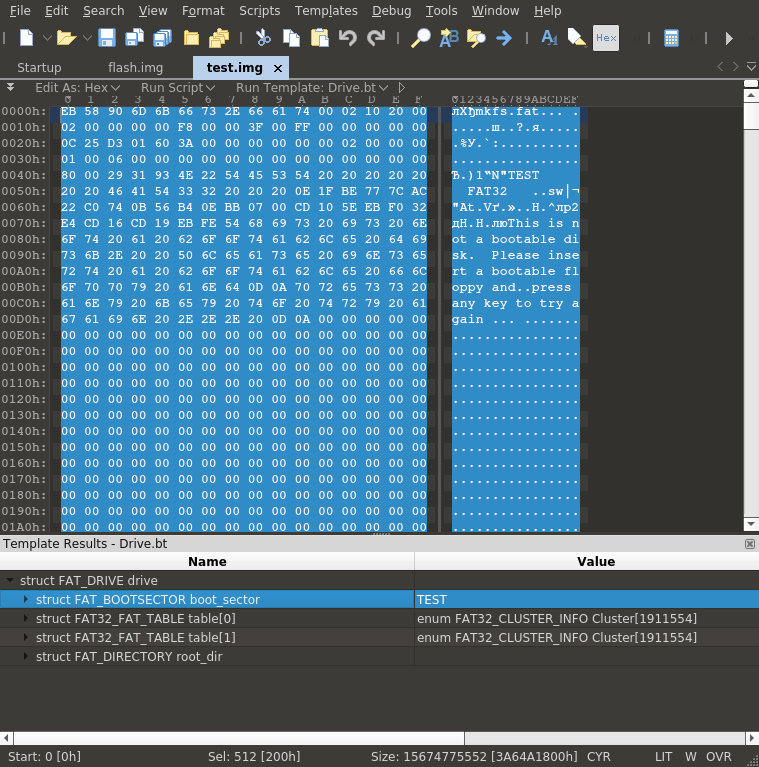
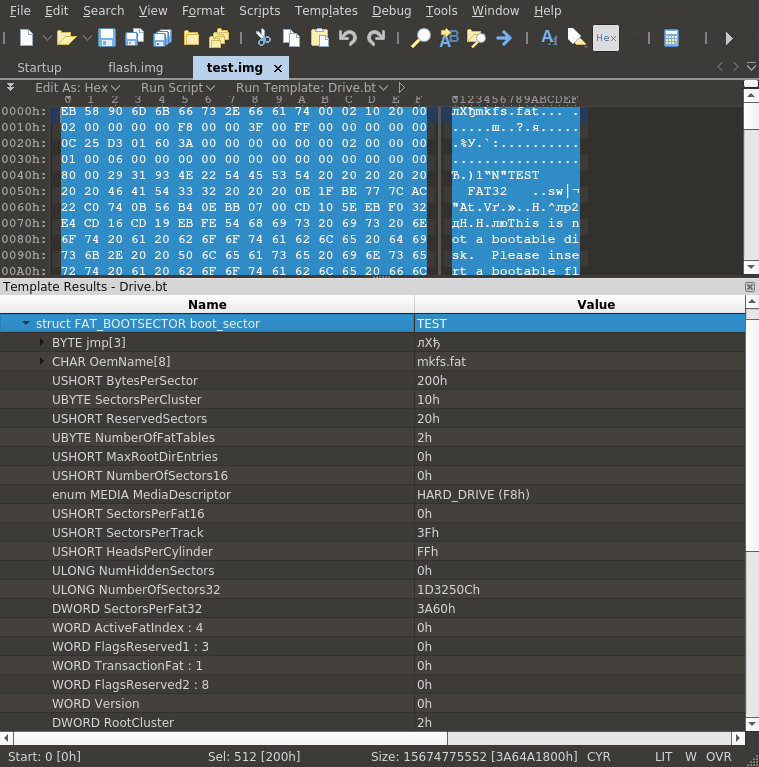
Great! Now I have boot sector structures filled-in with data; time to transfer them to my image.
I use the mouse to select the structure FAT_BOOTSECTOR in the Templates Results window; the data range is selected automatically, and I copy it to the clipboard by right-clicking in the data window and selecting Copy).
Assembling Frankenstein’s monster
To build the image, I have to insert the generated boot sector into it and write the second copy of the FAT table over the first one.
The boot sector is already in the RAM. I jump to the computed address (i.e. 0x15E800) and paste the data from the buffer.

It turns out that 0xFF bytes are located after the pasted boot sector, while in the generated image, the boot sector is followed by more data.

Something is wrong: the FSInfo structure must begin immediately after the first (i.e. boot) sector. In addition, a copy of the boot sector is located at offset 0xC00 (in case it’s damaged). So, I decide to copy all the 32 sectors (0x4000 bytes) to the flash drive image. Concurrently, I reconfirm that the image generated by mkfs contains the sequence F8 FF FF FF at offset 0x4000. After pasting the data to the flash drive image, I find myself at the address 0x162800, which exactly matches the address that I has previously calculated.
Now I have to write the second FAT table copy over the first one. I select a data range with the length of 0x74BC00 bytes starting at the address 0x8AE400, copy it, and paste at the address 0x162800. It’s convenient to use the Select Range menu option (Ctrl + Shift + A) for this purpose: you just enter the starting address and size in the respective fields.

After pasting the FAT copy, I find myself in the beginning of the root directory. So far, everything goes fine.
Time to mount this partition and see what can be read from it.
Reading data
To mount the file system, I use the following commands.
$ $ $
ls: unable to access ‘mnt/28-02-~1’: Input/output error
ls: unable to access ‘mnt/map_n’: Input/output error
10_10_2016
2019.07.13
28-02-~1
BOOTEX.LOG
……
Interesting… The image has been mounted, and I can see names of files and folders. However, there are some weird errors as well. I request more details (some entries in the output are purposively omitted).
$
…
d????????? ? ? ? ? ? map_n
…
This is strange. I examine the contents of the directories and see that an error definitely exists somewhere.
$
ls: unable to access ‘mnt/some_dir/%PDF-1.4.’$’n”%╨’: Input/output error
ls: reading directory ‘mnt/some_dir/’: Input/output error
The file name matches a PDF header. Apparently, the entry for this directory points to a cluster that contains a PDF.
Magic didn’t happen, and I have to find out what’s the problem. Prior to doing this, I am going to make my life a little easier by creating a partition table. Important: the seemingly smart Drive template in 010 Editor cannot start parsing at a certain offset, but only from the file beginning.
To create a partition table, I use fdisk. I create one partition starting from sector 2804. The offset is nonstandard (the default value is 2048); perhaps, there were two partitions on the flash drive. The first one was very small and was completely destroyed. But this doesn’t really matter. To calculate the starting sector, I divide the starting address of the partition by the sector size: 0x15E800/512 = 2804.
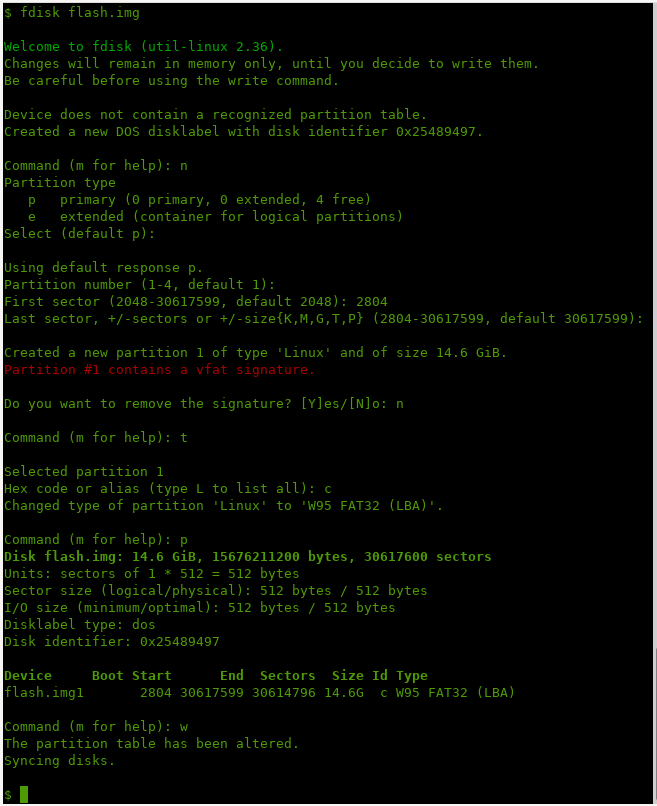
Important: fdisk detected the presence of a FAT32 (vfat) partition at this offset and asked whether I want to remove the vfat signature (the answer must be no). In addition, it’s important to change the partition type to W95 (code 0c).
Analyzing errors
It took me almost an hour to identify the error: I had to review specifications and compare values in structures parsed by the Drive template in 010 Editor. A brief description of my searches is as follows.
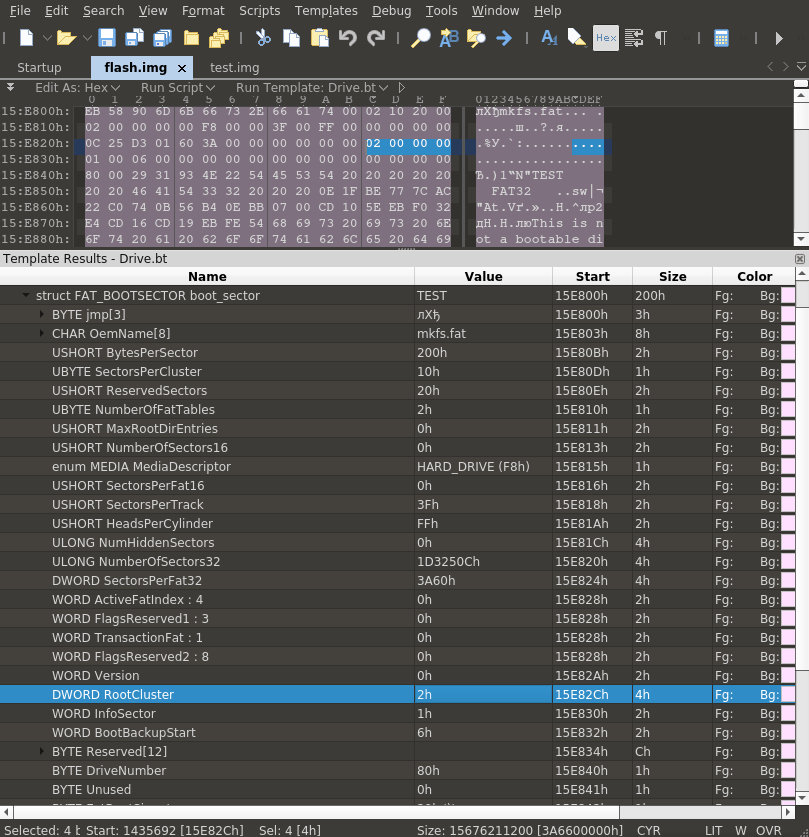
First, I noticed that the root directory is located at the address 0xFFA800, not 0xFFA000.
My first guess was that the cluster size was determined incorrectly. The fdisk utility created clusters consisting of 16 sectors whose size is 512 bytes (see the fields BytesPerSector and SectorsPerCluster on the above screenshot). So, I played with values of these parameters for a while remounting the image every time.
Loop
Because the image contains a partition table, there is no need to run mount with all the required parameters (-oro,) every time. Instead, it’s possible to connect a loop device and instruct the kernel to read the partition table from it.
$ sudo losetup -f flash.img$ sudo partprobe /dev/loop0An alternative variant involves the losetup command:
$ sudo losetup -f -P flash.imgAfter that, you can mount and remount the partition as many times as you need.
$ sudo mount -oro /dev/loop0p1 mnt/$ sudo umount mnt/A good thing is that you don’t need to reconnect the loop device after each edit: the partition offset in the image doesn’t change.
Alas, all my efforts were in vain; the situation got only worse.
After a while, I realized that the second copy of the table also begins in a wrong place.
At this point, I noticed the field SectorsPerFat32 (see the screenshot). This field provides the size of the FAT table in sectors. Its value is 0x3A60, while it should be: 0x74BC00/512 = 0x3A5E. The difference is two sectors for each copy of the FAT table, which translates into 2x2x0x200 = 0x800 bytes – this is the difference between the correct root directory offset and the wrong one I had used.
I correct the value in the field (this can be done right in the structure window, which is very convenient), save the changes, and check the result.
$ sudo mount -oro /dev/loop0p1 mnt/$ ls mnt/Terrific! No more errors! The structure seems to be correct.
I apply the fsck utility to the image and see again a bunch of errors. However, the first thing that attracts my attention is that the boot records don’t match each other.
$
fsck.fat 4.1 (2017-01-24)
There are differences between boot sector and its backup.
This is mostly harmless. Differences: (offset:original/backup)
36:5e/60
Not automatically fixing this.
FATs differ but appear to be intact. Using first FAT.
….
Important: the -n parameter instructs fsck not to make any corrections.
I have no choice but to correct the second copy. Too bad, the Drive template cannot parse the second copy of the boot sector; so, I have to locate the required byte and edit it manually. It’s not a big deal to find this byte: the offset from the boot sector beginning (in this case, it’s 0x15F424) is 0x24, and 0x60 is replaced by 0x5E.
I run fsck again.
Surprisingly, fsck reports errors, claims that the copies of the FAT table don’t match each other (even though I had copied them), and complains about file lengths. Perhaps, this is because of the numerous mounts and other operations performed with the image?
I restore the original flash drive image from the backup (remember the safety precautions described above?), repeat all the operations (copying the tables, the boot sector (including adjustments in the SectorsPerFat32 field), and the copy of the boot sector), and run fsck. The result looks surprisingly good.
$
fsck.fat 4.1 (2017-01-24)
Free cluster summary wrong (1911553 vs. really 899251)
Auto-correcting.
Leaving filesystem unchanged.
/dev/loop0p1: 32183 files, 1012304/1911555 clusters
Generally speaking, the presence of such errors is logical because I didn’t recalculate values in the fields of the FSInfo structure. But if necessary, fsck can be run without the -n parameter to fix these minor bugs. Then you can take a new 16 GB flash drive, write the restored image on it, and return it to your friend. Impressive and elegant, isn’t it?
Conclusions
I think you got the point: if TestDisk and PhotoRec cannot help, don’t give up and use your wits. It took me some two hours in total to recover virtually all the data from a bricked flash drive, including the directory structure and metadata.
In addition, I strongly recommend to backup your data as often as possible. This applies both to the images used to restore lost information and your own flash drives. You see, in this world, there’s two kinds of people: those who never backup their data and those who do this. Guess who’s smarter!
