Be Your Own Auditor: Do‑It‑Yourself Security
Admins—and especially infosec auditors—often have to assess the security of a large number of hosts in a very short time. In the enterprise space, there are dedicated tools for this, such as network vulnerability scanners. I’m sure readers are familiar with everything from the open-source OpenVAS engine to commercial products like Nessus and Nexpose. However, these tools are typically used to find outdated and therefore vulnerable software and then kick off patch management. Moreover, not all scanners account for the nuances of built-in protection mechanisms in Linux and other open-source products. And last but not least, cost matters: commercial tools are usually only feasible for organizations that budget for them.
That’s why today we’ll look at a specialized set of freely available tools that can assess your system’s current security posture, identify potential risks—such as unnecessary services exposed to the internet or insecure default configurations—and even suggest ways to remediate the issues they uncover. Another advantage of these tools is the ability to replicate standard assessment playbooks across farms of any number of Linux systems and build an auditable body of evidence in the form of logs and standalone reports.
Practical Aspects of Security Auditing
Viewed through an auditor’s lens, testing approaches fall into two categories.
First is compliance with so‑called compliance requirements: verifying that mandatory security controls defined by an international standard or best practice are in place. Classic examples include PCI DSS for payment IT systems, SOX404, NIST-800 series, and MITRE.
Second is a purely rational approach, guided by the question “What else can we do to improve security?” There are no mandatory requirements here—just your knowledge, a clear head, and skilled hands. For example, upgrading the kernel and/or application packages, enabling volume encryption, enforcing SELinux, and configuring the iptables firewall.
Everything that falls under the second approach is commonly referred to as Hardening, which can be described as “measures aimed at strengthening the baseline security of an operating system (or application), primarily using built-in capabilities.”
Compliance is typically assessed when preparing for mandatory audits like PCI DSS or other certification audits. Here, we’ll focus on the hardening aspect. Most major vendors publish Hardening Guidelines for their products—documents with advice and best practices for strengthening security using built-in controls and product specifics. For example, such guides are available from Red Hat, Debian, Oracle, and Cisco.
[ INFOHardening is an infosec term for securing a system or application by minimizing vulnerabilities—typically using only built-in utilities and security features.
By the way, Hacker already had a similar article about configuring Hardening options, but it focused purely on setup. We’ll first check the system with specialized utilities—that is, run a security audit and assess the current security posture—and only then enable the necessary security options. Alternatively, if the server is already hardened, our tools can verify that and possibly suggest further improvements.
Tools Overview
1. Lynis — auditing, system hardening, compliance testing
Lynis is first on our list and arguably the most feature-rich Linux auditing tool. Despite that, it’s very easy to use and highly transparent—every test and its result is shown on screen. The utility scans your current security settings and assesses the system’s hardening state. Any warnings and critical security alerts are printed to the terminal and also saved to a separate log file, grouped by category. Beyond security insights, Lynis can also report general system information, details about installed packages, potential configuration issues, and kernel update status.
The developers claim support for a wide range of operating systems: from Arch, BackTrack, and Kali to various flavors of Debian/Ubuntu, RHEL/CentOS, and SUSE; the BSD family (FreeBSD, NetBSD, OpenBSD, DragonFly BSD); as well as more exotic platforms like HP-UX, Solaris 10 and later, TrueOS, and macOS.
Comprehensive documentation with detailed descriptions and usage examples is available in the Lynis Documentation section on the official CISOfy website. If you don’t want to stick to the built-in tests, you can develop your own. You’ll find more details in the Lynis Software Development Kit. And for anyone still undecided about installing the tool, the developers provide a short demo that shows the installation and first run.
In addition to the free version we’ll be using below, the developers offer an enterprise-grade solution. This augments the standard package with a web-based administration interface, optional dashboards, extra documentation (hardening snippets), and a detailed remediation plan for identified issues. And that’s not all—the solution is also available as a cloud service (Software-as-a-Service).

Lynis runs hundreds of individual tests to determine the system’s security posture. The audit itself consists of a series of steps, from program initialization through to report generation.
Since Lynis is a highly flexible, multi-purpose tool, it’s used for a variety of purposes. For example, common use cases for Lynis include:
- Security audit (user-defined baseline scenario)
- Compliance testing (e.g., PCI DSS, HIPAA, SOX 404, OpenSCAP, NSA benchmarks)
- Vulnerability scanning (e.g., outdated software)
- Penetration testing mode (attempted privilege escalation)
- System hardening and optimization (unapplied kernel tunables, unnecessary daemons, etc.)
You can install the tool in several ways—for example, by downloading it from the GitHub repository:
git clone https://github.com/CISOfy/lynis
cd lynis
./lynis
as well as by installing it from the Debian/Ubuntu repository:
sudo apt-get update
sudo apt-get install lynis
And for RPM-based distributions (after adding the appropriate repositories first):
yum install linus -y
Installation on macOS:
$ brew search lynis
$ brew install lynis
To run Lynis, you only need to provide at least one option. For example, to run all available tests, use the -c option (check all):
# Typical test suite
sudo lynis audit system
# Full test suite
sudo lynis audit system -c
# Scan a remote host
audit system remote <host>
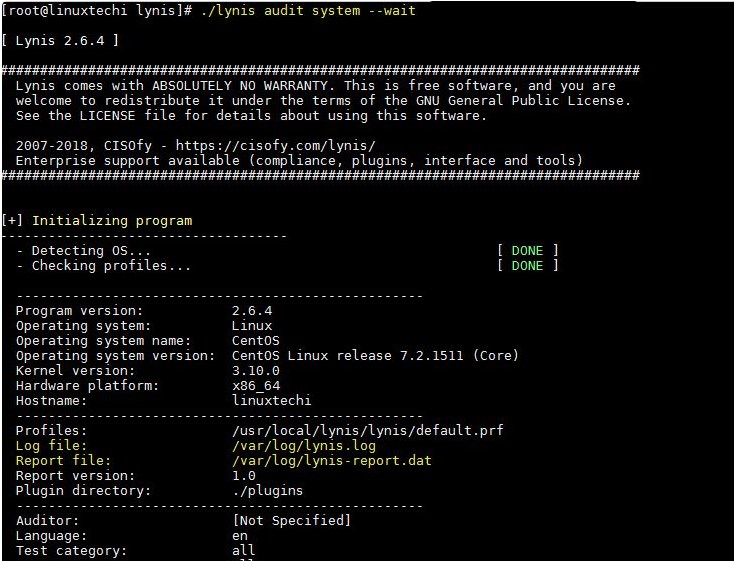
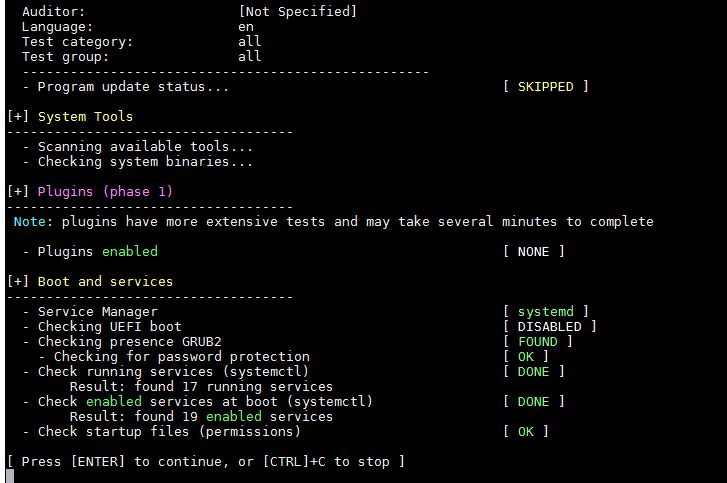
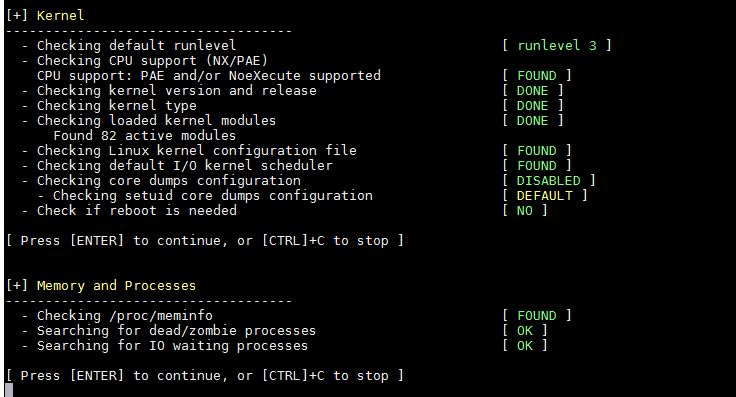
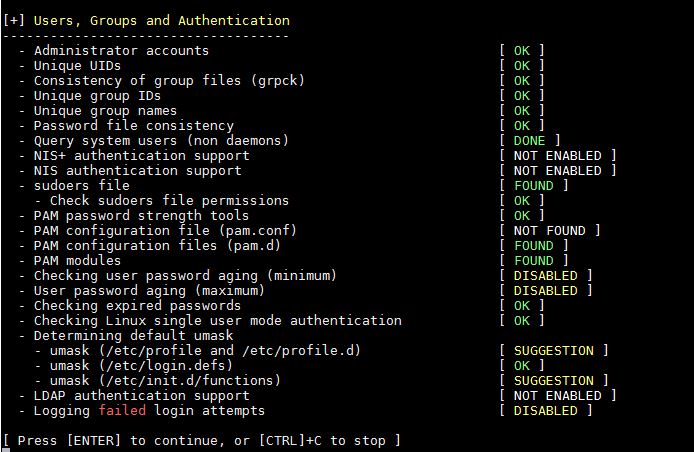
Before running an audit, it’s always a good idea to check whether a new version of Lynis is available:
lynis update info && lynis update check
Besides the default mode, Lynis also supports an — unprivileged mode:
lynis audit --pentest
If you want to include the name of the auditor who ran the test, just add the -auditor < parameter:
sudo lynis audit system -c -auditor Daddy
At any point during the audit, press Enter to continue or Ctrl+C to forcibly stop. Test results are written to the Lynis log at /. Note that the log is overwritten on each subsequent run of the utility.
To run tests regularly and automatically, you can schedule a Cron job using the -cronjob flag. In this mode, the tool runs with the specified profile (config) and won’t display any interactive prompts, questions, or warnings. All results are saved to the log. For example, here’s a script that launches the tool with the default config once a month:
#!/bin/sh
AUDITOR="automated"
DATE=$(date +%Y%m%d)
HOST=$(hostname)
LOG_DIR="/var/log/lynis"
REPORT="$LOG_DIR/report-${HOST}.${DATE}"
DATA="$LOG_DIR/report-data-${HOST}.${DATE}.txt"
cd /usr/local/lynis
./lynis -c –auditor "${AUDITOR}" –cronjob > ${REPORT}
mv /var/log/lynis-report.dat ${DATA}
# End
Save this script to /etc/cron.monthly/lynis. And don’t forget to create the log directories (/usr/local/lynis and /var/log/lynis), otherwise it may not function properly.
You can view a list of all commands you can invoke:
lynis show commands
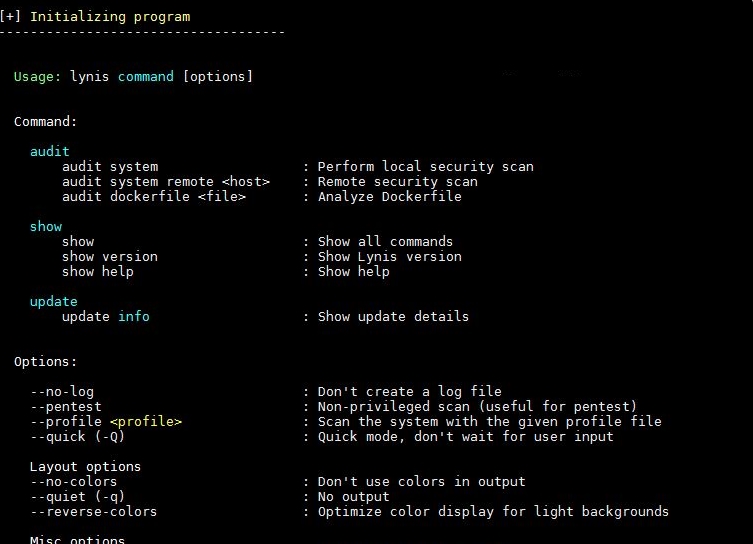
Curious readers can take a look at the default configuration settings:
lynis show settings
Brief guide to using the utility:
man lynis
The possible statuses for the check results are limited to the following: NONE, WEAK, DONE, FOUND, NOT_FOUND, OK, WARNING.
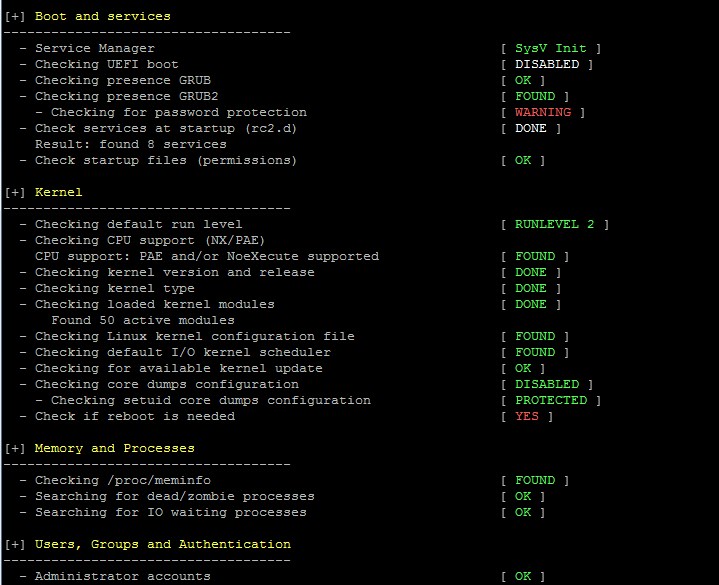
Running specific tests in Lynis
In practice, you may only need to run a subset of tests—for example, if your server only acts as a mail server or runs Apache. To do this, we can use the -tests option. The command syntax is as follows:
lynis -tests "Test-IDs"
If the sheer number of test IDs is overwhelming, you can use the group parameter -test-category. With this option, Lynis runs only the test IDs that belong to a specific category. For example, we’re going to run the firewall and kernel tests:
./lynis -tests-category "firewalls kernel"
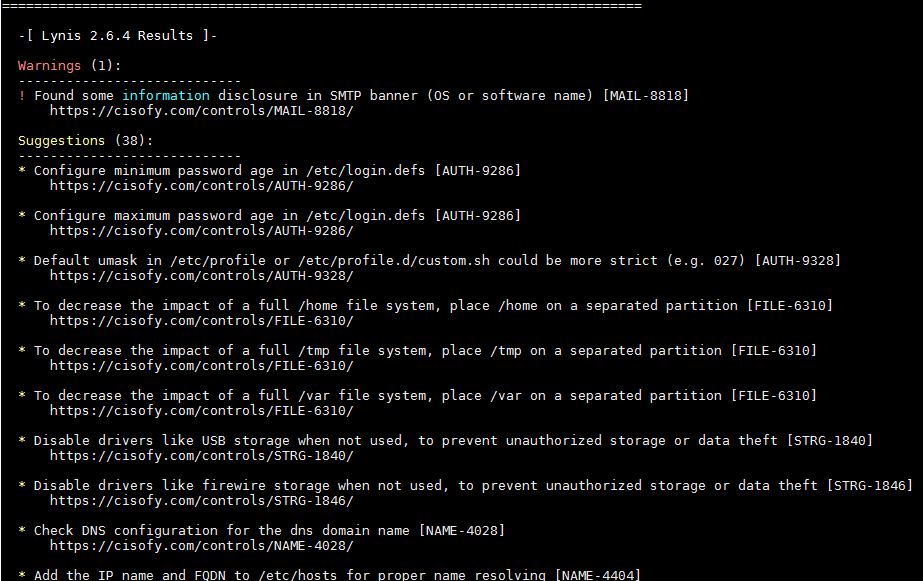
You can view the full list of available tests in the Controls section.
In addition, Lynis’s functionality can be extended with various plugins: you can write your own, or simply drop new ones into the existing plugin directory.
Suggested Fixes
All warnings will be listed after the results. Each entry starts with the warning text, followed by the name of the test that generated it in parentheses. The next line suggests a fix, if one is available. The final line is a URL where you can find details and additional guidance on how to resolve the issue.

Audit Profiles
Audit profiles are defined in files with the .prf extension located in the / directory. The default profile has a predictable name: default.. The developers advise against editing it directly; any changes you want to make to the audit should be added to the custom. file in the same directory.
Create and edit a custom profile:
touch /etc/lynis/custom.prf
sudo nano /etc/lynis/custom.prf
In this file, you can specify a list of tests to exclude from the Lynis audit. For example:
- FILE-6310: partition check;
- HTTP-6622: nginx installation test;
- HTTP-6702: Apache installation test.
To exclude a specific test, use the skip-test directive and specify the test ID. For example:
# Is nginx installed?
skip-test=HTTP-6622
# Is Apache installed?
skip-test=HTTP-6702
Hardening State Assessment
After all tests have run, at the end of each audit output from the tool (just below the recommendations section), you’ll find a section that looks roughly like this:
Lynis security scan details:
Hardening index : 57 [############.........]
Tests performed : 216
Plugins enabled : 0
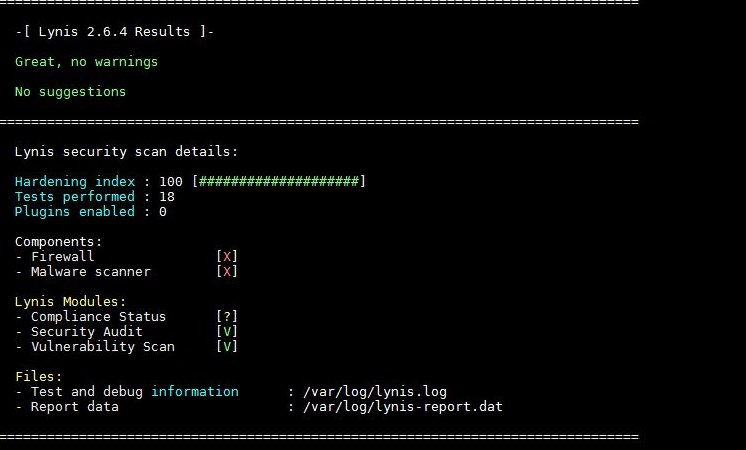
This numeric result shows both the number of tests passed and the system’s security score—the hardening index—the final figure Lynis uses to rate a server’s overall security posture. It’s important to remember that this index changes as you fix warnings and implement Lynis’s recommendations. So after applying fixes, a subsequent audit may produce a very different number!
[ WARNINGAnything you do as root demands extra care and accountability. Only perform actions you fully understand and are confident about. Don’t skip backups or snapshots.
2. Lunar — a UNIX security auditing tool based on several security frameworks
Lunar is a set of native Bash scripts that assess a target Linux host and generate a security audit report. The tool is based on the CIS benchmarks and other global security frameworks. It claims support for all major platforms: on Linux—RHEL and CentOS from version 5, SLES from version 10, Debian/Ubuntu, and Amazon Linux; plus Solaris from version 6, macOS (recent builds), FreeBSD (partial), AIX (partial), and even ESXi.

Among other things, this utility supports the Amazon Web Services (AWS) cloud platform and Docker containers. A detailed description of all features, along with examples of how to run the tool and initiate tests, is provided in the Wiki documentation on GitHub.
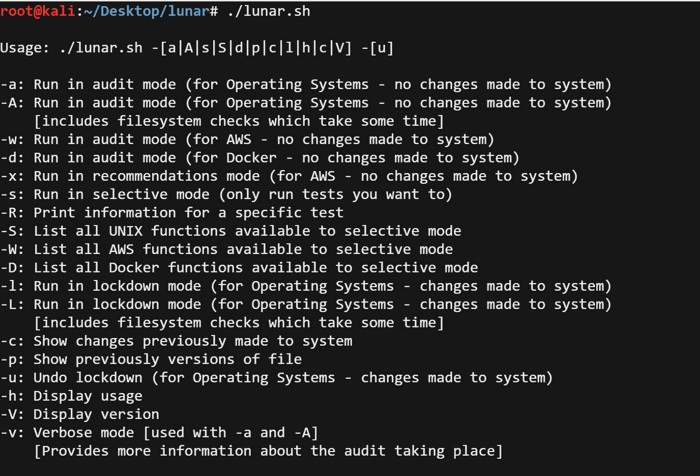
Run in audit mode, i.e., without making any changes to the system:
./lunar.sh -a
Running in audit mode with more detailed output:
./lunar.sh -a -v
List the tests:
./lunar.sh -S
Run only shell-based tests:
./lunar.sh -s audit_shell_services
Running in remediation mode, that is, with changes being made to the system:
./lunar.sh -l
Preview the proposed system tweaks before committing them to configuration files:
./lunar.sh -d
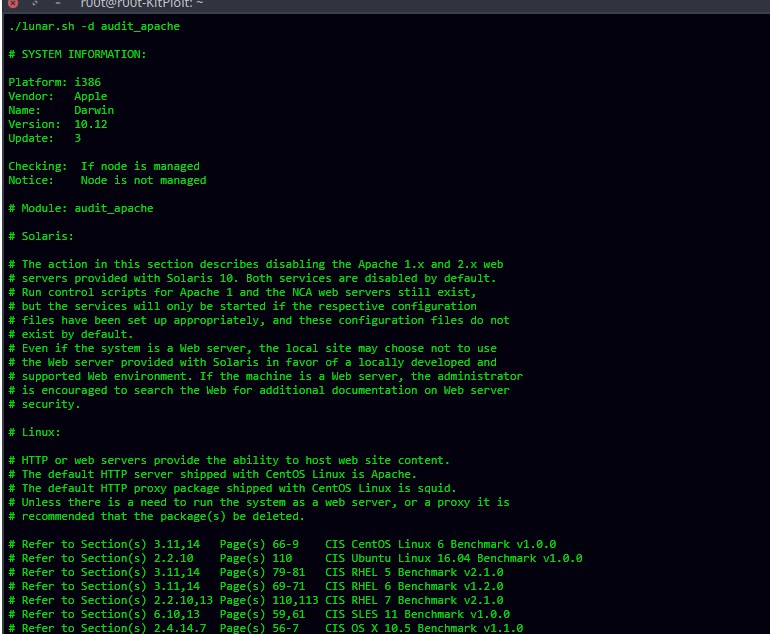
3. Nix Auditor — a CIS Audit made easier
Nix Auditor is another script for auditing whether a Linux system’s security meets CIS Benchmark requirements. It targets RHEL, CentOS, and other RPM-based distributions.
The developers claim the following advantages of Nix Auditor:
- Scanning speed — a basic OS audit takes under 120 seconds, with the report available immediately.
- Accuracy — validated across multiple CentOS and Red Hat releases.
- Configurability — the source code and documentation are on GitHub, making it easy to tailor the code to your OS and the specific system components you need to assess.
- Ease of use — just make the startup script executable and you’re ready to run the checks.
Example command sequence for downloading the utility from a GitHub repository and then running the script:
git clone https://github.com/XalfiE/Nix-Auditor.git
cd Nix-Auditor
chmod +x nixauditor
./nixauditor
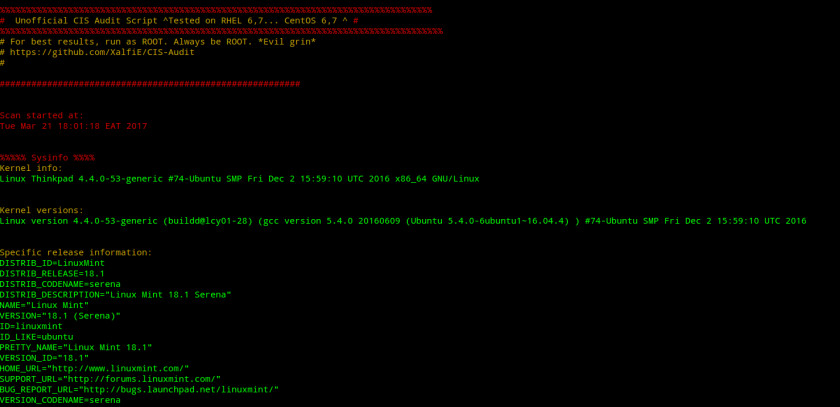
4. Loki — Simple IOC and Incident Response Scanner
The Loki utility isn’t a traditional information security auditing tool, but it’s great for finding signs of compromise—something that can reasonably be considered part of audit practice.

According to the developers, their tool offers the following capabilities:
I. Four ways to detect a breach:
- File names (regex matching against the full file path)
- YARA rules scan (YARA; match signatures against file contents and process memory)
- Hash checking (compare scanned files against hashes—MD5, SHA‑1, SHA‑256—of known malicious files)
- C2 callback checks (compare communication endpoints against C2 IOCs)
II. Additional checks:
- Regin filesystem check (via –reginfs)
- Anomaly detection in system and user processes
- Scanning of unpacked SWF files
- SAM dump analysis
- DoublePulsar check — attempt to detect the DoublePulsar backdoor listening on TCP ports 445 and 3389
Let’s briefly touch on how Loki determines whether a system has been compromised. Common indicators of compromise (IoCs) that suggest a computer has been compromised (i.e., breached) include:
- Appearance of malware on the computer (viruses, backdoors, Trojans, keyloggers, crypters/packers, crypto‑miners, etc.), as well as hacker tools (e.g., for network reconnaissance, vulnerability exploitation, credential harvesting).
- New, unknown executables or other files showing up, even if the antivirus engine doesn’t flag them as malicious.
- Abnormal network activity (connections to remote hosts, unknown programs opening listening ports, etc.).
- Abnormal disk I/O activity and increased system resource usage (CPU, RAM, swap).
Before starting the installation, you need to install a few dependencies: Colorama (adds colored output in the console), psutil (a process inspection utility), and the YARA package if it isn’t already installed.
Alright, let’s begin. Installation on Kali Linux (the YARA package must be installed beforehand; it’s included by default in Kali Linux):
sudo pip2 install psutil netaddr pylzma colorama
git clone https://github.com/Neo23x0/Loki
cd Loki/
python2 loki-upgrader.py
python2 loki.py -h
Installation on Ubuntu/Debian:
sudo apt-get install yara python-yara python-pip python-setuptools python-dev git
sudo pip2 install --upgrade pip
sudo pip2 install -U setuptools
sudo pip2 install psutil netaddr pylzma colorama
git clone https://github.com/Neo23x0/Loki
cd /home/download/Loki
python2 loki-upgrader.py
python2 loki.py -h
Installing on BlackArch:
sudo pacman -S yara python2-pip python2-yara
sudo pip2 install psutil netaddr pylzma colorama
git clone https://github.com/Neo23x0/Loki
cd /home/download/Loki
python2 loki-upgrader.py
python2 loki.py -h
Usage example
Some startup options:
optional arguments:
  -h, --help      show this help message and exit
  -p path         Path to scan
  -l log-file     Log file
  --printAll      Print all files that are scanned
  --noprocscan    Skip the process scan
  --nofilescan    Skip the file scan
  --noindicator   Do not show a progress indicator
  --reginfs       Do check for Regin virtual file system
  --onlyrelevant  Only print warnings or alerts
  --nolog         Don't write a local log file
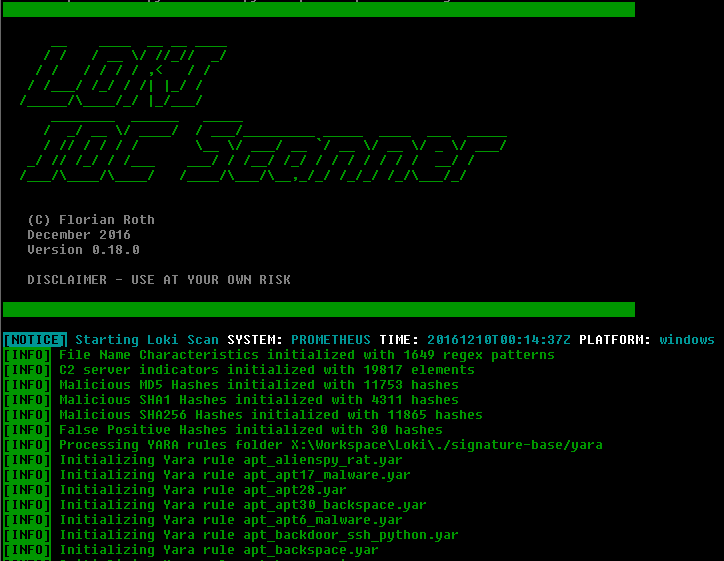
By the way, after installing the tool, it’s a good idea to check the local IoC database for updates; you can do this with the Upgrader command:
Loki - Upgrader
optional arguments:
  -h, --help   show this help message and exit
  --sigsonly   Update the signatures only
  --progonly   Update the program files only
  --nolog      Don’t write a local log file
  --debug      Debug output
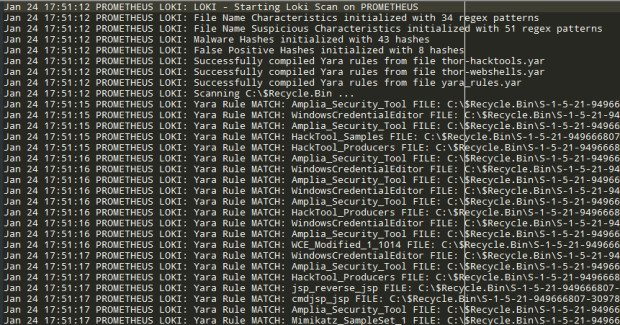
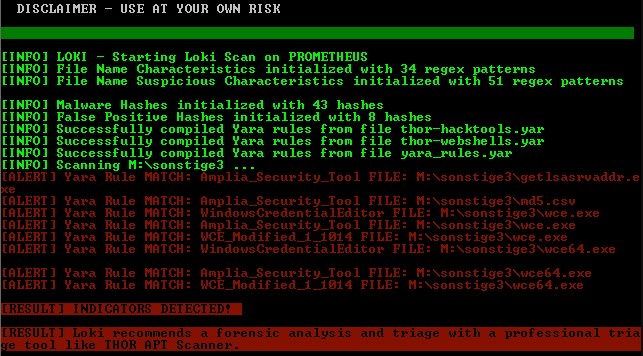
First, pay close attention to items highlighted in red. The DESCRIPTION field explains what the file is and why it’s considered suspicious. These are typically viruses, backdoors, and similar malware.
5. Linux Security Auditing Tool (LSAT)
LSAT is the final tool in our Linux security auditing roundup. Its standout feature is a modular design that, according to the developer, enables rapid addition of new checks. As of now, the utility claims support for the most common platforms: Linux — Gentoo, Red Hat, Debian, Mandrake on the x86 architecture; SunOS (2.x), Red Hat, Mandrake on SPARC; and Apple macOS.
LSAT is installed by building from source and comes with a pre-made autoconfig, autoconf. If you don’t plan to customize it, you can jump straight to compilation:
./configure
make
# You can also install LSAT system-wide; it will be installed to /usr/local/bin
make install
# and clean up post-installation files
make clean
Alternatively, on Debian/Ubuntu, you can install the package directly from the repository:
sudo apt-get install lsat
The utility is run with the /lsat command and additional options:
/lsat [OPTIONS]
Options:
    -d        diff current and old md5, output in lsatmd5.diff
    -f        Force a specific distribution test. Distro names are:
                  redhat
                  debian
                  mandrake
                  solaris
                  gentoo
                  macosx
                  If no -f option, lsat will guess. If lsat can
                  not guess the distribution, default is redhat.
    -a        Show this (advanced) help page
    -o        Output file name -- default is lsat.out
    -r        Check rpm integrity -- redhat or mandrake only
    -s        Silent mode
    -v        Verbose output
    -w        Output file in html format
    -x        eXclude module(s) in filelist from checks..
Conclusion
We’ve covered the most popular, powerful, and practical tools for auditing Linux server security. You should now be well prepared for certification or any other compliance audit. This will also help you objectively assess your current security posture and automatically or semi‑automatically tune your Linux fleet to achieve the highest possible hardening index.
