
Not too long ago, we shared my extensive collection of console utilities for automating tasks. Encouraged by the positive feedback, I went through my archives once again and unearthed a few more handy tools that make life easier in small ways. Some of these tools have repeatedly saved the day when I needed to get things done quickly without reinventing the wheel.
Networking
Netfilter
Every sysadmin at some point should build a network, give the accountant a piece of their mind, and set up a firewall. You’ll handle the first task on your own, the second is completely optional, and we’ll focus on the third—configuring the firewall.
Philippe Humeau from CrowdSec has created some excellent scripts for automating defense setup and routing configuration on systems that support iptables/nftables. The package also includes configurations for knockd, which implements port knocking elegantly.
There is support for multiple uplinks and VPNs. Additionally, the author makes an effort to keep the scripts for iptables and nftables as similar as possible to ease the migration for those who haven’t switched yet.

adbwebkit
Adbwebkit is a useful web interface for interacting with an Android device via ADB. It consists of a set of PHP scripts that parse the output of the ADB client on the system and display the results in a web interface. This tool was helpful for me when working with a phone that had a malfunctioning touchscreen but still required system access.
The installation is done in four commands, including setting up dependencies:
sudo apt install -y git php
git clone https://github.com/jxroot/adbwebkit.git
cd adbwebkit
php -S 127.0.0.1:8000
After that, the web interface will be accessible at localhost:8000.

Dashboards
Cockpit
Cockpit is not just a dashboard; it’s a comprehensive web console for server management.
The installation process is extremely straightforward:
sudo apt update
sudo apt install cockpit
sudo systemctl enable cockpit
sudo systemctl start cockpit
Next, you need to open port 9090 on the firewall:
sudo ufw allow 9090/tcp
Next, you can set up access via an nginx reverse proxy using hostnames with valid SSL certificates on standard ports.
After completing all the steps, go to < and you’ll see the login window. Enter the username and password of an active server account, and you’ll be taken to the dashboard.

Cockpit can generate graphs for most key metrics, including disk usage.

The Host tab provides options for server management, such as installing updates, managing services, power management, and so on.
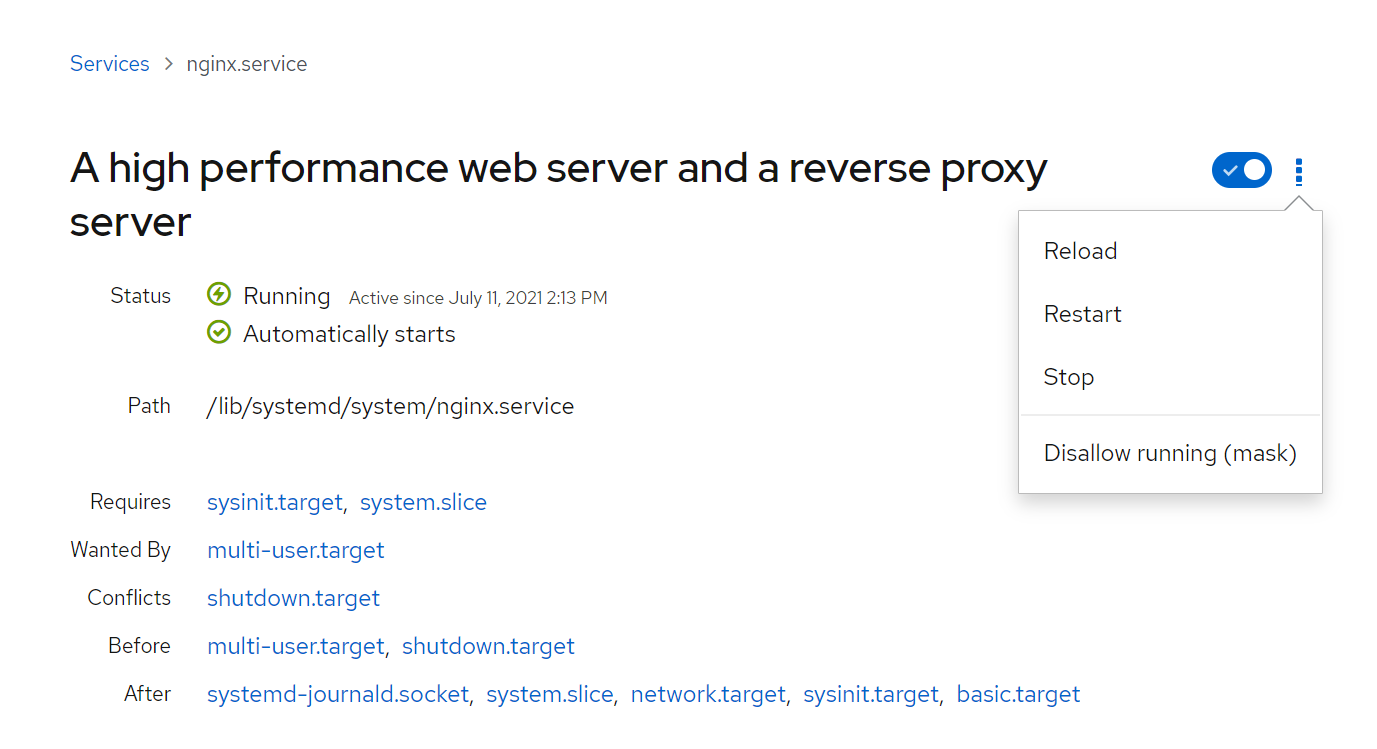
This can really make life easier for a novice admin.
btop++
Remember bashtop from the previous discussion? Btop++ is its C++ implementation, designed for better performance. The reduced graph update interval doesn’t significantly increase CPU load. Meanwhile, the dashboard remains as colorful and impressive for any novice wandering around your server room!
Bottom
Bottom looks similar to bashtop in terms of appearance, but it’s written in Rust, which ensures high performance and low CPU usage.
Bottom supports Linux (on x86, x64, and aarch64 architectures), Windows (x86 and x64), and even macOS!
It can be installed on Debian-based distributions with just two commands:
curl -LO https://github.com/ClementTsang/bottom/releases/download/0.6.4/bottom_0.6.4_amd64.deb
sudo dpkg -i bottom_0.6.4_amd64.deb
On Arch, it’s even simpler:
sudo pacman -Syu bottom
For Windows, there is an MSI installer available, which you can easily download and run.
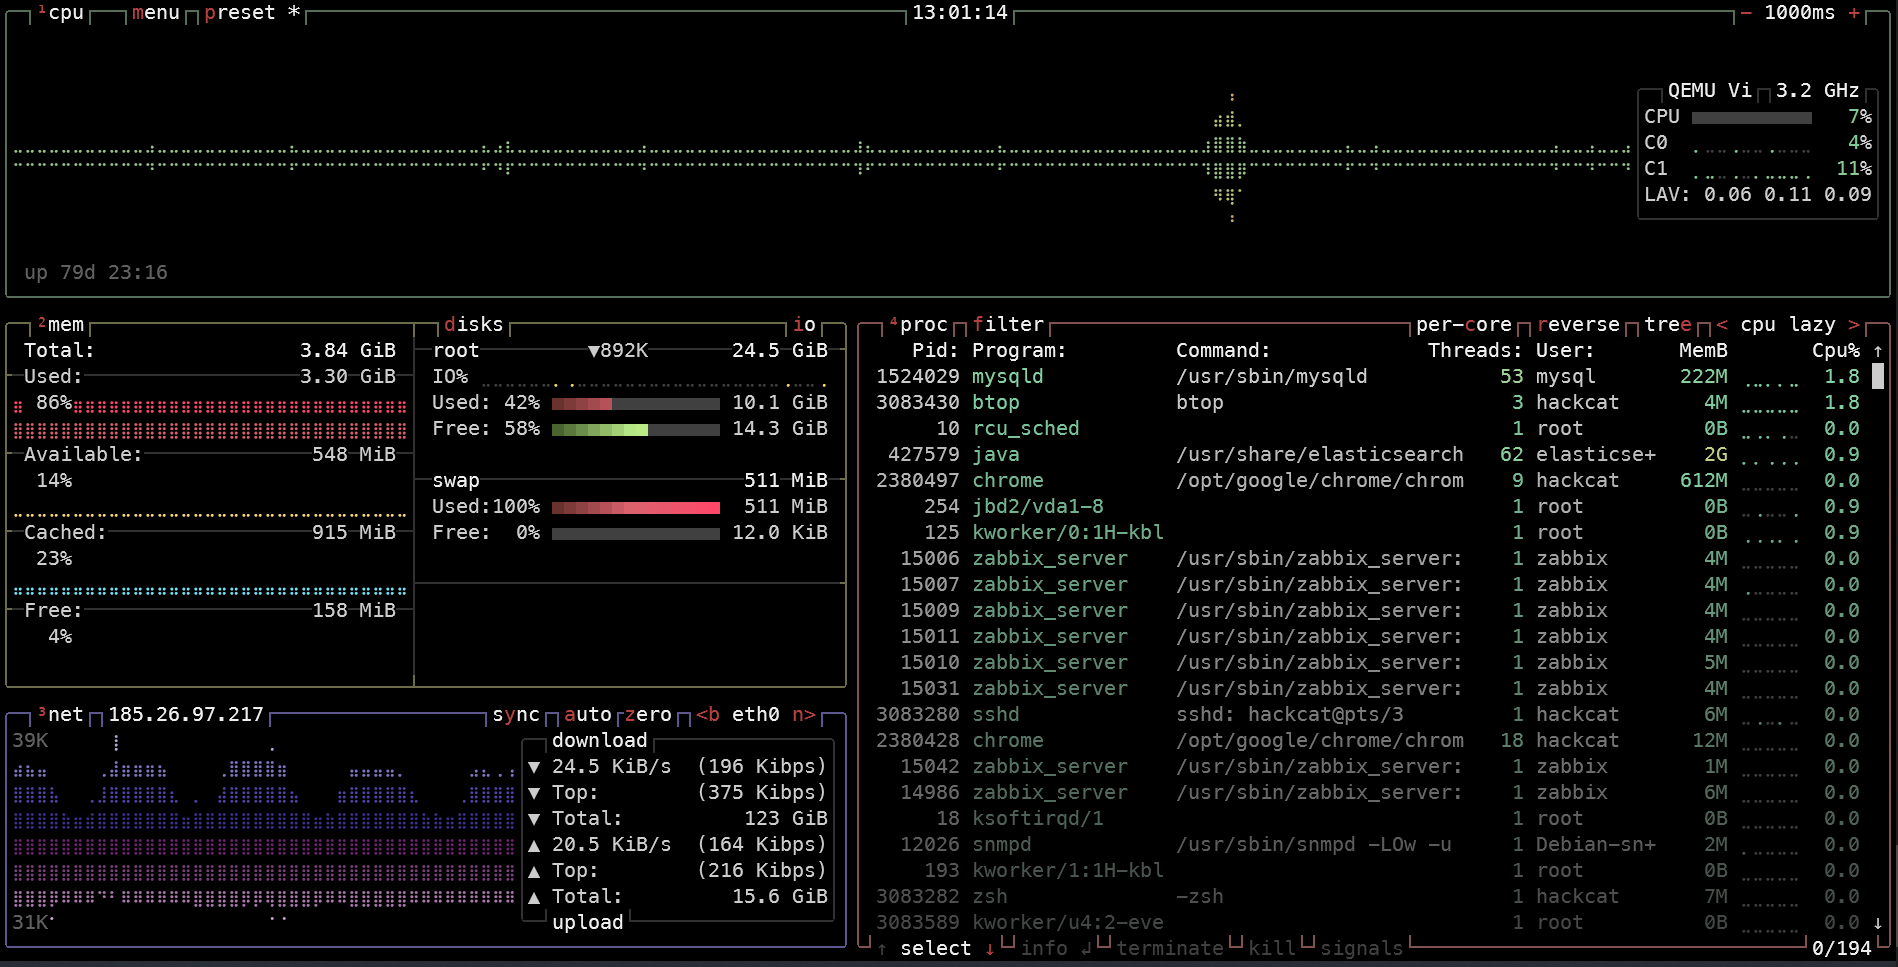
To launch the utility, you should type btm, not bottom as you might have thought. Once started, you’ll see something that looks like the screenshot.
")
Viddy
Viddy is a modern version of watch written in Go, featuring bells and whistles like time travel.
Interestingly, it not only allows you to observe what is happening but also to rewind events in time.
Installing on Linux systems is typically reduced to a single command:
wget -O viddy.tar.gz https://github.com/sachaos/viddy/releases/download/v0.3.1/viddy_0.3.1_Linux_x86_64.tar.gz && tar xvf viddy.tar.gz && mv viddy /usr/local/bin
To control Viddy while it’s running, you only need to know two commands: pressing the spacebar activates the time machine, and pressing s pauses the execution of the invoked command.
Automation & Scripting
htmlq
Of course, you’re familiar with jq, the utility for working with JSON directly from the terminal. But what about HTML? When you’re writing scripts to parse various websites, it’s incredibly useful to interact with HTML in a straightforward way, rather than using regular expressions. htmlq is exactly that kind of tool.
htmlq is written in Rust and can be installed via Cargo:
cargo install htmlq
htmlq uses CSS selectors or attributes to function. Let’s, for example, extract all the links from the main page of “Hacker”.
 hackcat@srv8 ➜ curl --silent https://xakep.ru/ | htmlq --attribute href a
https://xakep.ru/wp-login.php?redirect_to=https%3A%2F%2Fxakep.ru%2F
https://xakep.ru/
https://xakep.ru/category/hack/
https://xakep.ru/category/privacy/
https://xakep.ru/category/tricks/
https://xakep.ru/category/coding/
https://xakep.ru/category/admin/
https://xakep.ru/category/geek/
https://my.xakep.ru/courses/
https://xakep.shop/
/wp-admin/users.php?page=paywall_subscribes&from=paywall_subscribe&subscribe=12_months
https://xakep.ru/tag/windows/
https://xakep.ru/tag/linux/
https://xakep.ru/tag/android/
https://xakep.ru/tag/zhelezo/
https://xakep.ru/tag/messengers/
https://xakep.ru/tag/leaks/
https://xakep.ru/tag/covid-19/
https://xakep.ru/issues/xa/
...
sysz
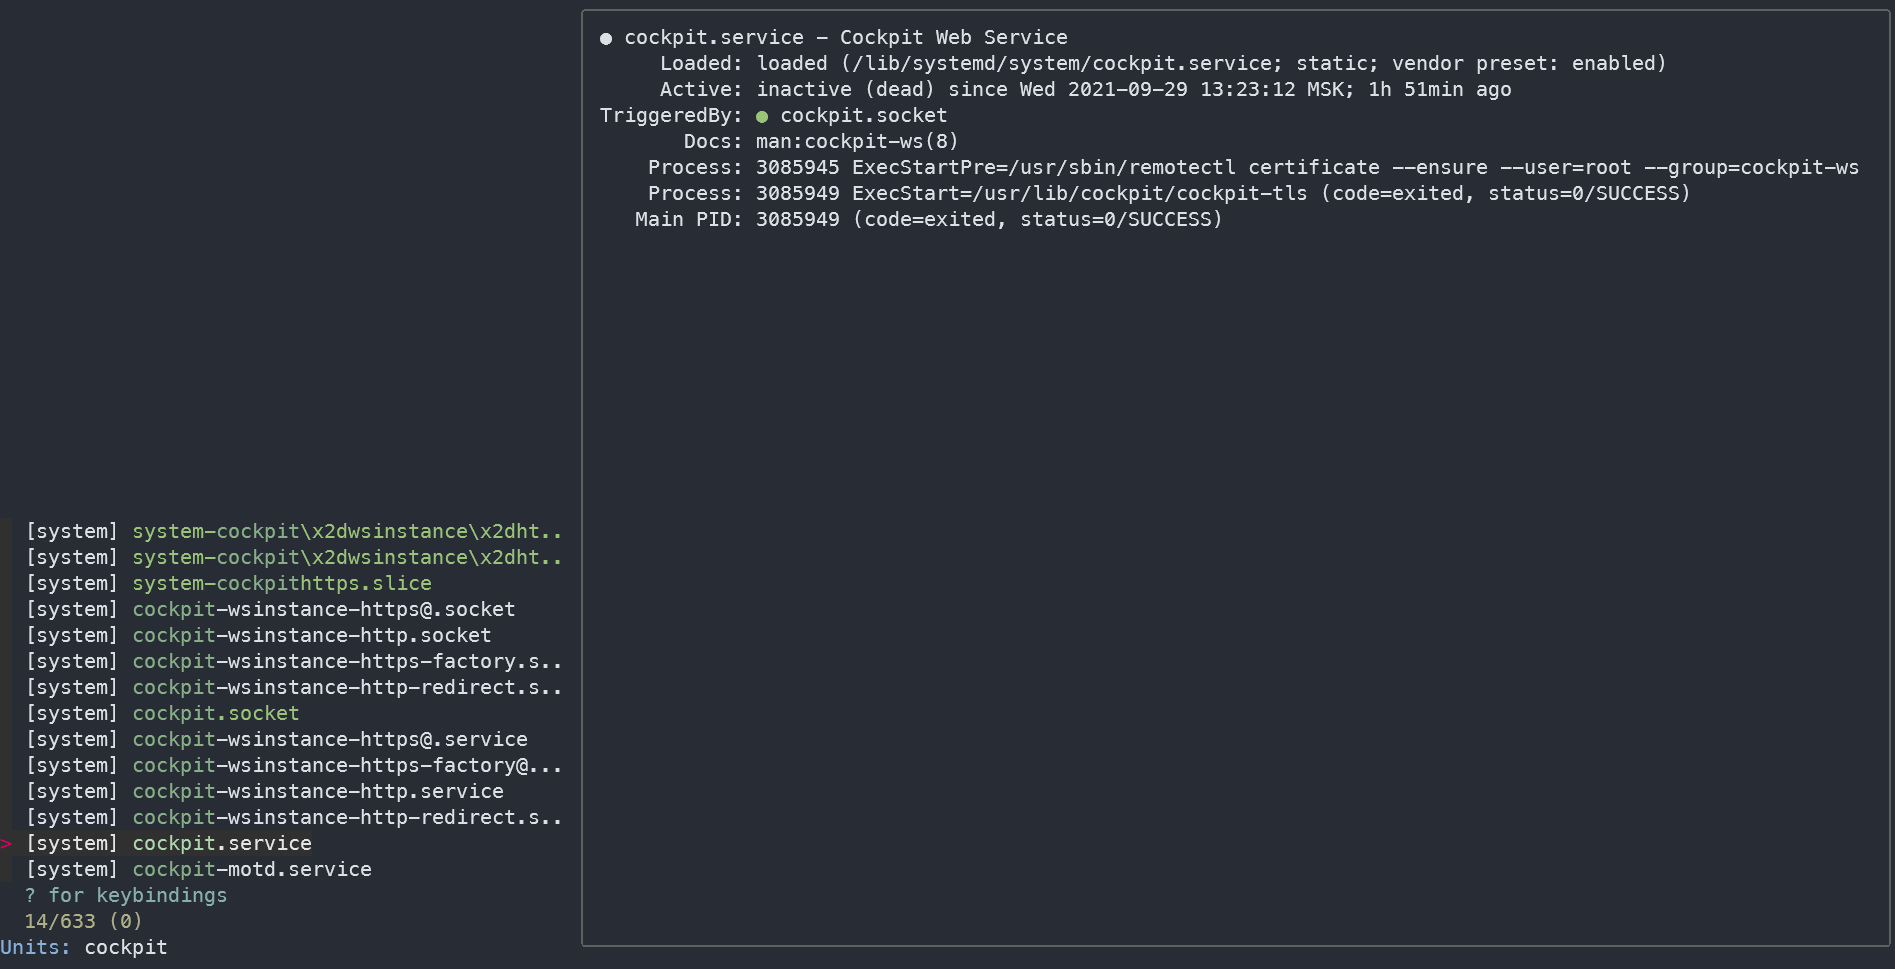
Sysz is a text-based user interface for managing systemd units. It provides a convenient way to view and control services. For instance, here’s how you can check the status of the Cockpit daemon, which we discussed earlier.
xargs
If you haven’t heard about xargs yet, you’re missing out. It’s a utility that executes a specified command with arguments received from standard input.
Here’s a simple example: let’s remove all the license files for every program installed in the home directory. Why? I’m not sure, but with xargs, it can be done through an intuitive pipeline like this:
find ~/ -name LICENSE | xargs -d $'\n' -- rm
Here’s a neat and lesser-known trick: xargs can parallelize tasks on its own. Want to run a bunch of tasks simultaneously? Using xargs will execute them in 16 parallel processes. Need more? Just increase the number. You won’t achieve this with a for loop.
Sure, you can use $(..., but it’s not as convenient as running a single command. For instance, in the example above, you could use the -exec parameter with find, but that might launch hundreds of separate delete processes instead of just one. The optimization is clear!
miller
Miller is a tool designed for processing structured data in formats like CSV, TSV, and JSON. You specify the input format and the desired output format to receive the data presented in the way you need.
If you’re using Ubuntu, you can install miller with a single command.
sudo apt install miller
Installation instructions for other operating systems and distributions can be found in the project’s repository.
As an example, I took a CSV file with some random data and used Miller to neatly display it, sorted by the “Location” field.

If you work with tables from the terminal, this tool is incredibly useful!
Miscellaneous
Windows Registry Recovery
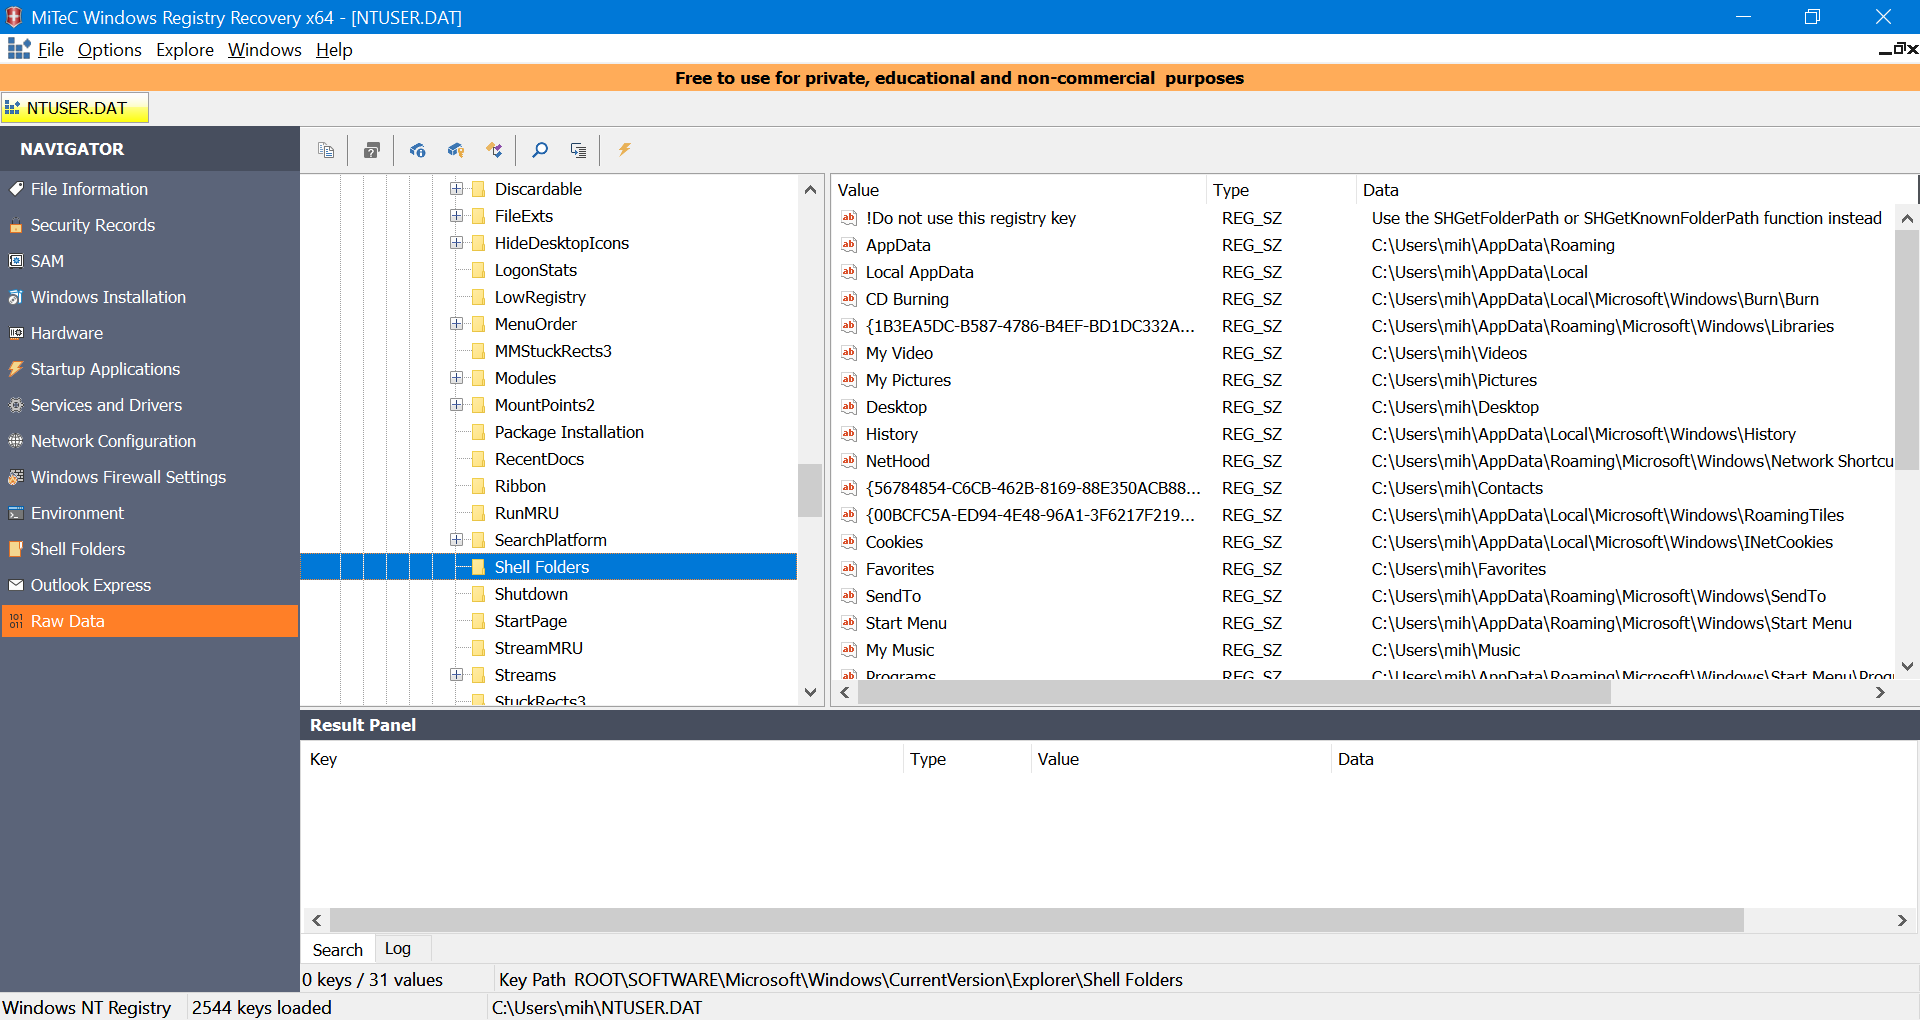
As you know, Windows registry hives are stored in user folders. It’s also well-known that these files may contain valuable information that sometimes needs to be extracted. Typically, this involves copying the NTUSER.DAT file and mounting it to the registry. However, I’ve come across instances where standard methods failed to read these files, yet it was absolutely necessary to access them.
A solution was found: the Windows Registry Recovery program successfully interpreted those unreadable files and helped complete the task. For personal use (which is all we really need, right?), the program is free.
PAM duress
Imagine unexpected guests suddenly show up at your door, and they might be interested in the information on your computer. But you’re prepared! Even if you’re forced to log into your system or reveal a password, you can provide a special password that will trigger a script to erase any sensitive data.
The tool pam-duress can assist with this task. It is implemented as a PAM (Pluggable Authentication Module) library. This module integrates into the authentication request process and applies its own logic to handle the entered password if the regular login fails.
The installation process is a bit more complex than usual, but it’s definitely worth it.
sudo apt install build-essential libpam0g-dev libssl-dev
git clone https://github.com/nuvious/pam-duress.git
make
sudo make install
make clean
mkdir -p ~/.duress
sudo mkdir -p /etc/duress.d
After the module is installed, it needs to be activated for the system to use it for user authentication. To do this, edit the / file and replace these two lines with the following:
auth    [success=1 default=ignore]      pam_unix.so
auth    requisite                       pam_deny.so
auth    [success=2 default=ignore]      pam_unix.so
auth    [success=1 default=ignore]      pam_duress.so
auth    requisite                       pam_deny.so
Now you can configure and test.
The scripts in ~/. must have permissions set to 500, 540, or 550; otherwise, they will not execute.
A decoy password is set during duress_sign and must not match the regular one.
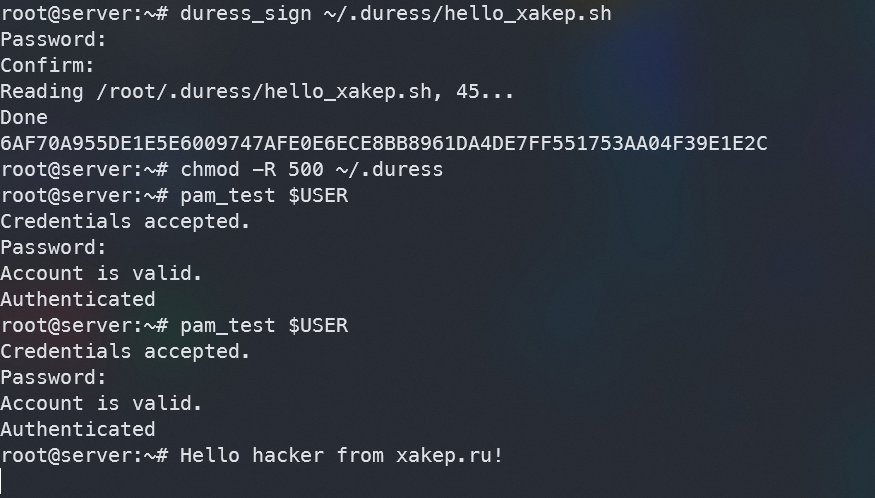
In the screenshot above, you can see the testing process. In the first case, I entered the correct password and nothing happened. In the second case, I entered a fake password, which triggered a script and its output was displayed in the console.
Important note: when following these instructions, you won’t see any output in the console. This is not a mistake; the script is still running, but its output is redirected to /. If no script can be executed when a fake password is entered, pam_test will display Not . To view the output, you’ll need to build a debug version. For instructions on how to compile that, please refer to the author’s repository.
Eternal Terminal
The goal of Eternal Terminal is to ensure that connecting to a remote server via SSH is seamless even with an unstable connection or changing client IP addresses, such as when traveling. You might think it sounds similar to Mosh, and the developer doesn’t deny it, but this utility reportedly works much better.
Eternal Terminal doesn’t restart a session if it crashes (for that purpose, there’s autossh). Instead, it offers seamless switching between uplinks without interrupting the session. As I frequently work remotely, maintaining intact and live SSH connections can be quite challenging, and Eternal Terminal has been extremely helpful in addressing this issue.
Installing ET on Ubuntu is straightforward:
sudo apt-get install -y software-properties-common
sudo add-apt-repository ppa:jgmath2000/et
sudo apt-get update
sudo apt-get install et
Now check whether the daemon is running on the server:
systemctl status et
If it says running, then everything is set up correctly. Just open port 2022 and ensure you can connect without a password. All configurations will automatically be pulled from the ssh_config file if it exists, so you won’t lose any specific SSH settings. After that, from the client machine, simply type et and forget about connection drops!
screen
We recently mentioned screen in our article about DevOps tools, but I’d like to remind you again about this remarkable tool that was a lifesaver for me before I discovered Eternal Terminal. In short, screen creates a virtual console that persists even if the SSH connection is lost, allowing you to reconnect (screen ) to it after re-establishing the connection.
Ventoy
One tool that has saved me an enormous amount of time is Ventoy. It’s designed to make it easy to create multiboot drives without the hassle and complications of dealing with outdated bootloaders. All you need to do is install Ventoy using its user-friendly installer from any OS and then copy the ISO files of the desired operating systems onto the created partition.
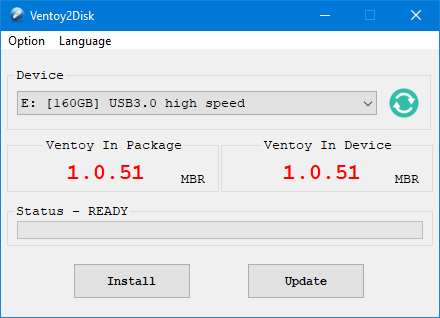
You can find the installer on the program’s download page. On Windows (which is how I created my upgraded disk), you’ll need to extract the archive and run Ventoy2Disk.. Then, simply select the desired device from the list and click Install.
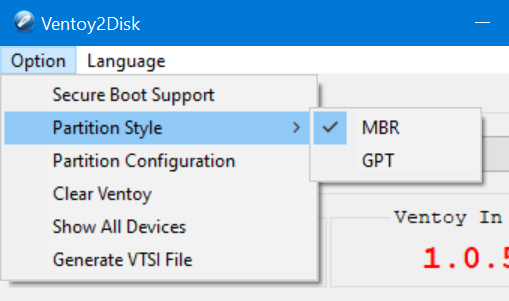
Additional settings such as section styles and Secure Boot support can be found in the Options menu.
Once the installation and ISO copying are complete, you can restart your system. If everything works as expected, you should see a menu similar to the one shown in the screenshot below.

To install, just select the ISO from the list and press Enter. That’s it! Both Windows and popular Linux distributions boot easily with Ventoy. No hassle with repackaging images or configuring grub4dos.
When you update the list of images on the drive, no additional actions are required—no need to replace configurations or reinstall anything. Everything will automatically synchronize and function properly.
www
The program is open-source, and its code is available on GitHub.
Takeaways
It’s possible that you’re already familiar with many of the tools we mention, and you might even know of other useful utilities that we haven’t covered. If that’s the case, please let us know in the comments or reach out to our team. We’ll do our best to address any gaps!