People were tinkering with customized or “lite” Windows builds back in the late 1990s; for example, a Hacker magazine article on assembling a minimalist Windows 98 Lite build was published twenty years ago. Surprisingly, the project’s website is still up! The trend seemed to fade for a while, but it picked up again with the arrival of Windows 10. On low-end tablets and netbooks, Windows 10 runs at a snail’s pace, and installing it on older hardware often leads to driver issues that Windows can’t resolve on its own.
The obvious solution is to strip out unnecessary apps, disable extra components, integrate drivers and all current updates directly into the installation image, and then turn off automatic updates so they don’t get in the way. If you also set up an unattended Windows installation, as described in a previous article, it’ll be perfect. And why not?
Preparation
To dissect the Windows 10 distribution, you’ll need at least the Windows 10 installer itself. I’ve covered where to get it before, but briefly: download the “Windows 10 Media Creation Tool” from Microsoft and either save the distribution as an ISO file or write it to a USB drive. Choose the edition of the OS that fits you—specifically, the one you have a product key for.
To surgically strip bloat from Windows and add useful components, enthusiasts created the tool MSMG Toolkit. The utility is distributed as a 7‑Zip archive; extract it to a drive while preserving the folder structure.
info
To work properly with Windows 10 images, the MSMG Toolkit must be run on Windows 8.1 or 10. You can convert ESD to WIM on Windows 7, but most other features likely won’t work there.
Go to the folder where you saved the Windows 10 ISO. You can mount the ISO as a virtual drive, but for our purposes it’s enough to install the free 7‑Zip utility and open the ISO in it like a regular archive. If you wrote the image to a USB flash drive, you can simply browse its contents in File Explorer. Copy all folders and files from the Windows installation media to the DVD subfolder of the directory where you extracted the MSMG Toolkit.
Now launch the MSMG Toolkit by running the file Start. from the tool’s folder, press the A key to accept the license agreement, then press Enter.
Extract and Mount the Image
Historically, Microsoft’s operating system installers were packaged as Windows Image Format (WIM) files. Later, the company moved to the ESD format, which offers higher compression to save disk space. Unfortunately, most modern tools can’t work with ESD and require a traditional WIM image instead.
So, first we need to extract the compressed WIM image from the install. file located in the sources folder. On Windows, the dism command-line tool can do this, but it’s a bit clunky—you have to dust off your command-line skills. We’ll take a different route.
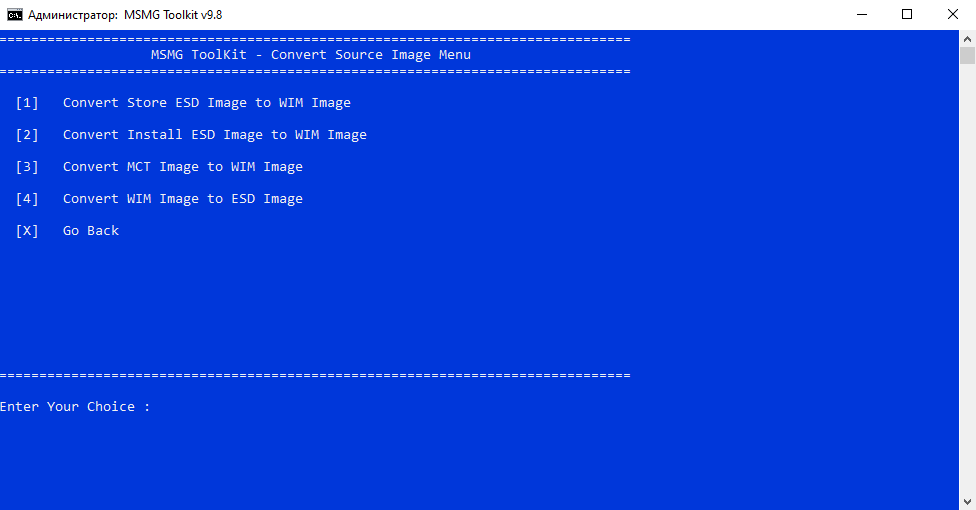
MSMG Toolkit comes with its own up-to-date copy of dism, so you don’t have to type long command-line switches or puzzle over why they still won’t run. To convert install. to a WIM, press 2. The tool will show several conversion options; select “Convert Install ESD image to WIM image” by pressing 2 again.
The tool reads the ESD and displays a list of all Windows images contained in the ESD archive.
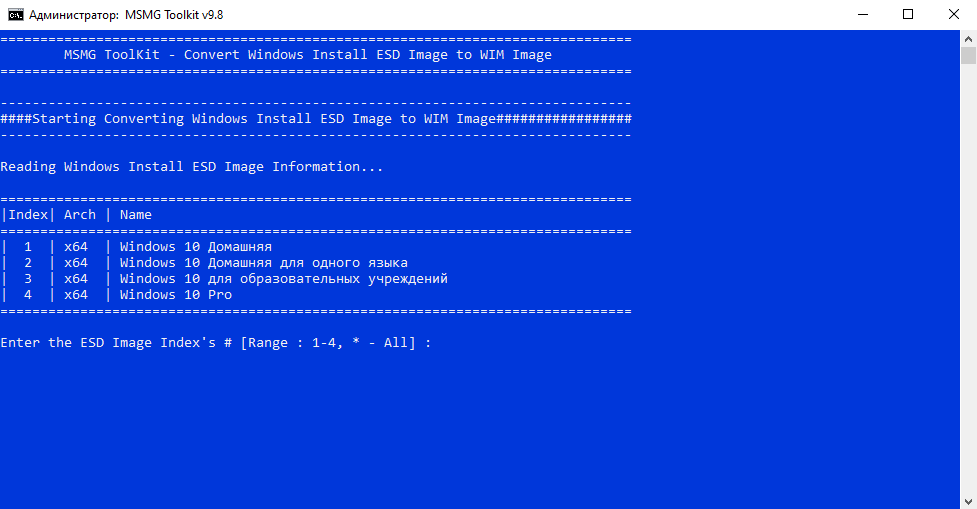
Press the number key that matches the Windows edition you want to work with. Then wait while the tool extracts the selected image from the ESD file and exports it to a WIM; this may take a while. The converted image, install., will be saved in the same sources folder where the original file was located, which is removed automatically.
Now you need to mount the extracted image to continue. Press 1 (Source), then press 1 again (Select source from
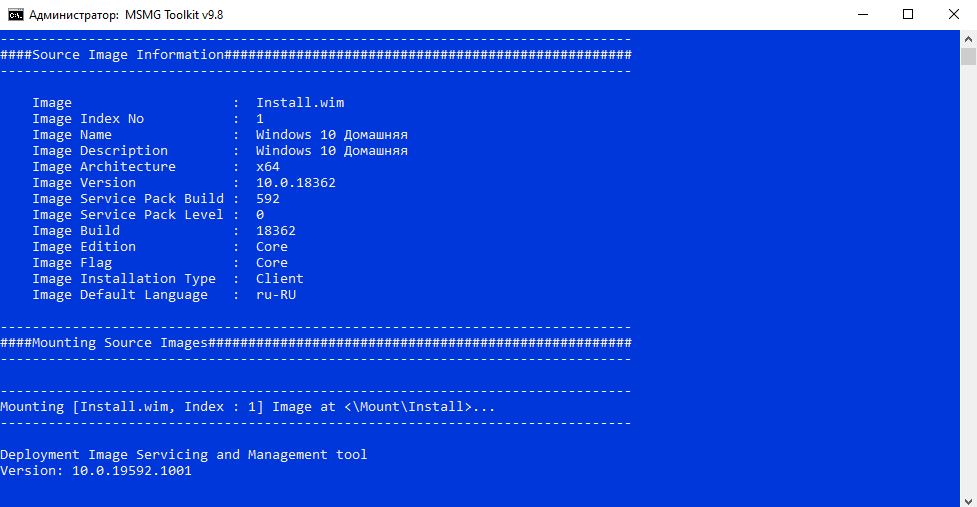
You can now confidently proceed with the next steps.
Integrating Drivers, Updates, and Language Packs
Windows 10 doesn’t always find device drivers automatically. If you’re installing the system on a PC for which you already have a set of drivers, you can slipstream them into the installation image to save time. The same goes for OS updates: you can avoid the tedious download-and-install routine by pre‑integrating the available updates into the Windows 10 image.
Download all updates for your Windows edition from the Microsoft website and place them in the appropriate subfolder under Updates\: x64 for 64-bit Windows and x86 for 32-bit. Copy the drivers into the x64 and x86 folders located at \. Make sure the driver architecture matches the folder you place it in.
В the MSMG working folder, there’s a directory \. It contains folders for Windows editions, and inside those are subfolders for the OS architecture. If you want to integrate a missing language pack into your installation image, go to the appropriate folder, create a subfolder there (if it doesn’t already exist) with the same name as the language you’re adding—for example, ru-RU for Russian or fr-FR for French—and place the . language pack files inside.
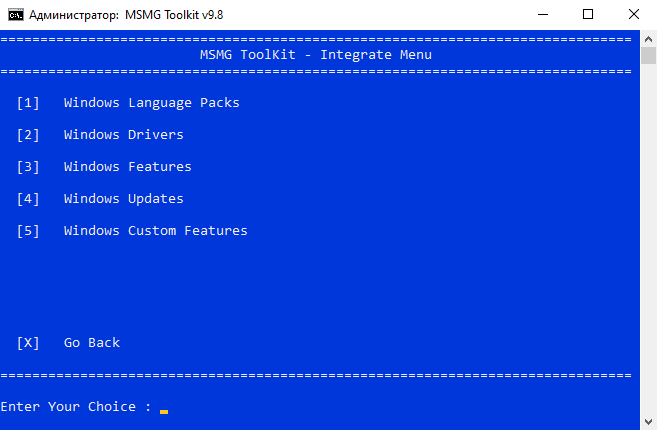
In the MSMG main menu, press 3 to select the Integrate option.
warning
Do not add updates to the installation image before integrating the language packs. First integrate all language packs, and only then apply hotfixes, service packs, and patches that include language-dependent resources. Otherwise, there’s a real chance the language components of those updates won’t be applied correctly by the operating system.
When integrating language packs, press 1, confirm your choice (Y), then select Integrate to Windows Installation Image (2). Next, enter the language code of the package by choosing it from the list.
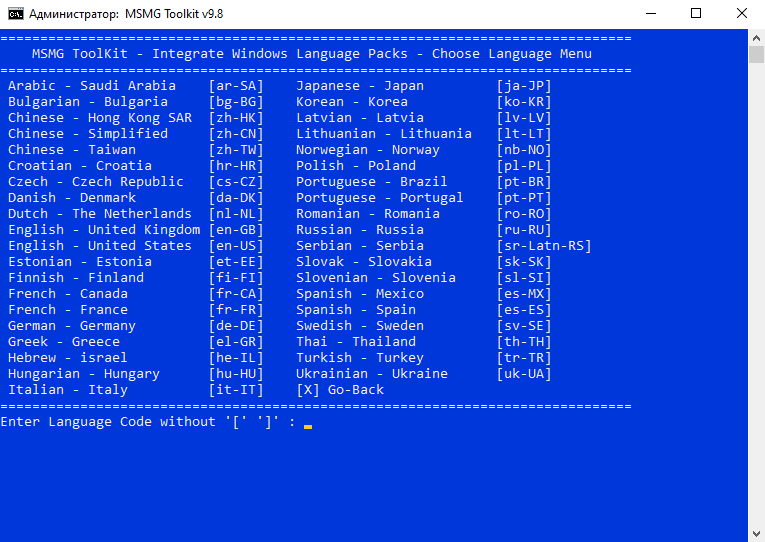
Driver integration is done the same way: in the MSMG main menu, press 3 (Integrate), then 2 (Windows Drivers), press 2 again (Integrate to Windows Installation Image), and finally confirm by pressing Y.
As the final step, integrate the updates. Press 3 (Integrate), then 4 (Windows Updates). Confirm to proceed by pressing Y, then press 1 (Integrate Windows Updates).
Strip Out the Bloat
With MSMG Toolkit, you can strip built‑in programs and Metro apps you don’t use from a Windows installation image. In the main menu, press 4 (Remove), then 1 (Remove Windows Components). You’ll then be presented with several sections to choose from:
- [1] Internet — includes Adobe Flash for Windows and Internet Explorer;
- [2] Multimedia — seven components, including Speech Recognition, Windows Media Player, and Windows Photo Viewer;
- [3] Privacy — 11 different services related to system access and security;
- [4] Remoting — includes HomeGroup, MultiPoint Connector, and Remote Assistance;
- [5] System — built-in apps such as Paint, System Restore, and Windows Subsystem for Linux — eight in total;
- [6] System Apps — 26 apps, including File Explorer, Microsoft Edge, Cortana, and Skype;
- [7] Windows Apps-1 — stock apps, including Calculator, Paint 3D, Messaging, and Microsoft Pay — 35 in total;
- [8] Windows Apps-2 — Windows Store apps, the Xbox app, and Xbox Identity Provider.
The selected programs will be stripped from the installation image and won’t be installed on your device, saving disk space. In some versions of Windows, the Remove screen also includes a Remove Default Metro Apps option, which lets you remove unwanted Metro apps.
Additional customization options
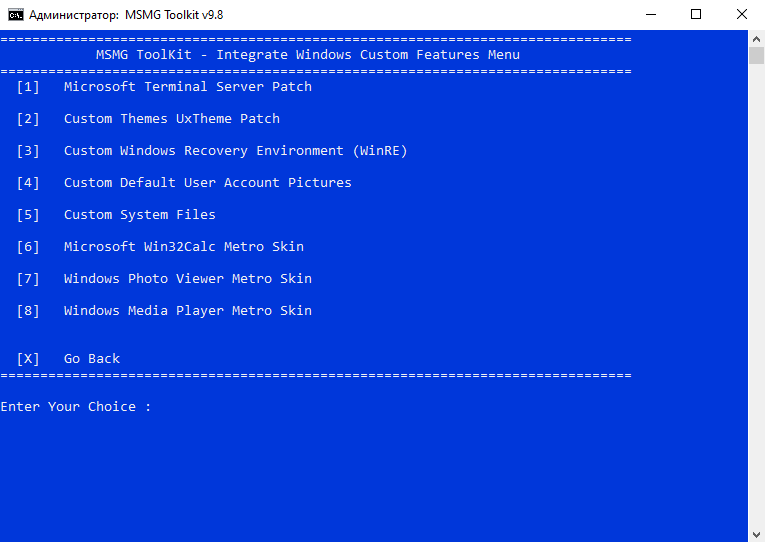
With MSMG Toolkit, you can add extra files and components to a Windows installation image: fonts, user account pictures, mouse cursors, arbitrary system files, Windows Recovery Environment components, and themes for Metro‑style apps (the Windows media player, Photo Viewer, Calculator).
First, place all these files into the appropriate subfolders under \ or \. Then, in the MSMG Toolkit, choose option 3 (Integrate), then 5 (Windows Custom Features), and finally press Y. You’ll be able to select the components to integrate from the list that appears.
warning
When you add components using this method, be aware that the SFC utility will report Windows system file integrity violations. You’ll have to accept that.
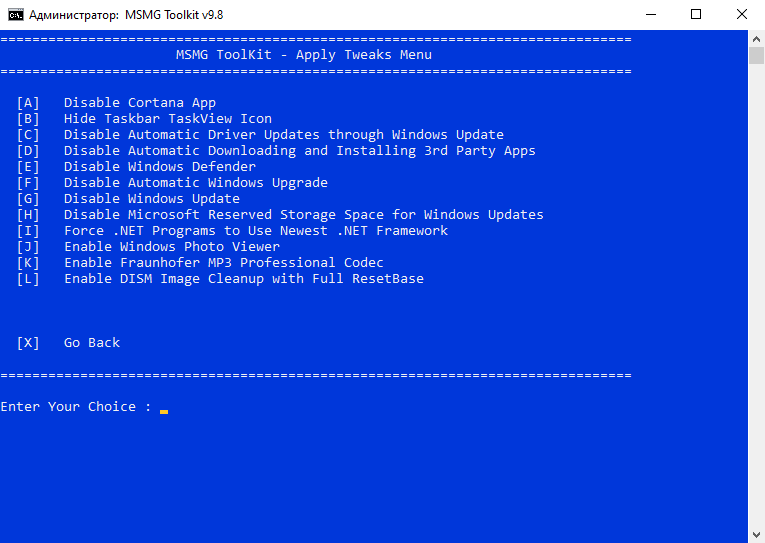
Additionally, you can adjust a number of basic Windows settings by choosing 5 (Customize) → 8 (Apply Tweaks) in the MSMG menu. Here you can do the following with Windows:
- Disable Cortana
- Remove the Task View button from the taskbar
- Disable automatic driver updates via Windows Update
- Disable automatic download and installation of third-party apps
- Disable Microsoft Defender
- Disable automatic updates—both Automatic Windows Upgrade and Windows Update
- Disable reserved disk space for updates (Microsoft Reserved Storage for Windows Updates)
- Force .NET applications to use the latest .NET Framework
- Enable Windows Photo Viewer (disabled by default)
- Enable the Fraunhofer MP3 Professional codec
Saving the changes
When everything’s ready, in the MSMG Toolkit main menu run options 6 (Apply) and 2 (Apply & Save Changes to Source Image). Then press 7 (Target) and choose the format you want to save the updated image in.
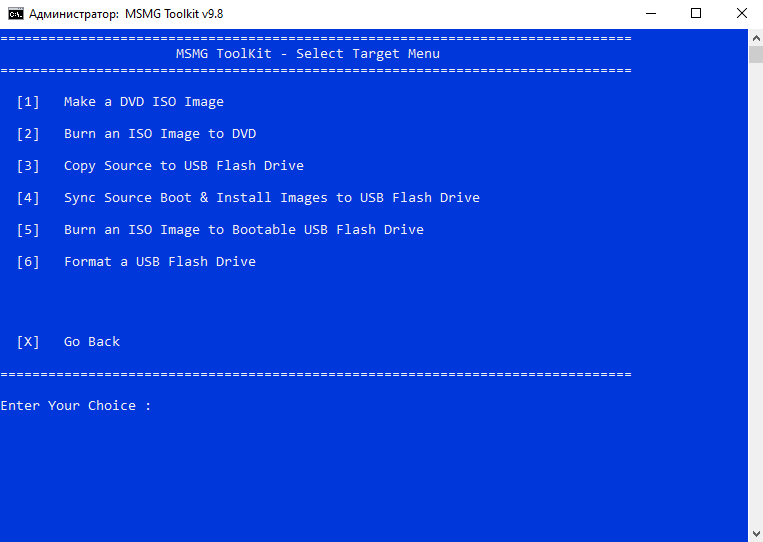
You can create an ISO file for later burning to an optical disc, burn the installation media directly to a blank DVD, or copy it to a USB flash drive. You can also overwrite the modified bootloader and Windows image onto an existing installation USB drive (Sync Source Boot & Install Images to USB Flash Drive), or create a new bootable USB drive using Burn an ISO Image to Bootable USB Flash Drive. Pressing 6 will format the USB drive before writing.
Afterword
Using MSMG Toolkit, you can build a lightweight Windows 8.1 or 10 installation image for a tablet, netbook, or older PC—the tool helps free up disk space by removing unnecessary components and apps. You can also save time by pre-integrating all required updates and drivers into Windows, and streamline the environment by disabling unused operating system features.
