The Weirdest Editor
At first glance, Vim looks downright strange. Getting started with it can be a painful ordeal when you simply can’t tell what’s going on. The editor either ignores your keystrokes completely or behaves in utterly baffling ways. You type the word “door,” and instead Vim jumps to a new line and inserts “or.” You delete this nonsense and try typing again—and, lo and behold, real text actually appears on the screen.
And then it starts acting up again.
After a few attempts to figure out how it works—and more cursing than you’d like to admit—you head online and discover that Vim is a modal editor. You can only enter text in Insert mode (INSERT), which you switch to by pressing i or Insert.
The main mode—entered with Esc—is for issuing what might, at first glance, look like hotkeys. Many of them are just single keystrokes: w moves the cursor to the next word, 0 to the start of the line, $ to the end of the line, A moves the cursor to the end of the line and switches to insert mode, and u is the equivalent of Ctrl+Z in conventional editors.
After a bit more Googling, you discover there are shortcuts made up of two or more consecutive keystrokes. For example, dd, which deletes the entire line; dw, which deletes a word; and gg / GG, which move the cursor to the beginning and end of the document, respectively.
Once you get the hang of it, you can more or less switch between modes and use those weird hotkeys—they even start to feel convenient—but one question still nags at you:
— Why are these modes here?!
Vim’s “hotkeys” are undeniably efficient because they’re so concise, but doesn’t having to switch modes kill that convenience? Isn’t it simpler to use the more verbose shortcuts in conventional editors than to keep bouncing between modes? Maybe forty years ago—when keyboards didn’t have Ctrl and Alt—that was justified, but what’s the point now?
That’s usually how the average user’s first brush with Vim ends. They’ll spend a while just figuring out how to quit, then write it off like a bad dream and go back to their beloved Sublime Text. And in the harsh reality of a server, even nano will do just fine.
Why does this happen? For one simple reason: using Vim requires a completely different mindset, and very few people can switch to it right away.

The Vim Philosophy
To understand why Vim is the way it is—and to learn how to use it effectively—you need to remember two simple truths.
Truth #1. Vim’s separation of modes is purely practical. In one mode you type text; in the other you edit it. Modern editors blur this line—we’re used to typing, immediately tweaking, deleting, and typing again. Vim’s Insert mode allows a bit of that, but only within tight limits: typed the wrong character? Delete it and type another. Everything else belongs in Normal mode (the primary editing mode).
Truth #2. The “hotkeys” you use in normal mode aren’t hotkeys at all—they’re a powerful command system with arguments, counts, loops, and registers. When you’re using Vim, don’t think in the usual way: “I’ll click that word with the mouse, hit Backspace as many times as needed to delete it, type another word, then move the cursor back.” Instead, you should issue a command: replace that word with this one, and put me back where I was.
To illustrate this principle, consider a simple example. Suppose you’re reviewing a freshly written text and decide that, in the paragraph where your cursor currently is, the last sentence is unnecessary and should be deleted.
Your first instinct might be to grab the mouse, highlight the last sentence, pick “Cut” from the menu or hit Delete. Sounds straightforward enough—but here’s the catch:
}d(
Pressing these three buttons achieves the same result. I’d be very surprised if it takes you more than a couple of seconds.
What do they mean? Let’s figure it out:
- } — motion command; moves the cursor to the end of the paragraph.
- d — editing operator; deletes (d = delete).
- ( — motion command; moves the cursor to the start of the previous sentence.
Since movement commands can be used as arguments to editing commands, in plain terms the whole thing is: } — move the cursor to the end of the paragraph, then d( — delete all characters back to the start of the previous sentence. Or, even simpler: delete the last sentence of the current paragraph.
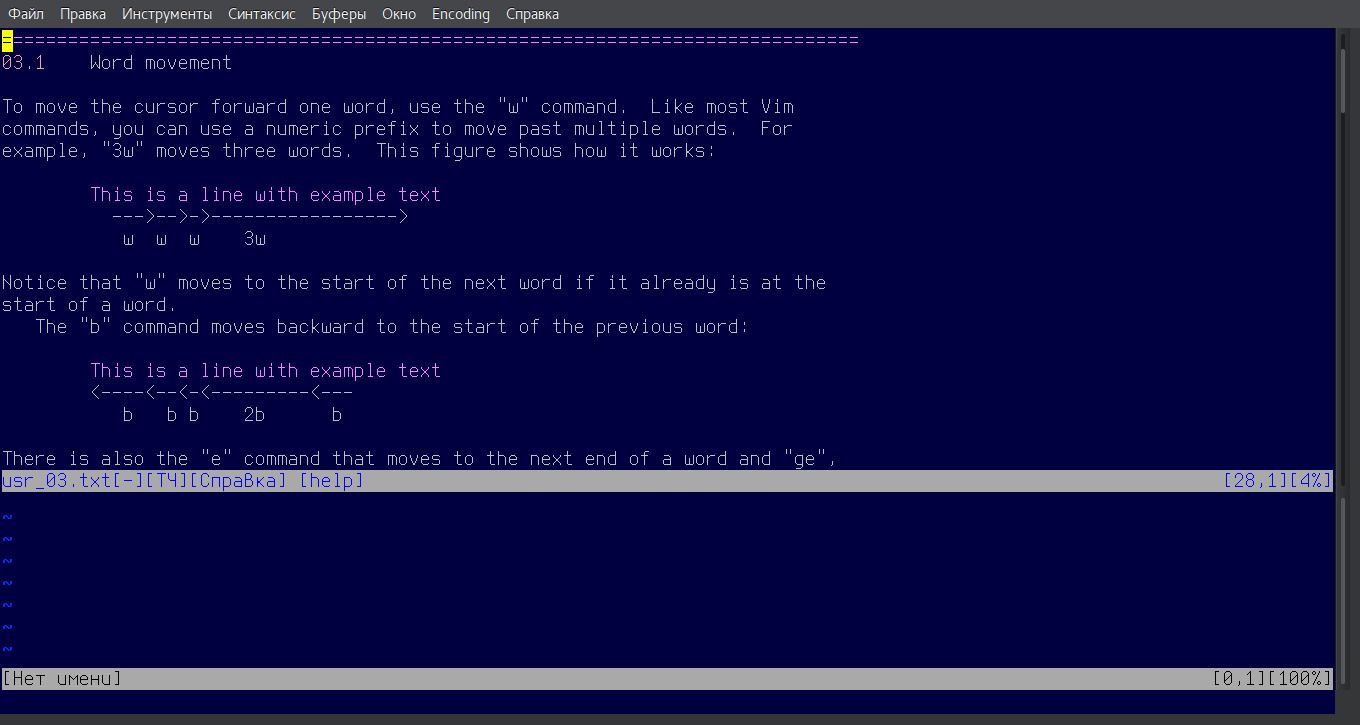
You can repeat commands. For example: 3} — move the cursor forward three paragraphs, }d2( — delete the last two sentences in the paragraph, 3J — join the next three lines (J — Join), 3w — move forward three words (w — word), 50G — go to line 50 (G — Go).
Another example: you’re reviewing a finished text and notice the word Windows, which you’d rather replace with Linux. The brute-force approach is to put the cursor before it, hit Delete the required number of times, then type the other word. The backwards approach is to move the cursor onto the word, press some awkward three-finger “replace word” shortcut, and type the new one. The correct solution:
/Win<Enter>cwLinux
- /Win — a search-based motion (here we search for “Win”);
- cw — the change operator (c = change) with the motion “word” (w = word);
- Linux — the new word.
To simply delete a word, you can do this: /Windw followed by dw (dw = delete word). Note that, unlike search-and-replace, you don’t have to type the whole word. You can also achieve the same result with motions. For example, if “Windows” is the second word in the third sentence, you can replace it like this: {3)wcwLinux.
Now, about editing code. Imagine you’re writing or reviewing your code and notice that a method of the current class—the one whose call is under the cursor—is only used here, so it’s better to make it private. In other words, you need to jump to the method’s declaration and add the private modifier in front of it.
A newbie will tackle this the straightforward way: scroll through the code, find the method, click it, stick private in front of its name, then scroll back. A more advanced developer uses a keyboard shortcut to jump to the method declaration; they might even use another shortcut to make the method private. And the most advanced will also use the back-navigation shortcut.
A Vim user would do it this way:
gdiprivate <Esc>``
- gd — go to a function or method definition (gd — go definition)
- i — switch to insert mode
- private — type the modifier keyword and a trailing space
- Esc — return to normal mode
- “ — jump back to where you were before (return the cursor to the previous location)
You might say that Vim has no advantage here over a good IDE, but consider two points. First, this is a very toy example, which is exactly why modern development tools handle it easily. Pick a more exotic scenario and the IDE will fall short, while Vim will let you solve it quickly and efficiently.
Second point: like modern development tools, Vim comes with a huge range of productivity features. For example, you can predefine abbreviations in your Vim config—say, create an alias #p that expands to private. You can also bind an entire command to a single key combo. Plus, there’s an enormous ecosystem of Vim plugins that make development easier.
By the way, take a look at the command. you can use . , a or ‘a (the latter goes to the beginning of the line).
This is another standard editor feature, but Vim makes it far more powerful. As you already know, text-changing commands take motions as arguments, which means a jump to a mark can also be used as a motion. For example, to delete from the current cursor position up to mark “a”: d`a.
By the way, Vim’s delete commands don’t remove text permanently—they place it into a buffer (a “register” in Vim terminology). This lets you do things with built-in commands that other editors might require a special hotkey for. For example, swap two lines with ddp. The dd command deletes the current line (and moves the cursor to the next one), and p (paste) inserts the contents of the register below the current line.
Instead of deleting, you can simply copy the line with yy (y = yank) and then paste it with p. Combine this with command repetition to quickly insert multiple identical lines: yy10p.
You can draw a line like ———- this way: type the – character, then switch to Normal mode with Esc and run x10p (x deletes the character under the cursor, 10p pastes it ten times).
The . command repeats the previous command. And yes, you can loop it too: 3. — repeat the previous command three times. The qa command starts recording a macro named “a”; press q to stop recording. Run the macro with @a.
Vim has a huge number of commands, and at first you’ll probably feel lost about how things work. But you won’t need most of them. Memorize the basic text-editing commands (delete, insert, etc.) and the basic motion commands (jump by words, lines, paragraphs, code blocks, marks, and so on). Combine those, and you can do almost anything in just a few keystrokes.
Command-Line and Visual Modes
When I referred to the key combos in the previous section as commands, I intentionally deviated from Vim’s standard terminology to make the mechanics clearer. In reality, Vim has a separate command-line mode—closer to a classic command prompt—that lets you do even more advanced things.
Command-line mode is invoked by typing : in Normal mode. It’s intended for line-oriented editing using powerful commands that can include regular expressions and even execute operating system commands.
One of the most well-known commands in this mode is :s. It’s used for search and replace. Using it, you could solve the second example from the previous section like this:
:s/Windows/Linux/
This command replaces the first occurrence of “Windows” with “Linux” in the current line. To replace every instance of “Windows” with “Linux” in the current line, use the g modifier.
:s/Windows/Linux/g
Or use a regular expression instead of the search term:
:s/W.*ws/Linux/g
You can apply the substitution to the entire file by prefixing the command with a percent sign:
:%s/Windows/Linux/g
You can also run it on just the line range you need:
:1,10s/Windows/Linux/g
Or to the text between two markers:
:'a,'bs/Windows/Linux/g
The most convenient workflow is to use Normal mode together with Visual mode. Visual mode is a selection mode that the original Vi didn’t have. Here’s how it works: move to the line where you want the selection to start, press v (or Shift + V for linewise selection), then expand the selection with any movement commands (for example, } to select the current paragraph). After that you can either run an operator (e.g., d to delete the selection) or press : to enter command-line mode and perform a more complex operation on it.
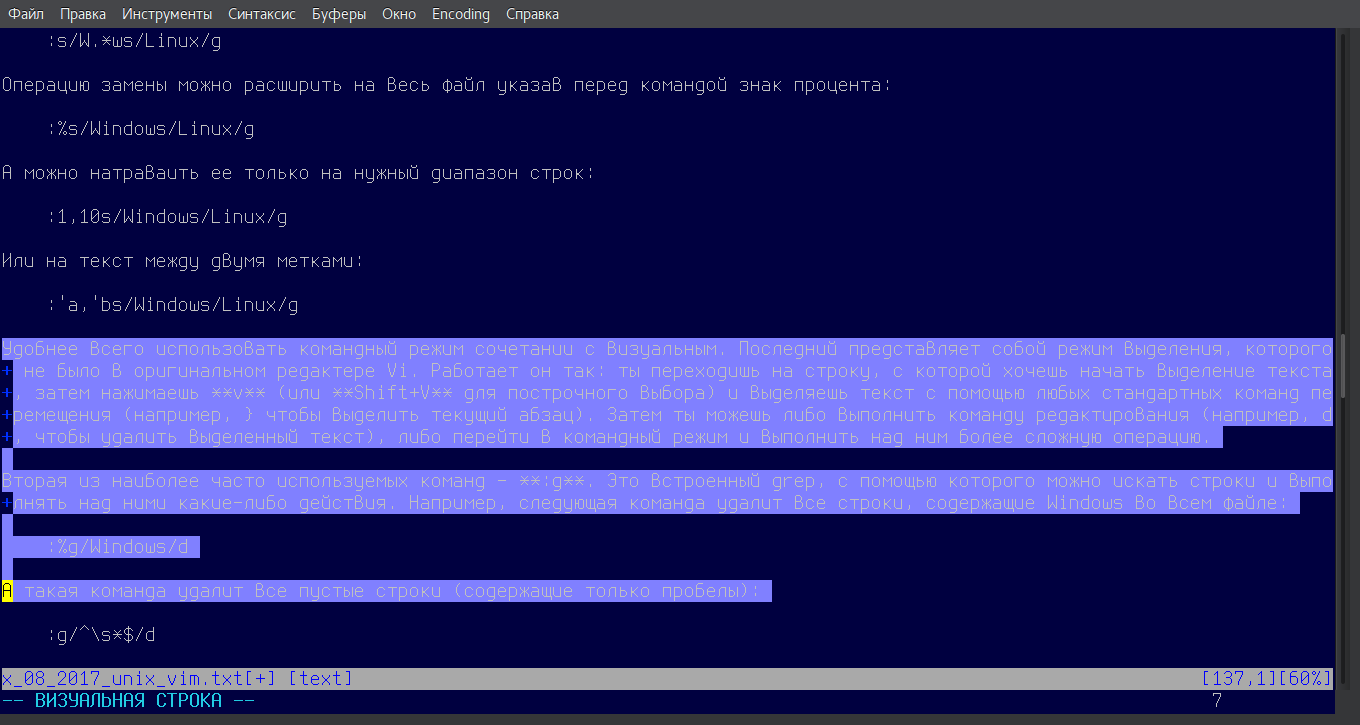
The second of the most commonly used commands is :g. It’s a built-in grep that lets you search for lines and perform actions on them. For example, the following command will delete every line containing Windows across the entire file:
:%g/Windows/d
And the following command will remove all blank lines (i.e., lines that contain only spaces):
:g/^\s*$/d
The following command removes empty rows (that don’t contain any characters) in an HTML table:
:/<table>/,/<\/table>/g/^$/d
You can move lines around. For example, to move all lines that contain “Windows” to the end of the file, type:
:g/Windows/m$
That’s far from everything the built-in grep can do. But if we go into all the details, it would be beyond the scope of any article. Instead, let’s look at what else the Vim command line can do.
It makes it easy to embed the contents of other files or the output of Unix commands into your text. For example, here’s how you can insert the contents of the file todo.txt into the text:
:r todo.txt
The :r command supports autocomplete, so you don’t have to type the full path.
If you add an exclamation mark to r, it will insert the output of the specified command into the text:
:r! uname -a
When you’re writing a piece for Hacker packed with command-output snippets, this feature becomes indispensable.
Vim lets you not only read the output of Unix commands, but also send text to their standard input. For example, the following command will sort lines 1 through 10 using sort:
:1,10!sort
Sort the entire file:
:%!sort
Run the file through the fmt formatter:
:%!fmt
Naturally, all of this works in visual mode as well.
How to Switch to Vim from Sublime Text or Atom
Switching to Vim after a long run with Sublime Text or Atom can feel awkward. Don’t worry! It’s easy to clutter Vim with unnecessary panels and plugins. Here’s a quick guide to tweaking Vim into something that feels like a reasonably modern code editor.
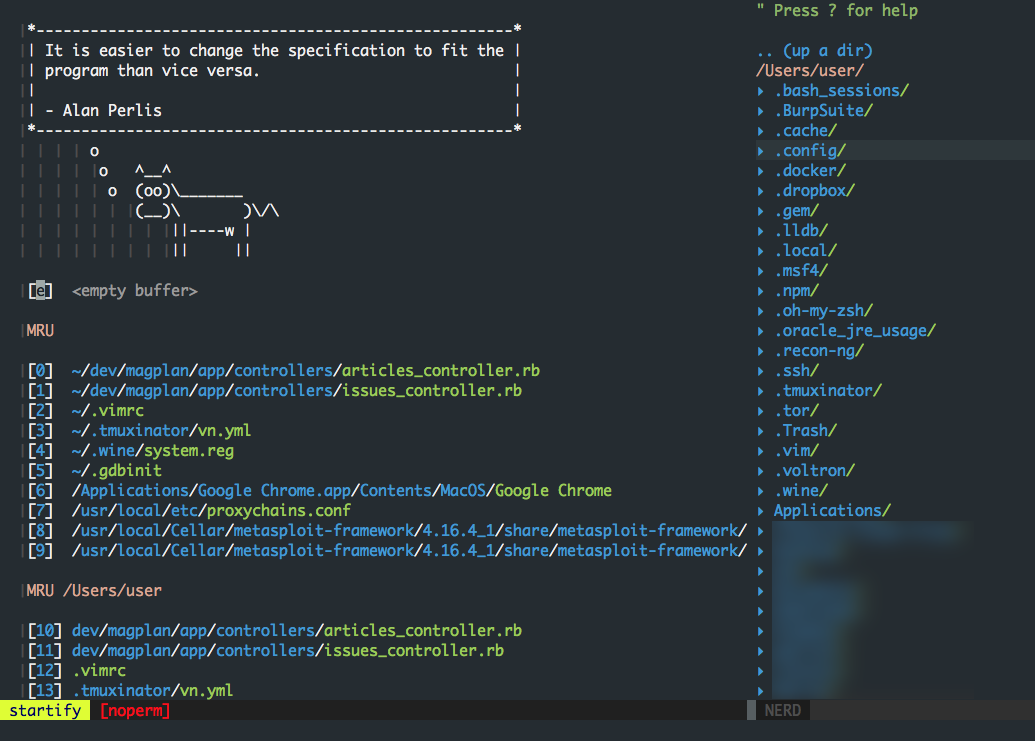
Before you start cobbling together your own Vim setup, take a look at the popular prebuilt distributions: spf13 and Janus. They include a solid baseline of settings and plugins. That said, it’s not exactly the “true” way. You should at least once build your own config from scratch, and then go play with third‑party distros.
Step 0: Pick the right Vim version
Under the hood, Vim runs on code that’s about forty years old. Naturally, some parts aren’t optimized for modern hardware and graphics stacks. As a result, you may hit glitches, scroll lag, and noticeable delays when switching modes. YouTube is full of demos from frustrated users.
Consider more modern forks of Vim, such as Neovim, or, if you’re on macOS, MacVim.
Step 1: Choose a GPU-accelerated terminal emulator
Vim’s slowness and glitches are often caused by the terminal you’re running it in. On macOS, skip the built‑in Terminal—install MacVim or run it in iTerm2.
Better yet, try Alacritty. It’s a fast, cross‑platform terminal written in Rust that efficiently leverages the GPU. It renders graphics much faster than most alternatives. Some quirks: all configuration lives in plain text files, and you’ll need to tweak window management yourself. For example, on macOS CMD+H doesn’t work, so you can’t hide the window with that shortcut out of the box.
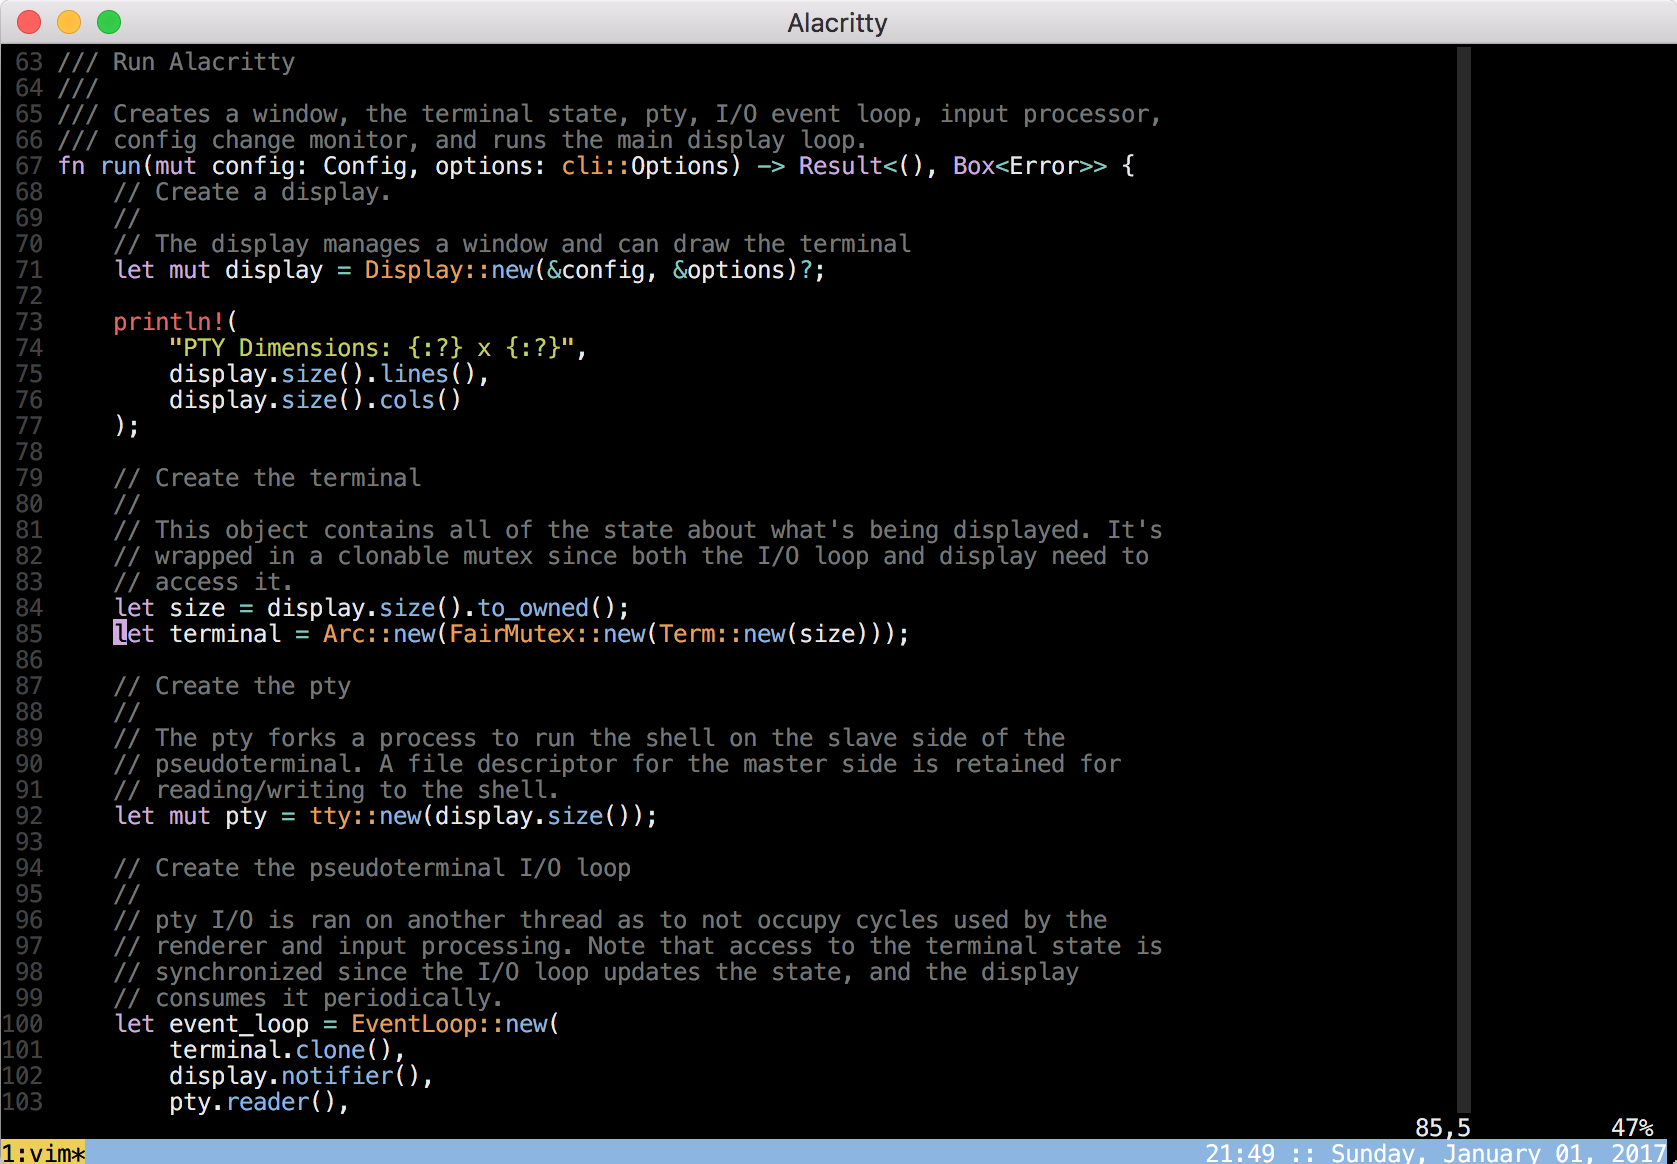
Going forward, I’ll use screenshots from the standalone build of MacVim, but nothing else changes.
Step 2: Basic ~/.vimrc setup
Vim is easy to configure. It keeps its settings in ~/.vimrc, and supporting files—plugins, locales, dictionaries, color schemes—under ~/.vim. The ~/.vimrc file is executed when the editor starts. Every Vim user has their own setup. I’ll share mine. Open (or create) ~/.vimrc and add the following in order.
First, set a comfortable font and size. I use the Monaco font, but feel free to pick your favorite. Many Linux users prefer Terminus or Roboto.
set guifont=Monaco:h15
Eliminate the delay when switching between editor modes:
set timeoutlen=1000 ttimeoutlen=0
Let’s add support for remapping Cyrillic characters to Latin. This way you won’t have to switch keyboard layouts while editing (for example, press вв instead of dd). Add the following lines to your config:
set keymap=russian-jcukenwin
set iminsert=0
set imsearch=0
highlight lCursor guifg=NONE guibg=Cyan
Then download the file russian-jcukenmac.vim (for macOS!) and place it in the ~/.vim/keymap directory.
Let’s disable word wrap. It’s optional, but I personally don’t like soft-wrapping code.
set nowrap
Let’s configure the code folding settings:
set foldmethod=indent
set foldnestmax=10
set nofoldenable
set foldlevel=1
Let’s install a theme. To start, I suggest trying one of the most popular color schemes in the world — Solarized. The vim-colors-solarized project provides the Solarized theme in a Vim-ready format.
Clone this repository, cd into it, and copy the file solarized.vim to ~/.vim/colors/ (create the directory if it doesn’t exist):
cd vim-colors-solarized/colors
mv solarized.vim ~/.vim/colors/
Now let’s add it to ~/.vimrc:
colorscheme solarized
" Pick the dark Solarized variant. As you might guess, there's also a light oneset background=dark" Explicitly set the number of colorslet g:solarized_termcolors = 256
Sometimes Vim misdetects file types and applies the wrong syntax highlighter. For example, if you code in Rails, you’ve probably used the Slim templating engine. Vim can’t highlight these templates properly out of the box. Fortunately, Slim is syntactically compatible with Haml, so let’s make it highlight .slim files as Haml.
au BufRead,BufNewFile *.slim setfiletype haml
Naturally, this is just a specific example. You can use the same trick for any file types you need.
That wraps up the basic settings. Now, on to plugins.
Step 3: Install a plugin manager
Like Sublime Text and Atom, Vim has several package managers. I prefer Vundle—it’s one of the most convenient and easiest to set up.
Clone Vundle:
git clone https://github.com/VundleVim/Vundle.vim.git ~/.vim/bundle/Vundle.vim
Add the following lines to ~/.vimrc:
set nocompatible              " be iMproved, required
filetype off                  " required
set rtp+=~/.vim/bundle/Vundle.vimcall vundle#begin()Plugin 'VundleVim/Vundle.vim'"" List the plugins we want to install here"call vundle#end()            " required
filetype plugin indent on    " required
Note the comment. This is the place in the file where we’ll add the URLs of the plugins to install. The format is:
Plugin 'tpope/vim-fugitive'Plugin 'rstacruz/sparkup', {'rtp': 'vim/'}Plugin 'git://git.wincent.com/command-t.git'...Add the plugin, save ~/.vimrc, and then run the following command in the terminal:
vim +BundleInstall! +BundleClean +q
Vundle will detect the new plugin and install it.
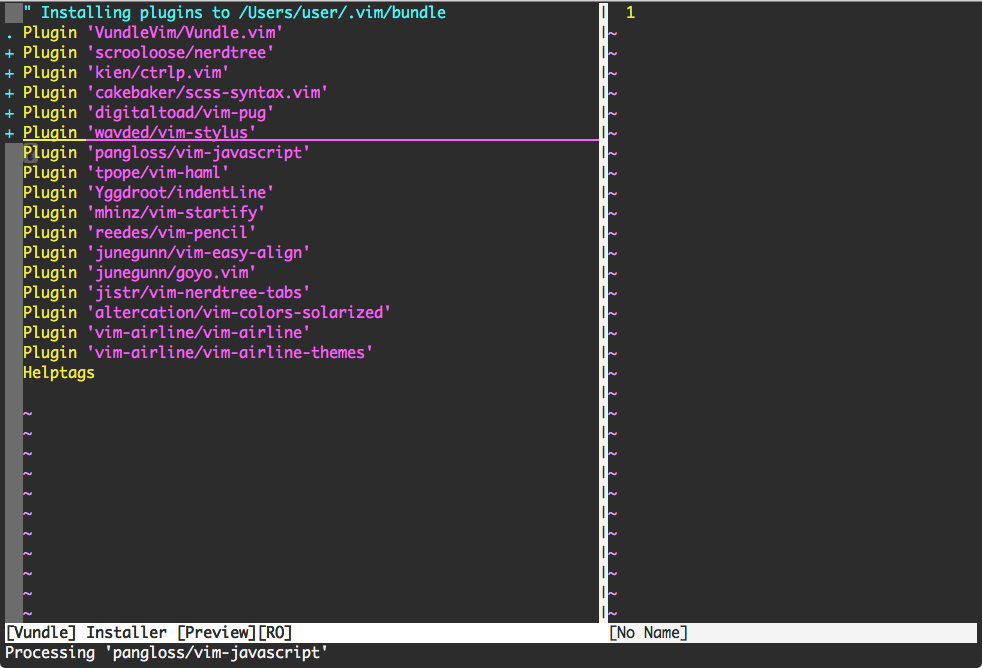
You can reference plugins in different formats—see the documentation. For plugins hosted on GitHub, the format is:
Plugin '<username>/<repository>'
Step 4: Install and configure plugins
I won’t share a full list of my plugins: you can easily find whatever you need with searches like vim react jsx syntax. Instead, I’ll list general ones that will be useful if you’re coming from Sublime or Atom.
nerdtree
https://github.com/scrooloose/nerdtree
This is a side panel showing the project’s file tree—similar to the Sidebar in Sublime or Atom. The workflow is familiar: pick a file and open it with Enter in the desired buffer. You can also set a base directory to work from.
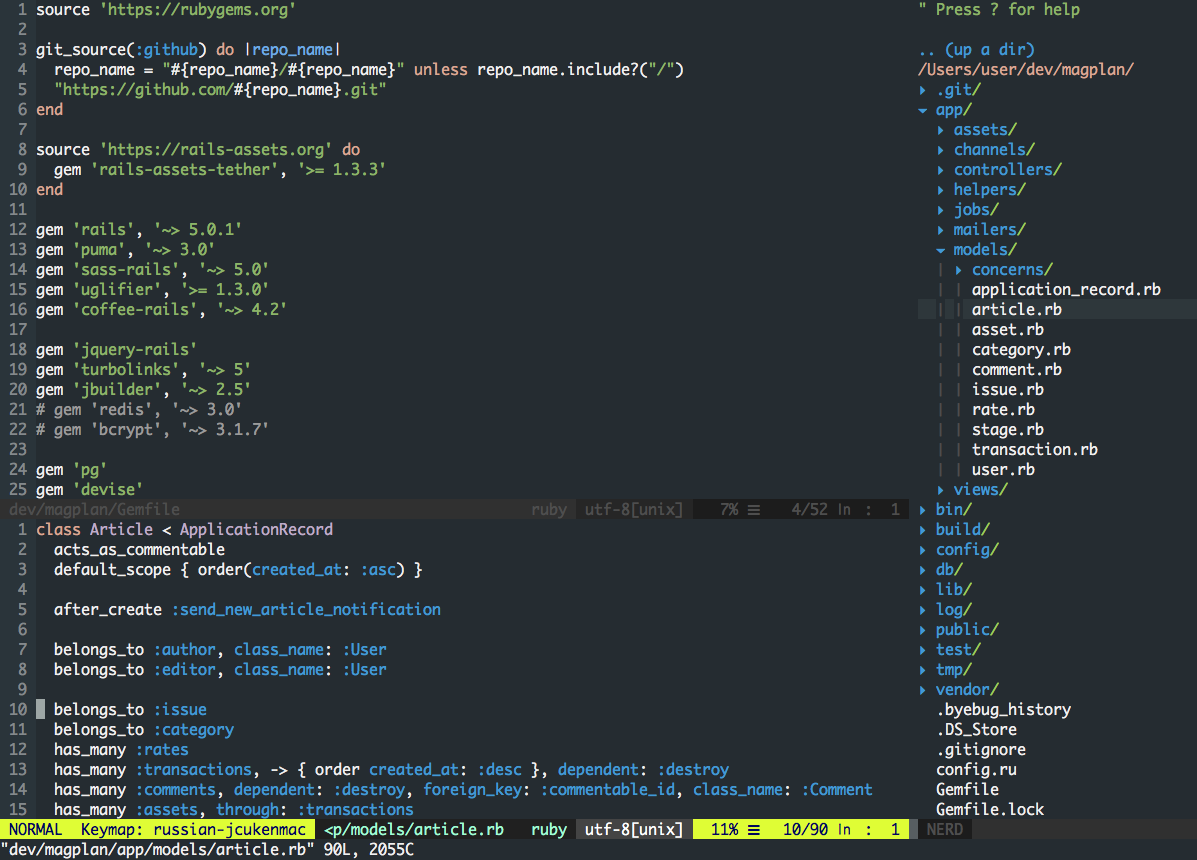
Here’s a handy trick: bind the panel’s show/hide toggle to Ctrl + e:
nmap <silent> <C-E> :NERDTreeToggle<CR>
Show hidden files by default:
let NERDTreeShowHidden=1
Enable NERDTree for all tabs:
nmap <silent> <C-N> :NERDTreeTabsToggle<CR>
CtrlP
https://github.com/kien/ctrlp.vim
A plugin that lets you quickly jump to a file in your project by its name. It doesn’t just look for exact matches—it tries to find any files whose path contains the character sequence you enter.
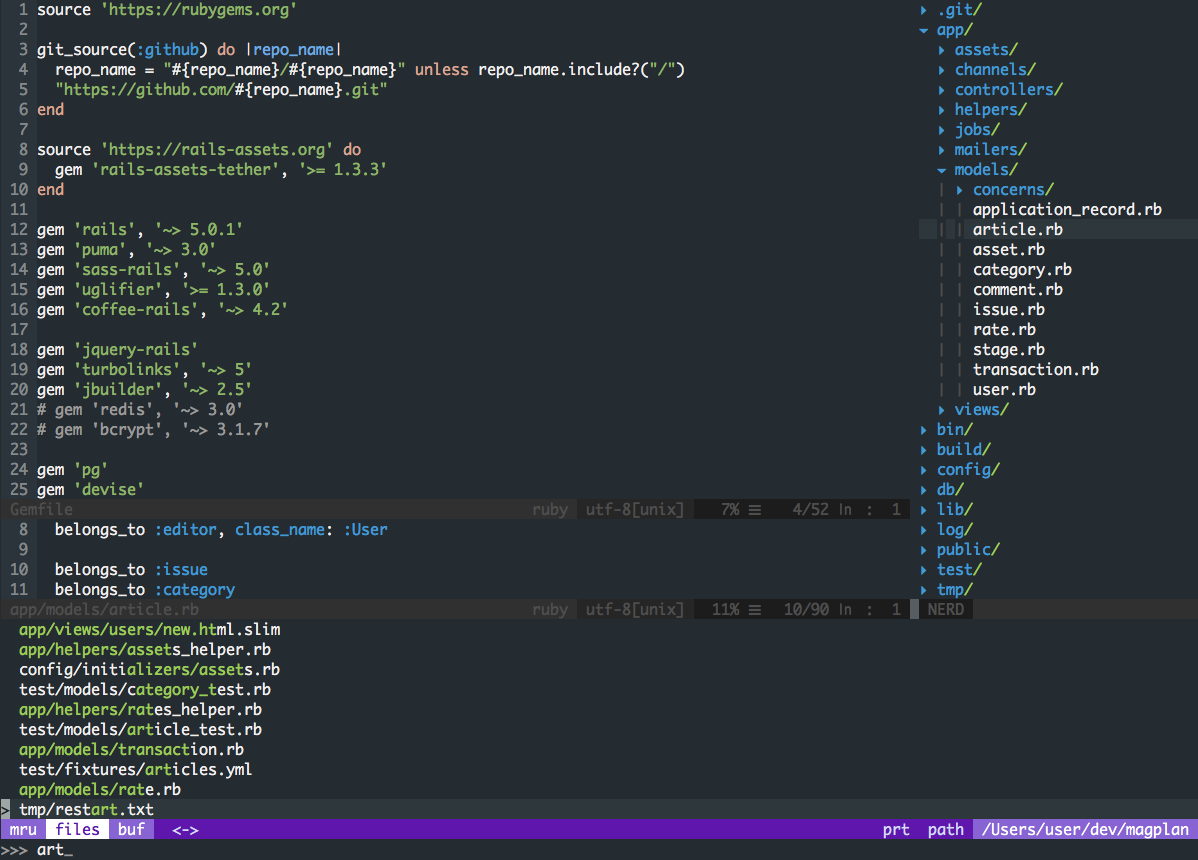
Press Ctrl + p, type acu, and the plugin finds the file pplication/
indentLine
https://github.com/Yggdroot/indentLine
The plugin draws indentation guides in code, making it easier to follow nesting. I used to use vim-indent-guides, but its glitches got pretty annoying. The indentLine plugin seems to work better overall.

Among the useful settings, I recommend configuring the indentation character:
let g:indentLine_char = '│'
The default “crocodile” is just too distracting.
vim-startify
https://github.com/mhinz/vim-startify
The plugin adds a handy startup screen for Vim. From there, you can select recently opened files or jump to a project (in Vim terms—a session).
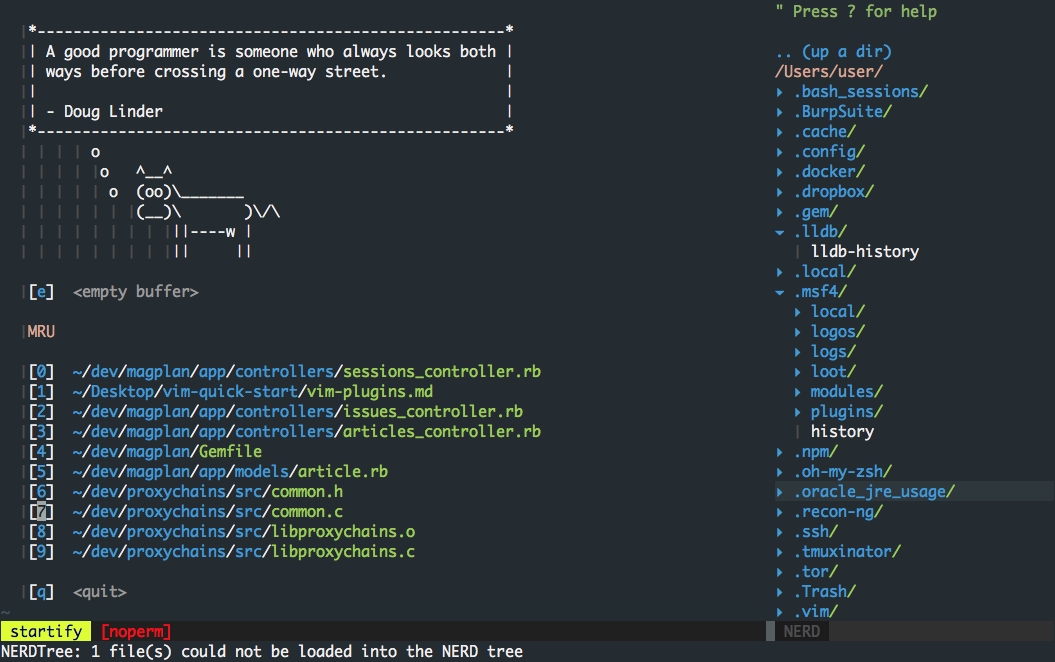
It’s also helpful to add the following lines:
autocmd VimEnter *
               \   if !argc()
               \ |   Startify
               \ |   NERDTree
               \ |   wincmd w
               \ | endif
This will make vim-startify work properly alongside NERDTree.
vim-easy-align
https://github.com/junegunn/vim-easy-align
An excellent plugin for quickly aligning code blocks on specific characters. In other words, so that from
let abc='foo'
let abcdef='bar'
let abcdefghi='baz'
get it done quickly
let abc       = 'foo'
let abcdef    = 'bar'
let abcdefghi = 'baz'
It comes with regular expressions, a convoluted syntax, and a whole page of code-alignment command examples for various languages. Pay attention to these lines from the getting started guide:
xmap ga <Plug>(EasyAlign)
nmap ga <Plug>(EasyAlign)
The first runs EasyAlign in interactive mode via ga (for example, vipga), and the second does the same for a block (gaip).
Goyo for a Better Writing Experience
https://github.com/junegunn/goyo.vim
A great tool for people who write a lot. The plugin hides all unnecessary panels and indicators and centers the text, helping you focus on the content. Essentially, it’s a distraction-free mode—the same idea behind standalone editors like ommwriter.
I mapped switching to this mode to Ctrl + g in ~/.vimrc. In the process, everything unnecessary gets disabled and the needed options are turned on:
map <silent> <C-g> :NERDTreeTabsToggle<CR><bar>:set wrap nolinebreak<CR><bar>:Goyo<CR><bar>:set background=light<CR>
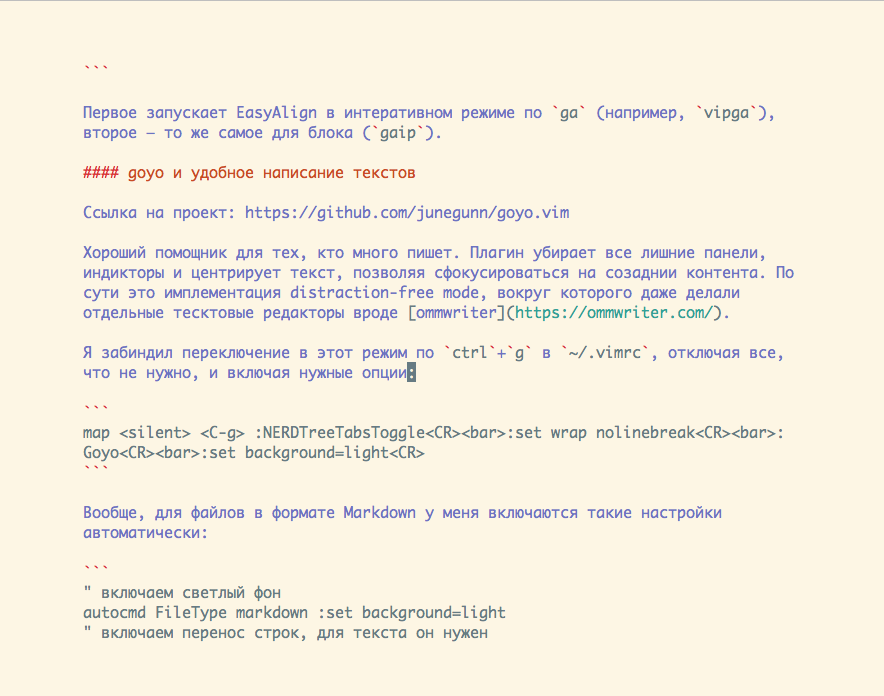
By default, I automatically enable the following settings for Markdown files:
" Enable light backgroundautocmd FileType markdown :set background=light" Enable line wrapping; needed for textautocmd FileType markdown :set wrap linebreak nolist" Enable distraction-free mode by activating Goyoautocmd FileType markdown :Goyo
" Enable spell checkingautocmd FileType markdown :set spell spelllang=ru_ru
vim-airline
https://github.com/vim-airline/vim-airline
A must‑have statusline with details about the currently open file. You’ve probably seen it in most Vim screenshots online—the plugin is hugely popular. The bar is interactive and shows the current mode, keyboard layout, encoding, cursor position in the file and on the line, and much more.
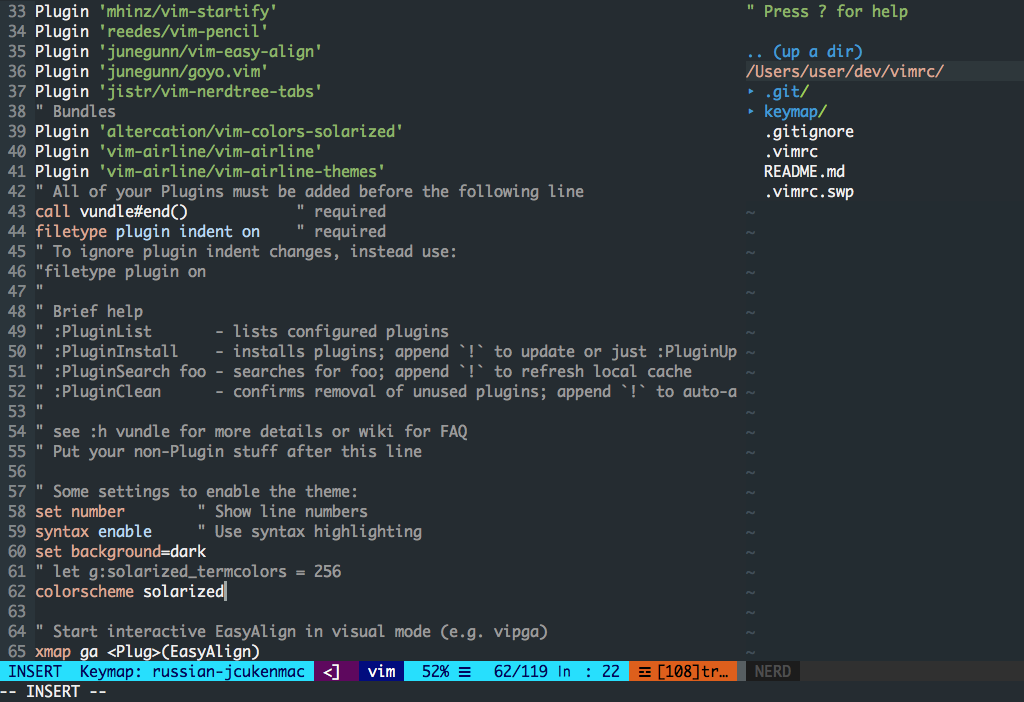
I also recommend checking out the companion project vim-airline-themes. It’s a collection of themes for vim-airline that lets your statusline blend seamlessly with your editor’s color scheme.
Conclusions
Vim shouldn’t be viewed as just another text editor. It’s more like the Unix command line. People who don’t know how to use it dismiss the command line as an anachronism. Those who do use it rely on it constantly and get things done much faster than those who prefer a GUI.
Like the command line, Vim has a steep learning curve. You can’t just open it and start using it. First you need to understand how it works, the principles it’s built on, and why it behaves the way it does. Then you’ll have to learn a lot of commands, practice, and build muscle memory—only then will Vim truly become convenient, and you won’t want to switch to any other editor.

Do you need it? That depends on how often you work with text—writing articles, coding, or editing HTML. Vim can make that work much more efficient. The skills also carry over to other tools—Vim-mode plugins exist for almost every popular IDE. I, for example, use the IdeaVim plugin in Android Studio. It gives you the power of Vim commands without giving up the rich features of the IntelliJ IDEA platform.
:wq!
