This article won’t teach you how to use the console, combine commands into pipes, or redirect input-output. It’s not about writing scripts or functions, nor will it cover the differences between bash and tcsh. Its goal is to show you how to maximize console usage, boosting your command input speed by 50% and your efficiency by 100%. Therefore, beginners should start with basic guides or at least study a Linux cheat sheet.
Let’s get straight to the point.
Switching to ZSH
The first thing to do before you start upgrading your skills is to switch from Bash. Not because it’s bad or outdated, but because there’s ZSH. It can significantly enhance your productivity.
ZSH is a highly complex and comprehensive command interpreter. The complete ZSH manual spans about 800 pages, and probably no one knows all of its features. However, mastering all of them is not expected. For several years now, there has been a project called oh-my-zsh, where users create a collection of scripts to tweak and configure ZSH quickly and easily.
To gain access to a standard set of tweaks and configurations, including a powerful auto-completion engine, an informative command prompt, and settings that enhance the usability of ZSH, simply install oh-my-zsh. You can then enhance it with plugins for improved functionality with various applications and change the command prompt theme to any of the dozens created by users.
Let’s start by installing ZSH:
$ sudo apt-get install zsh
Next, download and install oh-my-zsh:
$ sh -c "$(curl -fsSL https://raw.githubusercontent.com/robbyrussell/oh-my-zsh/master/tools/install.sh)"
The installation script clones a git repository into the / directory, makes the necessary modifications to the / configuration file to call the required scripts, and then launches ZSH.
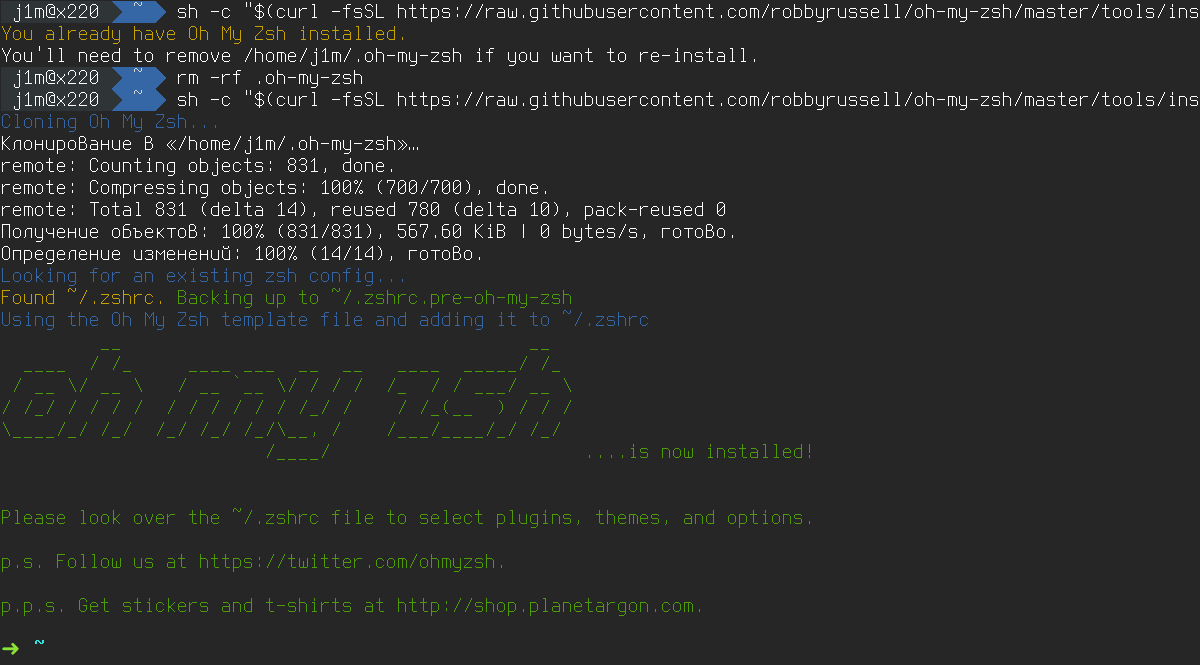
Next, you need to set ZSH as the default shell:
$ sudo usermod -s /usr/bin/zsh username
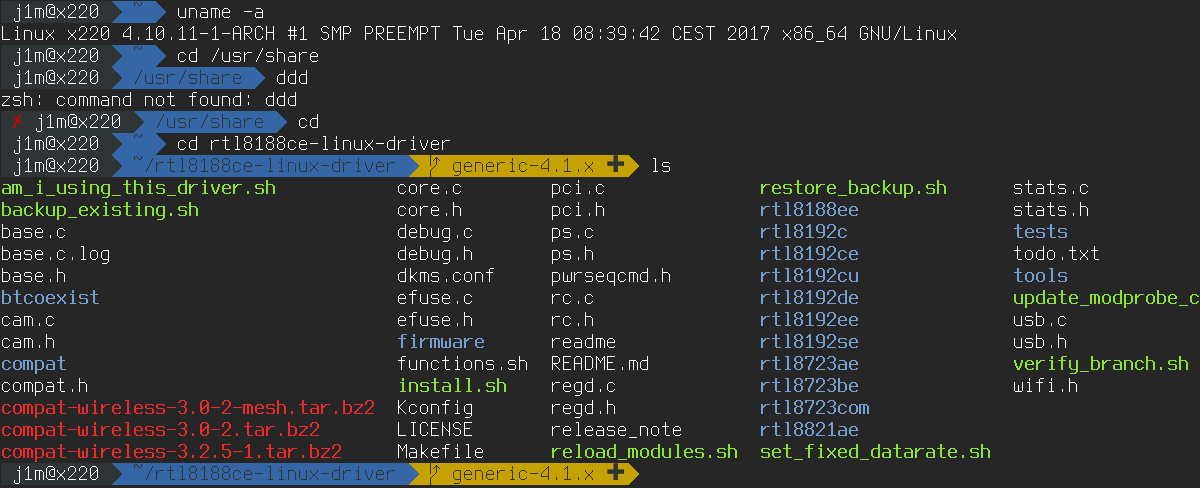
And re-login so that the terminal emulator uses ZSH as the default shell. As an optional step, you can change the theme. The oh-my-zsh package includes a wide variety of themes, which you can explore on the wiki page. To select a new theme, modify the value of the ZSH_THEME variable in the ~/.zshrc file. For example, let’s choose the agnoster theme:
ZSH_THEME="agnoster"
Navigating Directories Efficiently
One of the main issues with using the console is that it’s inconvenient for navigating directories, especially when there are many nested directories with long names or, even worse, similar names. In such cases, the tab-completion system provides little help, leaving you to manually type out directory names.
ZSH simplifies navigation. First of all, it can correct letter case, so you can start typing something like
$ cd ~/do
Then press Tab to get this:
$ cd ~/Downloads
Secondly, the directory name autocompletion system in ZSH is far more advanced than its counterpart in bash. If ZSH detects that the characters you’ve entered match the beginning of names in multiple directories, it won’t simply beep and then display the list for you to refine your query. Instead, it will immediately show the list and allow you to select the desired directory using the Tab key or arrow keys.

Thirdly, the autocomplete function works not just for the start of a directory or file name, but for any part of it. To navigate to the ~/Downloads directory, you can type “load” and press Tab.
Finally, ZSH can autocomplete directory names throughout the entire path, not just the last part. This means you can type something like this:
$ cd /u/s/zs
Then press Tab to get this:
$ cd /usr/share/zsh
Moreover, you don’t even need to type the initial letters of directory names. Both ZSH and bash can locate the necessary directories on their own if they are listed in the CDPATH variable. For example, add the following line to your ~/.zshrc file:
export CDPATH=/var/www:/home/username/Dropbox
Now, to open the directory ~/Dropbox/Books, you can use the following command:
$ cd Books
ZSH will check if a Books directory exists in either /var/www or /home/username/Dropbox, and it will navigate you to that directory if it does.
Fasd
There is an even more powerful tool for navigating between directories. It’s the utility fasd (pronounced like “fast”). It remembers all the directories (and file paths) you’ve used and allows you to move between them by specifying just a part of the path (even just a few letters).
Here’s how it works. Let’s say you’ve previously navigated to the directory ~/src/projects/apps/myCoolApp, and now, after hours or even days, you want to return to it. All you need to do is execute the following command:
$ z myCoolApp
Here’s a simplified version:
$ z CoolApp
And even more simply:
$ z Cool
The main requirement is that the set of characters you specify must be unique among all the paths that fasd remembers. Besides ‘z’, fasd supports other shortcuts: ‘a’ — displays all saved paths, ‘zz’ — allows you to switch to a directory using an interactive menu (if the entered set of characters appears in multiple paths), and ‘v’ — opens a file in the Vim editor.
The fasd utility is available for Debian/Ubuntu, Arch Linux via AUR, and macOS through brew. To install it on Ubuntu, you can use the following method:
$ sudo add-apt-repository ppa:aacebedo/fasd
$ sudo apt-get update
$ sudo apt-get install fasd
Next, you need to activate the fasd plugin in your ~/. file:
plugins=(git fasd)
Peco
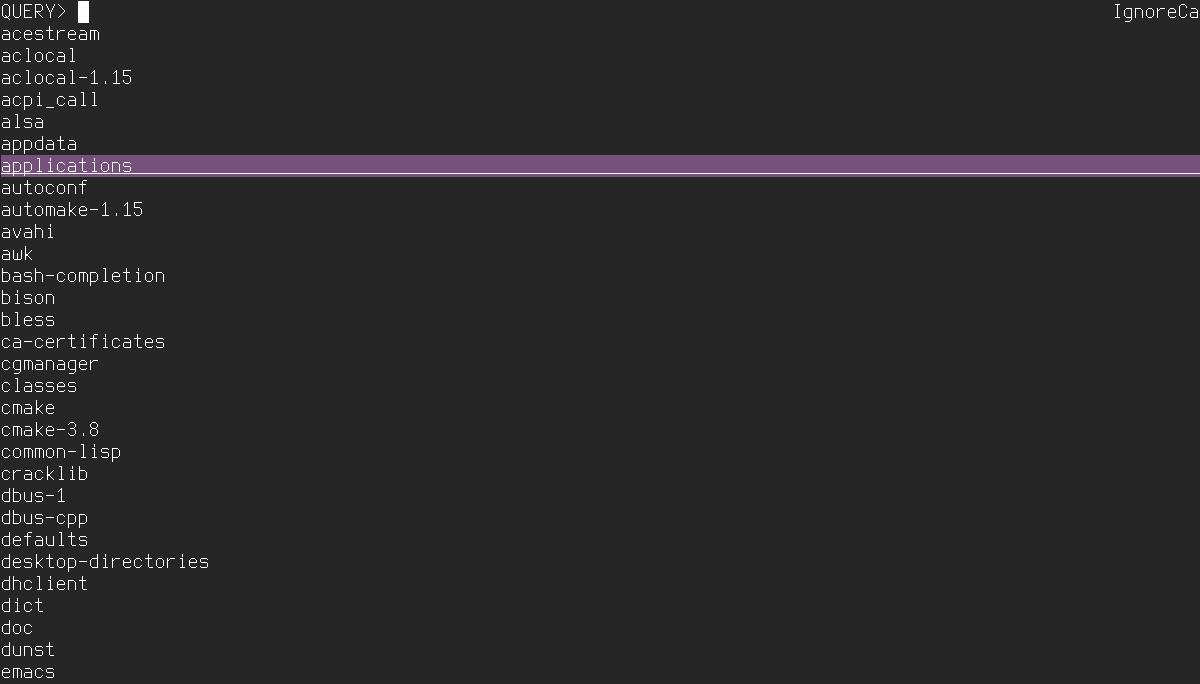
Peco is another tool that can significantly simplify navigation and searching. It’s a small utility that takes a list of strings as input and displays a pseudo-graphical menu, allowing users to select or find the desired string. Once a string is selected, peco outputs it and completes its task (essentially, it’s a console equivalent of dmenu).
Peco can be used for navigation and searching within any text strings, including paths. For instance, if you run the following command and select a directory, peco will print its name in the terminal:
$ ls | peco
It’s not very convenient or useful. However, by slightly complicating the example, you can create an interactive directory navigation (cd):
$ cd `ls | peco`
We’ve gained some benefits, but at the cost of convenience. To address this, let’s create a short and simple alias for this command. Add the following line to your ~/.:
alias cdi='cd `ls | peco`'
Now, the cdi command will execute our interactive cd.
Speaking of cd, remember these two simple rules:
- The command cd without arguments will take you to your home directory.
- The command cd – will return you to the previous directory.
Maximizing the Power of Autocompletion
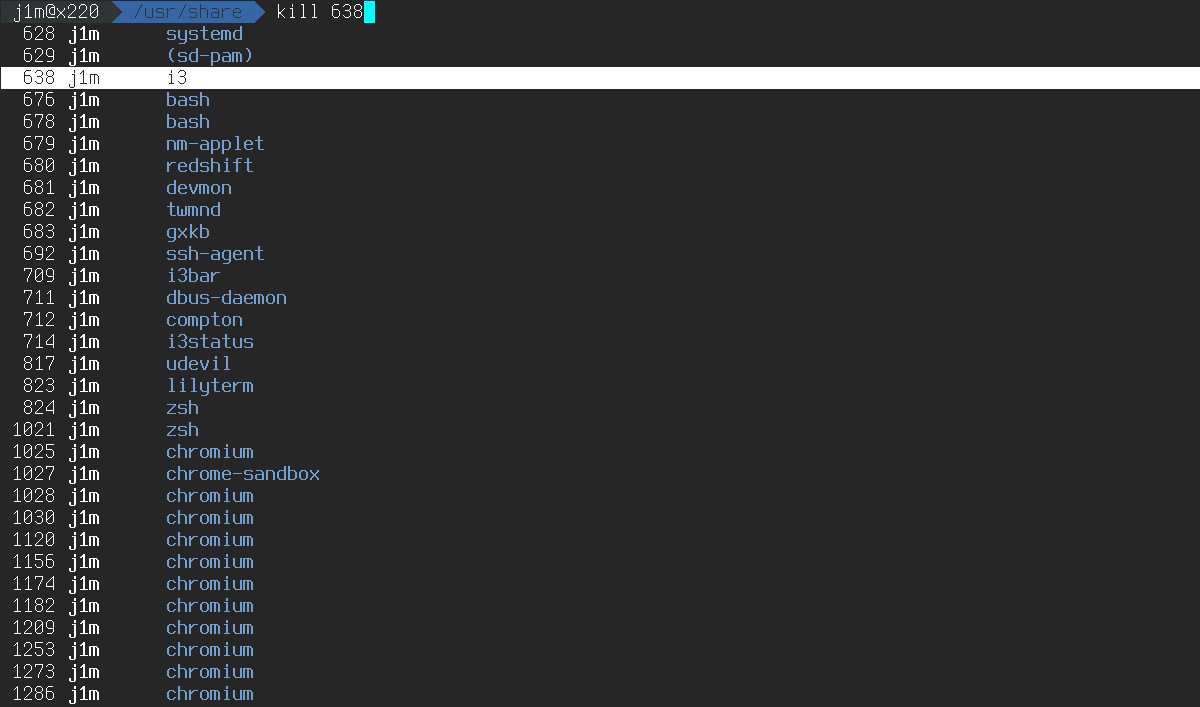
The ZSH autocompletion system is intriguing not only for its smart features but also because it operates beyond just directory and file names. ZSH can autocomplete flags and options for many utilities, provide handy documentation for them, and complete package names for package managers like apt-get, yum, and pacman. It can also autocomplete hostnames when connecting via SSH. If you type “kill” and press the Tab key, ZSH will display a list of processes. Pressing Tab again makes the list interactive, allowing you to select which process you want to terminate.
In addition to the built-in autocompletion rules, oh-my-zsh offers a wide array of plugins with autocompletion rules for many utilities and applications.
Managing Command History
Any modern command-line interpreter, whether ZSH or bash, keeps a history of entered commands. ZSH, for example, stores this history in the file /. If needed, you can search through it using grep (e.g., grep ) to find a specific command. However, this is not strictly necessary, as the command-line interpreter already offers built-in tools to work with command history.
For example, the following command will insert the previous command into the input line:
$ !!
It’s especially handy to use if you forget to prefix a command that requires root privileges with sudo:
$ pacman -Syu
error: you cannot perform this operation unless you are root.
$ sudo !!
sudo pacman -Syu
You can extract only the command argument from the history. For example:
$ cd /home/user/foo
cd: /home/user/foo: No such file or directory
$ mkdir !*
mkdir /home/user/foo
You can insert into the input line the last command that starts with the specified characters like this:
$ !qwerty
If you need to find a command containing specific characters somewhere in the middle or at the end, you can do the following:
$ !?qwerty?
You can even correct typos in the last entered command:
$ ^dc^cd
By using the Ctrl + R command, you can search commands interactively. Just start typing characters from the command, and ZSH will auto-complete it in the input line. This is a very handy feature, but it can be made even more convenient by utilizing the capabilities of peco, which we are already familiar with.
Online, you can find a third-party plugin for oh-my-zsh called zsh-peco-history. Just download it into your ZSH third-party plugins directory:
$ git clone https://github.com/jimeh/zsh-peco-history.git $ZSH_CUSTOM/plugins/zsh-peco-history
And activate in ~/.zshrc:
plugins=(git fasd zsh-peco-history)
Now, the Ctrl + R combination will launch a full-screen peco menu instead of a single-line search bar.
Copying, Deleting, and Renaming
It might seem like there’s nothing easier than copying or renaming a file. You simply type the cp or mv command, followed by the old and new file names:
$ cp httpd.conf httpd.conf.bak
But why bother with extra button presses when you can do it like this:
$ cp httpd.conf{,.bak}
A string containing curly braces with two items separated by a comma will be expanded into two lines: one containing the characters before the comma and the other containing the characters after the comma.
You can take it a step further by using regular expressions instead of simple string replacements. For this, you’ll need the rename command:
$ rename 's/regular_expression/replace_with/' *.txt
This command will replace all substrings matching the regular expression in the names of all files with the .txt extension. Pretty neat, right?
It’s also worth looking into the basename command. In regular use, it simply outputs the last element of a path.
$ basename /usr/bin/zsh
zsh
It can also be used to extract portions of a string, for example:
$ basename file.txt .txt
file
You might wonder, what does this achieve? Here’s what:
$ for file in *.png; do convert "$file" "`basename "$file" .png`.jpg" ; done;
This is a script that converts all PNG files to JPG. The command is quite simple: we create a loop that goes through all the PNG files in the current directory, then runs the convert command to re-encode them into JPG format. The basename is used to give the new files a proper name. Hint: Backticks execute the enclosed command in a so-called subshell, which allows you to run one command from within another.
To grasp their potential, consider the following command:
$ rm -f `tar ztf /path/to/file.tar.gz`
I’m sure this command will save you more than once when you extract a tar.gz archive in the wrong directory. It removes all previously extracted files.
Efficient File Searching
You should already know that every UNIX system has the find command, which is used for searching files. It’s incredibly easy to use:
$ find . -name *.c -type f
This command will find all files with the .c extension in the current directory and all its subdirectories. But what if you need to find the string “open” in each of these files? Here’s how:
$ find -name *.c -type f | xargs grep open
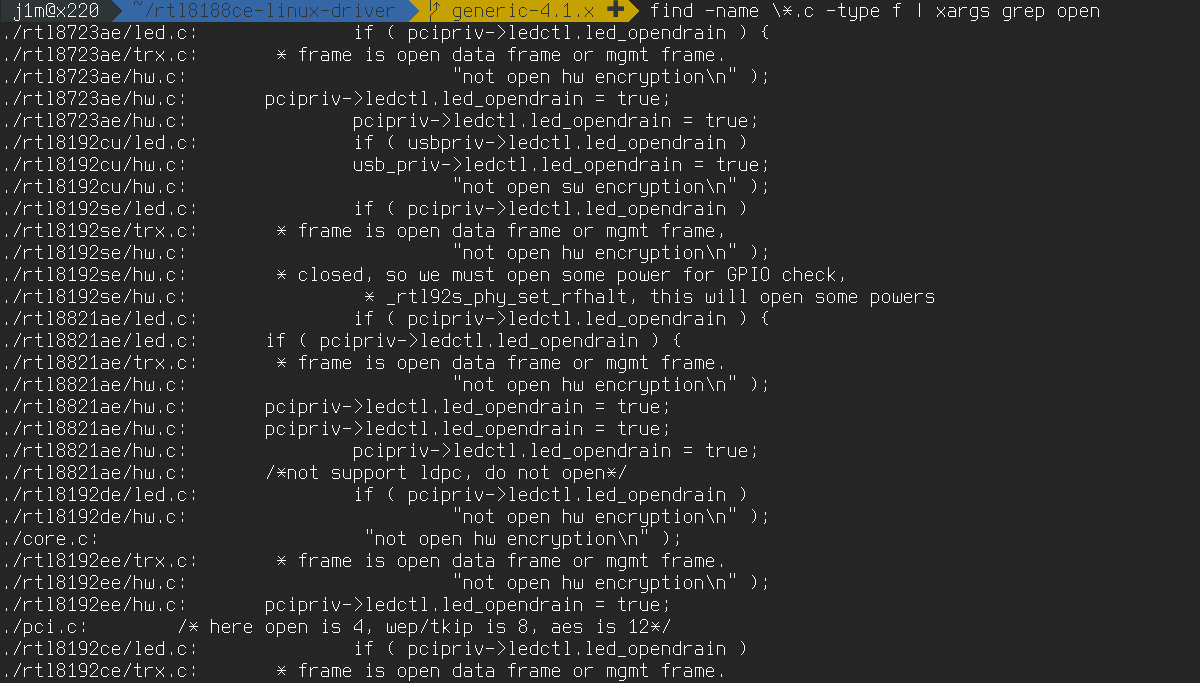
Here’s an alternative approach:
$ find . -name *.c -exec grep -H open {} ;
This example is a bit more complex and, surprisingly, slower. Why? Because xargs parallelizes the search by launching a separate grep process for each line.
If desired, you can completely do away with using find:
$ grep -R open --include="*.c".
Essentially, this is equivalent to the previous command.
Mastering the Clipboard
While reading this article, you’ve likely found yourself copying commands and pasting them into the terminal. If not, it means you were typing them manually, which is the preferable approach—your memory will thank you. Nonetheless, copying and pasting commands into the terminal is incredibly inconvenient, as is the whole concept of copy-pasting itself.
In the case of the terminal, you have a very powerful tool at your disposal. It’s called xclip, and it lets you copy and paste to the clipboard. To get started, add the following lines to your ~/.zshrc and restart the terminal (or ZSH):
alias -g xcopy='xclip -selection clipboard'
alias -g xpaste='xclip -selection clipboard -o'
Now, to copy something to the clipboard, simply redirect the output to xcopy. For example:
$ uname -a | xcopy
The output of the uname command will end up in the clipboard. You can paste it in the same way:
$ xpaste
Output can also be redirected. Alternatively, you can enclose xpaste in backticks to execute its contents in the shell.
Conclusion
The command line is not just a powerful tool; it’s so powerful that I struggle to think of any OS interface that could be more effective. What I’ve described is just a tiny fraction of the iceberg’s tip, and it would take an entire series of books, akin to the “Great Soviet Encyclopedia,” to cover all command line tricks. And finally, what everyone has been waiting for—using dd with progress display:
$ pv -tpreb /dev/sdb | dd of=~/sdb.img bs=1M
That’s all.
