A Brief History
Owners of early Android versions typically gained root by exploiting a vulnerability in Android’s security model or in a vendor-installed system app. These exploits let an app break out of the sandbox and escalate privileges to obtain system-level (root) access.
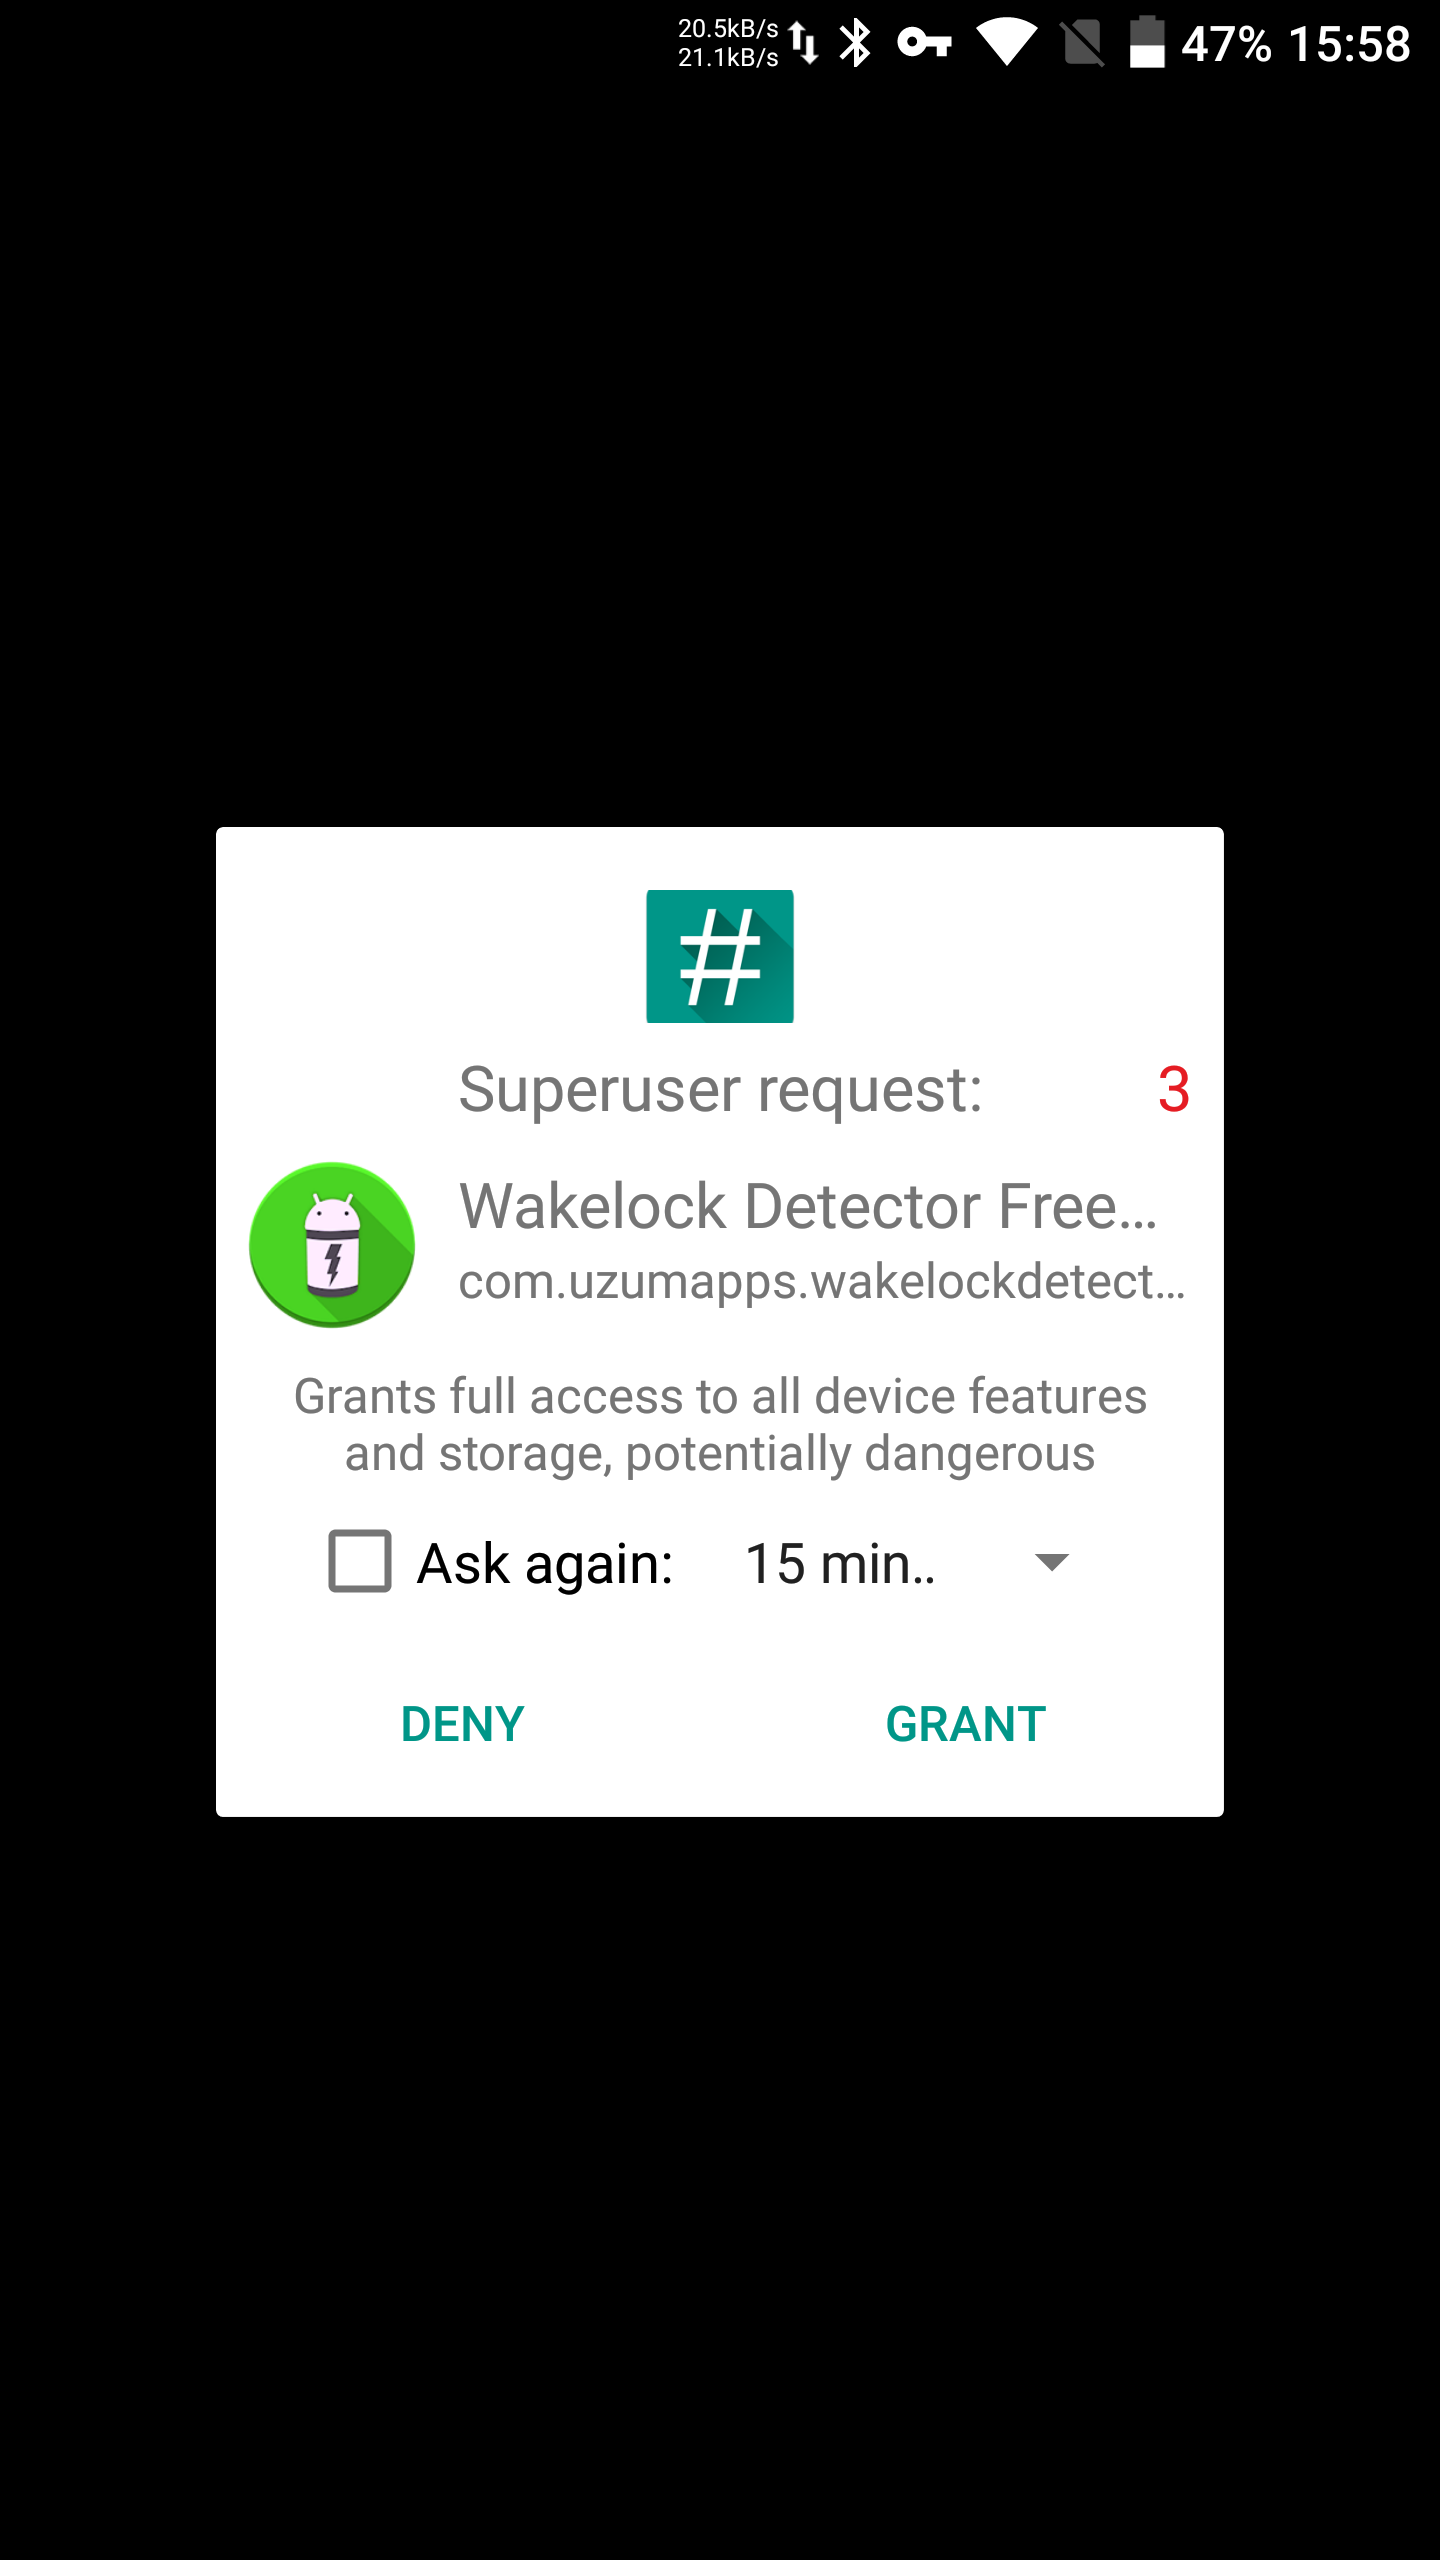
To avoid repeating the process every time and to let other apps use superuser privileges, the su binary was placed in the system partition (typically in /), along with an app to handle root permission requests (in /). To obtain root, an app would launch su; at that point, the request manager would trigger and ask the user to confirm.
 |
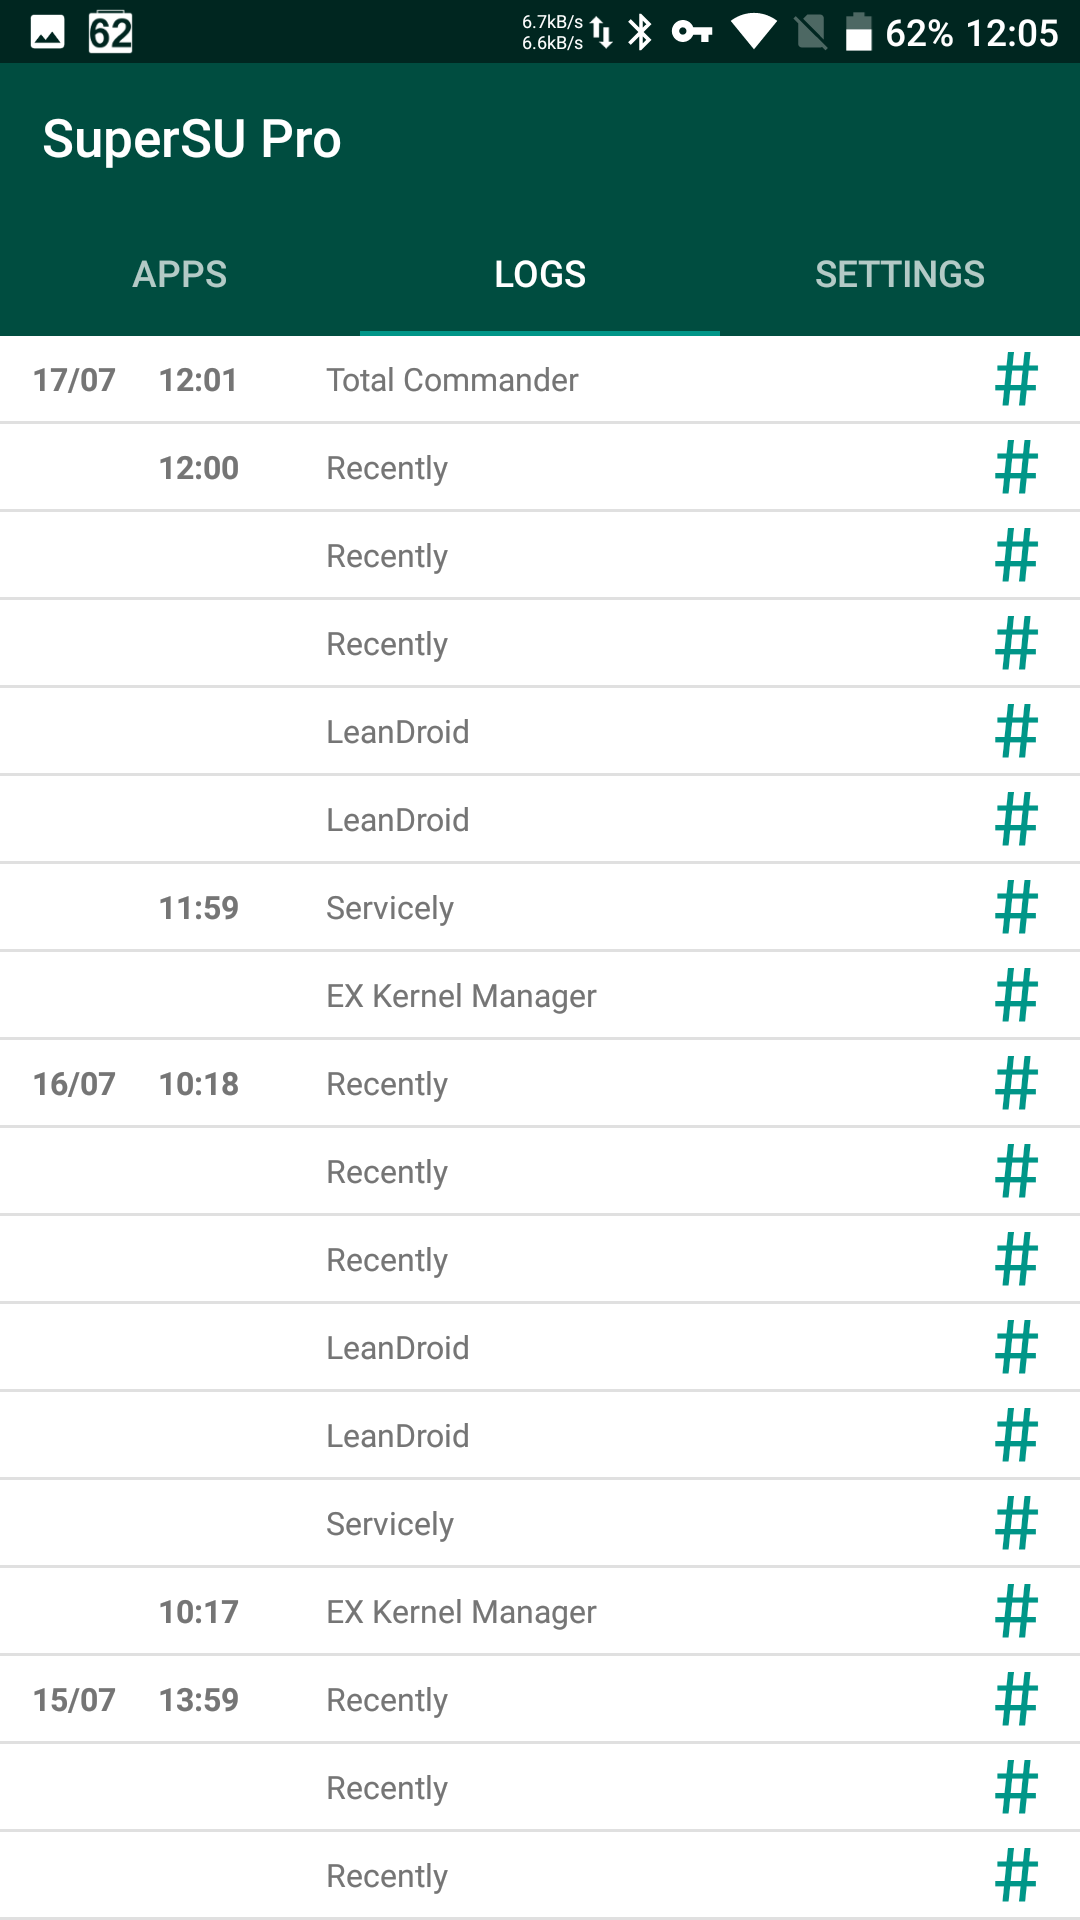 |
| Root access prompt and request history | |
This approach worked well on all Android versions up to 5, and the root access it provided usually didn’t block firmware updates and sometimes even survived them. Many popular apps exploited one or more vulnerabilities (for example, Towelroot). Over time, Chinese apps like KingRoot and Kingo Root attracted large audiences; they included sizable exploit packs that were downloaded at launch from servers in China. If privilege escalation succeeded, these apps would install a lot of their own components into the system partition; you could remove them either along with root access or with a special cleaner released by Chainfire, the developer of SuperSU.
Android 5.0 introduced a new update mechanism. OTA packages began describing changes at the block level rather than the file level; to avoid corrupting the filesystem, the updater verified the checksum of the system partition. Naturally, placing the su binary in the / partition altered that checksum, causing the update to refuse to install (and in cases where it did install, there was a high risk of ending up with a brick).
Android 6 also introduced an updated security model that (temporarily) made it impossible to obtain superuser privileges by simply dropping an app into the system partition. As a result, a workaround appeared—the so-called systemless root—which injects su into the ramdisk instead of modifying the system partition. On some devices with systemless root you could even install OTA updates, though there were no guarantees.
How the HTC Dream G1 Was Rooted
The first-ever Android device to be rooted was the HTC Dream G1, released back in 2008. It had a Telnet service running as root with no authentication. To gain temporary root access you could simply connect to the phone over Telnet; for a persistent root you’d place the su binary into the system partition.
Root Access on Android 7
Devices that ship with Android 7 preinstalled are a special case (though what we’re about to discuss also applies to many devices that receive Android 7 as an update).
As you probably know, Android’s Verified Boot has been around since 4.4 KitKat. Its goal is to protect users from pre-boot tampering—attacks that modify the system and inject code before the OS even starts. To do this, it uses a key stored in the TEE to verify the bootloader’s digital signature; the bootloader then verifies the digital signature of the boot partition, which in turn checks the integrity of the system partition using dm-verity (Device Mapper verity).
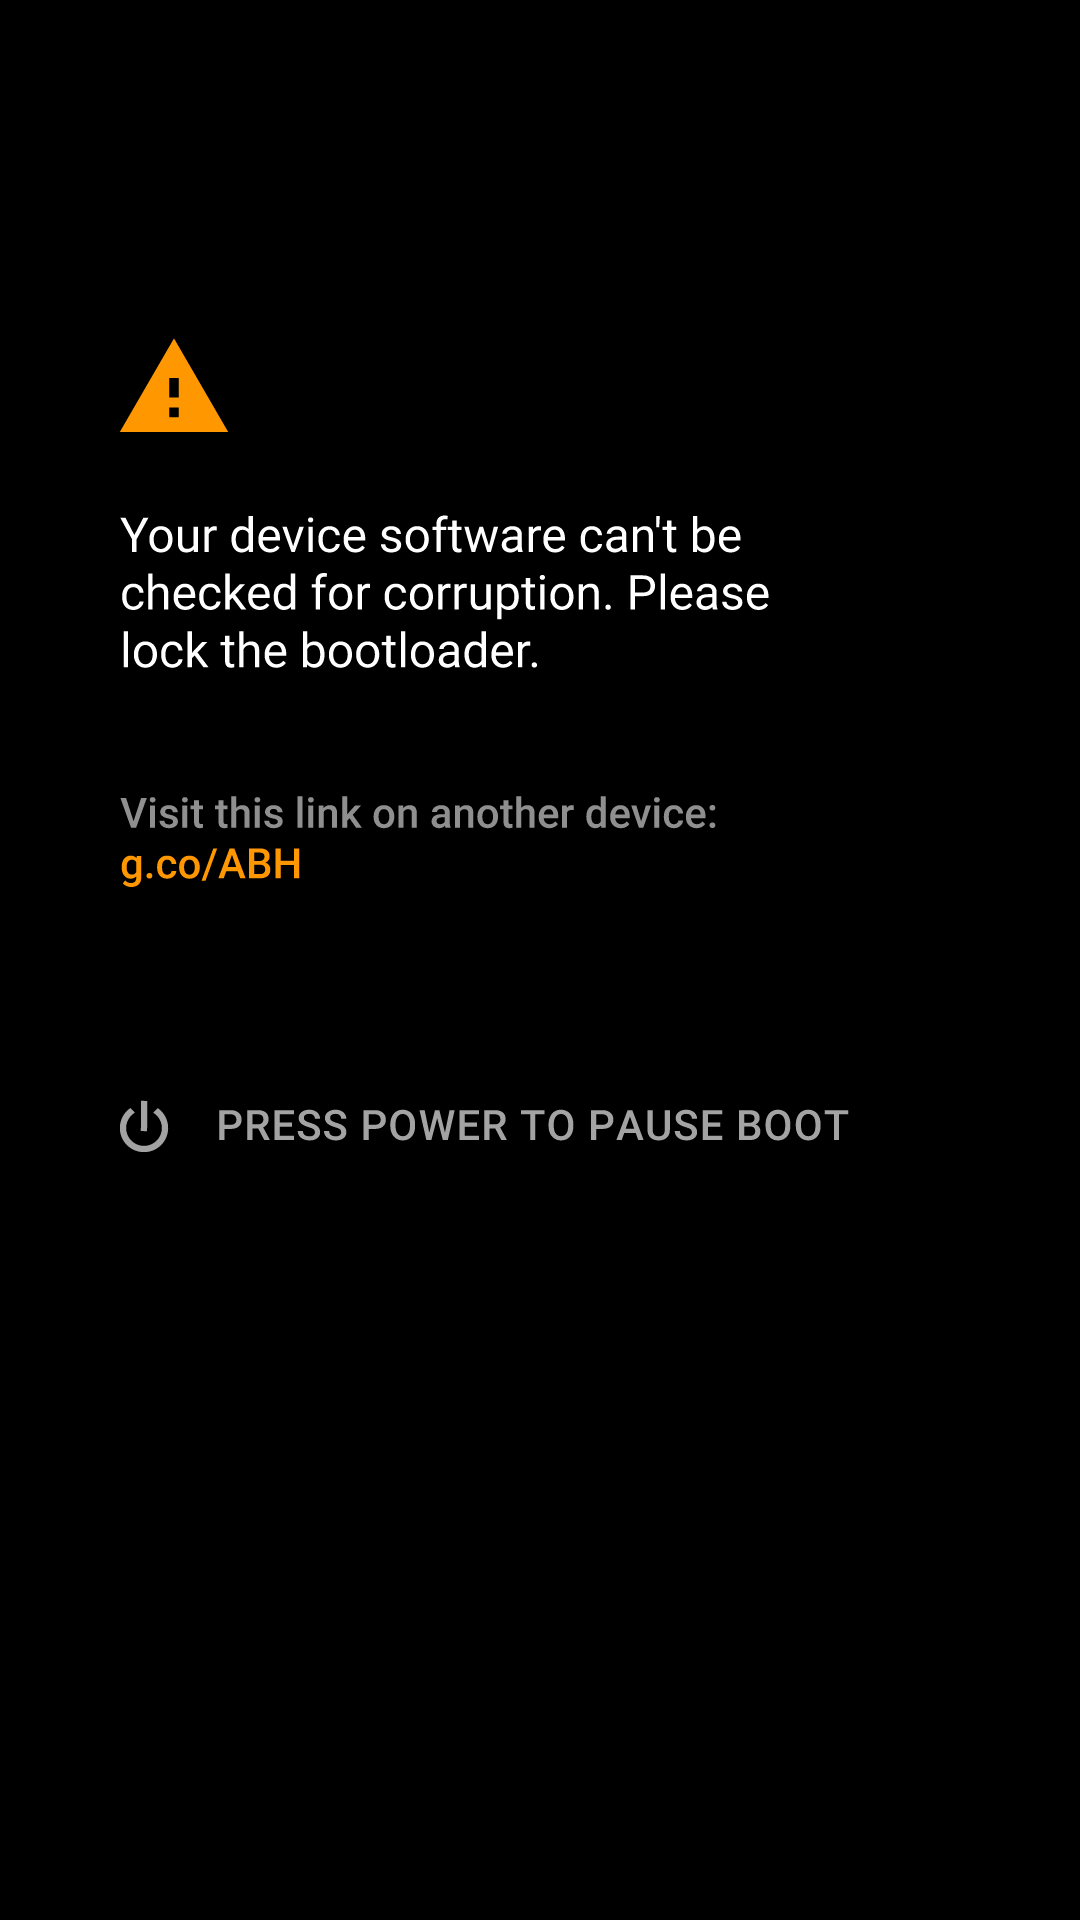
This chain of checks (known as the root of trust) ensures the integrity and absence of tampering across every stage of the boot process, from the bootloader to the operating system itself. On most devices running Android 4.4–6.0, an integrity check failure would simply display a warning and continue booting (with rare exceptions like BlackBerry phones and Samsung devices with Knox enabled). Starting with Android 7.0, however, this changed: the previously optional system integrity verification became mandatory.
 |
 |
| Verified Boot will load a modified boot image if the bootloader is unlocked (left), but will refuse to boot a modified image when the bootloader is locked. | |
What’s the impact? The old privilege-escalation rooting method on Android 7 simply doesn’t work anymore. Even if tools like KingRoot, KingoRoot, and similar utilities managed to root the device (and right now they can’t), the device would fail to boot afterward.
How do you bypass it? Unlock the bootloader using official methods and install SuperSU or Magisk. In that case, the bootloader will simply disable Verified Boot. However, don’t even try to hack the bootloader on devices that don’t support unlocking. Even if you manage it, the tampered bootloader won’t pass signature verification—and you’ll hard-brick the device.
What about Android O? The latest version of Magisk supports the current beta. Naturally, only on devices with an unlocked bootloader — and for now, Android O isn’t even installable on anything else.
Alright, we’ve covered the history. Now let’s look at different ways to gain root access. We’ll start with the most popular option—SuperSU.
Chainfire’s SuperSU
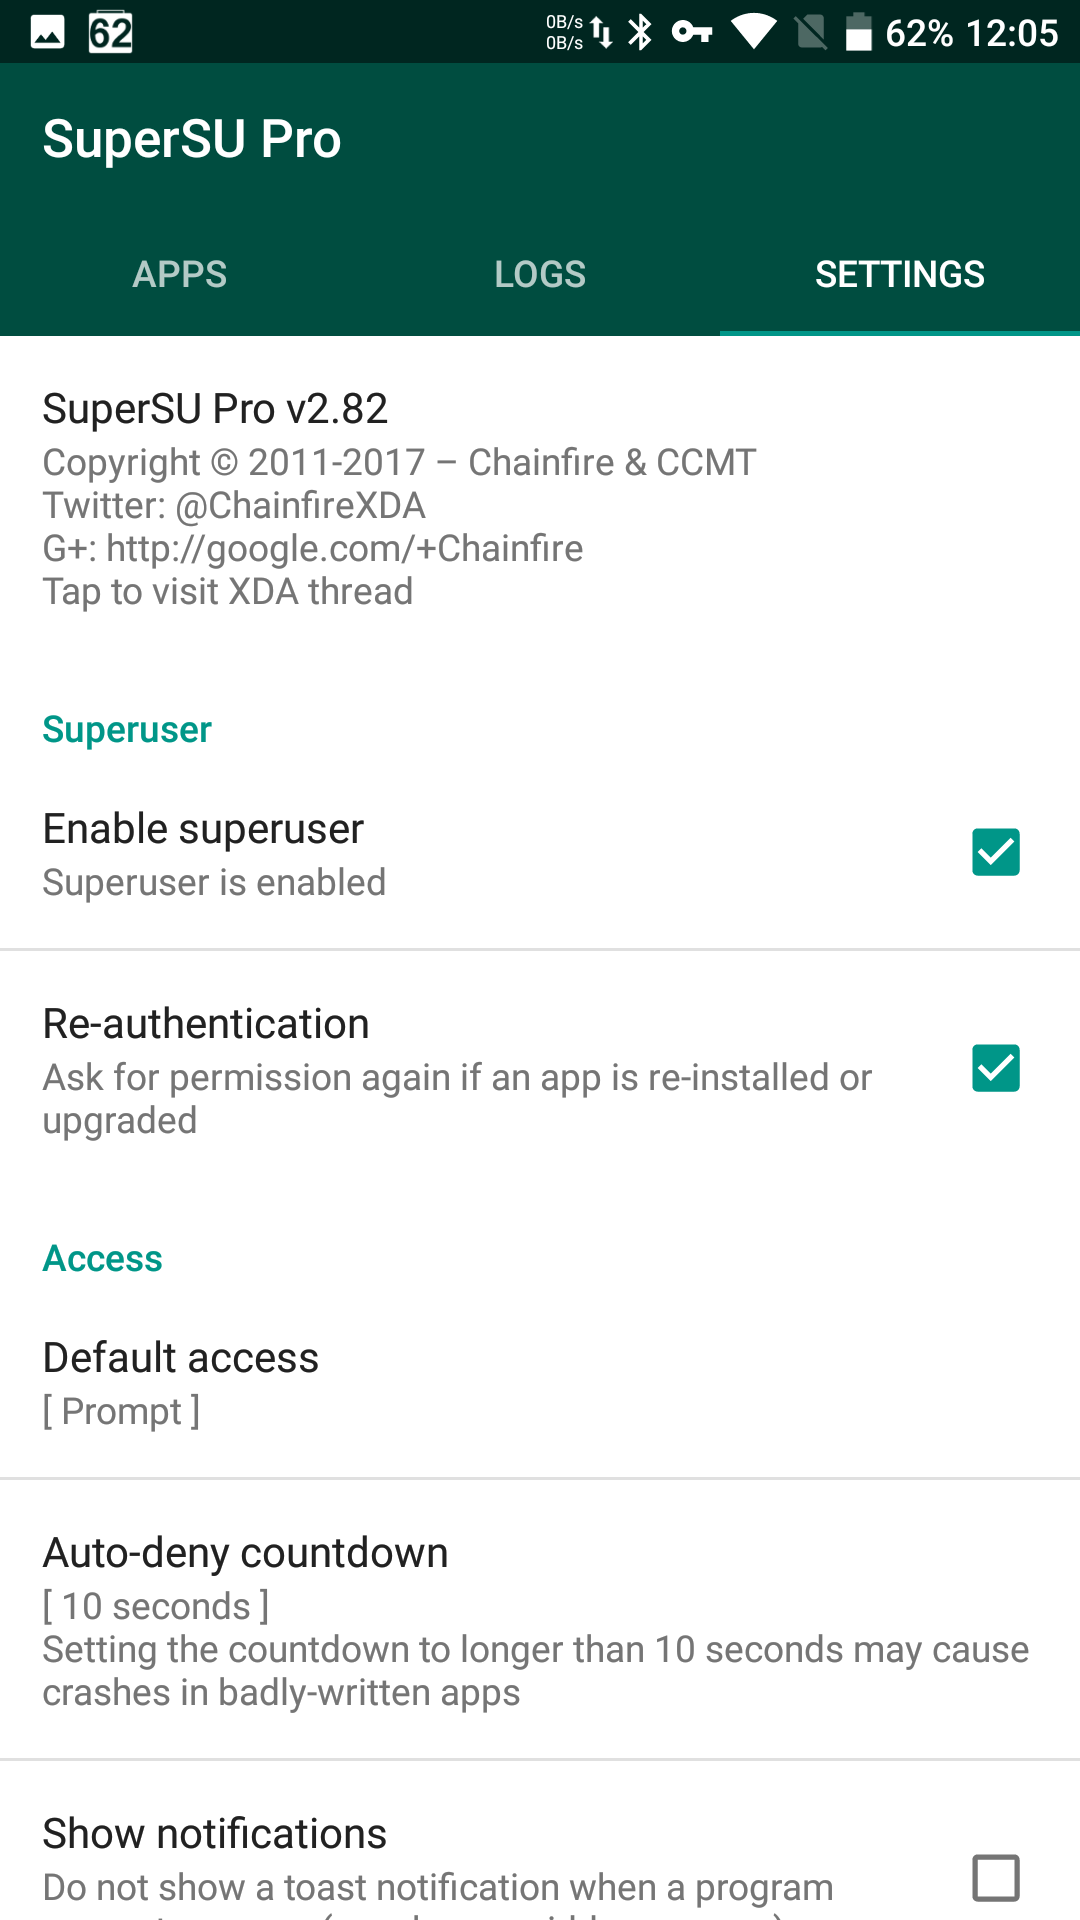
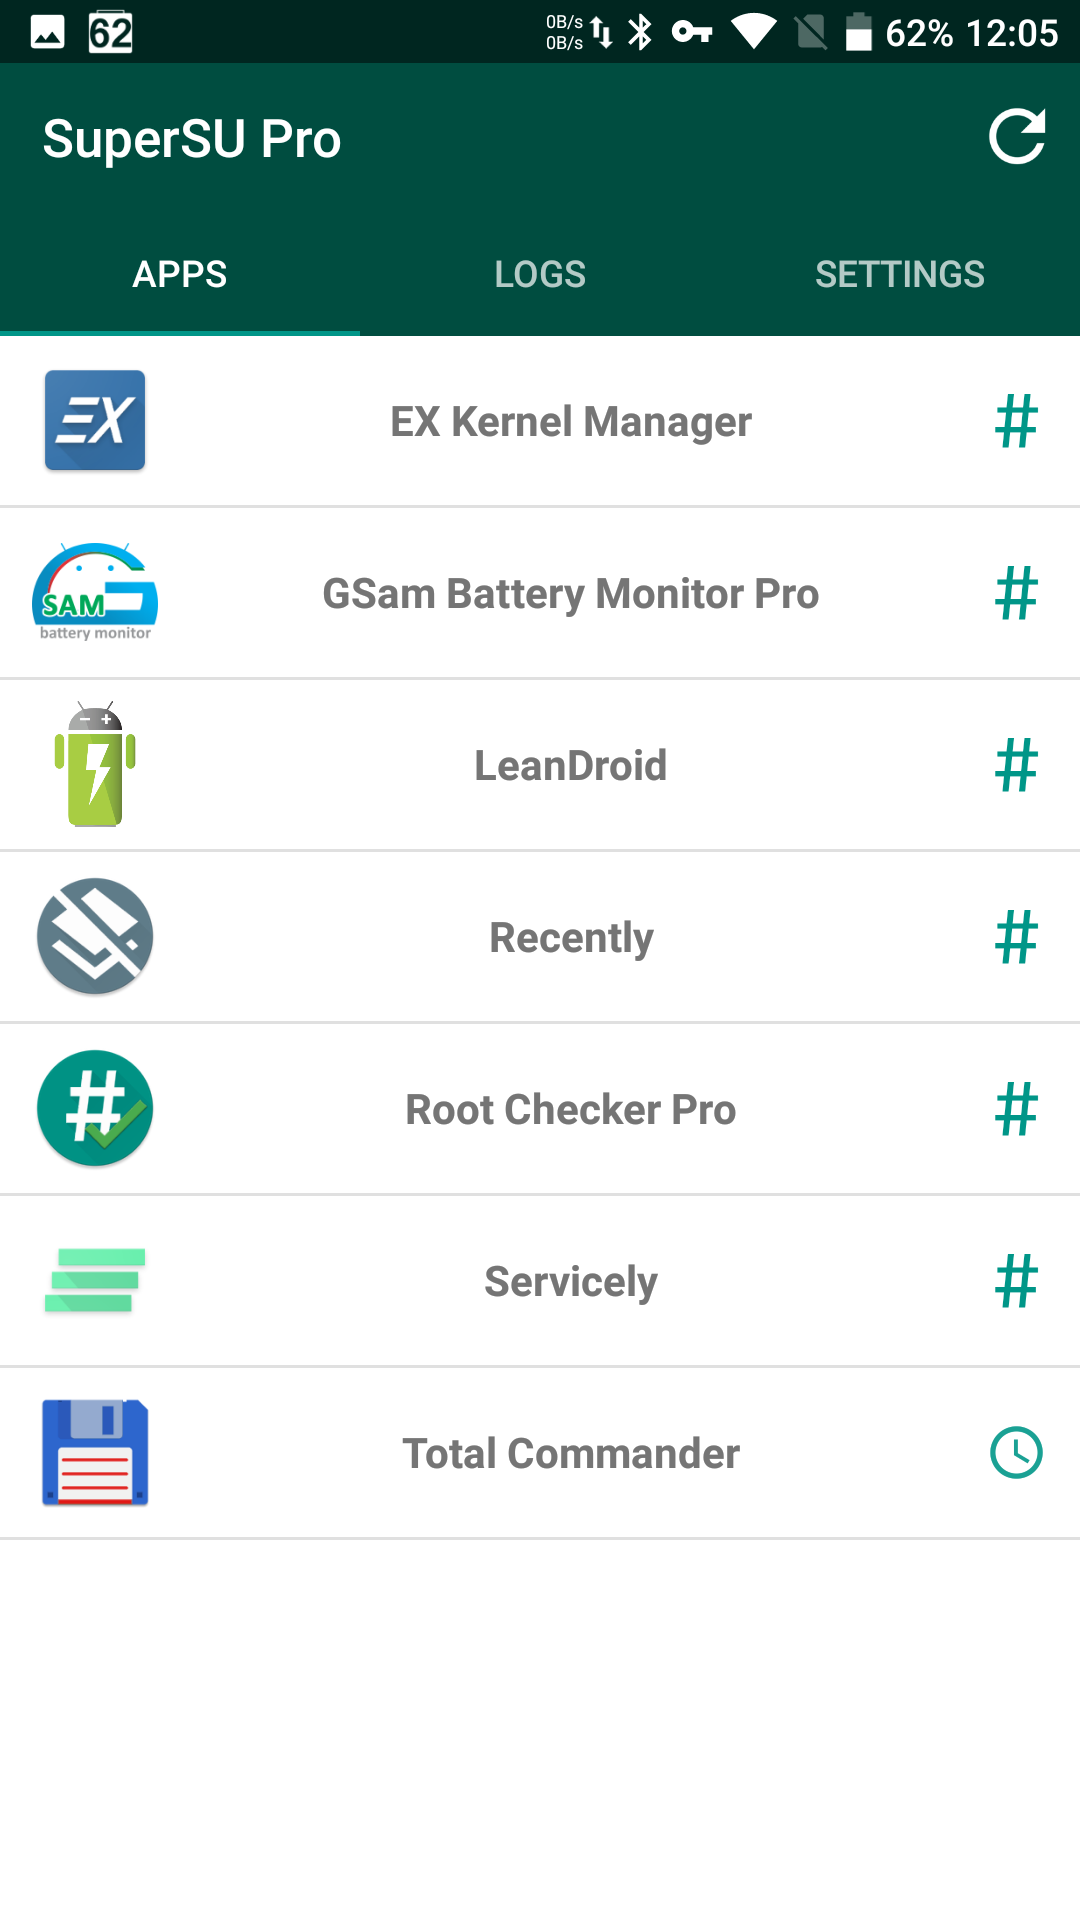
SuperSU is by no means the first app for obtaining superuser privileges. The name “SuperSU” is short for “Super Superuser”; it replaced the Superuser app in 2013.
 |
 |
| SuperSU | |
Then things got interesting. Chainfire, the developer who had been (and to some extent still is) maintaining SuperSU, sold the project to an incredibly opaque company, Coding Code Mobile Technology LLC (CCMT), about which little more than nothing is known.
The company behind SuperSU is registered in the U.S. state of Delaware through a registered agent—a jurisdiction often chosen by foreign firms as a kind of quasi-offshore (record of the company’s registration in the state registry).
The company’s roots trace back to China; its exact address, corporate structure, owners, and objectives are unknown. Since SuperSU’s source code isn’t published, some advanced users are wary of installing the latest releases (2.80+).
At the same time, SuperSU remains the most common and most compatible way to obtain superuser (root) access. Some apps work correctly with SuperSU but are only partially compatible with other superuser managers (e.g., Magisk). For example, when used with SuperSU, LeanDroid can automatically toggle mobile data and properly enable/disable the GPS satellite radio without affecting the “battery saving” location mode, whereas with Magisk it cannot—unless you put SELinux into permissive mode. Some popular Viper4Android builds have issues as well; that said, a systemless Magisk module for Viper has been available for a long time, and it’s a much cleaner and more convenient way to install it.
Installing SuperSU
There are several ways to install SuperSU. The most reliable method is to flash the ZIP archive downloaded from the official site using a custom recovery (TWRP or CWM). Naturally, this requires an unlocked (or at least partially unlocked) bootloader.
The installer script will automatically detect your Android version and choose the appropriate installation method (either into the system partition or systemless). On newer Android versions, it will automatically patch boot.img and modify the ramdisk. If your device has TWRP and the bootloader is unlocked, there’s no need to consider any other methods—especially not one‑click tools like KingRoot and similar apps.
Sometimes SuperSU comes preinstalled in firmware packages, most often in unofficial builds. In that case, you don’t need to do anything extra.
Finally, SuperSU can be injected—there’s no better word—into the system in various ways: via a script or an app, using a hardware programmer, or through a service mode—yes, that exists too! And while on Android 6.0 getting su to work properly is generally impossible without unlocking the bootloader, a range of alternative installation methods can often circumvent those restrictions.
Is SuperSU still worth using today? That’s your call. For some devices there’s simply no alternative, but overall the future seems to lie with other solutions—namely, Magisk.
phh Superuser
Before we move on to Magisk, a few words about phh SuperUser. It’s a fork of Koush’s original Superuser—the one that started it all and was later superseded by SuperSU.
phh SuperUser is an open-source solution whose source code is available to the developer community. It was introduced specifically as an open alternative to SuperSU after the latter was acquired by an unidentified group of parties.
As of today, phh SuperUser as a standalone app is history. There’s no need to install it separately anymore. It’s now integrated into Magisk, which is discussed below.
Magisk
What else is there to say about Magisk after the article that ran in the May issue? Frankly, not much.
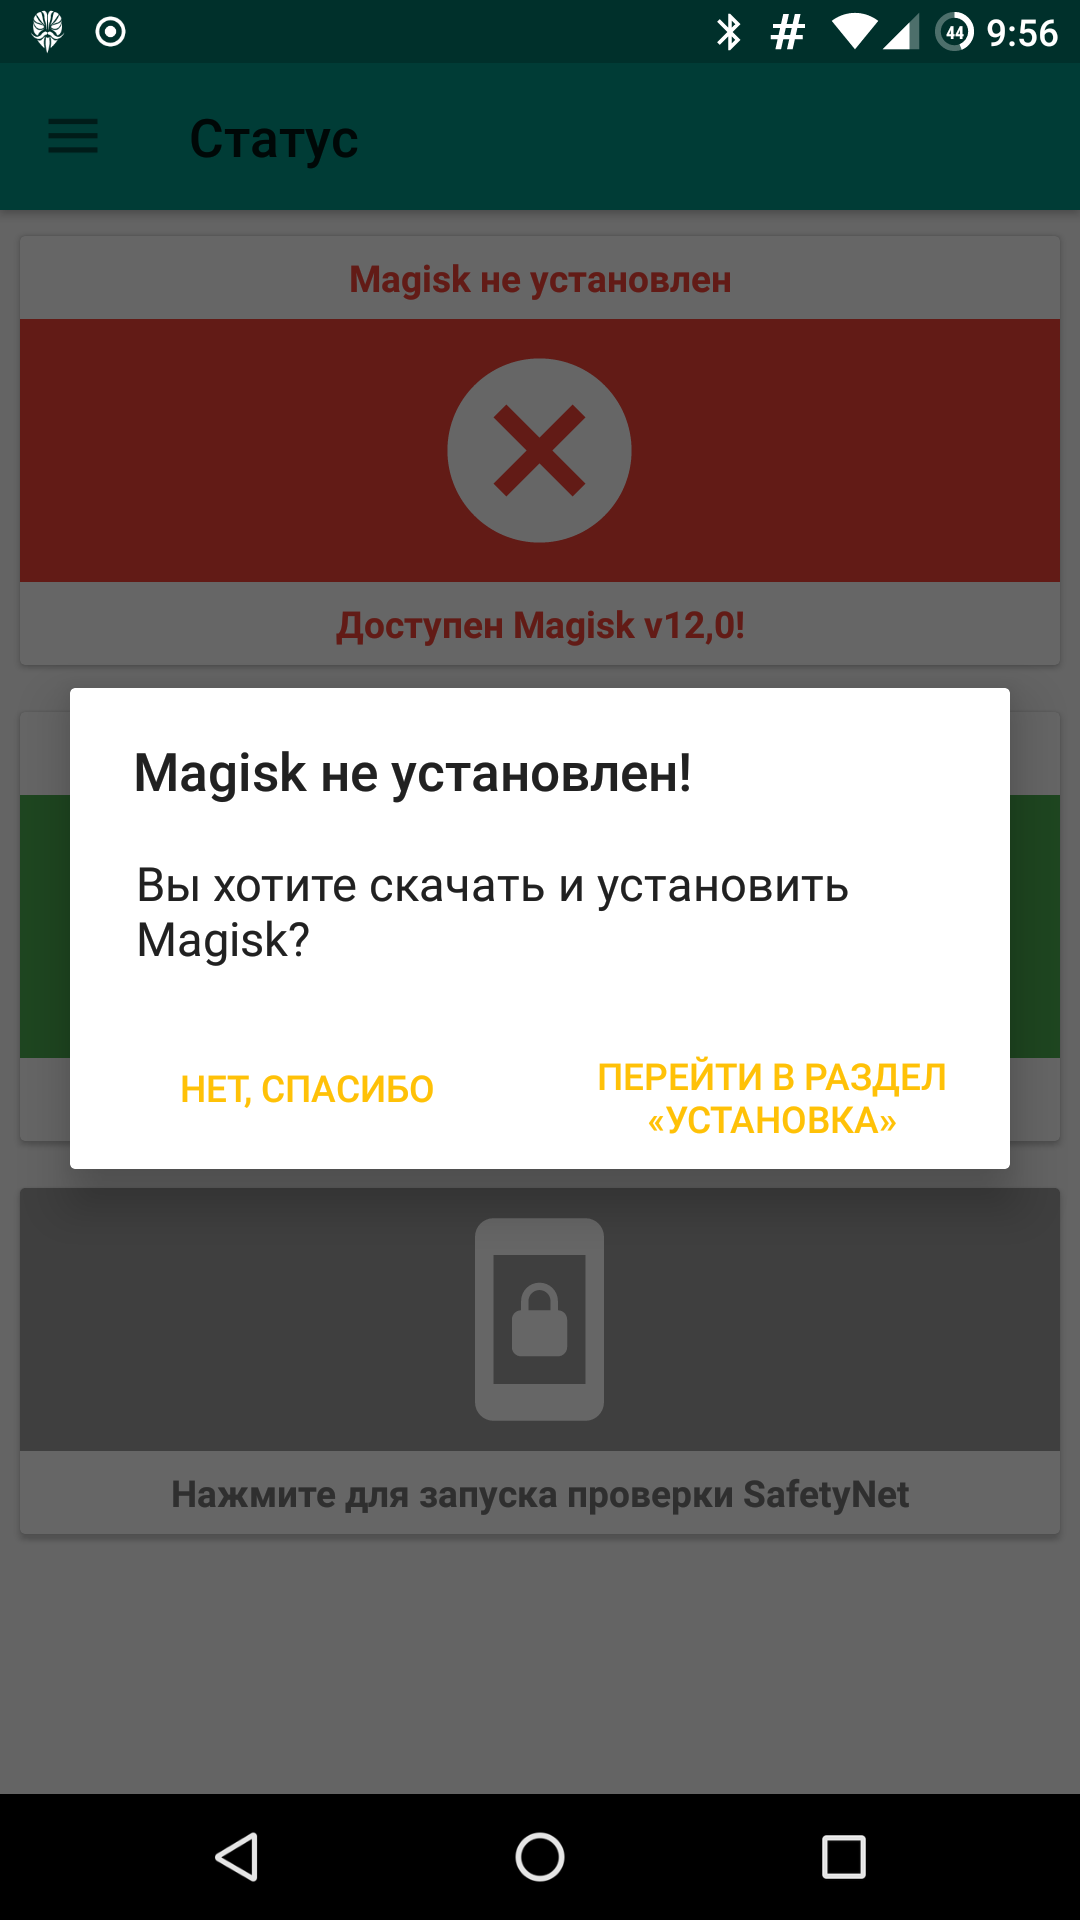
Magisk is a framework that combines the functionality of SuperSU (via phh’s SuperUser) with tools for low-level system modification. It’s a fully open-source project. Its root method is systemless—making no changes to the system partition—so you can install firmware/OTA updates without issues.
One of Magisk’s key features is the ability to hide superuser (root) access from individual apps as well as from SafetyNet checks. While hiding root can re-enable banking apps and certain games (for example, Pokémon Go), successfully passing SafetyNet checks allows you to use contactless payment systems (Android Pay, Samsung Pay, and similar).
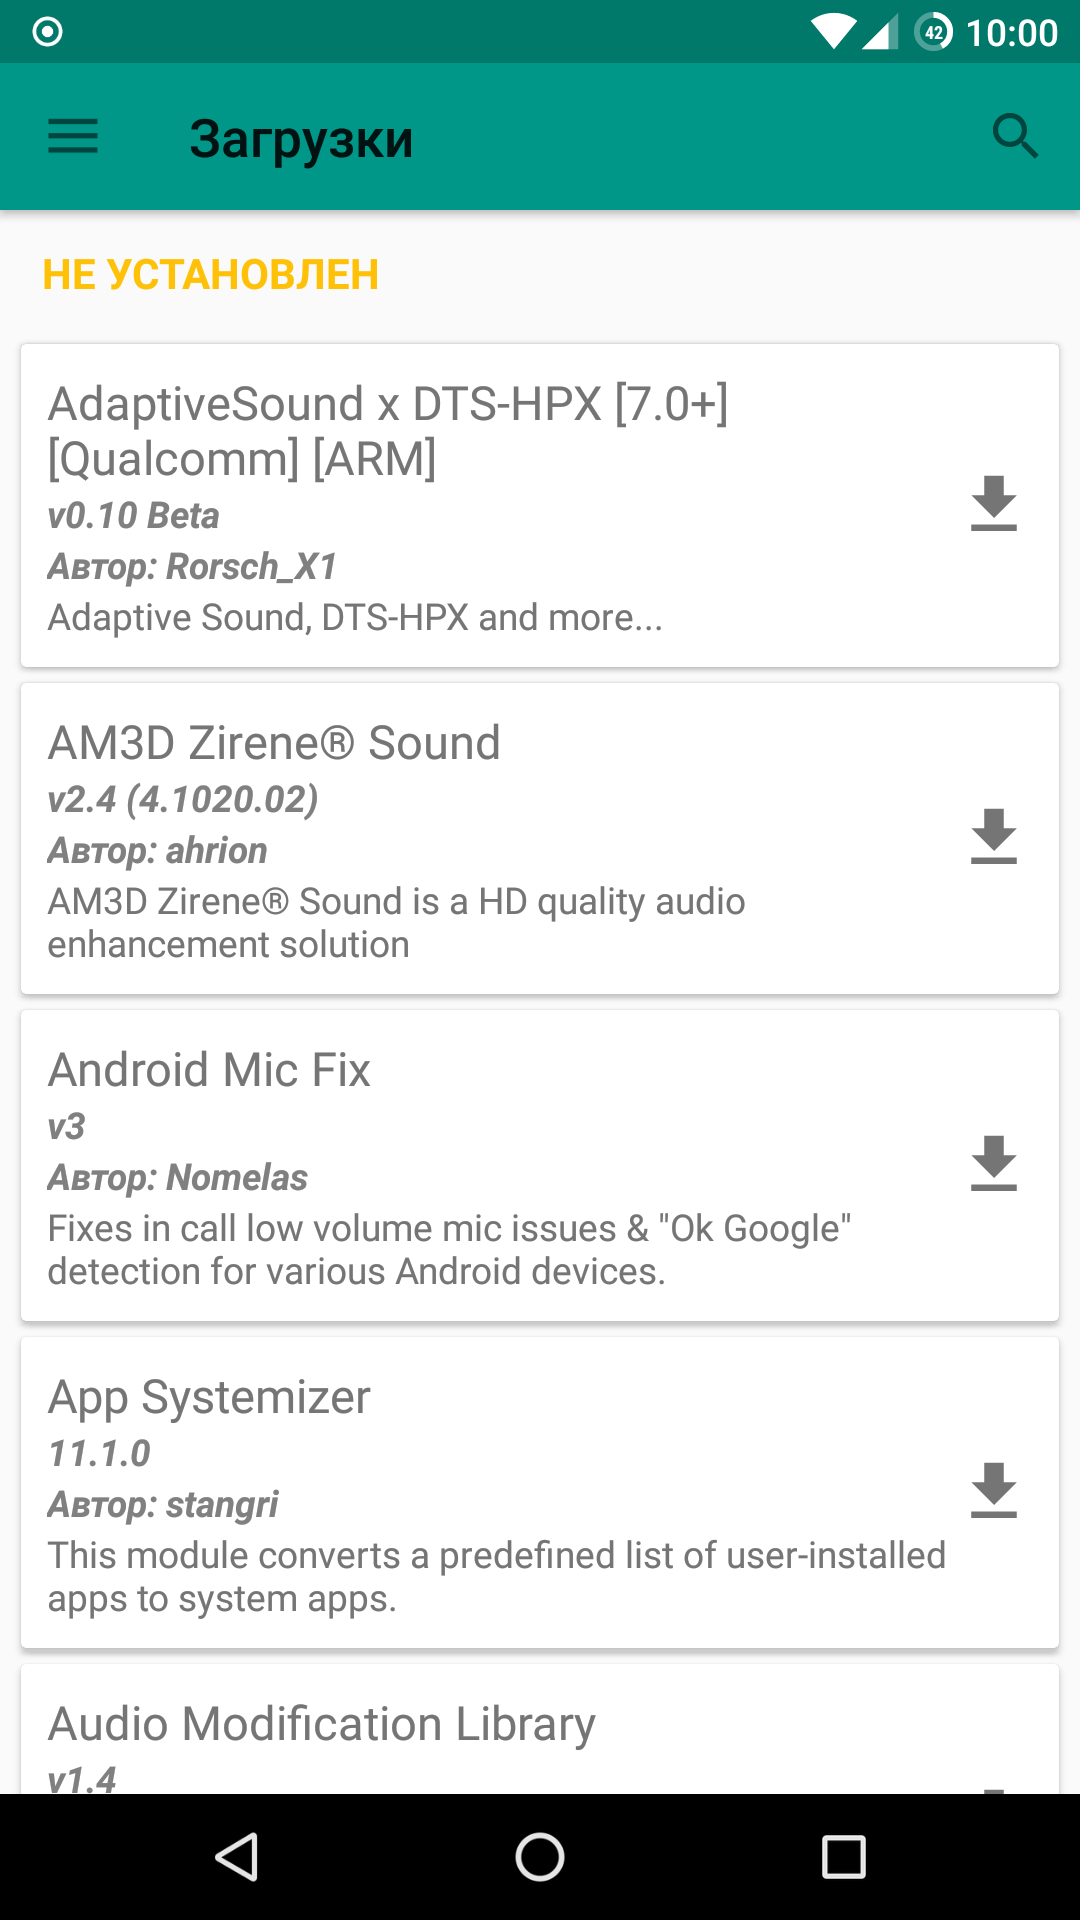
With Magisk, you can load modules that modify the system at a low level—from simple build.prop tweaks to more advanced tools like Viper4Android. These modules are installed in a systemless manner, so they survive firmware/OTA updates. If you need to restore all modules and settings after an update, just reinstall Magisk.
 |
 |
| Magisk | |
Magisk isn’t without its downsides. Some apps don’t work correctly with Magisk-based root but are fully compatible with SuperSU. The reason is the SELinux policies that Chainfire spent a long time refining, which let superuser apps write to the system partition—meaning not just modifying system files, but also writing variables into certain system settings.
Overall, we believe the future belongs to Magisk. It’s open source, evolving quickly, and backed by a large, active developer community. Most importantly, Magisk takes a sensible, well‑engineered approach to obtaining and managing root access without excessive reliance on hacks and kludgy workarounds.
How do you get root with Magisk? Just download the latest version from the XDA thread and flash it via TWRP. Naturally, your device’s bootloader must be unlocked beforehand.
LineageOS
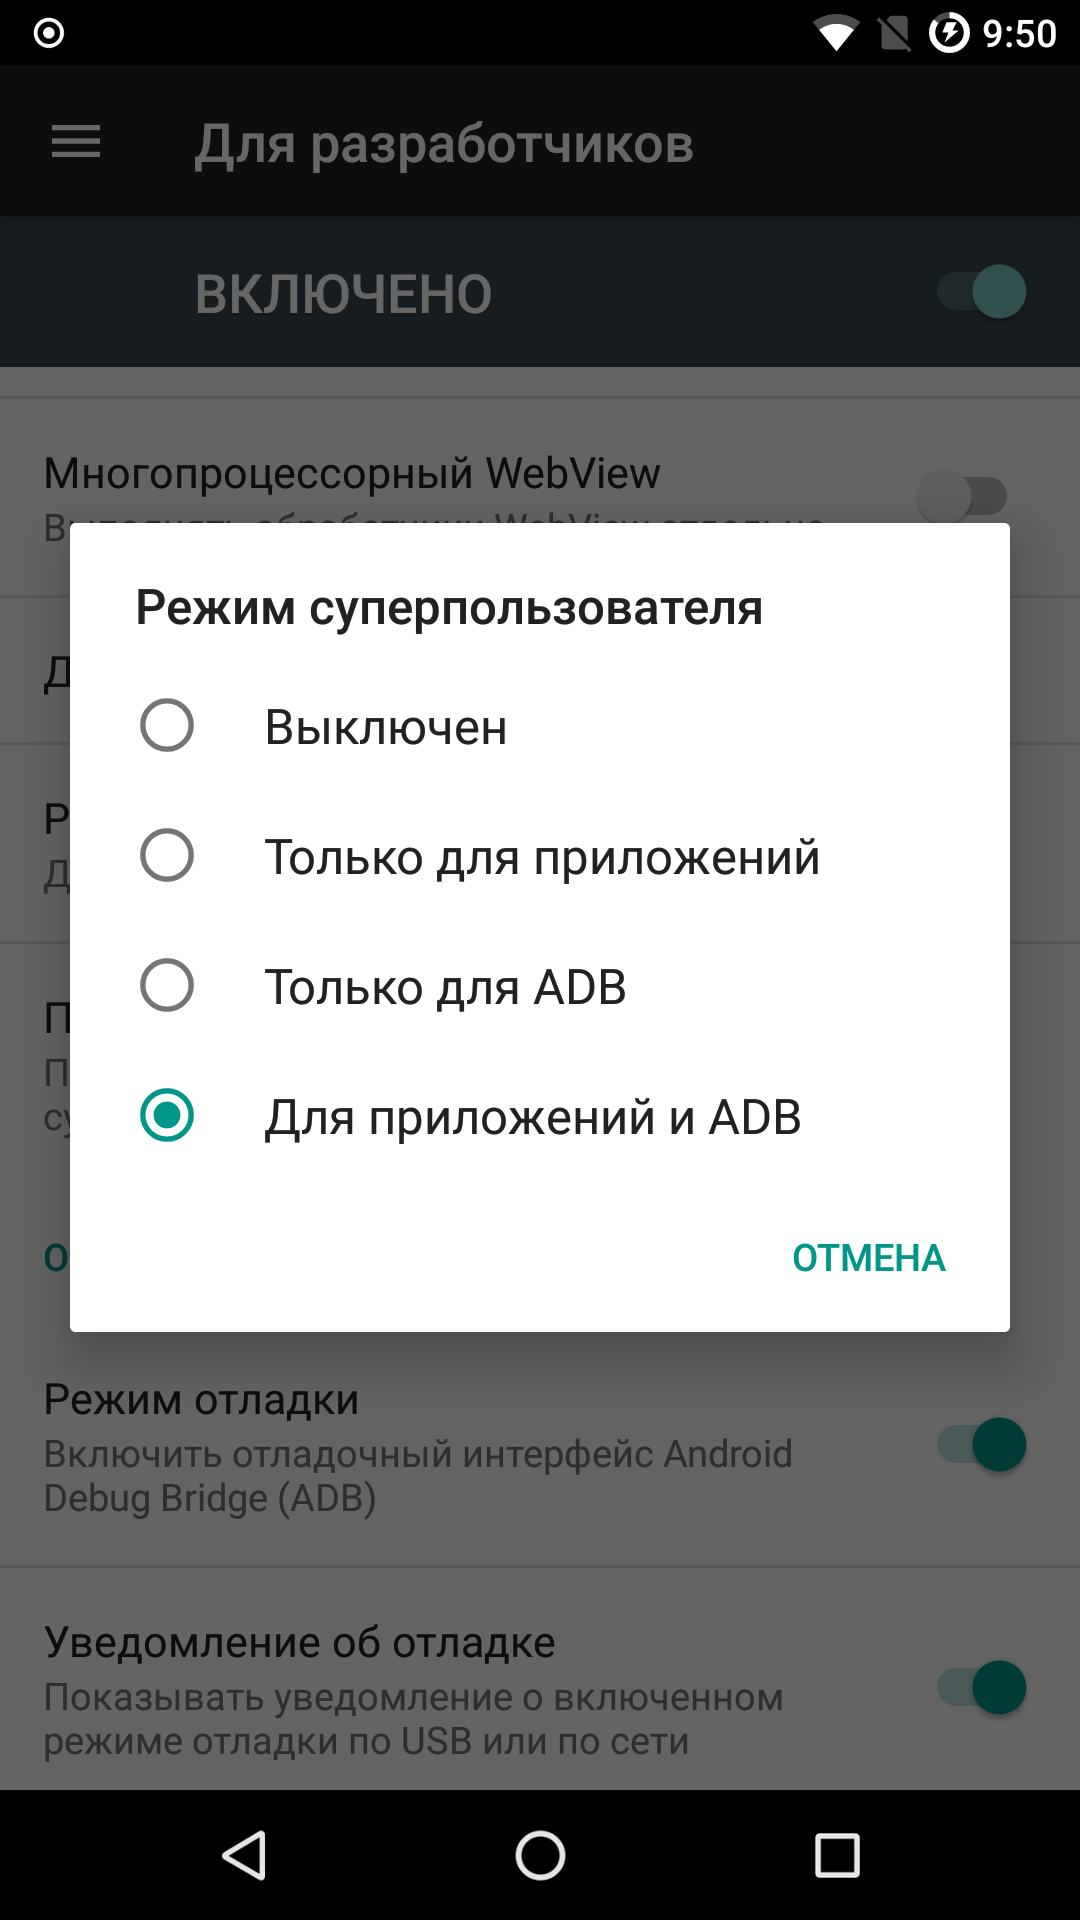
In LineageOS 13 and 14, root access is disabled by default. To gain superuser privileges, download and flash the additional su module via TWRP.
This is probably the cleanest way to gain root access among the methods we’ve discussed. The module, like the rest of the firmware, is available as source code; there won’t be any surprises, and you don’t need to disable SELinux. That said, you won’t be able to hide it from SafetyNet either, which is a consequence of Lineage’s policy.
 |
 |
| Root access management interface in LineageOS | |
Unfortunately, the module doesn’t work on every LineageOS build. On recent official builds downloaded from the project’s website—yes. On the many unofficial builds, it’s hit or miss: it may work, or you might find that only ADB has root. In those cases, you’ll have to flash SuperSU or Magisk.
What to do if your bootloader is locked
What should you do if your device’s bootloader is locked and can’t be unlocked? The correct answer: nothing. You don’t need root—you just want it. And please don’t confuse wants with needs: you have no real need for root access; if you did, you’d simply buy a device with an unlockable bootloader, and in 2017 that’s easy enough.
If you’ve got an experimenter’s streak, don’t mind voiding the warranty, aren’t deterred by the risk of bricking, can live without over‑the‑air updates, and you’re not planning to resell the device (foisting a rooted, locked phone on a buyer is, at the very least, bad form); or, finally, you’re a forensic expert who needs to extract data from the device—then read on.
If your smartphone runs Android 7.x, you’re out of luck. As mentioned, starting with Android 7.0, on Google-certified devices (i.e., any phone with official Google Play support), there’s only one way to get root access: unlock the bootloader and use a custom recovery. Which superuser manager you go with—SuperSU, Magisk, or something else—is entirely up to you and your needs.
On Android 6 devices that receive regular security updates, getting root is generally not feasible. If the security patch level is old, though, you might have some options. The outcome depends heavily on the device model, its specific revision, the manufacturer, the firmware, the patch level, the region, and even which carrier the device was built for (a jab at those who import cheaper Sprint or Verizon models from the U.S. and then flood forums with panic posts).
Even on Android 5.0–5.1.1, it’s not all straightforward. For example, on the old 2014 Moto G running Android 5.1.1 with a security patch that’s about a year and a half old, no one has managed to get root without unlocking the bootloader. And you can’t unlock it on every model or carrier variant: AT&T devices can be unlocked, but Verizon’s can’t—there’s no workaround.
If your Android version is older, there’s a very real chance you can gain root with tools like KingRoot and KingoRoot.
KingRoot, Kingo Root
KingRoot and Kingo Root are two completely different products with similar names that can grant root access on some devices. They’re mostly limited to Android 4.x–5.1.1. KingRoot is installed directly on the phone as an .apk, while Kingo Root is available both as a mobile app and as a Windows tool that works over ADB. According to the developers, the Windows version has a higher success rate than the .apk.
How does it work? KingRoot is a Chinese app that, once installed on a smartphone, downloads exploit code from a server in China and uses it to leverage known CVEs for privilege escalation.
That said, KingRoot has a number of significant drawbacks you should be aware of before attempting to root your device with it:
- A completely closed-source app; no source code available.
- Classic old-school rooting via exploiting vulnerabilities.
- No guarantees: you can easily brick your device.
- You have no way to verify what code will run on your device—the payload is downloaded from a Chinese server at the moment of the exploit.
- KingRoot installs its own very sticky root manager, KingUser. The only standard way to remove it is to remove root entirely.
- You can replace KingRoot with SuperSU, but it’s not simple. There’s a whole thread on XDA about it: https://forum.xda-developers.com/a310/general/how-to-remove-replace-kingroot-kinguser-t3308989.
All in all, Chinese‑style rooting is a risky undertaking. You can end up in a bootloop, permanently break OTA updates, and discover all sorts of intriguing components in the system partition with unclear functionality.
Other classic ways to get root access
Naturally, KingRoot and Kingo Root aren’t the only ways to obtain root via an exploit. Framaroot, Towelroot, iRoot, One Click Root, and many other apps use a similar approach. The difference is that in most of these tools the exploit code is bundled directly into the app (the APK or the Windows client), whereas KingRoot downloads the code used to compromise the phone from a server in China.
A Cat-and-Mouse Game: Hiding Root from SafetyNet
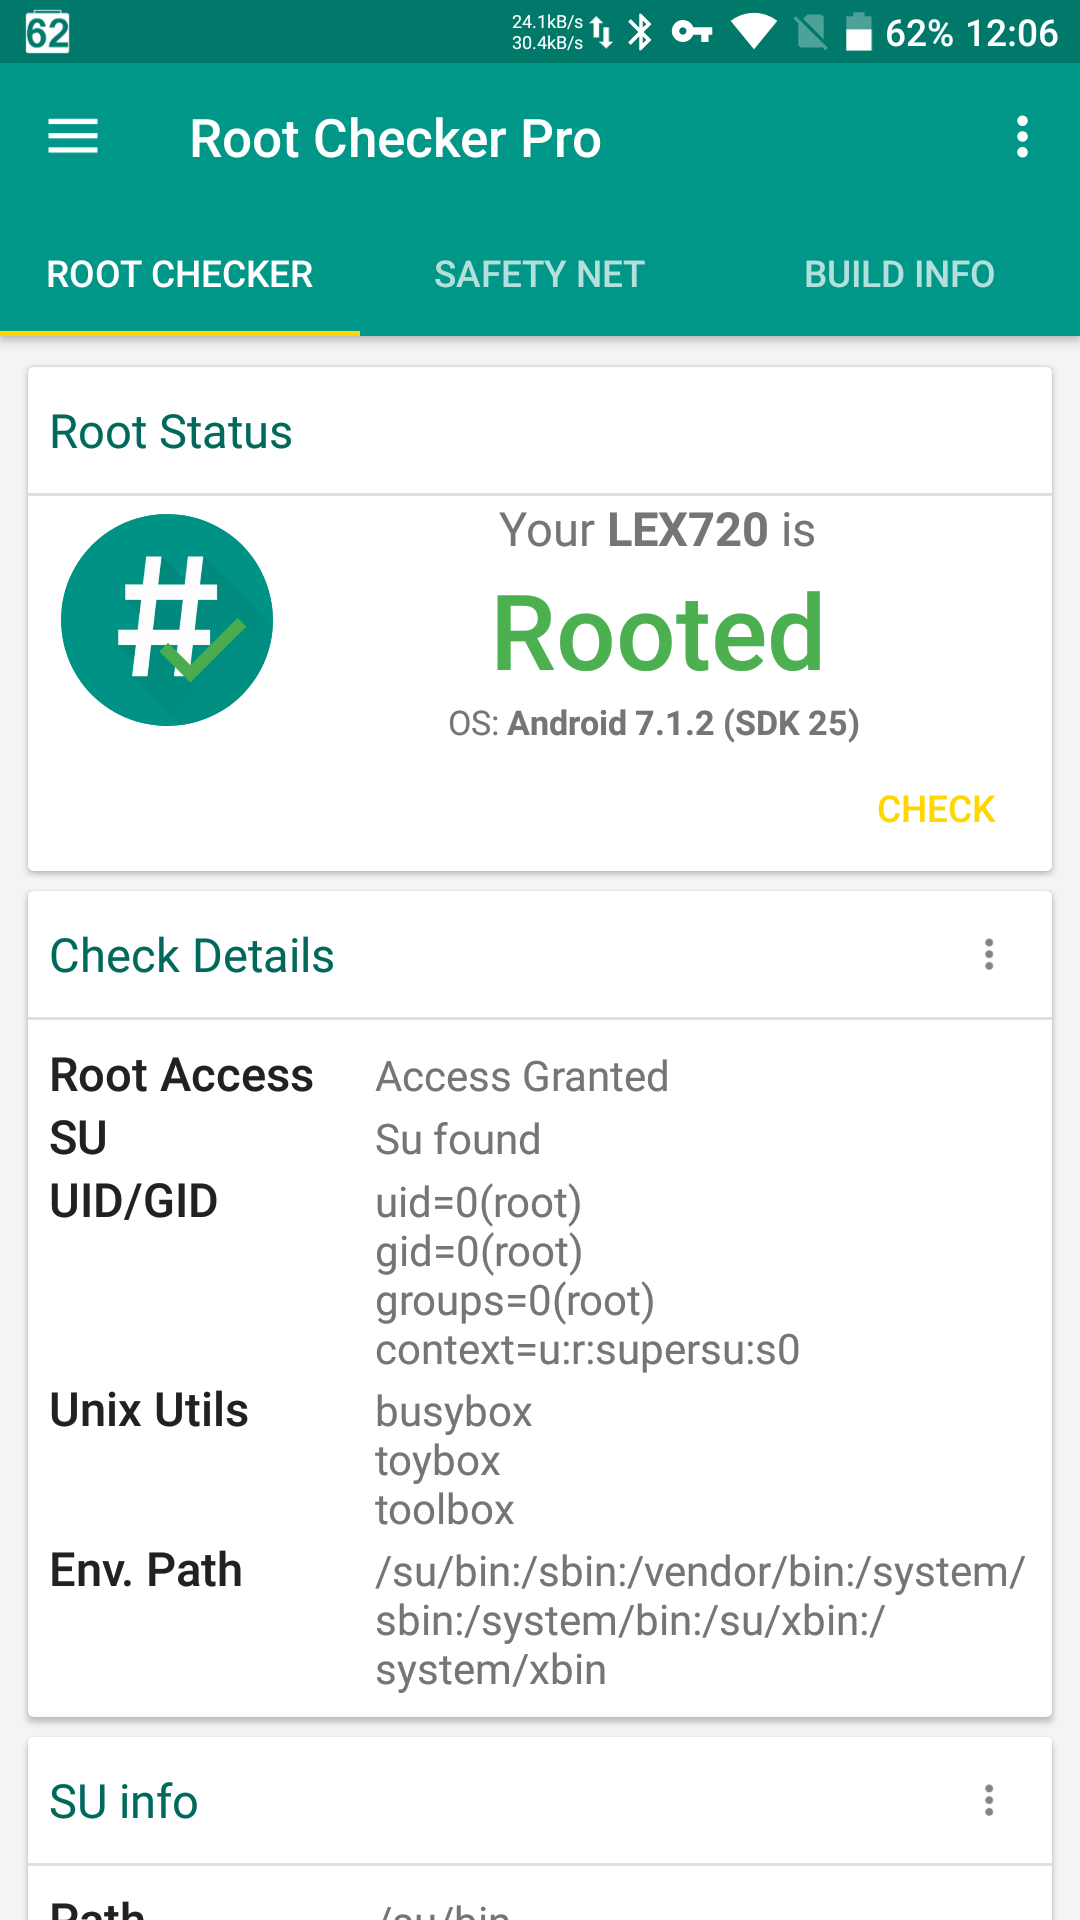
Let’s say you’ve gained root access. Suddenly, Android Pay or Samsung Pay stops working, banking apps switch to a limited mode, and your favorite game, Pokémon Go, waves goodbye. That’s because a rooted phone—and in some cases even a device with just an unlocked bootloader—is, quite reasonably, considered less secure than a device with a locked bootloader and no root access.
Security checks are handled by the cloud-based SafetyNet service, which tests many aspects of device behavior to determine whether it meets basic security hygiene requirements. Note: a device’s actual security posture is only loosely related to the SafetyNet result, regardless of whether it returns a pass or a fail.
 |
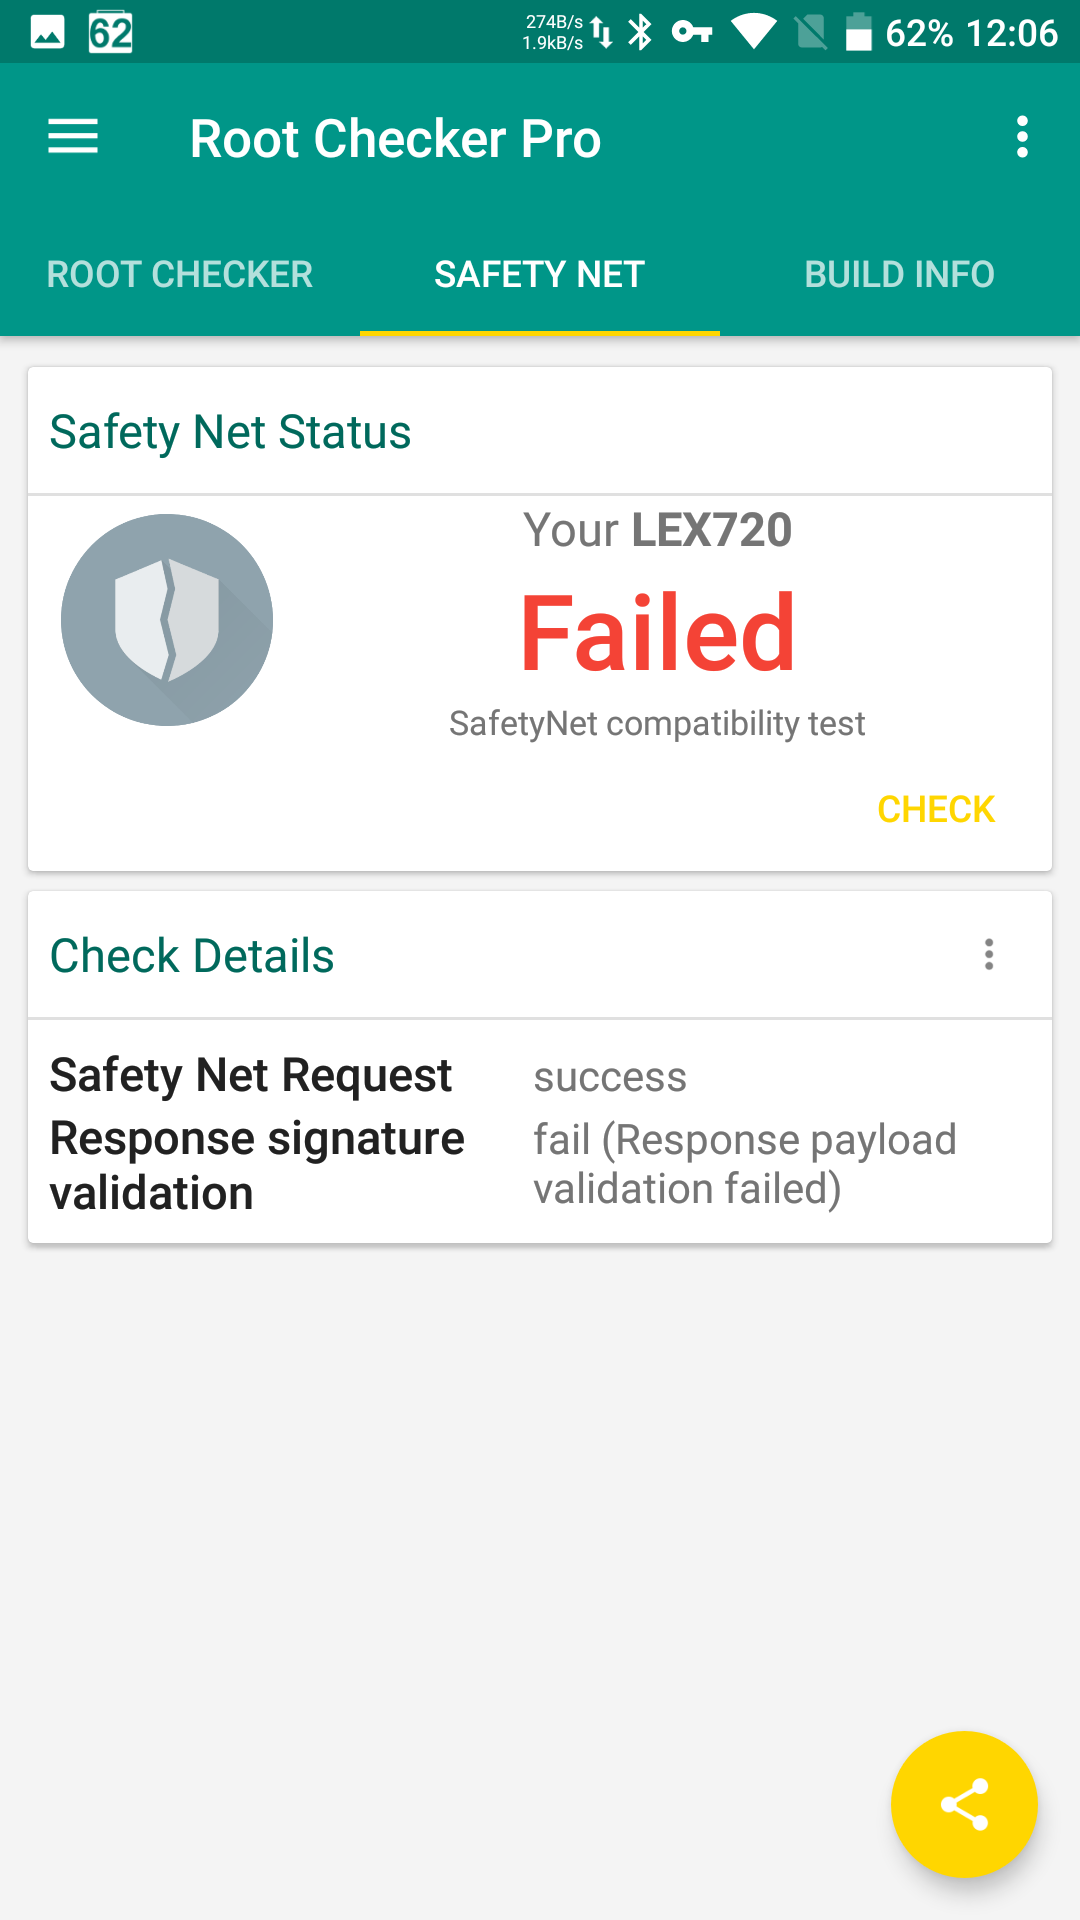 |
| Root Checker Pro: root detected, SafetyNet check failed | |
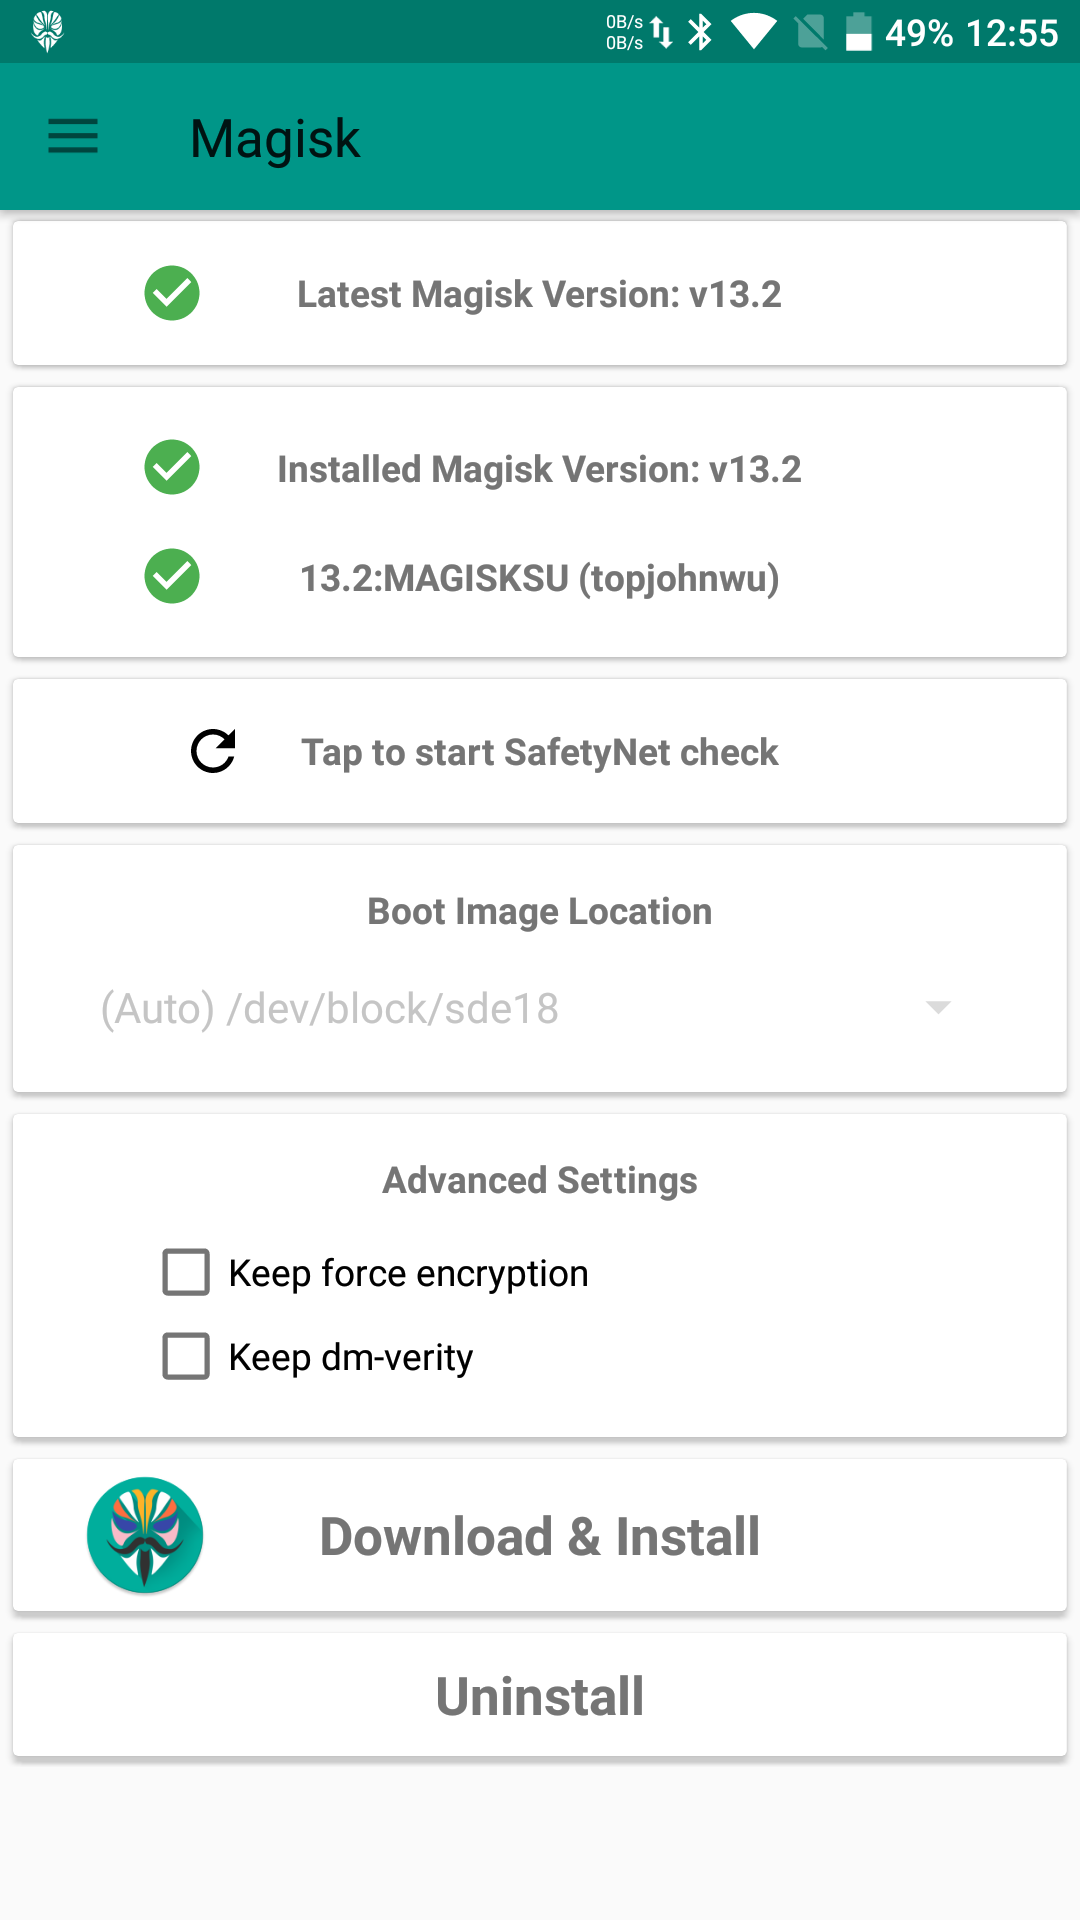
The easiest and most reliable way to hide root access and the fact that the bootloader is unlocked is to use the root implementation built into Magisk 13.3 (version 13.2, unfortunately, no longer passes the checks). To do this, enable the relevant module in Magisk and try to pass SafetyNet using Magisk’s built-in test.
 |
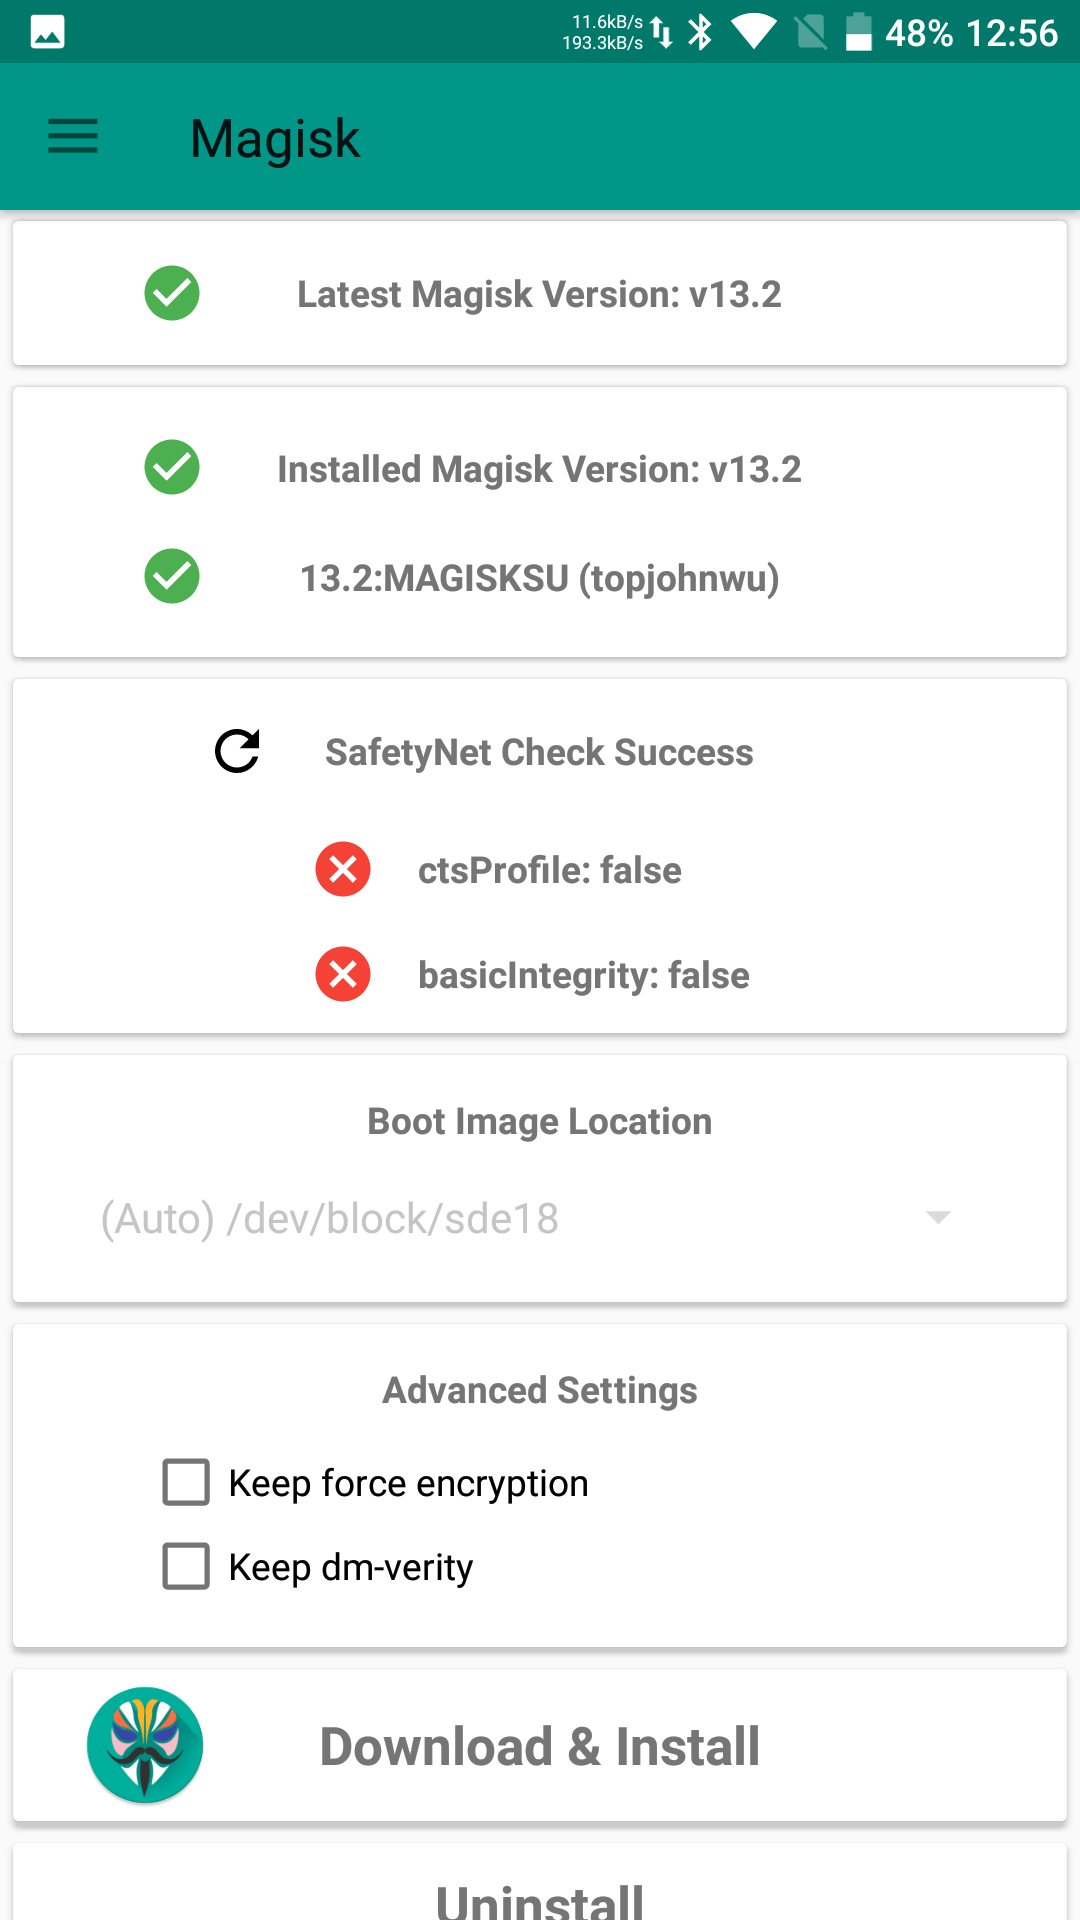 |
| Magisk and the SafetyNet test | |
Yes, it doesn’t always work on the first try, and yes, Google keeps getting smarter and sneakier. There’s no one-size-fits-all fix here: for some, flashing a different kernel helps; for others, turning off debugging in Developer options; for others still, toggling SELinux to Permissive and then back to Enforcing. Some users have also reported success by disabling BusyBox and Systemless hosts in Magisk settings (reboot required). Finally, in many cases switching Magisk to Core only mode works; unfortunately, that’s a half‑measure, since it disables third‑party modules—and those are hard to give up.
Until recently, hiding root worked reasonably well for SuperSU using suhide.zip. Unfortunately, that approach hasn’t seen much development and doesn’t always behave the way we’d like. In some cases, you can’t even get it installed (the phone just stops booting). Finally, the current SafetyNet check (as of July 2017) fails with suhide. That could change in the future, but here and now Magisk hides root more effectively.
S-OFF: What It Is and Why You Might Want It
If you use an HTC device, you’ve probably heard the term S-OFF. If not, you’ve likely never run into it. So what is it, and why should you care?
Some devices—including certain Samsung phones and most HTC flagships and sub-flagships—won’t grant access to critical partitions even with an unlocked bootloader. You need to take one more step after unlocking the bootloader, known as S-OFF.
Getting S-OFF is noticeably harder than obtaining an official bootloader unlock code from HTC’s website. S-OFF is essentially a hack that exploits discovered vulnerabilities. On many models, it’s only available as a paid service. Is it worth it? S-OFF gives you access to virtually all system partitions on the device. In particular, on some devices you can change the factory-set region or carrier lock, pull OTA updates from a different channel, and even enable additional LTE modem bands (though that last one may fall under licensing/regulatory restrictions).
Conclusion
Traditionally, we wrap up with takeaways and a moral to the story. This time there’s no moral, and the takeaway is simple. Can’t unlock the bootloader through official channels? Better not to mess with it; if you must, do it at your own risk. Bootloader unlocked or unlockable? You’ve got a choice between good and even better: SuperSU and Magisk. Used to SuperSU or rely on apps that only work properly with it? That’s fine too—just remember its source code is closed, and the new owners are hiding behind a Delaware registered agent.
