Windows Security Auditing: Key Considerations
If you haven’t read it yet, in our previous article we covered similar tools used to assess baseline security and enforce native security options in Linux. Today, we’ll focus on the desktop and server editions of Windows. And before we dive into the review, we’ll highlight a few critical aspects of security auditing on Windows.
Windows Is “Riddled with Holes”
There’s a long-standing view that Windows systems are less reliable and secure than Linux—and it’s not without merit. That said, in recent years Microsoft has invested heavily to make its products not just polished, but genuinely secure. A good example is Windows 10: an operating system that inherits the best of its predecessors (for example, UAC, DEP, BitLocker, DirectAccess, WFP and NAP, AppLocker, formerly Restrict Policy) and offers advanced security capabilities.
We’re primarily talking about features like the updated SmartScreen, the kernel protection Credential Guard, Device Guard, authentication technologies (including biometrics) Windows Hello and Microsoft Passport, process isolation via IUM, Advanced Threat Protection in Windows Defender, cloud analytics with Windows Analytics, as well as additional protection options against last year’s high-profile ransomware WannaCry, Petya, and Bad Rabbit. You can read a detailed overview of all Windows 10 security enhancements on Microsoft’s official site.
In practice, most home users, right after the first boot of the OS, disable—if not everything—then at least half of the security features, relying mainly on their antivirus. Another group installs unofficial Windows builds where components have been stripped out or security policies have been relaxed during installation. And even those who do use some built‑in security features seldom dig into the details, let alone fine-tune them.
This is what gives rise to the enduring myth that Windows is inherently inferior to Linux on security.
info
Windows 10 comes with a broad set of security technologies. These include long-standing features inherited from earlier versions—UAC, DEP, BitLocker, DirectAccess, NAP, AppLocker (the successor to Software Restriction Policies), and WFP—as well as newer capabilities like SmartScreen, Credential Guard, Device Guard, Hello, Microsoft Passport, Advanced Threat Protection, and Windows Analytics. There are even additional options to protect folders from unauthorized changes, useful, for example, in combating ransomware such as WannaCry, Petya/NotPetya, or Bad Rabbit.
When Popularity Becomes a Vulnerability
Windows’ undeniable popularity and ubiquity among both home users and enterprises automatically makes it a prime target for attackers. It goes without saying that the vast majority of company employees work on Windows systems. The exceptions are usually developers, DevOps engineers, and system administrators—groups that are statistically tiny compared to the main user base (remember our old interview with the Kaspersky Lab team, who all use Windows. — Editor’s note).
So blanket advice like “just switch to Linux and you’ll be fine” doesn’t really apply here. Can you picture an average accountant or sales manager running 1C on Linux? It’s probably doable, but not for most. That’s why Windows has effectively become the default workplace standard today.
If you factor in targeted attacks, which aim to achieve their objectives at any cost, the attacker’s toolkit includes not only 0day vulnerabilities and advanced technical techniques, but also social engineering. To counter such threats, the baseline protection provided by built-in tools is no longer sufficient, so organizations turn to advanced enterprise security solutions such as NGFW, SIEM, WAF, sandboxes, and IDS/IPS systems.
Flexibility vs. Licensing
While Linux is essentially a universal OS—you can add packages at any time, enable network services, configure routing, and turn a “home” setup into a real server—you can’t do the same with Windows as-is. Microsoft’s Licensing Policy (https://ru.wikipedia.org/wiki/Лицензионная_политика_Microsoft) draws a line between consumer/home and enterprise segments. As a result, the tools and the audit checklists will differ too.
For example, while a basic checklist for a home system might include account management, firewall configuration, installing updates, and enforcing least privilege for user accounts, a security audit of Windows Server demands much more attention. It should, for instance, also include:
- Monitoring and auditing changes to key Active Directory objects (Organizational Units/OUs, Group Policy Objects/GPOs, etc.)
- Domain user accounts with expired passwords
- Domain user accounts with passwords set to never expire
- Non-personalized (shared) administrative accounts on servers such as Windows Server, Microsoft SQL Server, and similar platforms
- Certain Microsoft Exchange Server and SharePoint settings that are governed by the security policy configured in Active Directory
- Security group membership
Because Windows Server is proprietary, most enterprise‑grade tools for auditing Active Directory security and other infrastructure components tend to be commercial—and therefore paid—unlike in the Linux world.
Microsoft’s recommended security baselines are available for the following Windows versions — 7, 8, 10, Server 2012, Server 2016. In addition, you may also want to look at the CIS Benchmarks for desktops and server editions of the operating system.
Tools Overview
We’re moving on to the most interesting, hands-on part—a review of the key tools for auditing and configuring Windows’ native security options. In the first installment, we’ll focus on free or open-source tools that are accessible to everyone.
MBSA — Microsoft Baseline Security Analyzer
MBSA is one of Microsoft’s oldest tools for auditing security settings. The early releases targeted Windows XP and Server 2003. More than a decade later, it’s still relevant: version 2.3 supports all editions up to Windows 10 and Server 2016.
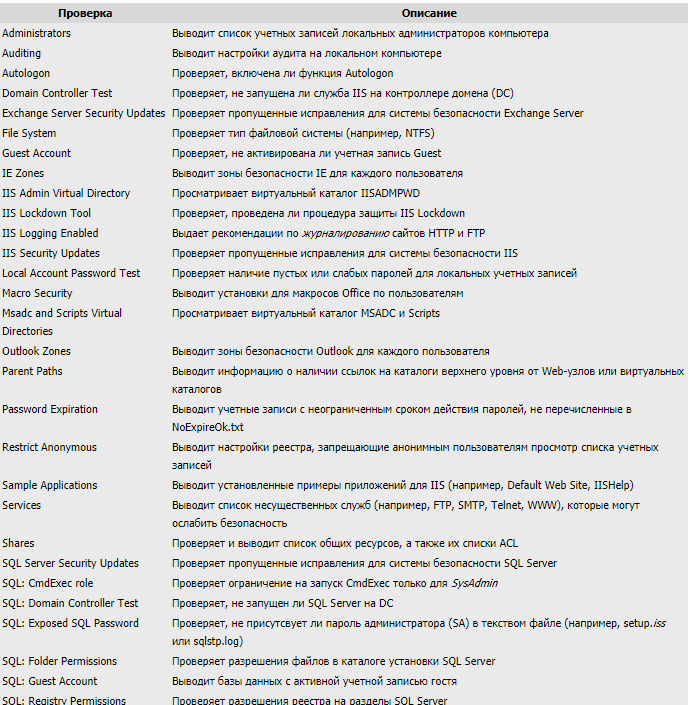
The tool’s original goals were to assess Windows’ security posture against Microsoft’s guidance, identify common security misconfigurations, and spot missing security updates/patches. Beyond that, it also provides concrete hardening recommendations—though these mostly boil down to a fairly standard checklist. Still, for software released in the mid‑2010s, that was a major achievement.
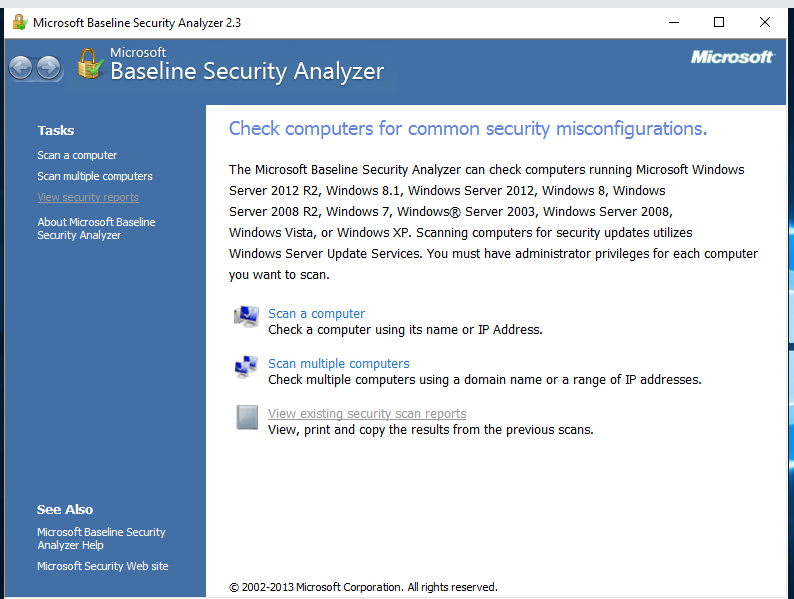
MBSA performs these checks by querying Microsoft’s continuously updated database that contains information about all updates and critical patches released for each Microsoft product (IE, IIS, SQL Server, MDAC, MSXML, and so on). You can use the tool via a graphical interface or the command line.
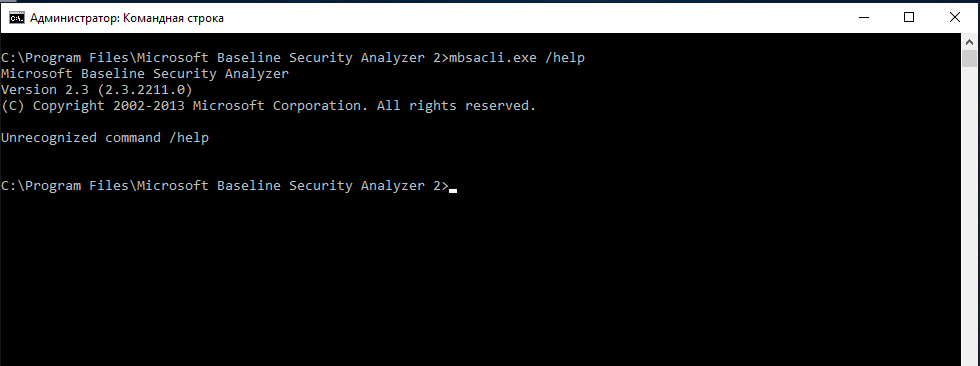
MBSA supports running scans both locally and over the network from the command line by launching the executable mbsacli.. The command offers a range of switches and additional options that let you control the scan: see the list of parameters.
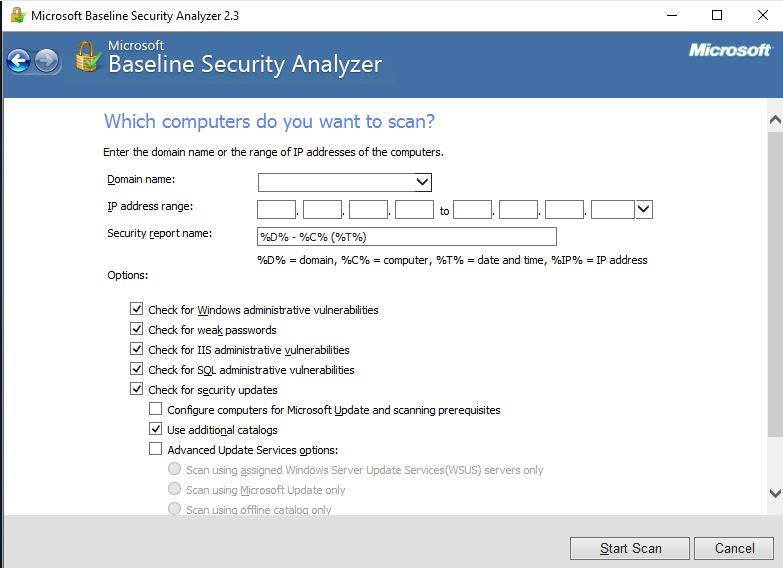
Creating Scan Scripts
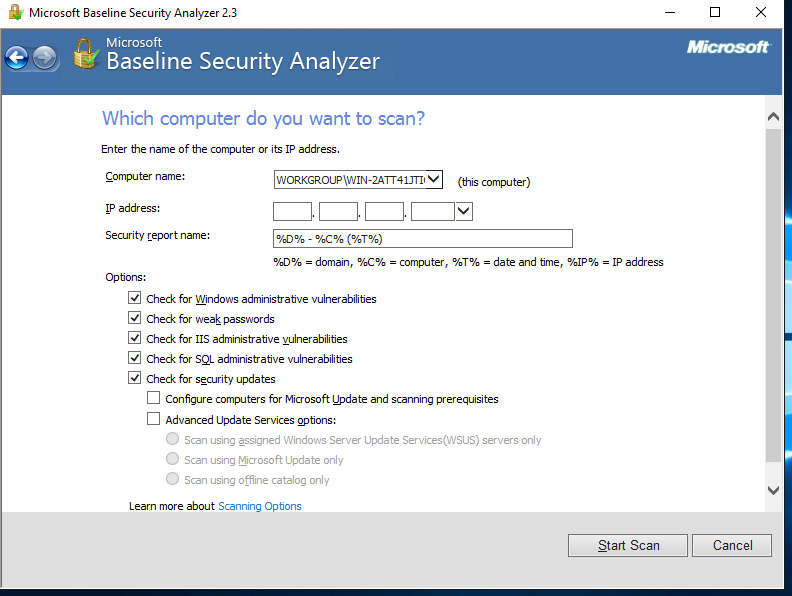
In practice, to maintain continuous and systematic monitoring of the IT infrastructure’s security posture, system administrators had to launch the utility manually each time. A more useful approach is to run MBSA on a schedule, allowing it to automatically email reports to the admins—significantly improving awareness of the corporate network’s security status.
For example, suppose we need to scan a set of computers (an IP address range) using WSUS data and save the report to a specific directory, with filenames in the format <. In that case, the MBSA command-line invocation would look like this:
mbsacli.exe /r [start IP address]-[end IP address] /q /wa /o %IP%-%T% /u [domain/username] /p [user password] /rd [directory where reports will be saved]
All that’s left is to add this task to Windows Task Scheduler, which will perform the required actions at the scheduled time.
Scan Results
When a scan is run with the default options, MBSA saves a report file in the logged-in user’s profile directory. In the tool’s GUI, the scan results are shown with different icons depending on whether a vulnerability or security issue was found on the target host.
The classic traffic‑light scheme is used for status indicators: red (critical), yellow (moderate), and green (recommended configuration). A blue star marks routine checks (for example, whether auditing is enabled), and the blue MBSA information icon is used for checks that simply report system details (for example, the OS version). For security update checks, a red exclamation mark appears when MBSA confirms that a security update is missing or when the security check could not be completed.
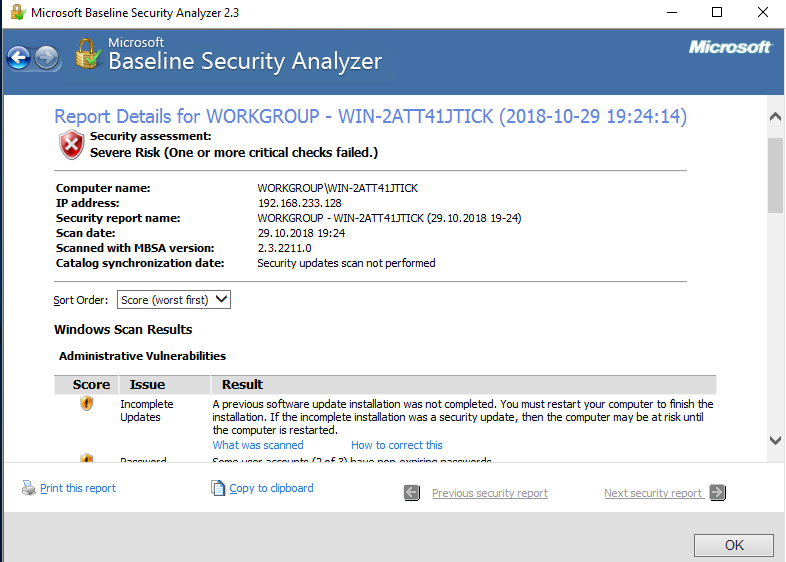
After scanning a single host, MBSA automatically opens the “View security report” window and displays the results. If you scanned multiple computers, use the “Pick a security report to view” mode to review the results.
The MBSA-generated report is divided into five sections:
- Security Update Scan Results;
- Windows Scan Results;
- Internet Information Services (IIS) Scan Results;
- SQL Server Scan Results;
- Desktop Application Scan Results.
Starting with version 2.0, MBSA reports also include CVE-ID (Common Vulnerabilities and Exposures) identifiers for common threats and vulnerabilities.
warning
Anything you do on a system as root (superuser) demands extra care and responsibility. Only execute actions you’re absolutely confident about. Don’t neglect backups and snapshots.
SekChek Security Auditing
Another excellent free tool in our arsenal is SekChek from the company of the same name. The tool supports a wide range of platforms—Novell NetWare, Unix/Linux, IBM iSeries, and of course, Windows. The utility is available in two editions—Classic and Local.
SekChek Classic provides analysts with a comprehensive host/subnet audit report in MS Word, Excel, and Access database formats, calculates an overall security score based on industry-average benchmarks from real-world environments, and includes detailed descriptions of identified security issues along with general remediation guidance.

In addition to the scanner, the SekChek Classic package also includes some handy additional modules:
- for encrypting the generated report: SekChek Encrypt Scan File
- getting-started documentation for the software: SekChek Classic – Install & Software
- some useful free tools: Free Tools

Here’s a general list of the security settings that SekChek Classic checks:
- System Configuration;
- System Accounts Policy;
- Audit Policy Settings;
- Registry Key Values;
- User Accounts Defined On Your System;
- Local Groups and their Members;
- Global Groups and their Members;
- Last Logons, 30 Days and Older;
- Passwords, 30 Days and Older;
- Passwords that Never Expire;
- Invalid Logon Attempts Greater than 3;
- Users not Allowed to Change Passwords;
- Accounts with Expiry Date;
- Disabled Accounts;
- Rights and Privileges (Users, Groups);
- Trusted and Trusting Domains;
- Local Accounts;
- Servers and Workstations;
- RAS Privileges;
- Services and Drivers on the Machine;
- Server Roles and Features;
- Task Scheduler Settings;
- Security Updates, Patches and Hot-Fixes;
- Products Installed;
- Current Network Connections;
- Domain Controllers in the Domain;
- Logical Drives;
- Network Shares;
- Home Directories, Logon Scripts, Profiles;
- File Permissions and Auditing.
After installing and launching the program for the first time, you’ll be prompted to create an auditor profile and enter contact details; these will be automatically appended to reports. The app then generates a secret key and a password used to encrypt the test results file. The completed testing profile must be generated separately by clicking the Create button in the Create Scan Software row.

After that, an executable with the default name SekClient. is extracted into the program directory. This is what the auditor should run to kick off testing. Launch SekClient. with Administrator privileges and then follow the step-by-step wizard to start the scan. Remember that scanning Active Directory requires Domain Admin rights.

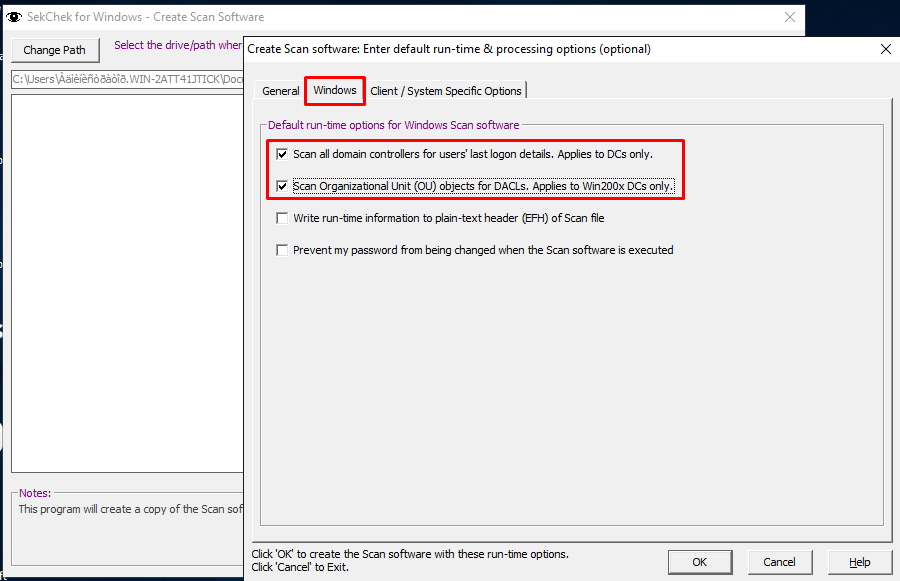
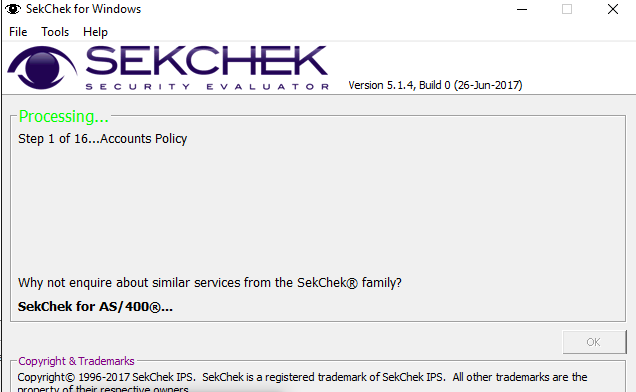
SekChek Local is the second edition of the tool, and it also includes a suite of automated security audit and testing features.
Compared to Classic, this variant is the preferred choice for testing a domain controller and Active Directory. The collection and reporting engine in this version comprises three built-in analysis modules:
- SekChek for SAM: https://www.sekchek.com/downloads/product-specification-sekchek-local-sam.pdf
- SekChek for Active Directory: https://www.sekchek.com/downloads/product-specification-sekchek-local-active-directory.pdf
- SekChek for SQL
The vendor’s site provides a short guide on running the tool on a domain controller and generating an Access-based report database. There’s also a sample report available for review.
To start the assessment, run SekChekLocal.exe with administrative privileges, choose SAM for a local machine or AD for a domain controller, and kick off the scan—it only takes a couple of clicks.
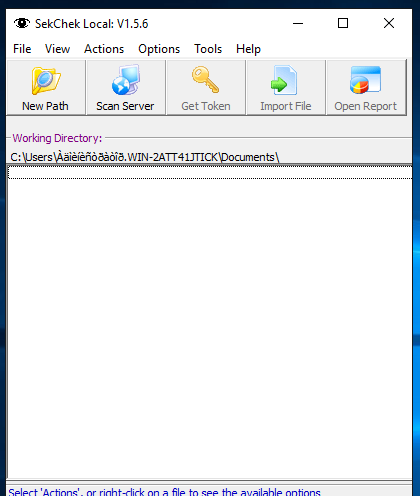
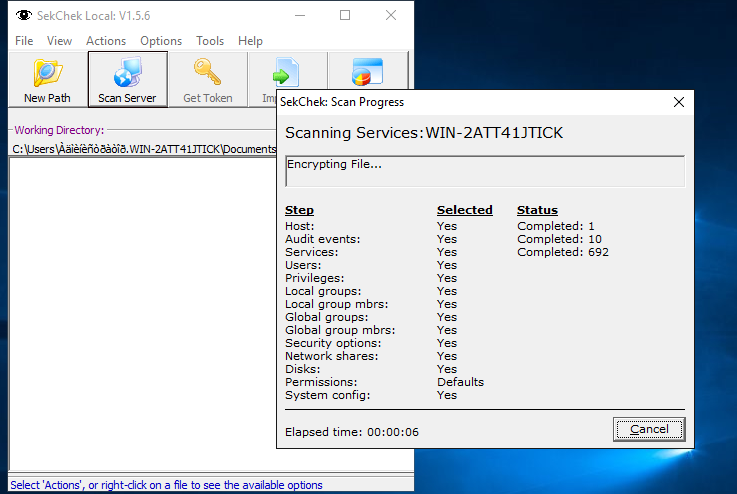
If you’re still choosing between the Classic and Local editions, the official site offers a detailed comparison of each tool’s capabilities and intended use. A complete list of demo reports is also available on a separate page of the vendor’s website.
Here is a general list of the security settings that SekChek Local audits:
- System Configuration;
- System Accounts Policy;
- Audit Policy Settings;
- Registry Key Values;
- User Accounts Defined On Your System;
- Local Groups and their Members;
- Global Groups and their Members;
- Last Logons, 30 Days and Older;
- Passwords, 30 Days and Older;
- Passwords that Never Expire;
- Invalid Logon Attempts Greater than 3;
- Users not Allowed to Change Passwords;
- Accounts with Expiry Date;
- Disabled Accounts;
- Rights and Privileges (Users, Groups);
- Trusted and Trusting Domains;
- Local Accounts;
- Servers and Workstations;
- RAS Privileges;
- Services and Drivers on the Machine;
- Server Roles and Features;
- Task Scheduler Settings;
- Security Updates, Patches and Hot-Fixes;
- Products Installed;
- Current Network Connections;
- Domain Controllers in the Domain;
- Logical Drives;
- Network Shares;
- Home Directories, Logon Scripts, Profiles;
- File Permissions and Auditing.

Lastly, the program’s biggest downside is hard to miss: a janky, 90s-style interface. The issue isn’t just cosmetic—it strongly suggests the software is no longer maintained and the vendor is defunct. That said, the website still works and still offers the utilities for download.
Windows SEC-AUDIT (PowerShell script)
The SEC-AUDIT script, published on GitHub by Sikkandar-Sha and written in PowerShell, is designed to audit Windows Server security settings. As you might expect, it’s completely free, and the source code is publicly available.

Once started, the script audits security settings, controls, and policies applied on a standalone machine or a domain controller. It compares the current values to the recommended ones for each setting/control/policy, ensuring alignment with recognized security standards and vendor best practices. As the author notes, this PowerShell script is useful when running automated audit tools like OpenVAS or Nessus (with a configuration audit policy) is not allowed or is otherwise difficult.
Regarding Microsoft’s security baselines, you can review them on the official MSDN pages for Windows 10 and Active Directory.
Execution and Usage
By default, PowerShell script execution is blocked, because scripts—especially those downloaded from the Internet—may contain malicious code that could harm the system. For security, PowerShell scripts should ideally be signed with a digital signature. This control mechanism is known as the execution policy.
For our purposes, if you’re confident the scripts you’re running are safe, you can disable enforcement of this policy. To do so, open PowerShell as Administrator and enter the following command:
Set-ExecutionPolicy RemoteSigned
You can save this script to any directory (for example, on the C: drive) and run it with administrator privileges. Before running the script, make sure the PowerShell execution policy is set to “Unrestricted.” You can also force this setting by running the following command in a PowerShell window
Set-ExecutionPolicy Unrestricted -Force
Once the script finishes—i.e., completes all checks—the results will be available in the directory it was executed from.
[ NoteHardening is an infosec term. It means securing a system or application by reducing its attack surface—usually using only native tools and security controls.
Windows-audit (PowerShell script)
Windows-audit is another PowerShell script for auditing the security of Windows Server 2003+ systems, developed by claranet. It collects a broad set of data from one or more target Windows servers and serializes it to disk. The resulting report can be converted into an Excel spreadsheet or even a SQL database, with filters to include only the indicators you need.

Before running the script, double-check that PowerShell’s execution policy is forced to “Unrestricted,” or set it manually:
Set-ExecutionPolicy Unrestricted
Next, copy the script to any directory on drive C: and create a text file named “Node Hints”. The file can contain NetBIOS and DNS hostnames, as well as IP addresses and CIDR blocks for the subnets you want to scan. Each new line must start with the operator include> or exclude<, followed by one of: NetBIOS . You can find a sample in the folder included with the scripts.
After that, in the Get-AuditData. file you need to manually set a few parameters: PSCredential, . Then you can run the main scripts: first Get-AuditData., and once it finishes — Compile-AuditData.. Example of running the script:
.\Get-AuditData.ps1 -PSCredential $MyPSCredential -NodeHintsFile ".\nodehints.txt" -ThreadCount 128;
In the Compile-AuditData. script, you must also manually specify several parameters before running it: CompilationType, . You can find the syntax in the help file. Example script invocation:
.\Compile-AuditData.ps1 -CompilationType "Excel" -Filter "Example";
Once it completes, you’ll find a file named Filtered-Audit-Data-Example.xlsx in the Examples subfolder of the script’s directory.
Windows-Workstation-and-Server-Audit (PowerShell script)
Another script, Windows-Workstation-and-Server-Audit, also written in PowerShell by developer Alan Renouf (Alan Renouf). The script audits a Windows workstation or server against the most common security requirements. Its output is organized into the following sections:
- Basic system information
- Installed security patches and hotfixes
- Local security policy configuration
- Network Interface Card (NIC) configuration
- Installed software
- Local and network resources
- Printers and other peripherals connected to the host
- Security-related information from the Windows event logs
This script is straightforward: it already includes all the required variables and logic. Just extract it to the C: drive and run it with administrator privileges.

SQL Audit Script at TechEd 2014 (PowerShell script)
As the name suggests, this script is intended for auditing Microsoft SQL Server. It consists of two files: SQLAuditv02.ps1, which collects data from the system, and Compilereports.ps1, which converts the resulting report from a CSV file into an easy-to-read Excel spreadsheet format.
Note that, by design, these scripts should be copied to and run from the local drive directory C:\, updating the first three variables in SQLAuditv02. ($SQLServer, ) if needed. After that, the script requires no additional steps and can be executed as Administrator.
The collected data is organized into the following sections:
- Server Properties;
- Windows Info;
- Version Info;
- SQL Server Install Date;
- Configuration Values;
- DB File Names and paths;
- DB Properties;
- Server Hardware;
- Fixed Drive Freespace;
- IO Util by DB;
- System Memory;
- Process Memory;
- SQL Log file freespace;
- CM File Sizes;
- CM DB Statistics;
- CM Index Frag.
Once the script completes, we’ll get an HTML file that can be opened in any browser.
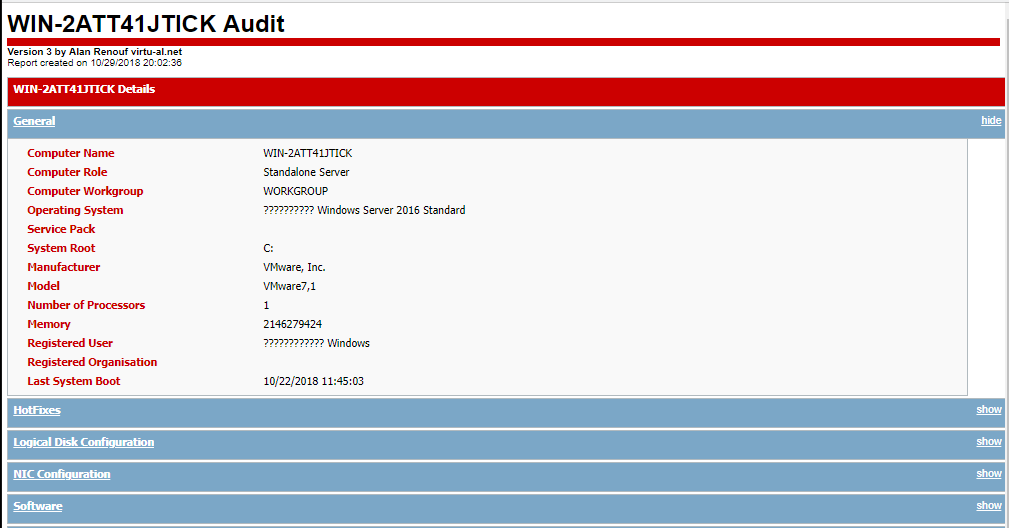
As you can see, the script doesn’t collect security data or run any compliance checks of the security posture. Still, it can be useful: the information it returns helps you build a picture of the running MS SQL Server instance, and by analyzing the Configuration Values and DB Properties you can extract some of the security settings.
Microsoft Windows Server Best Practice Analyzer
Starting with Windows Server 2008 R2, the server editions include built-in tools to assess installed components against best-practice recommendations — Best Practice Analyzer. For earlier versions, BPA can be downloaded as an installer from the official Microsoft page. In Windows Server 2008 R2 and later, BPA is installed during initial setup and is always available from the Server Manager console.
After you launch the tool, it checks a range of critical and non-critical parameters across your Windows-based IT infrastructure, for example: whether all PDC emulators are configured to a valid time source, whether each domain has at least two healthy domain controllers, whether all OUs in Active Directory are protected against accidental deletion, whether backups exist, whether DNS zones are configured correctly, and whether Group Policy and FRS replication are functioning.
Also, BPA works great with MS SQL Server. Since BPA is a Windows Server component, it ships out of the box and requires no additional spend.

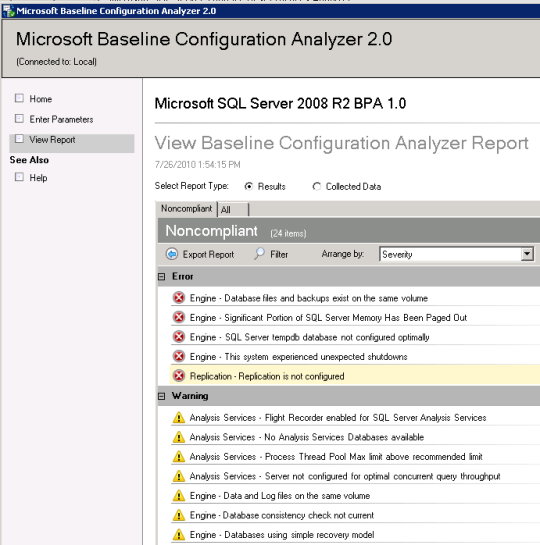
Although the BPA tool isn’t purely a security utility, it’s excellent for initial data collection and assessing AD health indicators, which in turn influence the overall hardening score.
You can run BPA not only from the MMC snap-in but also from the command line. To automate collecting information from the local server, you can use the script below:
#Get-BPAResults.ps1
# Microsoft Windows Server Best Practice Analyzer on CLI mode
#v.1.0
Import-Module ServerManager
Import-Module BestPractices
$ResultDir = "C:\Temp"
foreach ($BPAModel in Get-BpaModel)
 {
   $BPAinstance = $BPaModel.Id
   $FileName = $BPAinstance.Substring($BPAinstance.LastIndexOf("/")+1)
   Invoke-BpaModel $BPAinstance
   Get-BPAResult $BPAinstance | ConvertTo-Html > ($ResultDir + $FileName + ".html")
 }
The result of the system analysis performed by BPA for each individual server role will be saved as a separate HTML file in the C:\. folder.
Hardentools for Windows
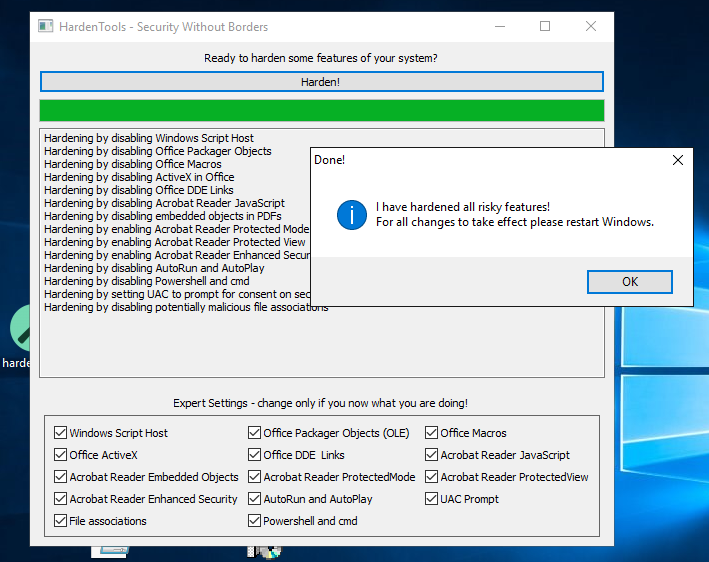
Hardentools is a free, lightweight, portable tool that lets you enable or disable a range of features in Windows and common desktop apps (MS Office, Adobe Reader, and more). With a single click, you can tweak security settings—for example, disable Windows Script Host, block risky ActiveX execution, enforce Attack Surface Reduction (ASR) rules on Windows 10, switch Adobe Reader to Protected Mode, disable Adobe JavaScript, and so on. If you’d rather not wrestle with MMC or manually edit the registry to add and tweak specific keys, this is exactly what you need.
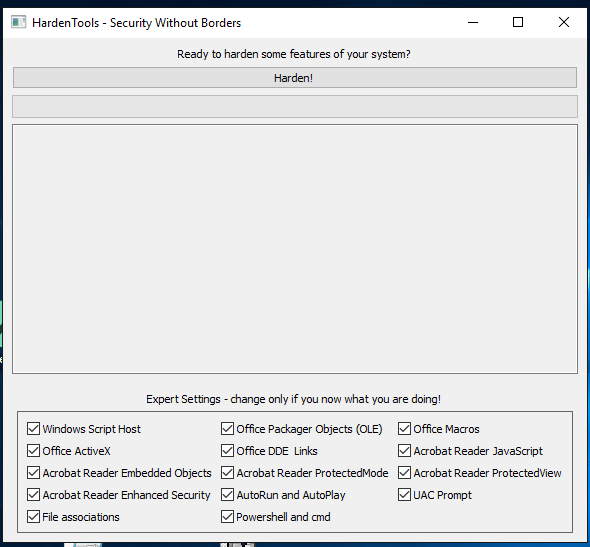
In essence, Hardentools is a standard system tweaker focused exclusively on security options. It doesn’t offer a huge feature set or tons of configurable parameters, but in some cases it’s perfectly suitable for quickly establishing a basic protection baseline on a host that isn’t governed by domain security policies.
SAMRi10 — Hardening SAM Remote Access in Windows 10 / Server 2016
SAMRi10 is another utility—more precisely, a Microsoft PowerShell script—designed to harden the Security Account Manager (SAM) database (SAM). When run, the script enforces a policy that blocks remote SAM calls used to enumerate domain members (users).
To run the script, simply extract it to any convenient directory (for example, on the same C: drive) and launch it as Administrator from a PowerShell console:
.\SAMRi10.ps1


Why is SAMRi10 so important? There’s a class of attacks against the Security Account Manager (SAM) that aims to extract usernames and password hashes from a local system (including, for example, a standalone domain controller). You can read more about the script and the theory behind SAM security on the GitHub page.
Results of enumerating domain users prior to SAMRi10 enforcement.

Here’s the output of the same command after enforcing SAMRi10. As you can see, domain users who aren’t in the Administrators group are blocked from enumeration.

Microsoft notes that enabling SAMRi10 won’t interfere with legitimate administrators. It also provides an example of how a Windows Server 2016 domain controller (DC) will respond to remote SAM requests based on the privileges of the account making the request:
- Domain Admin account: the request will succeed.
- Non-privileged user account: returns “Access is denied.”
- Member of the Remote SAM Users group: the request will succeed.
Conclusion
The first part of our review has come to an end. We covered the most popular and widely used free and open-source tools for auditing the security of desktop and server editions of Windows. With this straightforward toolkit, you can easily assess the baseline security of your laptop or a corporate server, and—by following the tips and guidance built into some of these tools—tune and improve your overall security posture (hardening level).
Stay tuned for part two of our review, where we’ll look at commercial editions of security audit tools. These typically offer an even broader set of features and capabilities and are sure to appeal to Active Directory administrators.
