Linux supports a highly versatile set of administration tools. On the one hand, it is good — users have options. But, on the other hand, this very variety is not quite suitable for a corporate sector, as there are often tens and hundreds of computers to be managed. Recently, quite a number of tools have emerged to simplify this task, and we will discuss one of them.
Before we proceed to the description of OpenLMI itself, it seems worthwhile to give an historical excursus. In due course, SNMP was developed for management over network. It was good in every aspect but one: the standard itself defined basic primitives only, while all the rest was farmed out to vendor/developer, and there were no standards except these primitives. Yes, certain standard OID’s do exist now, but there are very few of them in the standard itself, with the rest being set by leading vendors.
In 1996, DMTF organization consisting of the leading hardware and software manufactures submitted a set of WBEM (Web-Based Enterprise Management) standards, though at that time and in that context ‘Web-Based’ did not mean ‘Web-UI’ but just using protocols and standards including HTTP, SSL, XML. As opposed to SNMP, these standards have defined not only data exchange protocol but also a set of objects available for manipulations — CIM (Common Information Model) and the corresponding query languages CQL/WQL, created under the influence of SQL, as the name implies. But unlike SQL, this subset does not support modification or deletion of any parameters.
Time was passing. This set of standards was started to be realized in proprietor systems (Windows NT, Sun Solaris). However, for an open source this turned out troublesome because of its diversity and lack of any standards whatsoever. Yes, a basic part (CIM server) has existed for rather a long time already, and even in various implementations, but the rest of the infrastructure has been unavailable. Recently, however, the situation began to change: several leading players in the corporate Linux market launched their WBEM infrastructure versions based on various CIM server implementations. We will discuss one of the versions named OpenLMI, which is being developed under the auspices of Red Hat.
Installation and Architecture
Installation in RHEL/CentOS is incredibly simple — you must just enter the commands:
# yum install tog-pegasus openlmi-*
# systemctl enable tog-pegasus.service
# systemctl start tog-pegasus.service
But it’s not enough to install a set of tools — you must have an idea of the architecture, and we are going to describe it below.
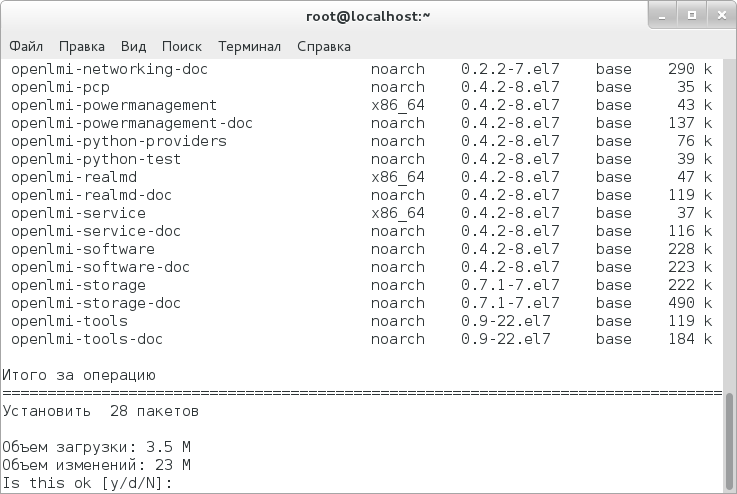
The central part of OpenLMI — OpenPegasus, which is a CIM server (alias CIM Object Manager, CIMOM, alias broker). OpenPegasus itself is useless; so, in addition to it, we also install providers, which actually form a backend performing particular actions with configuration files. Here is a list of some providers:
- openlmi-account — user management;
- openlmi-logicalfile — reading files and directories;
- openlmi-networking — network management;
- openlmi-service — service management;
- openlmi-hardware — submitting information on hardware.
One part of providers is written in Python, the other (larger) part — in C. Besides CIMOM and various providers-backends, there are two CLI versions in OpenLMI. At first, we will consider the one which is a component of CentOS 7 basic package. You can start CLI for managing both a local and a remote system. It is also worth mentioning that standard CLI is actually a Python interpreter with WBEM support.
CIMOM — client data exchange takes place via CIM-XML over HTTPS. HTTPS requires a certificate; therefore, for remote management you must copy the certificate of a machine to be managed and, if necessary, open TCP port 5989 on this machine. Let’s assume that a managed machine has a name ‘elephant’. Then, to copy a certificate, we enter the following commands:
# scp root@elephant:/etc/Pegasus/server.pem /etc/pki/ca-trust/source/anchors/elephant-cert.pem
# update-ca-trust extract
We can do without this for local management (by default, it is available for superuser only), whereas for remote management we must set a password for pegasus user on a managed machine.
WBEM standard also supports event notification which is called ‘trap’ in SNMP. However, it is not supported by all providers.
I’d like to note that in OpenLMI it is not possible to restrict access to individual namespaces — a user can either have access to all CIM providers installed on the managed machine or have no access at all. This is more than strange — a similar Oracle solution used in Solaris offers the option. Furthermore, an unprivileged user who has access to all namespaces, one may say, automatically gains superuser rights (an example will be given later).
Connection and basic examples. YAWN
However, let us go to CLI connection to OpenPegasus. To do it, you must start lmishell and enter the following in the pop-up prompt:
> c = connect("localhost", "root")
To check if the connection has been created, you can use ‘is’ operator with inversion:
> c is not None
For the established connection, the result will be ‘True’.
To simplify further work, we will set a namespace to operate within:
> ns = c.root.cimv2
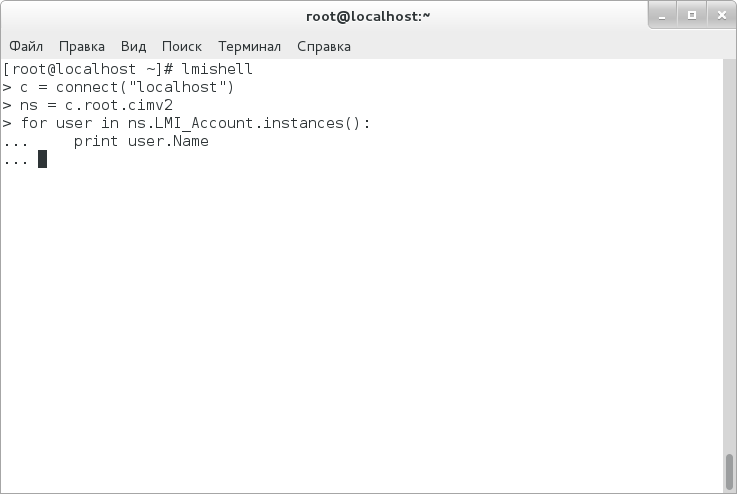
At last, let us examine the most primitive script to return a list of users:
> for user in ns.LMI_Account.instances():
... print user.Name
We are creating a cycle viewing all instances provided by LMI_Account provider, which is responsible for users, and then we output ‘name’ field for each instance.
The same can be done with WQL query:
> query = ns.wql('SELECT Name FROM LMI_Account')
> for result in query:
... print result.property_value("Name")
Here, the entering operations are somewhat longer than in the previous case. This can be explained by the fact that a query returns, instead of rows themselves, a list of instances from which we then retrieve in a cycle all the required properties. It must be noted that the type of quotation mark is of no importance for this query, but if comparison operators are used, it is necessary to enclose a query in single quotation marks, whereas a row to compare with — in double quotation marks (see example below).
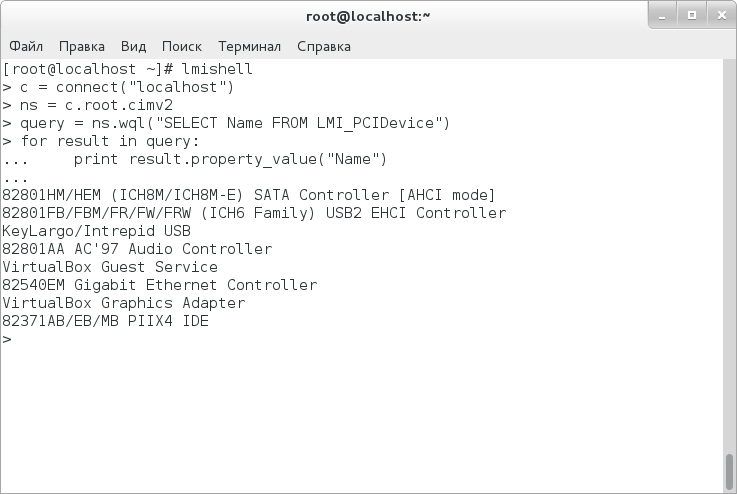
A list of PCI devices can be returned in exactly the same way:
> query = ns.wql('SELECT Name FROM LMI_PCIDevice')
> for result in query:
... print result.property_value("Name")
Now, we proceed to a bit more complicated query — we will modify a query to list user names so that only names of pseudousers are returned:
> query = ns.wql('SELECT Name FROM LMI_Account WHERE LoginShell = "/sbin/nologin" OR loginShell = "/bin/false"')
> for result in query:
... print result.property_value("Name")
Let us see how we can retrieve a hash of root user password:
> query = ns.wql('SELECT Name, UssrPassword FROM LMI_Account WHERE Name = "root"')
> for result in query:
... print result.property_value("UserPassword")
But all this refers to data sampling only. We will try to change something — for example, add a new user. For good reason, WQL is not suitable for this; so, we will use an object notation:
> import crypt
> cs = ns.PG_ComputerSystem.first_instance()
> accmgr = ns.LMI_AccountManagementService.first_instance()
> print accmgr.CreateAccount(Name="testuser", Password=crypt.crypt('test', crypt.mksalt(crypt.METHOD_SHA512)), System=cs)
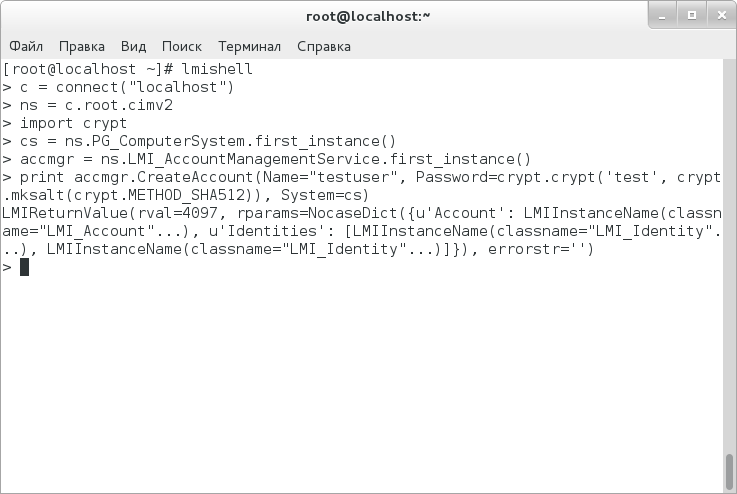
Let us examine what these commands do. The first command imports Python crypt module for password hashing. The second command creates an object of PG_ComputerSystem class, which indicates a local system. The third command creates an accmgr object, which is responsible for account management. Well, it is the fourth command which just creates a user with the preset properties (including hashed password) on a specified computer.
But you may have a question on how to orient in the CIM tree. First, all descriptions of classes, properties, and methods are stored in MOF files, which in the case of OpenLMI are in directory /var/lib/openlmi-registration/mof, though their syntax is rather complicated. Second, you can install one of CIM browsers, which I have done — by installing YAWN. Unfortunately, it is not available in CentOS repositories (moreover, now it is unavailable even on the website of its developers); so, you have to download the package from some third-party resource:
# wget "ftp://ftp.muug.mb.ca/mirror/fedora/linux/development/21/i386/os/Packages/y/yawn-0-0.18.20140318svn632.fc21.noarch.rpm"
# rpm -ivh yawn-0-0.18.20140318svn632.fc21.noarch.rpm
Note that for using YAWN you must have Apache started and SELinux permission to establish network connections. For the latter, enter the following command:
# setsebool -P httpd_can_network_connect 1
After that, you can enter http://localhost/yawn in the browser and browse a tree of classes.
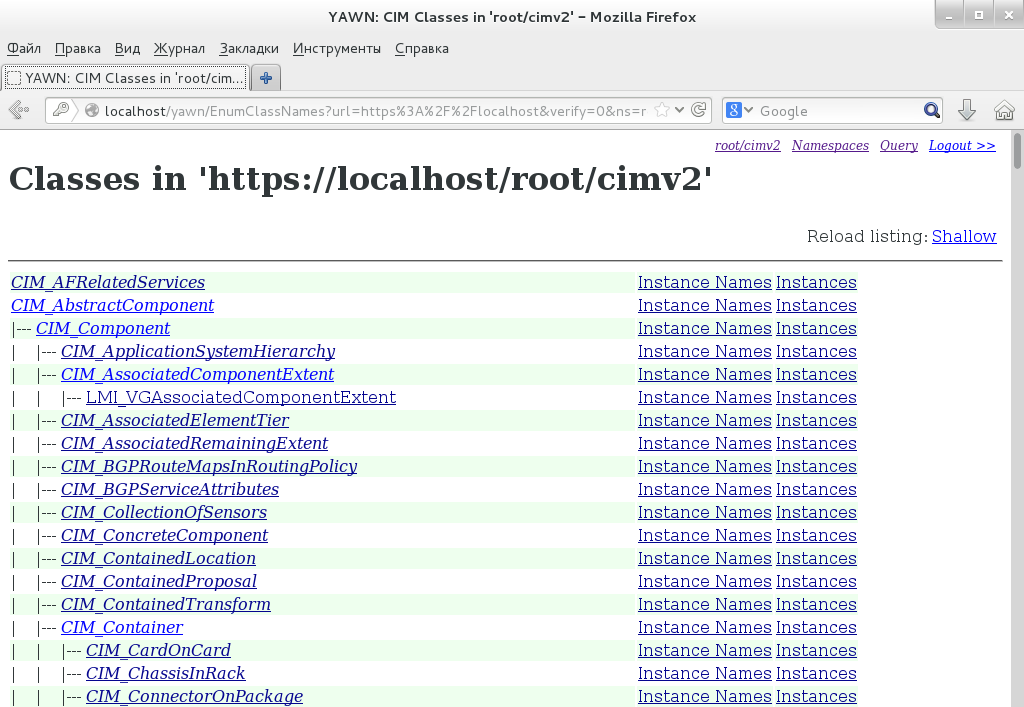
On the whole, the basic principles of work are approximately clear, and we can proceed to more complicated examples.
# Writing CIM providers for OpenLMI

Here is a brief report of what is necessary for writing an OpenLMI provider:

* Write NOF file containing a description of classes and methods.
* Write a provider. In case of Python, the names of methods to be referred to by CIMOM, will be approximately as follows: enum_instances() — enumerates instances of CIM class, get_instance() — gets a certain instance or property, set_instance() — creates or changes an instance/property, delete_instance() — deletes an instance, and, at last, cim_method_method_name() — calls some method specific for a given class.
* Register MOF file and a registration file, which has been written, using command 'openlmi-mof-register provider.mof provider.reg' and copy a provider directory to /usr/lib/python2.7/site-packages/lmi.

After that it can be used.
Complex examples of using lmi command
Since LMIshell is a Python interpreter, you can enter scripts instead of commands, and this is what we take up. We will write a script which creates GPT, creates partitions themselves and formats them for the specified FS. Of course, the partition scheme is extremely simplified but it will be sufficient for understanding. So, the script itself:
#!/usr/bin/lmishell
# Set initial variables
c = connect('localhost')
ns = c.root.cimv2
MEGABYTE = 1024*1024
# Create helper function
def print_partition(partition_name):
    partition = partition_name.to_instance()
    print "Created partition", partition.DeviceID, \
            "with", partition.NumberOfBlocks * partition.BlockSize, "bytes."
# Define disk
sdb = ns.LMI_StorageExtent.first_instance({"Name": "/dev/sdb"})
# Create instances for appropriate managers
partmgr = ns.LMI_DiskPartitionConfigurationService.first_instance(
{"Name":"LMI_DiskPartitionConfigurationService"})
fsysmgr = ns.LMI_FileSystemConfigurationService.first_instance({"Name":"LMI_FileSystemConfigurationService"})

# Define the type of future partition table
gpt_style = ns.LMI_DiskPartitionConfigurationCapabilities.first_instance({"InstanceID": "LMI:LMI_DiskPartitionConfigurationCapabilities:GPT"})
# Create
partmgr.SetPartitionStyle(Extent=sdb, PartitionStyle=gpt_style)
# Create partitions. The first two — 200 Mb each, the third —the rest of the volume
for i in range(2):
    (ret, outparams, err) = partmgr.SyncLMI_CreateOrModifyPartition(Extent=sdb, Size = 200 * MEGABYTE)
    print_partition(outparams['Partition'])
(ret, outparams, err) = partmgr.SyncLMI_CreateOrModifyPartition(Extent=sdb)
print_partition(outparams['Partition'])
# Create file systems on these partitions
sdb1 = ns.CIM_StorageExtent.first_instance({"Name": "/dev/sdb1"})
sdb2 = ns.CIM_StorageExtent.first_instance({"Name": "/dev/sdb2"})
sdb3 = ns.CIM_StorageExtent.first_instance({"Name": "/dev/sdb3"})
for part in sdb1, sdb2:
    print fsysmgr.SyncLMI_CreateFileSystem(FileSystemType=fsysmgr.LMI_CreateFileSystem.FileSystemTypeValues.EXT3, InExtents=[part])
print fsysmgr.SyncLMI_CreateFileSystem(FileSystemType=fsysmgr.LMI_CreateFileSystem.FileSystemTypeValues.XFS, InExtents=[sdb3])
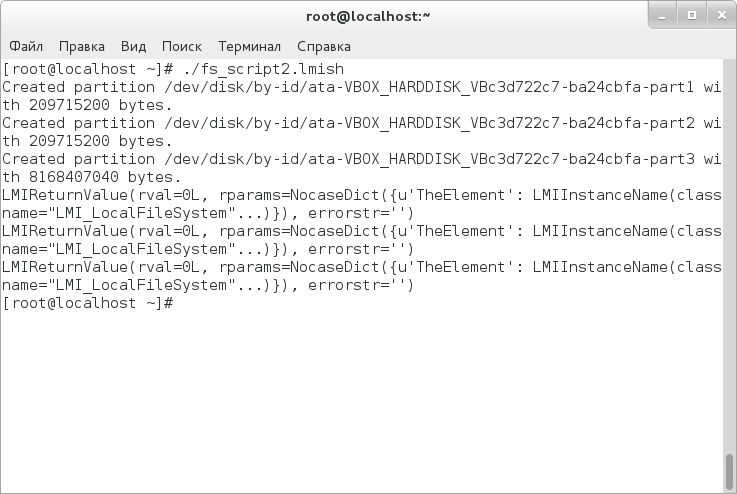
As you can see, in order to do something serious, you have to write rather much. However, there is an alternative available in the form of a more convenient wrap around LMIshell named LMI. Unfortunately, it is not included in CentOS basic package; so, we begin with beta version of EPEL7 repository:
# wget "http://dl.fedoraproject.org/pub/epel/beta/7/x86_64/epel-release-7-0.2.noarch.rpm"
# rpm -ivh epel-release-7-0.2.noarch.rpm
Then we install the required packages:
# yum install openlmi-scripts*
And now, you can start a fresh install shell. Let’s discuss how we can use it to do the same as the above script did:
# lmi -h localhost
lmi> storage partition-table create --gpt /dev/sdb
lmi> storage partition create /dev/sdb 200m
lmi> storage partition create /dev/sdb 200m
lmi> storage partition create /dev/sdb
lmi> storage fs create ext3 /dev/sdb1
lmi> storage fs create ext3 /dev/sdb2
lmi> storage fs create xfs /dev/sdb3
It is worth pointing out that this shell supports namespaces as well, i.e., you can go, for example, to ‘storage’ namespace and enter commands with respect to this space now. For orientation in namespace, you can use commands ‘:cd’, ‘:pwd’, and ‘:..’, the last command being the alias for ‘:cd ..’.
Let us discuss how you can install Shorewall package, using this shell, and view the files comprising the package (it is assumed that EPEL has been connected already). First of all, we should learn the exact name of the package:
lmi> :cd sw
>sw> search shorewall
The package of interest is named shorewall-0:4.6.3-1.el7.noarch. This is the package to be installed:
>sw> install shorewall-0:4.6.3-1.el7.noarch
Then, we must find out what files comprise this package:
>sw> list files shorewall-0:4.6.3-1.el7.noarch
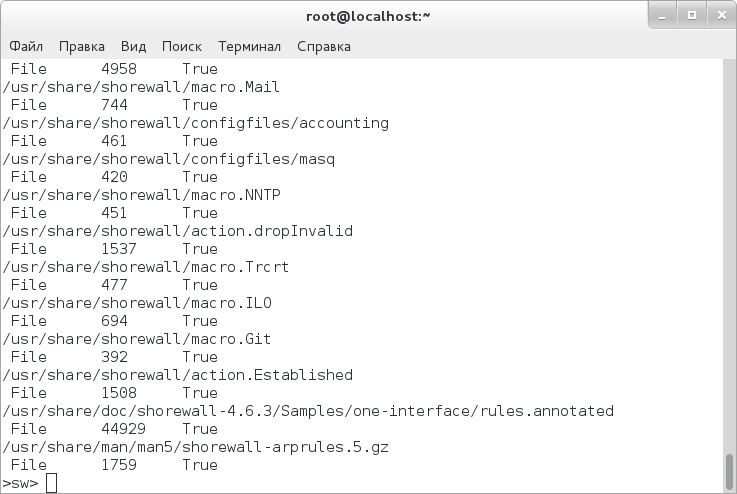
To delete the package, you can just enter the command:
>sw> remove shorewall-0:4.6.3-1.el7.noarch
Let’s find out what can be done with network settings. This shell supports the following options for network settings: add/delete static routes, addresses, and DNS servers; configure interfaces in bridging and bonding modes. As an example, we will add DNS server for enp0s3 interface:
lmi> net dns add enp0s3 8.8.8.8
In terms of convenience for end user, this shell obviously seems to fit better than LMIshell as you don’t need to remember a lot of class, method, and property names. On the other hand, if you need to do something a bit less primitive, you’ll have to study the above-presented material, because ‘lmi’ command is inappropriate for this — it does not even have cycles.
Conclusion
The impression generated by OpenLMI is ambiguous. On the one hand, the need in this functionality in Linux has existed for a long time — the syntax of configuration files and commands is so versatile that one fails to keep everything in one’s head if there are lots of servers. No argue, a tree of CIM classes is also rather complicated but it obeys certain rules, and eventually it allows you to abstract from particular configs and commands.
On the other hand, it looks like a raw trick. A browser of classes is lacking in the delivery which does not promote their study. Convenient event processing is also lacking; so, you’ll have to write everything yourself — that means you must meet rather high requirements. At last, security. For pity’s sake! What can we discuss if any user who has connected to CIM server can perform absolutely the same actions as those ensured by OpenLMI agents — moreover, it does not make any difference whether this user has the required privileges on the managed system or not. It looks extremely strange that Red Hat did included this infrastructure in its commercial distribution disk.
I would recommend to consider this infrastructure as a certain Technology Preview and a further progress vector for management tools. Industrial operation can be accompanied by vulnerabilities in security.
