
OSINT
OSINT (Open source intelligence) is a discipline of American Intelligence Service responsible for search, collection, and choice of information from publicly available sources. Social networks are among the largest public information suppliers, because almost all of us have an account (sometimes more than one) in one or more social networks. Here we share the news, private photos, preferences (e.g., when you “like” something or start following some community), friend lists. And we do it of our own free will without thinking of possible consequences. In several articles, we already analyzed the ways of getting the interesting data out from the social networks. Usually it had to be done manually, but for better results, it’s more reasonable to use specific utilities. There are several open source utilities enabling to get user information out of the social networks.
Creepy
Among the most popular ones — Creepy. It serves to collect user geolocation information from his/her Twitter, Instagram, Google+ and Flickr accounts. Among the advantages of this standard for Kali Linux tool are: plain interface, very handy process of API services tokens acquisition, and indication of the found results with placemarks on the map (which, in its turn, enables to follow all the user’s movements). Among the disadvantages: weakish functional. Tools utility can collect geotags from the mentioned services and indicate them on Google Map showing who and how many times has been retwitted by the user, statistics of the devices used for tweets, and the posting time. But as far as this is an open source tool, you can always extend its functional by yourself.
Let’s not study the program use — clear and detailed explanation given in official video should be enough for anyone to work with the tool.

fbStalker
Two more tools which are less widespread, but have a strong functional and merit your attention — fbStalker и geoStalker.
fbStalker serves to collect the following user information from his/her Facebook account:
— user’s video, photo, posts;
— amount of “likes” he/she received from other users;
— photos geotaggings;
— statistics of comments he/she receives to the posts and photos;
— time of day when the user is usually online.
To run the tool you need Google Chrome, ChromeDriver, which are installed in the following way:
wget http://goo.gl/Kvh33W
unzip chromedriver_linux32_23.0.1240.0.zip
cp chromedriver /usr/bin/chromedriver
chmod 777 /usr/bin/chromedriver
You also need to have Python 2.7 and pip to install the following packages:
pip install pytz
pip install tzlocal
pip install termcolor
pip install selenium
pip install requests --upgrade
pip install beautifulsoup4
And finally, you need a library for GraphML files parsing:
git clone https://github.com/hadim/pygraphml.git
cd pygraphml
python2.7 setup.py install
After that, one can edit fbstalker.py to indicate there his/her own e-mail address, password, username and start the search. Running the Tools is rather simple
python fbstalker.py -user [the name of the targeted user]
geoStalker
geoStalker is much more interesting. It collects the information from the coordinates you’ve sent it. For example:
— local Wi-Fi-points based on wigle.net (in particular, their essid, bssid, geo);
— Foursquare check-ins;
— Instagram- and Flickr-accounts from which the photos with given coordinates have been posted;
— all tweets posted from this location.
To run the tool, just as in the previous case, you need Chrome & ChromeDriver, Python 2.7, pip to install the following packages: google, python-instagram, pygoogle, geopy, lxml, oauth2, python-linkedin, pygeocoder, selenium, termcolor, pysqlite, TwitterSearch, foursquare, as well as pygraphml and gdata:
git clone https://github.com/hadim/pygraphml.git
cd pygraphml
python2.7 setup.py install
wget https://gdata-python-client.googlecode.com/files/gdata-2.0.18.tar.gz
tar xvfz gdata-2.0.18.tar.gz
cd gdata-2.0.18
python2.7 setup.py install
After that, you need to edit geostalker.py, indicate all the necessary API-keys and access-tokens (if you don’t indicate these data for some certain network, it will not be searched). Then, run the tool with sudo python2.7 geostalker.py command and indicate an address or coordinates. As a result, all the data are collected, placed on Google Map, and saved as HTML-file.
Let’s take action
Previously, we referred to complete tools. In most cases, their functional will not be enough, and it will be necessary to update them or to write your own tools — all popular social networks provide their APIs. Usually, you see them as separate subdomains, where you send GET-request and receive XML/JSON-response. For example, api.instagram.com for Instagram, api.vk.com, for Vkontakte. Of course, most APIs of that kind have their own function libraries, but we want to understand how it works; moreover, charging the script with excessive external libraries in order to have a couple of functions is not the best idea. So, let’s write our own tool, which would enable the search of photos in VK and Instagram by specified coordinates and time period.
Using VK and Instagram API documentation, we’ll form a request for the list of photos bound with the geographic information and time.
Instagram API Request:
url = "https://api.instagram.com/v1/media/search?"
    + "lat=" + location_latitude
    + "&lng=" + location_longitude
    + "&distance=" + distance
    + "&min_timestamp=" + timestamp
    + "&max_timestamp=" + (timestamp + date_increment)
    + "&access_token=" + access_token
Vkontakte API Request:
url = "https://api.vk.com/method/photos.search?"
    + "lat=" + location_latitude
    + "&long=" + location_longitude
    + "&count=" + 100
    + "&radius=" + distance
    + "&start_time=" + timestamp
    + "&end_time=" + (timestamp + date_increment)
The variables used here:
- location_latitude — geographic latitude;
- location_longitude — geographic longitude;
- distance — search radius;
- timestamp — start date of the time interval;
- date_increment — amount of seconds from the start to the end date of the time interval;
- access_token — developer token.
As it turned out, one needs access_token to access Instagram API. It’s not hard, but takes some time to get it (see the side bar). Vkontakte is more loyal to the strangers, and that’s very good for us.
Process automation
So, now we know how to make the necessary requests; however manual break-up of the server response (in JSON/XML view) is not an entertaining thing to do. It’s far more convenient to create a small script that will do that for you. And again we use Python 2.7. The procedure is the following: you search all the photos within the given radius of coordinates and time interval. Consider that the amount of resulting photos is limited. So, for a large time interval you need to make several requests with intermediate time intervals (the very date_increment). Consider also coordinates inaccuracy and don’t use a radius of several meters. Don’t forget that the time should be in timestamp format.
Let’s start coding. First, let’s connect all necessary libraries:
import httplib
import urllib
import json
import datetime
Write the functions for getting data from API through HTTPS. By means of the sent function arguments, you form a GET-request and return the server response with a string.
def get_instagram(latitude, longitude, distance, min_timestamp, max_timestamp, access_token):
    get_request = '/v1/media/search?lat=' + latitude
    get_request += '&lng=' + longitude
    get_request += '&distance=' + distance
    get_request += '&min_timestamp=' + str(min_timestamp)
    get_request += '&max_timestamp=' + str(max_timestamp)
    get_request += '&access_token=' + access_token
    local_connect = httplib.HTTPSConnection('api.instagram.com', 443)
    local_connect.request('GET', get_request)
    return local_connect.getresponse().read()

def get_vk(latitude, longitude, distance, min_timestamp, max_timestamp):
    get_request = '/method/photos.search?lat=' + location_latitude
    get_request += '&long=' + location_longitude
    get_request += '&count=100'
    get_request += '&radius=' + distance
    get_request += '&start_time=' + str(min_timestamp)
    get_request += '&end_time=' + str(max_timestamp)
    local_connect = httplib.HTTPSConnection('api.vk.com', 443)
    local_connect.request('GET', get_request)
    return local_connect.getresponse().read()
Let’s also code timestamp converting function to improve it:
def timestamptodate(timestamp):
    return datetime.datetime.fromtimestamp(timestamp).strftime('%Y-%m-%d %H:%M:%S')+' UTC'
Now, let’s split the time interval, save the results in HTML-file, and then, write the principal image search logic The function looks bulky, but the most difficult thing in it is to split the time interval into blocks. As for the rest, it’s a usual JSON parsing and saving the data in HTML.
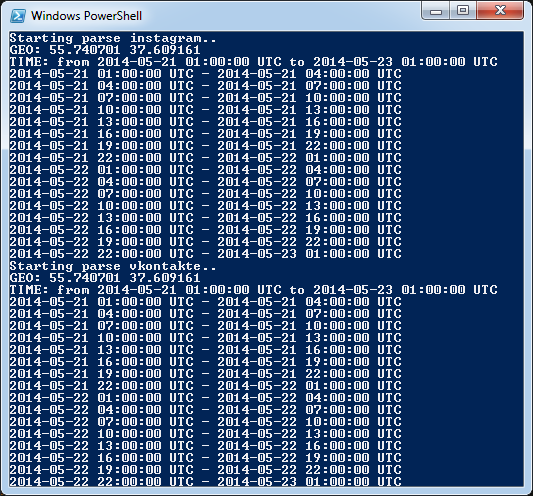
def parse_instagram(location_latitude, location_longitude, distance, min_timestamp, max_timestamp, date_increment, access_token):
    print 'Starting parse instagram..'
    print 'GEO:',location_latitude,location_longitude
    print 'TIME: from',timestamptodate(min_timestamp),'to',timestamptodate(max_timestamp)
    file_inst = open('instagram_'+location_latitude+location_longitude+'.html','w')
    file_inst.write('<html>')
    local_min_timestamp = min_timestamp
    while (1):
        if ( local_min_timestamp >= max_timestamp ):
            break
        local_max_timestamp = local_min_timestamp + date_increment
        if ( local_max_timestamp > max_timestamp ):
            local_max_timestamp = max_timestamp
        print timestamptodate(local_min_timestamp),'-',timestamptodate(local_max_timestamp)
        local_buffer = get_instagram(location_latitude, location_longitude, distance, local_min_timestamp, local_max_timestamp, access_token)
        instagram_json = json.loads(local_buffer)
        for local_i in instagram_json['data']:
            file_inst.write('<br>')
            file_inst.write('<img src='+local_i['images']['standard_resolution']['url']+'><br>')
            file_inst.write(timestamptodate(int(local_i['created_time']))+'<br>')
            file_inst.write(local_i['link']+'<br>')
            file_inst.write('<br>')
        local_min_timestamp = local_max_timestamp
    file_inst.write('</html>')
    file_inst.close()
HTML-format is chosen for a reason. It lets you indicate a link to the images instead of saving them separately. When starting the results page in browser, the images will be loaded automatically.
Let’s write the same function for Vkontakte.
def parse_vk(location_latitude, location_longitude, distance, min_timestamp, max_timestamp, date_increment):
    print 'Starting parse vkontakte..'
    print 'GEO:',location_latitude,location_longitude
    print 'TIME: from',timestamptodate(min_timestamp),'to',timestamptodate(max_timestamp)
    file_inst = open('vk_'+location_latitude+location_longitude+'.html','w')
    file_inst.write('<html>')
    local_min_timestamp = min_timestamp
    while (1):
        if ( local_min_timestamp >= max_timestamp ):
            break
        local_max_timestamp = local_min_timestamp + date_increment
        if ( local_max_timestamp > max_timestamp ):
            local_max_timestamp = max_timestamp
        print timestamptodate(local_min_timestamp),'-',timestamptodate(local_max_timestamp)
        vk_json = json.loads(get_vk(location_latitude, location_longitude, distance, local_min_timestamp, local_max_timestamp))
        for local_i in vk_json['response']:
            if type(local_i) is int:
                continue
            file_inst.write('<br>')
            file_inst.write('<img src='+local_i['src_big']+'><br>')
            file_inst.write(timestamptodate(int(local_i['created']))+'<br>')
            file_inst.write('http://vk.com/id'+str(local_i['owner_id'])+'<br>')
            file_inst.write('<br>')
        local_min_timestamp = local_max_timestamp
    file_inst.write('</html>')
    file_inst.close()
And the function invocations, of course:
parse_instagram(location_latitude, location_longitude, distance, min_timestamp, max_timestamp, date_increment, instagram_access_token)
parse_vk(location_latitude, location_longitude, distance, min_timestamp, max_timestamp, date_increment)
“Trial by fire”
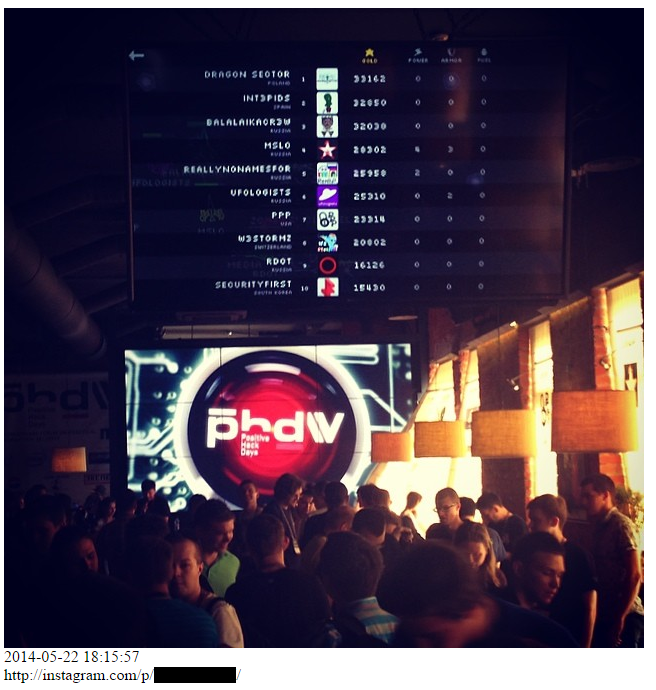
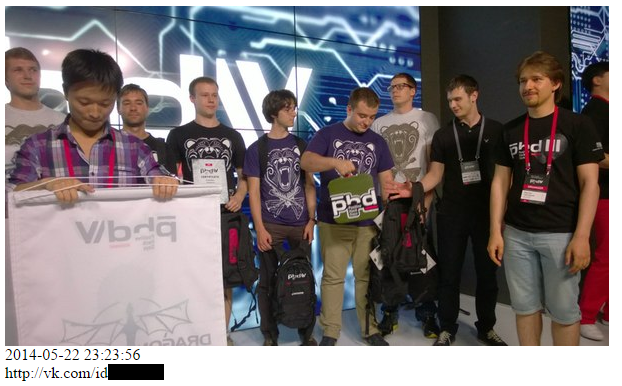
The script is ready, it’s time to try it out. And here, an idea came to my mind. Those who were at PHD’14 surely remember those very attractive Mail.Ru promo-girls. Well, let’s make up leeway — we’ll find them and get acquainted.
What do we actually know about PHD’14:
- venue — Digital October — 55.740701,37.609161;
- date held — May 21–22, 2014 — 1400619600–1400792400.
We obtain the following data-set:
location_latitude = '55.740701'
location_longitude = '37.609161'
distance = '100'
min_timestamp = 1400619600
max_timestamp = 1400792400
date_increment = 60*60*3 # every 3 hours
instagram_access_token = [Access Token]
Launch the script and start studying the results. Aha, one of the girls posted a selfie from a restroom with coordinates reference! Certainly API didn’t let it go by, and soon all the pages of other promo-girls were found. As it turned out, there was a couple of twins among them :).

Instructive example
As the second example, I’d like to mention one of PHD’14 tasks for CTF final. Actually, the very case provoked me to get into this topic. The point was the following.
There is an evil cool hacker who has developed some malware. You have a set of coordinates and related time marks of his Internet connections. And you need to get his name and photo. The coordinates were the following:
55.7736147,37.6567926 30 Apr 2014 19:15 MSK;
55.4968379,40.7731697 30 Apr 2014 23:00 MSK;
55.5625259,42.0185773 1 May 2014 00:28 MSK;
55.5399274,42.1926434 1 May 2014 00:46 MSK;
55.5099579,47.4776127 1 May 2014 05:44 MSK;
55.6866654,47.9438484 1 May 2014 06:20 MSK;
55.8419686,48.5611181 1 May 2014 07:10 MSK
Definitely, first of all we checked which places correspond to these coordinates. As it turned out, these were railway stations; the first one — Kazansky Rail Terminal (Moscow) and the last — Zeleny Dol (Zelenodolsk). The rest of them — the stations between Moscow and Zelenodolsk. So he was going online from the train. The very train was found by departure time. Kazan turned out to be the arrival station. And that’s when a question came up: where to find his name and photo? The logic was the following: if one needs to find a photo, it makes sense to search it in social networks. The main targets were Vkontakte, Facebook, Instagram, and Twitter. Besides the Russian teams, the foreigners also took part in the competition, so we decided that the organizers wouldn’t have chosen Vkontakte. So, it was decided to start with Instagram.
At that time, we didn’t work with photos and coordinates search scripts, so we used public services able to do that. It appeared that there weren’t many of them, and these available had rather poor interface. After having checked hundreds of photos from every station of the train traffic, finally we found the needed one.
After all, it took not more than one hour to find the train and missing stations, and to develop the further search logic. But it took a really long time to find the photo. Once again it confirms how important it is to have and to use correct and handy programs.
Conclusions
The article is over, it’s time to make a conclusion. And this conclusion is pretty simple: load the geotagged photos cautiously. Competitive spies can grab hold of any possibility to get new information, and social networks’ API can really help them do that. When writing this article, I studied some more services, including Twitter, Facebook, and LinkedIn to check the presence of such functional. Good news — Twitter gave positive results. Facebook and LinkedIn, instead, disappointed me, but maybe all is not lost, and they will extend their APIs. So be cautious posting geotagged photos — they can come to be in the wrong hands :).