Nowadays, top Android devices have the same capacity as the five-seven year-old laptops, which were quite suitable for code writing. But due to some peculiarities of modern gadgets, it’s rather hard to do this sacred work on them. However, hard doesn’t mean impossible.
The environments for Android development exist, and there are many of them. The question is — do they correspond to the proud name of IDE? What is essential for convenient code writing, besides compiler and word processor?
- First of all — at least minimal syntax highlighting support.
- Second — code completion. And here there are three options. The first one — snippets. These are the abbreviations which unwrap in code line at the press of certain keys (or keys combination). The second one — cache-based code completion, when after keying in a word, one can see all variants existing in cache. And finally the third one — contextual code completion, when you are offered only those variants which are suitable for you.
Thirdly… there are many small, but useful features often applied when code writing on PC, for example integration with version control system, debugging message display, and code writing style.
Here are several IDEs that more or less meet the abovementioned requirements.
AIDE or Android SDK
Perhaps the most famous IDE for Android. Both paid and free versions are available. According to the developers, IDE has the following features:
- syntax highlighting and code completion;
- a possibility of standard Android apps creation and compilation;
- the projects are saved in Eclipse format, which enables to open them on PC. And vice versa — Eclipse projects can be opened in AIDE;
- UI designer with drag and drop support (through paid App UI Designer);
- support of NDK for ARM;
- integration with Git.
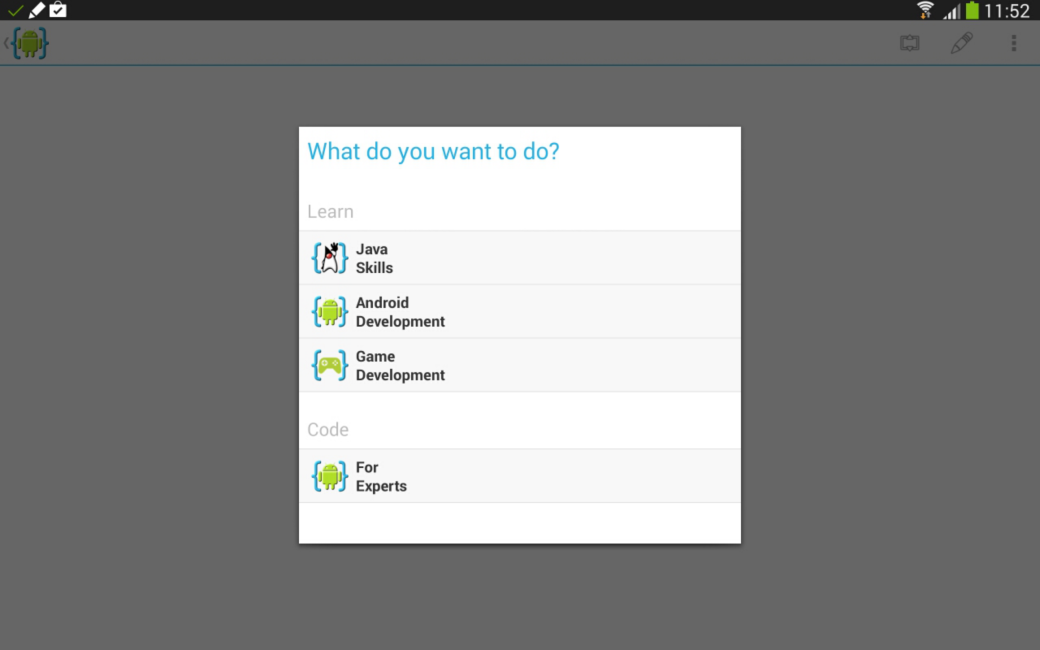
But these are, let’s say, program statements. Let’s try, as far as feasible, to analyze how trustworthy they are. So, install AIDE from Play Market. At the first start, you’ll be asked which action would you like to take — to study Java, to analyze Android apps / games development, or to start coding immediately? To make it simpler, let’s assume that you choose the latter.
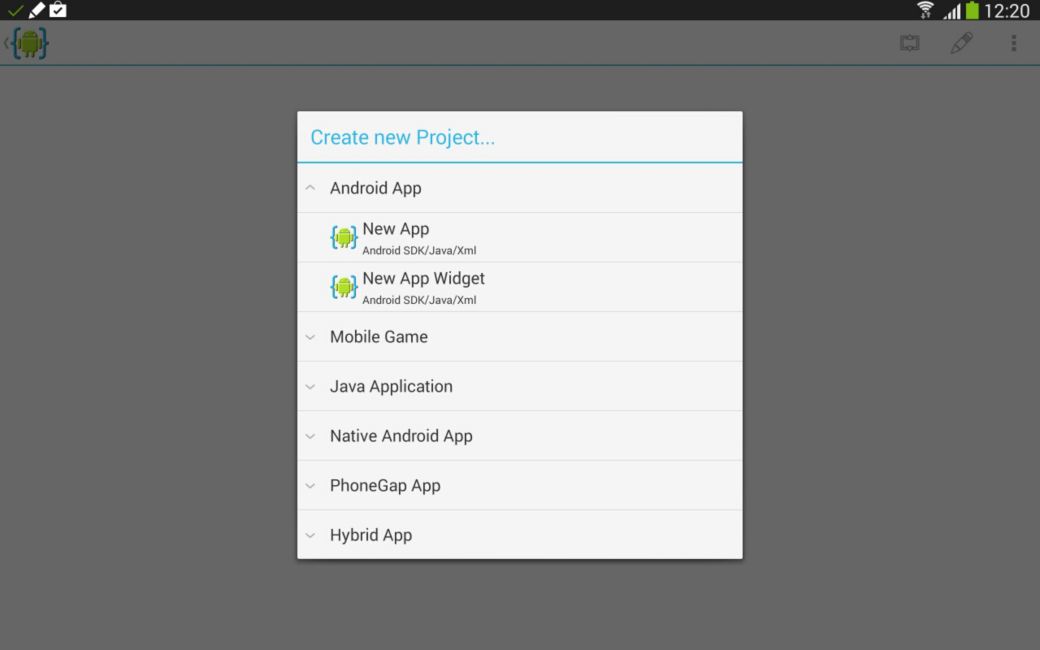
Then you’ll see “Create new project…” window. Right, it’s rather similar to what you see on the “desktop” IDE. Options:
- Android app — development through Android SDK;
- Mobile Game — games development through libGDX;
- Java Application — console Java application;
- Native Android App — use of NDK;
- PhoneGap App — use of HTML5-framework PhoneGap (for which it’s necessary to install one more IDE, but we are not going to do that; the article is not about HTML5);
- Hybrid App — a mixture of PhoneGap and Java-code.
Let’s choose the first option. When creating a new project, a source “Hello, World!” is generated automatically. Perhaps it’s useful for newcomers, but for netheads such kind of care seems irritating. Anyway, some desktop IDEs also do the same thing.
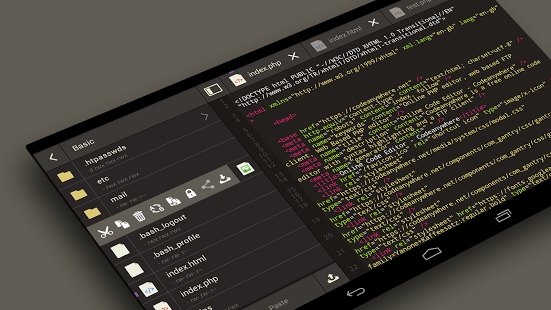
Let’s take a look at the interface, which (though it’s full of IDE functions) is rather ascetic. After the project creation, two files get opened: main.xml, which contains layout and actually is a description of the graphic interface, and MainActivity.java, which contains Activity. The files open in tabs.
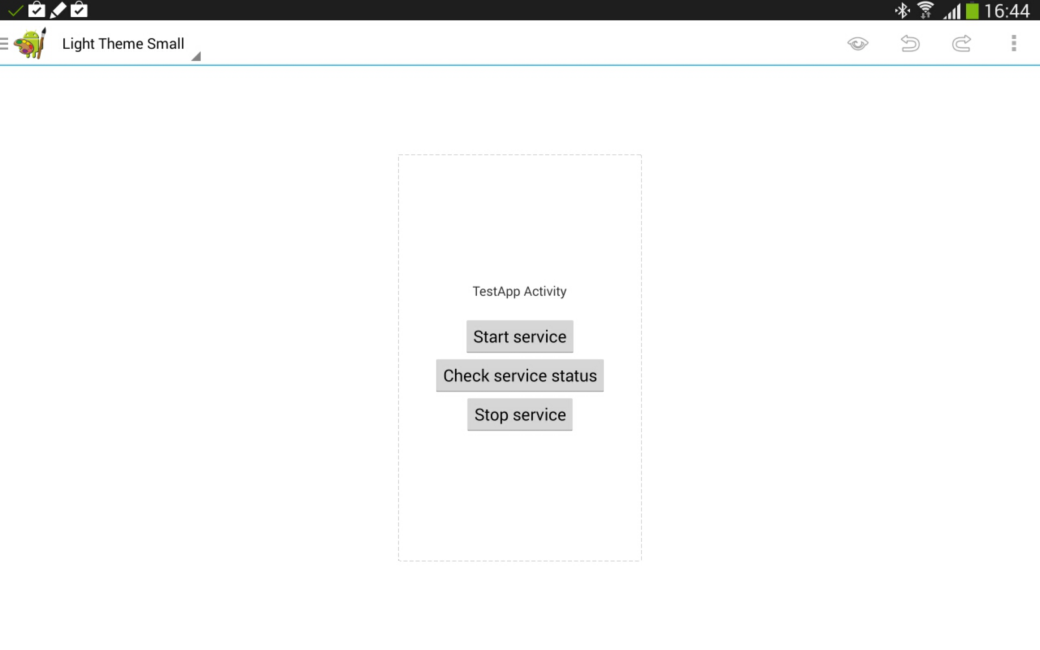
The first tab you see after having created the project — main.xm, which seems to be simple, but it’s very boring to edit it manually. But if you splurge on App UI Designer (which costs around RUR 100), in the upper right corner you’ll see a special start button, and GUI creation will become much easier. I’ll describe its capabilities. Briefly, they are almost as good as desktop GUI designers — the same layout marking, standard widgets, properties editor… Of course there is a drop of poison — I would say it’s impossibility to conveniently link to the strings from strings.xml and absence of functions stubs autogeneration by onClick event; but in whole this tool is really able to facilitate developer’s life.
Let’s move to the code editor. Subjectively, syntax highlighting is scantier than in desktop development environments, but in fact it’s quite enough for convenient source code editing. As for code completion, it works in a pretty strange way: for example, in XML files it puts Android classes names in the places where they usually shouldn’t be — in XML properties.
It’s the same with Java editor. In Android projects, the names of imported packages often start with android. One would think that in this situation the code completion should work correctly, but it doesn’t — AIDE doesn’t find any suitable coincidence. But if you put “android” and a point, you will be immediately offered variety of other variants, just as it should be in any goodish code completion system.
The same thing for overloaded superclasses methods — it’s enough to put public void onC, and at once you will be offered a suitable choice. All fine and dandy, but after stub creation, public void appears again, just when you need to fill the stub with a code.
File panel is invoked by tapping an unremarkable sign in the upper right corner; the panel is located vertically from the left side, but the second tap will place it below horizontally. Despite this name, it’s not only a file panel — it contains error panel, search results panel and logcat panel.
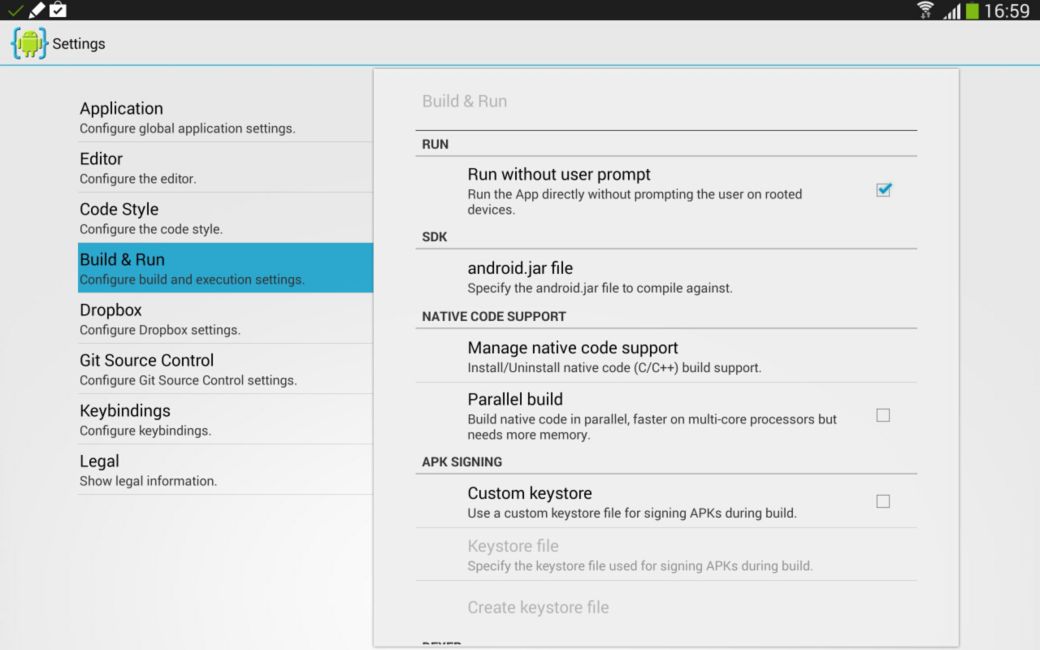
In settings (invoked by tapping Menu -> More -> Settings), you can find the following configuration opportunities:
- screen image (light — dark);
- code editor (print, autosave, tabulation parameters…);
- code writing style (tabulation size, parameters aligning, new strings…);
- setup and start — here, in particular, one can install NDK and activate parallel construction (the latter eats up much memory);
- Dropbox configuration, in particular autosynchronizing;
- Git (email and username, folder for a catalogue with SSH-keys…). Here there is one parameter that I strongly recommend to change — tick Create Repo. This option forces AIDE to create repositories for new projects. I underline that it’s impossible to create a repository for current projects.
- keyboard combinations.
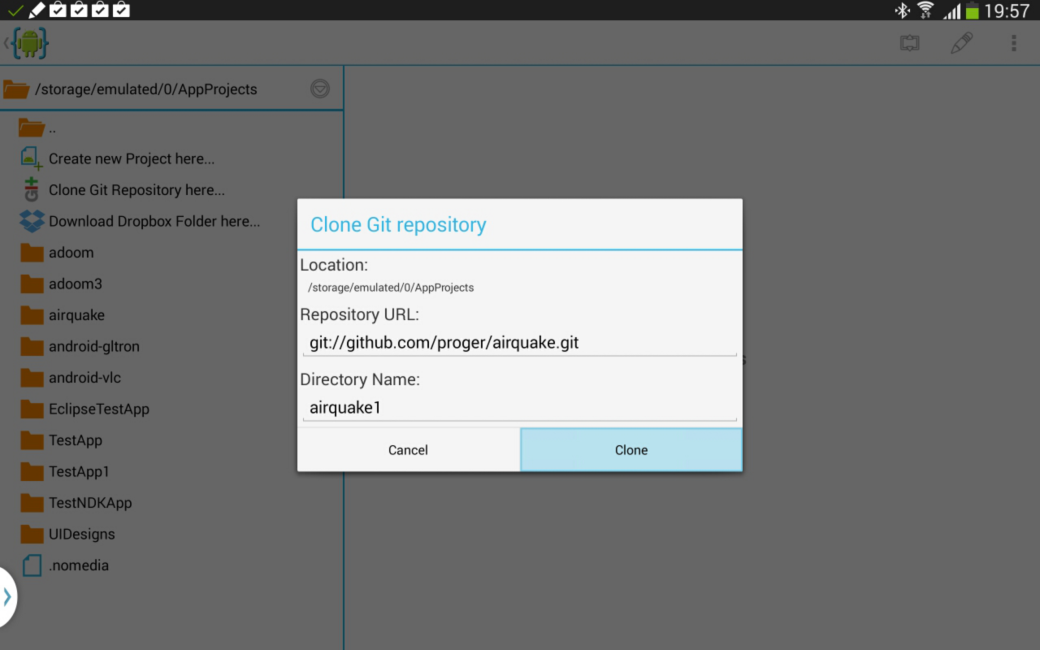
Since I have already mentioned Git, it’s better to describe it in details. Working with it in AIDE is a real pleasure. Development environment supports standard operations for Git — clone, commit, pull, push, checkout — but the major part of them is available only in paid IDE Premium version. Repository control is performed from the file panel. If a project is not opened, one can clone a complete one, for example from GitHub. But you should remember that it’s better to use git:// as URL — cloning by https:// doesn’t work well. Directory name field should be filled manually; IDE reaction on double slash is incorrect — instead of cloned repository it puts “-2” in the field.
Eclipse projects opening proceeds faultlessly. AIDE, as if nothing had happened, accepted not only a simple application created by me, but also a serious project found GitHub’е. Simple applications setup doesn’t take much time — 13–16 seconds for PureJava projects written without NDK application.
In general, AIDE gives rather good impression. Of course, it’s not a desktop development environment, but it can be used for complex applications coding. Yes, there are some gaps, but they are not so serious to impede development. AIDE is definitely worth being bought if you are forced to develop on the way.
Terminal IDE or mini-Linux in your pocket
Despite the name, it’s difficult to call Terminal IDE a development environment. It’s rather a Swiss military knife, which contains many tools — from GCC and Make to Vim and terminal emulator. It’s kind of a minimalist Linux environment that works on any Android device, even if the latter doesn’t have root rights.
The application represents a graphic wrapping for Linux environment, which works in a sandbox. That’s why after first start of Terminal IDE, you need to click Install System button to deploy the environment to a separate catalogue. Than, you’ll get access to a set of Linux applications, among which are:
- BusyBox — full set of standard Linux commands;
- Vim — well-known editor with a set of plugins: NERDtree, snipMate, javacomplete, etc.;
- javac — Java compilator;
- aapt — generator of APK packages from JAR files;
- GCC/Make — language compilator and a setup system for large projects;
- dropbear — SSH server and client;
- Git — the abovementioned version management system;
- mc — the very Norton Commander clone.
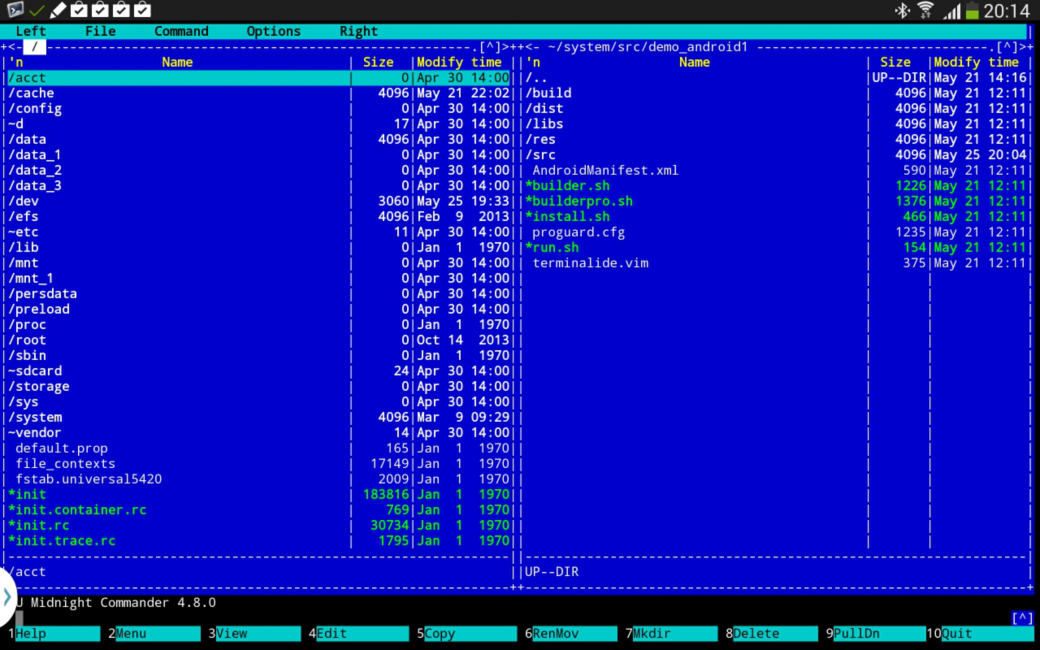
Let’s not go into details of commands usage (it’s the same as in Linux), but focus on capabilities of local Vim. To start, use “terminalide” command. It launches Vim with all necessary plugins. Let’s study NERDtree plugin — it’s kind of a file panel, similar to those of desktop IDEs. Here is the list of main keys and commands for the plugin:
- ma name — to create a file or a catalogue;
- o or Enter — to open a file / a catalogue;
- I — to display hidden (dot) files;
- :NERDTreeToggle — starts and closes the panel. For more convenience, I recommend to bind this command for example with \ by adding a string like map \ :NERDTreeToggle to ~/.vimrc file.
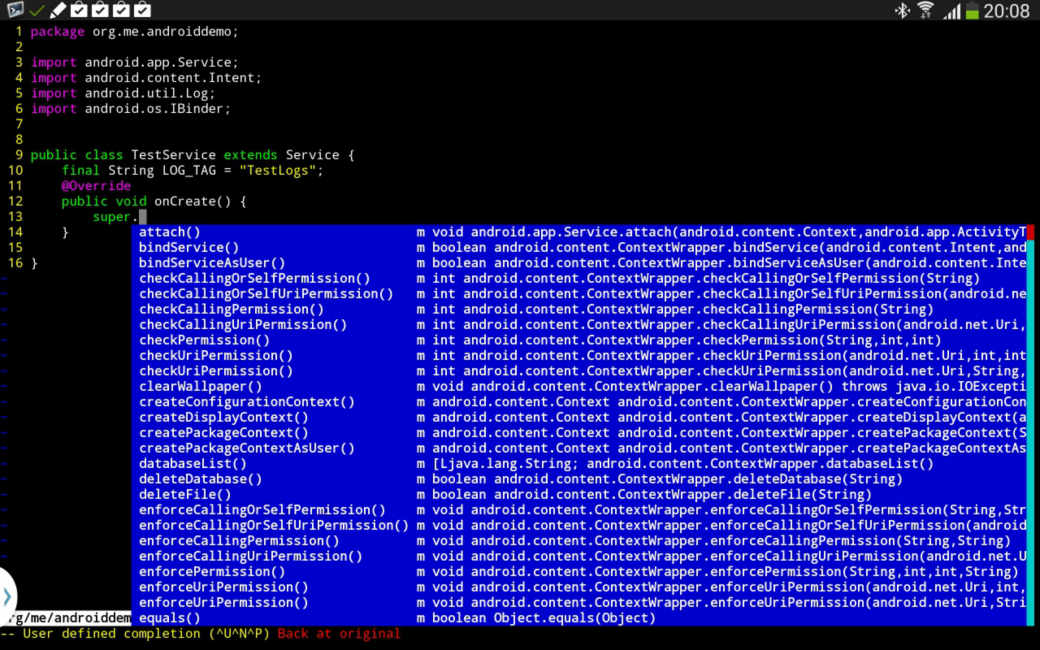
After file creation/opening, you can start writing a code; to do that, place Vim in insert mode by clicking “i” and key in a text. I’ll describe some features of Vim and plugins from point of view of IDE. Syntax highlighting here is similar to the one of AIDE. As for code completion, it works on the cache principle: the more you write, the more variants will be available further. This Vim setup includes javacomplete plugin, but it’s not reliable — in my case, it erratically reacted on keyboard combinations (, for appending key words, , for functions in insert mode). SnipMate plugin works greatly, one just needs to print, e.g., fi in Java code and click tabulation, and it will automatically deploy the combination in “final”. Let’s study a couple of abbreviations for Java files:
- main — deploys in a standard entry point for desktop Java apps;
- tc — deploys in public class FileName extends TestCase;
- t — deploys in the header of a function, which can eliminate an exception;
- fore — deploys in Java foreach;
- if — you know what it deploys in.
It’s also possible to compile to Terminal IDE (by means of F7), but you will need a make file. Before compilation, it’s necessary to unpack toolchain (located in system/android-gcc-4.4.0.tar.gz) in home catalogue manually or through install_gcc command and use C-compiler through terminal-gcc script, which installs the necessary variables and starts the compiler with necessary arguments.
Terminal IDE tools set is very large (having patience, you can even set up a core), but this is an “environment” for those who know what UNIX is and got used to Vim and terminal. If you didn’t try anything except Eclipse and similar “all-in-one” environments, IDE is not for you.
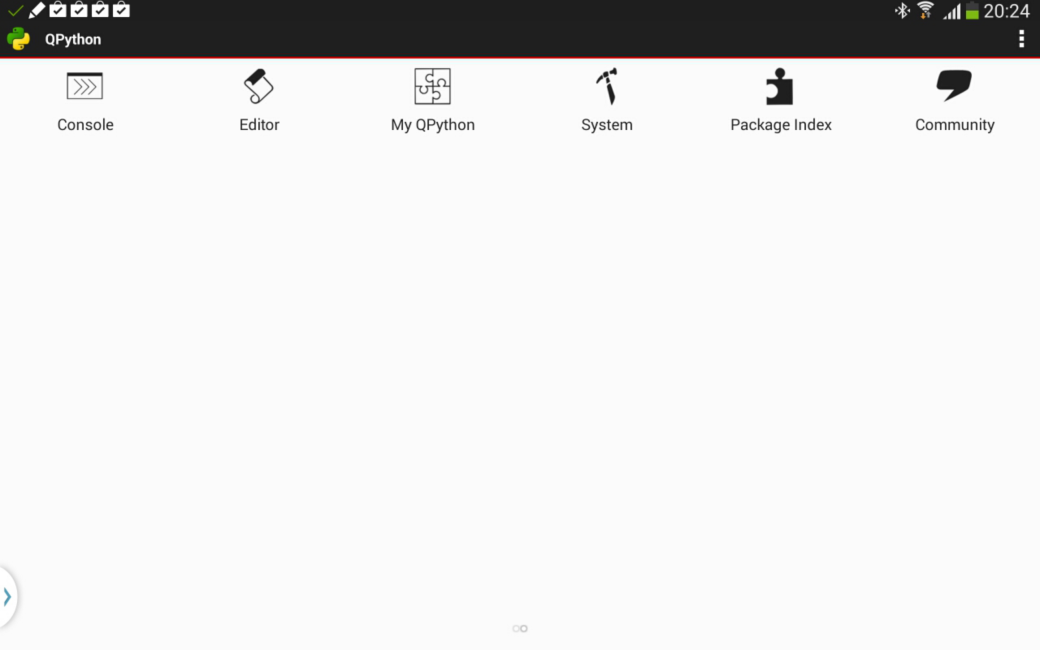
QPython
Android has its own Python version and with a possibility of graphic applications creation. This miracle is called QPython and has even three reincarnations in Play Market: QPython 3 (beta-version), QPython, and QPython Player, customized to scripts execution. We need only QPython; it enables both to write and to launch scripts, but unlike the third version it’s more stable (Python version — 2.7.2). After installation and start, you’ll see a window with the only round button, at the click on which you’ll see a menu with three points (as for me, this button is unnecessary). The points are:
- Get script from QRCode — receives a script by link coded in QR-code;
- Run local script … — enables to choose and start a script;
- Run local project … — an analogue of the previous point with the difference that in file selection window, Projects, not Scripts, will be opened as a root directory.
However, when scrolling, one more screen appears — the one which, theoretically, should be placed the first:
- Console — Python console;
- Editor — code editor;
- My QPython — scripts and projects review;
- System — a possibility to install additional libraries and components, like Docutils for example;
- Package Index — for QPython there is a QPyPi repository; this icon serves to view it.
QPython supports the following capabilities:
- work with images (PIL);
- access to Java classes (Pyjnius);
- graphic applications development by means of Kivy;
- simple games development (pygame library).
Let’s move to the code editor. And here, unfortunately, QPython with its QEdit is not so cool — it can impress only with code highlighting, which also activates only after file saving. Code completion is missing a priori, even based on cache. Actually, the only convenience is support of three boilerplates (Web App, GUI App and Console App), which, for some unknown reason, were called “snippets” by developers. They can be included to snippets catalogue. Several skins are supported: classical, dark, and Matrix — green text on the black background. With the latter, code highlighting looks much more convenient. For indents, there are two buttons in the bottom-left corner. Debugging is performed only under the classical for Android applications scheme — writing to log or (for console apps) screen output.

As a framework, QPython is beyond praise — it supports almost all capabilities of a “usual” Python. But as IDE… its functionality is definitely enough for writing small scripts, but it’s not suitable for something more than that.
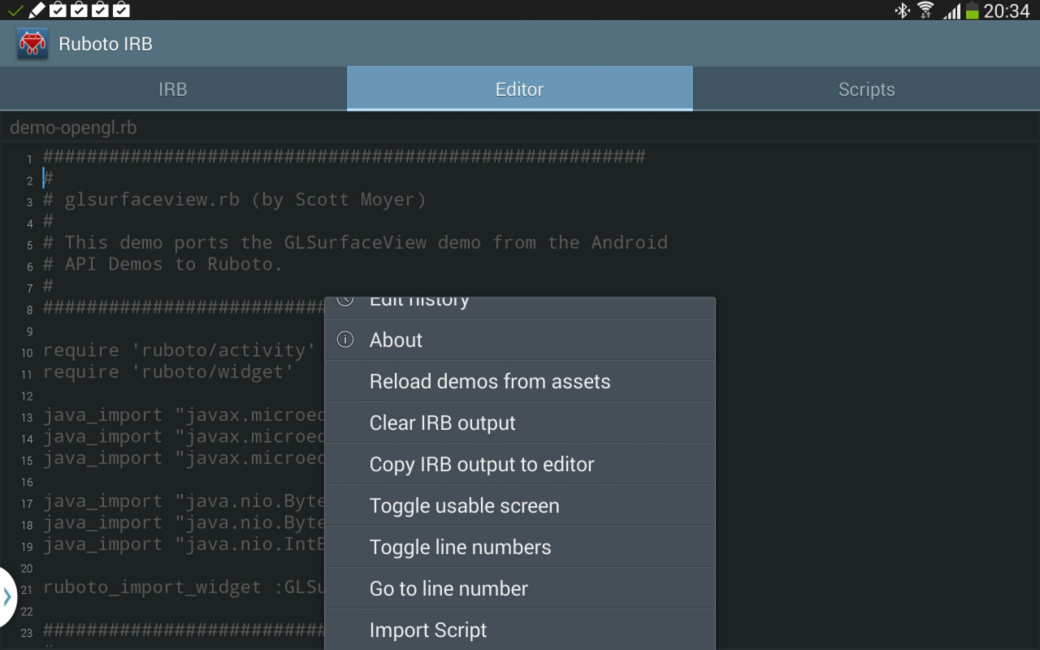
Ruboto
Besides Python, for Android there is also Ruby interpreter called Ruboto. To develop an application on Ruboto, it’s better to use desktop, but if you want to try it on the device, you can install Ruboto IRB development environment after having pre-installed Ruboto Core framework.
De facto, this framework represents JRuby 1.7.12with stdlib library, therefore using it one can write and run the same applications that can be run and written using a usual JRuby. Adjustment for internal Android peculiarities, like a diverse internal structure of class files, is performed automatically.
The capabilities of the framework as kind of backend are quite ample — vibration, camera, and even OpenGL. But as a graphic interface for applications developed by means of Ruboto, its capabilities are pretty scanty and primitive, therefore it’s suitable only for writing one-day scripts for your own needs.

Speaking about the editor’s capabilities, it’s extremely primitive — not only is code completion missing, but even syntax highlighting. Actually, I could say that the only peculiarity is the possibility to activate full-screen mode without tabs by means of menu point Toggle usable screen.
In general, Ruboto gives a strange impression both as a framework and as a development environment. The first case perplexes — almost everything that can be written for a Google OS by means of this framework can be written also without it and often with less expenses. One should also remember that it’s not a JIT-compiler, therefore serious projects (if somebody decides to do that) will lag. Yes, OpenGL demo doesn’t lag, but I doubt that it can be considered as a serious project.
I don’t have the heart to call Ruboto a development environment — the code editor doesn’t even have a full-text search! I would say Ruboto is worth being used only in case when you have no PC or laptop around, but you desperately need Ruby, for example, to start a code of an indolent student.
Conclusion
Host-target development for Android is possible and often can be performed even comfortably. In the article I presented some means which can be considered IDE (though some of them can be taken into consideration at a long stretch). I think App UI Designer + AIDE liaison can be called the most potent IDE for development on Android. It costs RUR 500, but if you seriously deal (or plan to deal) with development, that’s worth the money. All-inclusive — code completion, handy UI design, and a possibility for NDK apps development.
Terminal IDE, though having JavaComplete plugin and APK packages creation tools, is customized to console apps — here it’s second to none. QPython will be interesting for Python fans. As an IDE it’s worse than two abovementioned applications, but, if you get used to it, you can use even its editor. As for Ruboto, I can say Proof of Concept — and there is nothing to add. It hardly makes sense to use it without an urgent need. IDE diversity, as you can see, is quite ample, so the choice is up to you.

2022.06.01 — Quarrel on the heap. Heap exploitation on a vulnerable SOAP server in Linux
This paper discusses a challenging CTF-like task. Your goal is to get remote code execution on a SOAP server. All exploitation primitives are involved with…
Full article →
2023.07.07 — Evil Ethernet. BadUSB-ETH attack in detail
If you have a chance to plug a specially crafted device to a USB port of the target computer, you can completely intercept its traffic, collect cookies…
Full article →
2023.06.08 — Cold boot attack. Dumping RAM with a USB flash drive
Even if you take efforts to protect the safety of your data, don't attach sheets with passwords to the monitor, encrypt your hard drive, and always lock your…
Full article →
2022.06.01 — WinAFL in practice. Using fuzzer to identify security holes in software
WinAFL is a fork of the renowned AFL fuzzer developed to fuzz closed-source programs on Windows systems. All aspects of WinAFL operation are described in the official documentation,…
Full article →
2022.01.01 — It's a trap! How to create honeypots for stupid bots
If you had ever administered a server, you definitely know that the password-based authentication must be disabled or restricted: either by a whitelist, or a VPN gateway, or in…
Full article →
2022.06.01 — First contact. Attacks on chip-based cards
Virtually all modern bank cards are equipped with a special chip that stores data required to make payments. This article discusses fraud techniques used…
Full article →
2022.01.11 — Pentest in your own way. How to create a new testing methodology using OSCP and Hack The Box machines
Each aspiring pentester or information security enthusiast wants to advance at some point from reading exciting write-ups to practical tasks. How to do this in the best way…
Full article →
2022.02.09 — First contact: An introduction to credit card security
I bet you have several cards issued by international payment systems (e.g. Visa or MasterCard) in your wallet. Do you know what algorithms are…
Full article →
2023.06.08 — Croc-in-the-middle. Using crocodile clips do dump traffic from twisted pair cable
Some people say that eavesdropping is bad. But for many security specialists, traffic sniffing is a profession, not a hobby. For some reason, it's believed…
Full article →
2022.06.01 — Cybercrime story. Analyzing Plaso timelines with Timesketch
When you investigate an incident, it's critical to establish the exact time of the attack and method used to compromise the system. This enables you to track the entire chain of operations…
Full article →