
As you are well aware, users often screw up their systems and then bring their computers to you asking for help (“I just pressed something here and everything disappeared.”) And you have no choice but to use your time-tested flash drive with a fresh Windows version.
Everything changed in summer 2020, after the advent of coronavirus. People cannot visit computer workshops personally anymore, and IT specialists started rendering their services remotely.
A PC can be purged from viruses over a network, but the OS reinstallation had traditionally required physical access. Today, I will show how to perform this procedure remotely (without giving any instructions to the customer!), which includes, among other things, entering the boot menu and boot-up from a USB flash drive.
warning
The techniques described in the article may cause nearly irreversible damages to the target system. Unauthorized access to computers belonging to other people is punishable by law. Neither the author nor the Editorial Board can be held liable for improper use of information provided in this material.
Preparations
To reinstall Windows, you will need this OS in the form on an ISO image, WinNTSetup, Bootice, remote connection, admin rights, and some wits.
An image can be downloaded from the Microsoft website.
If you want, you can download the image directly to the customer’s PC. However, it’s possible to reduce the download size and concurrently customize the build by extracting from the ISO image just one file located in the sources folder of the root directory: install./install.. This file is all you need for installation. Its names may slightly differ, but you won’t overlook it: the file size exceeds one gigabyte, and it occupies most of the image. For your information: Windows installer supports both the WIM and ESD formats.
The remote connection must support graphics. Accordingly, Telnet and other relics of the past are unsuitable for your purposes. And of course, the admin rights must be available on the target machine. But don’t worry about this: even in 2020, most users have no idea of how to use a computer without admin rights.
The key feature of my method is that you don’t log out of the old OS until the client’s PC reboots into the newly-installed OS. By the way, this may be your only option if you reinstall the OS on VPS – because it’s simply impossible to gain physical access to it, while the loss of remote access would result in the loss of the server. Initially, this method was invented and implemented to reinstall Windows on a server whose panel cannot be accessed.
The method uses the WinNTSetup 4 utility to deploy a system from a WIM/ESD image bypassing the native installer and WinPE. The program deals with the image, tweaks the installed system, and offers plenty of settings. Overall, WinNTSetup is a must-have for any system admin or IT specialist.

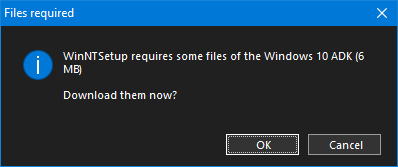
At the first launch, you will be prompted to download the Windows ADK components required by the program. They occupy very little space but, unfortunately, aren’t supplied with WinNTSetup. Just for your information.
In addition, you will need Bootice, a very handy bootloader manager. Among other things, it allows you to edit the BCD (Boot Configuration Data) file. You will need it to force the Windows bootloader to load the newly-installed OS instead of the old one.

It’s important not to lose remote access after the reinstallation because the new OS has to be configured. Since the procedure was originally invented for VPS, RDP was used for remote access, and my method uses it, too. If you use another remote access method, I will explain how to deal with it later. In the case of RDP, the Windows registry is automatically edited after the installation to ensure access persistence.
warning
Any manipulations with the boot code, including OS reinstallation (especially in an abnormal way), can irreversibly damage your PC. Backup all data prior to performing such operations.
OS reinstallation
Now that you have all required software and know the basics, connect to the customer’s PC, and let the Force be with you!
Partition
First of all, you have to allocate space for the new OS. You cannot install it on a partition containing the existing system. So, open the Disk Management window and create a new NTFS partition. Its size must be at least 10 GB.
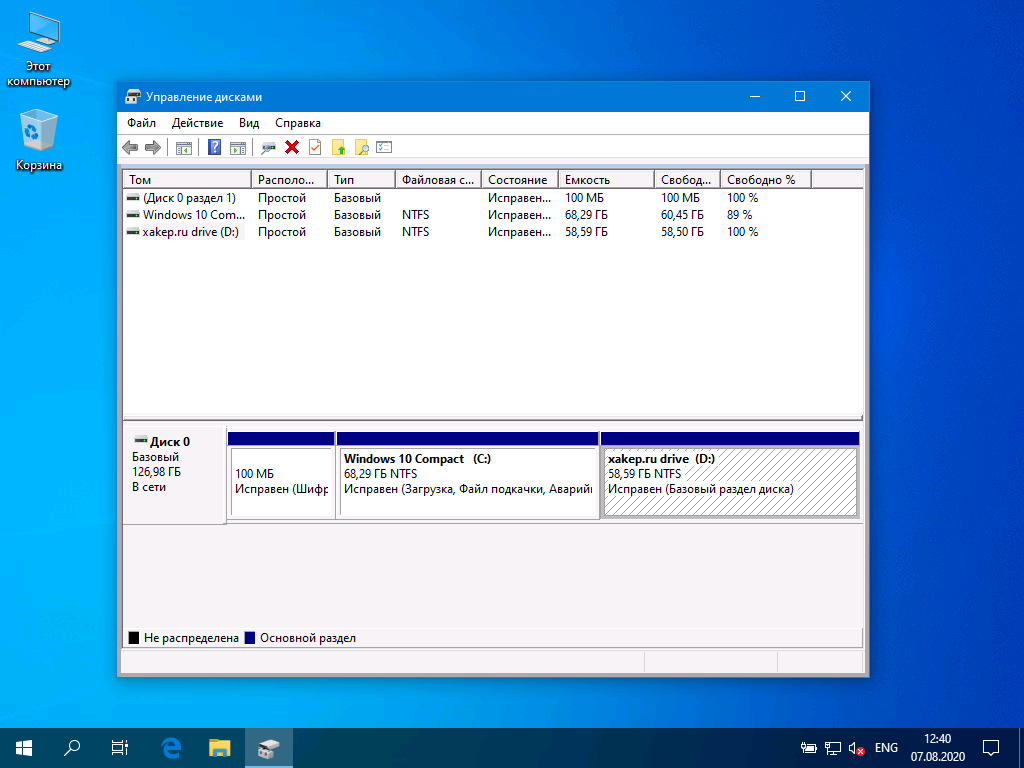
After creating a new partition (mine is some 60 GB in size), you can proceed further.
WinNTSetup
Start WinNTSetup, remember what Windows version you wanted to install, and select the respective tab on top of the window. I assume that you aren’t going to install Windows XP or Windows 2000 and, therefore, skip instructions for these systems. For your information: the process is not very different, and the program provides numerous tips.
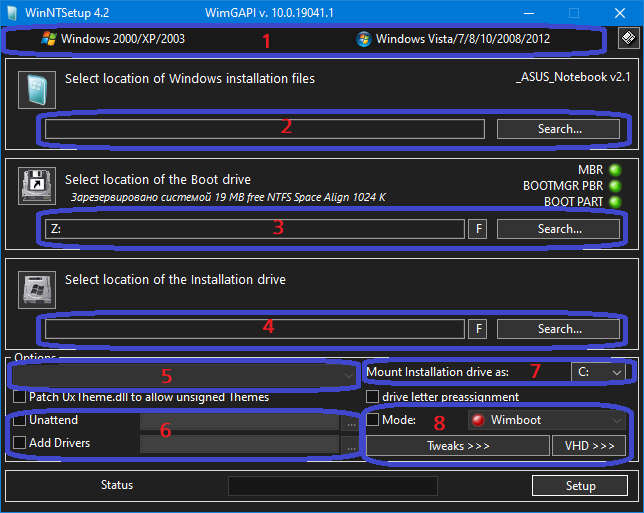
Time to examine the WinNTSetup settings in more detail. For convenience purposes, I marked them with red digits.
-
These two tabs determine the version of the installed OS. By default, the second tab is open (as shown on the screenshot); it allows to install modern versions of Windows. The first tab offers a slightly different set of tweaks and options.
Here you specify the path to the WIM/ESD file containing Windows. An ISO image won’t work. Therefore, you must either extract the required file from the ISO image using any modern archiver or mount it with UltraISO or DaemonTools. By the way, if Windows 10 is already installed on the client’s computer, you can mount an image (although not every one) using Windows Explorer! In that case, you don’t have to copy anything.
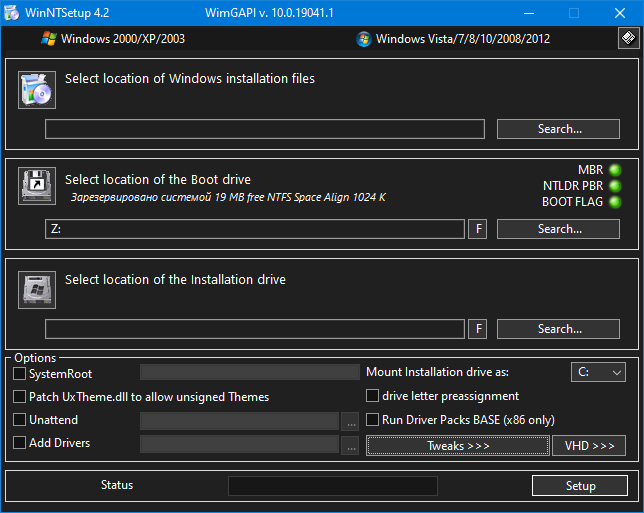
Here you select the boot drive. Not the one where the current OS is installed, but the boot drive. By default, it’s not displayed, but the program mounts it to
Z:at startup (see the screenshot). The EFI bootloader and its components are located there; so, I strongly recommend not to touch anything in this section. This partition is marked as “System Reserved” both on MBR and GPT disks; however, on EFI (GPT) it’s formatted in FAT32, while on BIOS (MBR), in NTFS. As you can see, I used two computers to take screenshots: the main one with MBR (too bad, it does not support the UEFI properly) and the test one with GPT (that’s why the screenshots are slightly different).Here you select the newly-created partition. It may contain other files; this won’t prevent the installation. But of course, it’s preferable to install Windows on a clean disk.
Here you can see the list of OS editions that can be installed. As you are aware, one ISO image may contain several Windows editions (e.g. Enterprise and Pro), and they may have different bitness. WinNTSetup allows you to select the edition for installation (if there are more than one), which is very convenient.
These two settings have similar purposes.
Unattendallows you to specify a customUnattend.file for installation. This function is required to maintain remote access.xml Addallows to integrate drivers into the newly-installed system. If you have a disk with special drivers required for the client’s hardware, you can install them immediately, without waiting for a reboot.drivers This function allows to change the system drive letter in the newly-installed Windows. Even if you install the OS on drive
D:(as I do in the demo), this function will mount that partition as driveC:(or any other letter) in the new system.
8 The last three options are used to select the installation mode and tweak the new system.
Using the Mode function, you can either enable the Compact OS feature (in several ways!) or leave the oldie-goodie WIMBOOT. On modern SSD drives, this feature isn’t really actual, but on older models, it allows to save space on the hard drive and expedite the startup.
The Tweaks button allows to modify the new system (e.g. you can disable Windows Defender and “Hibernate” power option or tune Windows Explorer and Windows Registry).

VHD allows to install Windows on a VHD or VHDX virtual hard drive that can be used in a virtual environment or to create a ready-to-deploy image with a preinstalled OS. I never used this function, but it’s still worth mentioning.

Now you have a basic understanding of the program functions and can start the installation. Mount the ISO image (or extract the installation WIM/ESD file from it), open it in the program, and select the partitions, Windows version, and tweaks (their names are self-explanatory; so, I won’t describe them here).
Maintaining remote access
Prior to pressing the Setup button, remember that you must maintain remote access to the client’s PC. The Unattend. file is used for this purpose. In addition to the settings that appear on the screen at the first start, you can specify in this file commands to be executed after the installation. This is how it works in my method: the RDP server is enabled in the Windows Registry, which, in turn, can be edited in the command line. After the execution of commands specified in Unattend., the client’s PC reboots, and the server is launched.
Important: a real server usually has not a ‘white’ address – but a ‘gray’ one received over DHCP from the virtual (or not so virtual) router configured to forward ports to your server. If you haven’t enabled the accessibility of all ports from the Internet in advance, and the configured RDP port is different from the standard one (3389), then after the OS reinstallation and RDP startup, you won’t be able to connect to this server (because the required port wasn’t forwarded). Therefore, make sure to find out what port the RDP server is assigned to and specify it in Unattend. prior to the OS installation.
What about other remote access tools?
The majority of such programs are unsuitable for your purposes. For instance, TeamViewer doesn’t allow to install the client automatically and log into the account in it. AnyDesk generates a new identifier on each system; so, it’s useless, too.
The only real alternative is oldie-goodie Quasar RAT: it’s free, and nothing will interfere with it on the new system (provided that you have disabled Windows Defender). I assume that you have a server; so, nothing prevents you from installing Quasar host/server application on it and receiving a connection from the client.
Using Quasar host application, you have to build a client binary to be added to the startup on the new system. This can be done in many ways; so, use your favorite method. After finishing manipulations with the old OS, you restart the customer’s PC, and the new system is loaded and configured on it. The script is executed in the end of the configuring: it installs Quasar on the new system, then the computer is rebooted again, and you get a connection. Now you can use the remote desktop mode to continue configuring the newly-installed Windows. Alternatively, you can install a more handy program (e.g. AnyDesk or TeamViewer) and continue your work with it.
Yes, it’s a crutch. But it works.
Unattend.xml
I used Windows AFG to create the Unattend. file. But files generated by this online service contain plenty of junk; so, I had to edit it manually.

Configuration passes in Unattend. are specified in containers that have the following format: <. Only two of them are of interest to you: specialize and oobeSystem. These configuration passes determine the behavior of the initial system setup program and contain answers to questions that pop-up at the first startup. Therefore, delete lines from 13 to 164: you won’t need them. Also delete the comment in the beginning of the file: its sole purpose is advertisement.
Your goal is to automatically answer all questions popping up during the installation, create a user, add it to the remote desktop admins and users groups, launch and configure RDP, and then reboot the customer’s PC.
Thanks to Windows AFG, answers to the questions are already in place. A user is created but, for some reason, it cannot be added to several groups at once. RDP is launched and configured in the command line, and the required commands can also be added to the file. The system is rebooted automatically after processing Unattend..
Let’s examine the oobeSystem configuration pass in more detail. First, the user is automatically logged in (the component/ subcontainer). Then unnecessary questions popping up during the installation are disabled (OOBE). Next, user accounts are created: the login and password of each account are specified in plain text, and the owner’s account is set. Finally, the commands to be executed during the installation are specified. My method uses these commands to perform all the required operations.
Three commands are set by default: configure the control panel view, set the icon size, and disable the user password expiry. You can also add additional commands, but for your convenience, below is the entire code to be inserted after the existing commands.
<SynchronousCommand wcm:action="add"> <Order>4</Order> <CommandLine>reg add "HKEY_LOCAL_MACHINE\System\CurrentControlSet\Control\Terminal Server\WinStations\RDP-Tcp" /v PortNumber /t REG_DWORD /d 0x00000d3d /f</CommandLine> <RequiresUserInput>false</RequiresUserInput> <Description>Set RDP port</Description></SynchronousCommand><SynchronousCommand wcm:action="add"> <Order>5</Order> <CommandLine>reg add "HKEY_LOCAL_MACHINE\SYSTEM\CurrentControlSet\Control\Terminal Server" /v fDenyTSConnections /t REG_DWORD /d 0 /f</CommandLine> <RequiresUserInput>false</RequiresUserInput> <Description>Enable RDP</Description></SynchronousCommand><SynchronousCommand wcm:action="add"> <Order>6</Order> <CommandLine>netsh advfirewall firewall set rule group="remote desktop" new enable=Yes</CommandLine> <RequiresUserInput>false</RequiresUserInput> <Description>Enable RDP on firewall</Description></SynchronousCommand><SynchronousCommand wcm:action="add"> <Order>7</Order> <CommandLine>net localgroup "Remote Desktop Users" xakep_ru /add</CommandLine> <RequiresUserInput>false</RequiresUserInput> <Description>Allow login via RDP</Description></SynchronousCommand><SynchronousCommand wcm:action="add"> <Order>8</Order> <CommandLine>shutdown -r -f -t 120</CommandLine> <RequiresUserInput>false</RequiresUserInput> <Description>Schedule a reboot</Description></SynchronousCommand>In string 2, you can see the Order parameter: it specifies the command execution order. The CommandLine parameter specifies the command to be executed. The rest of the code is not really important.
The first command specifies the RDP port prior to the startup. The values are stored in the hexadecimal format only; so, make sure to correct the port number, if necessary. By default, I left 0x00000d3d (i.e. 3389 in the decimal format). The second command enables RDP and allows connections to the specified port.
The third command enables RDP on firewall (if, for some reason, you haven’t removed it from the system during the installation).
Then a new user is added (in my case, it’s xakep_ru) to the remote desktop users groups. The last command schedules a reboot in 2 minutes (120 seconds) if the system doesn’t reboot by itself.
Important: all settings are duplicated (i.e. settings for 32-bit and 64-bit Windows may be different). Therefore, after making the required changes, don’t forget to duplicate them in sections configuring other Windows architectures.
Installation
Now you can check the Unattend box and install the OS. The program will ask you to confirm the installation again (in case you have changed your mind).


As you can see, the process is pretty fast. Now all you have to do is configure the bootloader.
An alternative method
Virtualization makes it possible to avoid the hassle with the answer file and command line. You can forward a real disk to a virtual machine, install the OS on another partition, and configure it directly on the VM, which is much easier. This equally applies to Linux distributions. Too bad, virtualization is often unavailable on VPS; so, in many situations, the ‘cumbersome’ method described above remains actual.
Bootice
At some point during the installation, you are asked about updating the boot code. If you answer that you want to see all installed versions of Windows in the boot menu, you must be very careful.
Open Bootice, go to the BCD tab, select ‘BCD of Current System’, press Easy Mode, and delete the unneeded boot record. The remaining one should look something like the screenshot below.

On systems with BIOS (MBR), you have to check whether the right bootloader is specified in the MBR. To be on the safe side, you can forcibly rewrite it with the Windows bootloader. Just press ‘Process MBR’ in the main window of the program (and don’t forget to select the ‘right’ disk!).

Time to reboot and finish the article… but if you use a different remote access utility, the fun is just beginning for you.
Life after Windows
If everything went fine, then, after some waiting in the dark, you will get an operational PC with remote access and a new OS. The waiting time is different in each case: normally, it ranges from 3 to 15 minutes depending on the target machine’s hardware. Be patient. In the worst case scenario, the computer will reboot back to the old system, and you can try again.

After installing and loading the new OS, you can start configuring it, installing the required software and drivers, etc.
Conclusions
Needless to say that this method must not be used for hijacking other people’s servers and other malicious actions. I am sure that you are fully aware of the potential consequences. So, use this knowledge ethically and wisely. Good luck!
Wow, awesome! Thank you very much for this detailed post.
Any chance you might still have access to the pictures?
If yes, it would be immensely helpful if you could update their links.
Some of us just NEED some visuals 😉
Again, thank you very much for this awesome guide!
Fixed links to pictures. Although some of them are in Russian…