
After the release of Kinect sensor, in the wake of its success, other non-contact motion control devices began to appear. Kinect was the basis for the growth and development of the market for such devices: Investors have seen the prospects and understood the value of investing into gesture control devices. However, the most significant and successful was the Leap Motion Controller. As its prototype, the latter version is based on motion capture technology. This device connects to the USB port; in size, it is like two flash drives put together. Technically, there is Leap device that captures the projection of the user’s hands in space by using two optical sensors (cameras) and an infrared light source (the developers do not exclude the possibility that the future versions of the device will have a different number of cameras).
The device is placed with its worktop up next to the screen to create the feeling that the objects on the screen are controlled by hand. After the device is connected, a virtual inverted pyramid is generated over it, with the apex in the central unit. The most effective range extends from 25 to 600 mm above the controller, and has a 150-degree field of view. Leap Motion âseesâ all the movements within the scope of the pyramid and forwards them to the software which converts the data signals into coordinates and messages. The software is able to recognize both simple gestures (virtual touch and pressing) and complex movements: scaling, dragging, rotation, drawing different geometric shapes. Thus, the device itself does not perform any calculations and transformations, leaving it all at the mercy of the software of the host, which removes noise from the image and builds models of hands and fingers, which are used as pointers.
With the origin of coordinates at the center of the device, Leap Device interprets the coordinate axes as follows: X is negative on the left side from the device, and, accordingly, positive on the right side. Y coordinate grows up and does not have negative values, since Leap only “sees” objects that are located at least 25 mm above it. Positive Z is directed towards the user, while the negative Z is towards the screen.
Leap Motion SDK
Leap Motion SDK is developing surprisingly fast, and its new versions are released with enviable regularity: being around for a relatively short time, it already has a full second version of TOOLS, and modifications have also already emerged. To be precise, modes are still in their beta stage, and we will use the most recent version of SDK that is available at the time of the writing of the article, because each new version provides obvious improvements, which include more opportunities in tracking the skeleton (“the bones” of the hands). As we could expect, Leap Motion SDK works on all popular platforms: Windows NT, OS X, Linux. Recently I most often have to work on the Mac (Whereas I’m editing this article on EEE PC with Win XP, and it’s OK. â Editor’s Note), so the description that follows (with some reservations) will refer to this particular operating system. If you do not get on with it, do not despair, because Leap Motion SDK is cross-platform, and you can easily adapt the information from this article for any of the operating systems supported.
Ready to work hard!
To start working with the Leap Motion controller, you need to registered at the website of the device manufacturer, and then download archive LeapDeveloperKit_2.1.1 + 21671_mac.tar.from the Downloads. Unzip it to find a folder that contains the bundle Leap_Motion_Installer_skeleton-release_public_mac_x64_2.1.1 + 21671_ah1704.dmg (disk image for OS X) which contains the drivers for the device, as well as demo applications. Next to the bundle, you will find LeapSDK directory that contains all the required libraries and API for the development of applications that work with the Leap Motion device. The folder also includes documents and samples. Apart from demo applications, bundle contains Airspace Home, a kind of client for the Leap Motion app store: you can upload your applications and sell them in the same way that it is done on other digital distribution platforms.
The main difference of the second version of the SDK from the first one is the new system for tracking the “skeleton” of the upper extremities. It includes processing additional information about the bones of hands and fingers, the ability to predict the location of the bones invisible to the device and construct models of the hands which are not fully visible.
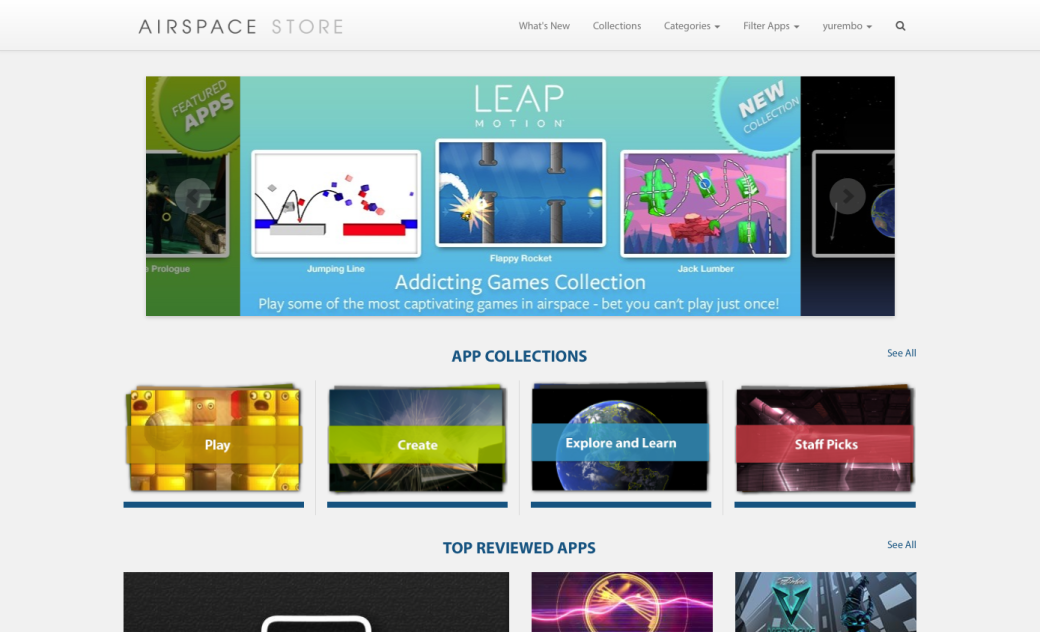
Fig. 1. Airspace
First, install the contents of the bundle (I am sure that under Windows it has the same name, but with the exe extension). The installation program itself, located inside the image, is called Leap Motion.pkg. It launches the installation of all of the above.
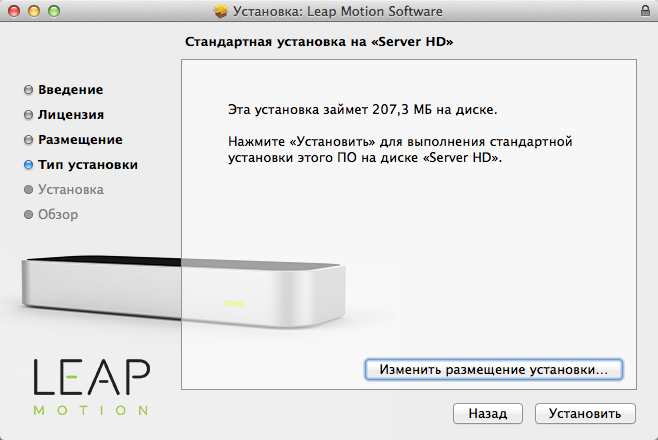
Fig. 2. Setup program for Leap Motion Software
When the software for Leap Motion has been installed, driver starts automatically that “settles” as a demon in the menu bar (top right). Three new applications will appear in the Programs folder: the driver itself, Leap Motion Orientation demo program (which I recommend to start with) and Airspace. If a controller has not been connected yet, it’s time to do it. The icon (in the menu bar) is highlighted in green. When you click on it, a menu with five items opens. The first step of Launch Airspace starts the eponymous window client. By default, it contains seven demo applications and two links leading to the Airspace Store and the developers community. Each of the demonstrations shows some functionality of Leap Motion.
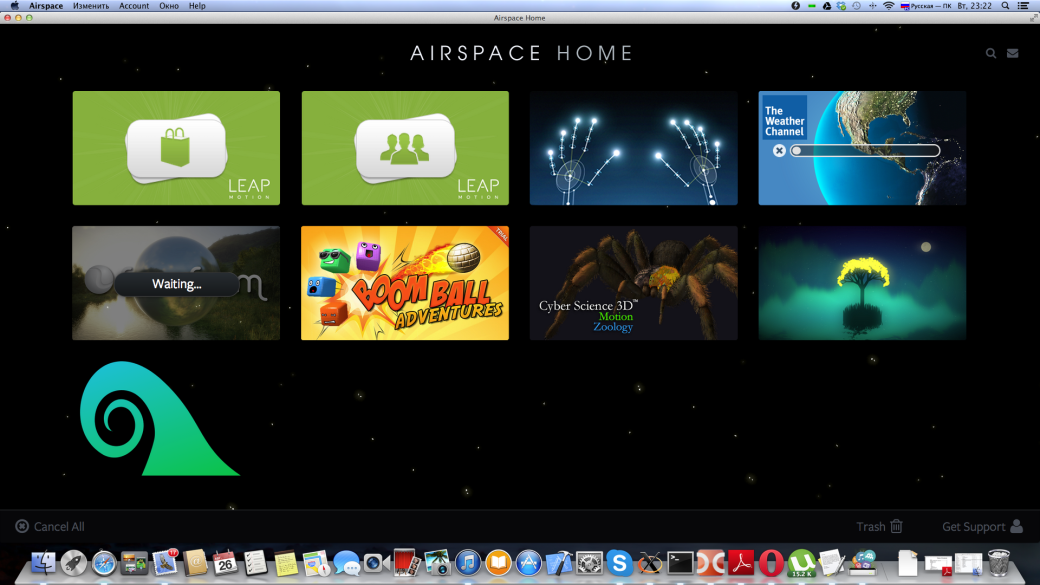
Fig. 3. Airspace Client
The next item on the menu, Settings, opens a window used to configure the device. This window has four tabs. The general parameters are set on the Generals page: enable or disable the interaction of the device with Web applications that support Leap Motion (looking ahead, I note that there is such a possibility, and it is based on HTML5 + JavaScript), enable or disable the opportunity to receive signals from devices to applications running in the background, automatically transfer the statistics on the device including (if necessary) the transition to the power-saving mode; set the lowest possible height above the device where it is able to “see” the hands and fingers (pointers); agree for automatic updating. The tracking page has two parameters related to the settings of a parameter related to the possibility of “tracking” with the use of the device. The next tab is dedicated to diagnostics and troubleshooting, and there are options for viewing the log of the software, diagnostic visualizer, recalibration of the unit and return to the default settings. The last tab simply provides user with the information on the device and the software that supports it.
By clicking on Visualiser item you open a demonstrator in which you can see how the device “sees” the limbs. That is, if you move your hands over the active area of the device, the application will display them in the virtual space. Pause Tracking button suspends tracking, Quit disables the daemon.
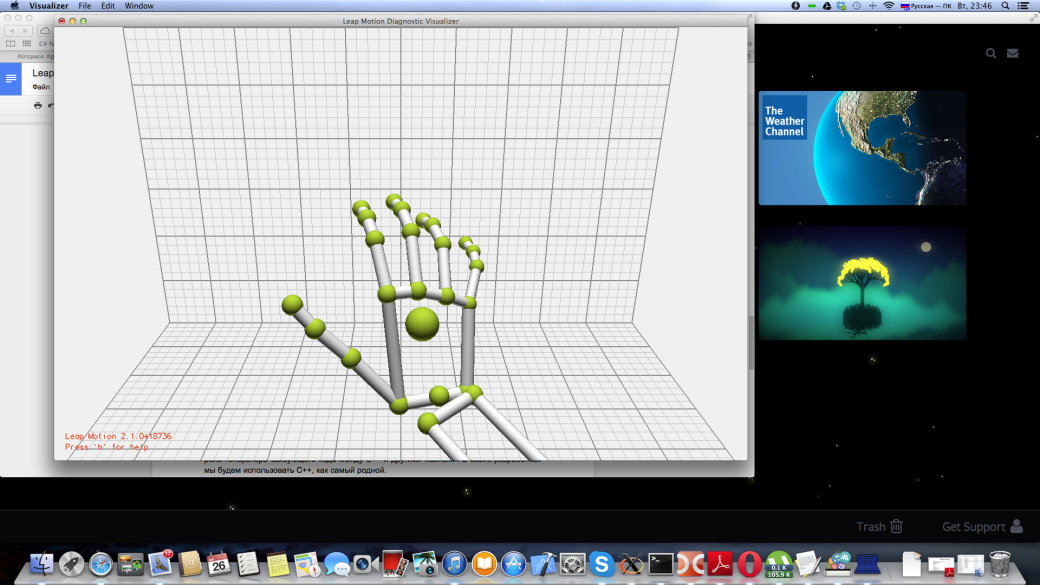
Fig. 4. Visualizer
When the software for Leap Motion is installed, you can set up the developer tools. However, I believe that you have the latest version of the operating system and developers tools (Xcode). As I already said, after the archive is unpacked, the folder with the SDK is next to the installation bundle. This folder contains documents, samples, header and object files for all officially supported languages.
Leap Motion SDK was originally written in C ++, but, due to SWIG, is supported in many popular compiled and interpreted languages, such as C# (with the .NET frameworks and Unity 3D, a Mono Plus engine), Objective-C, Java, Python, JavaScript. SWIG, being a free open source tool, plays the role of generator of glue code between C ++ and other languages. For our developments we’ll take C ++, as the most familiar language.
The client computer and the controller communicate over a TCP-connection, which opens ports 6437, 6438, 6439, so for the correct operation of the device you have to make sure that they are not blocked by the firewall.
Leap Motion SDK enables you to develop two types of applications: supporting native interface (client applications) and WebSockets interface (web applications running in a browser environment). The former work (retrieve data from the controller) by using a dynamic link library, which is specific to a particular operating system; it connects to a device and provides a service to the upper level. The latter receive data via WebSockets server of the local host as a message in JSON format. In this case, JavaScript + open source add-on LeapJS are used, and for the purposes of device management the application can pass configuration messages through the WebSockets server back to the device.
Coding for Leap Motion
Today we will focus on native applications for OS X, but as the tools are cross-platform, you can easily alter our progs for another supported operating system. We will not develop a console application that shows the coordinates passed to it by the controller, this is boring. We’ll immediately get immersed in some serious coding and write an application that displays a graphical representation.
Visualization
Leap Motion SDK provides wonderful means to obtain data from the controller, but it has nothing for the output of the graphics. Therefore, we’ll have to use additional tools. To bring the graphics from native applications to OS X you need to use OpenGL. This idea can make us sad: the level is too low, the description won’t fit into any article, and it all makes you yawn. So we will use the customization for OpenGL. From the rich variety of such libraries I chose Cinder.
Cinder is a set of libraries with open source code for image processing, graphics, sound, computational geometry. As I said above, Cinder is cross-platform, and the same code will work not only on desktop platforms, but also on smartphones and Apple tablets. In the future, developers are going to expand the range of supported hardware and software platforms. In addition to the generation of a draft for a new project, Cinder has a TinderBox utility, which can be used to create a project with the support for OpenGL, DirectX, CocoaView (OpenGL), and each of these drafts can contain support for the Box 2D physical engine, Cairo rendering library, FMOD audio library, OpenCV computer vision library. For the Apple devices, you can generate a draft which will use geolocation and movement managers and is based on standard frameworks (Core Location, Core Motion). All this can be easily included in the project during its creation through the GUI-interface. In addition, a project can be generated for a specific programming environment and operating environment: Xcode (Mac), Xcode (iOS), VC 12/13 (WinRT). As a result, we have more than an API library, as all this reminds us a cross-platform game engine! At the very beginning, you can also immediately create a local Git-repository. In my humble opinion, Cinder will soon become the best cross-platform solution, even compared with Qt.
As Cinder uses boost quite a lot, it’s a good idea to upgrade boost to the latest version. Let’s open the favorite console, and the first thing we do is to set Homebrew, package management software for the packages that Apple believes to be obsolete:
ruby -e "$(curl -fsSL https://raw.github.com/Homebrew/homebrew/go/install)"
Then we’ll install boost 1.55 from this system: brew install boost. To work with Cinder directly, it is enough to download and unpack it, and to generate the project you can use TinderBox utility located in the tools subfolder.
Hands, fingers, space management
OK, to warm up we’ll create an app that displays what the sensor sees in a special window. If you read my articles about Kinect, then you can remember that we started there in the same way, so let’s say that’s our tradition. We’ll do very well with a draft from TinderBox for OpenGL, we’ll just have to add Leap Motion support to it.
To do this, drag the two files specified below from the subdirectory include of the LeapSDK folder you had unpacked (more details about this are provided above) into the directory tree of the Xcode environment project: Leap.h and LeapMath.h. When the transfer is complete, a dialog box appears, where you have to specify how to insert / bind files to the project; check the box Destination -> Copy items into destination group’s folder (if needed), tick Folders -> Create groups for any added folders, and below tick the project which the files are added to. We also need a dynamic library. Since the compiler C++ (LLVM) included in Xcode follows the C++11 standard, it is necessary to use a library that is compiled on that standard. There is such a lib, it is called (version for OS X) libLeap.dylib and is located in a subdirectory libc ++ of LeapSDK subfolder of the lib directory. The lib also has to be placed into the Xcode system, and you need to go through the same dialogue after that. Now you have to instruct the Xcode environment to use the lib added to the project. In the tree of files / directories of the project, click the name of the project (the top item), and a menu for project configuration will appear. Go to Build Phases tab. In the top left corner of the tab, click on the plus sign, and in the pop-up menu that appears select New copy files build phase. A minimized Copy Files panel will appear in the bottom of the tab. Maximize it, select Executables from the Destination drop-down list, and drag the dynamic lib to an empty file list (below) from the tree of the project, and remove the flag on Copy only when installing. Now it is connected to the project.
The next step is required in order that the sensor submitted “raw” image data of what it sees; on the General tab in Leap Motion settings (Settings in the context menu of the device symbol in the menu bar) check Allow Images box.
The draft generated by TinderBox includes several folders, files and necessary frameworks. As I called the project RawImagesApp, I added a header file RawImages.h. It is there where I put the connection for header files of Cinder and Leap, inclusion of Leap namespace and the declaration of Leap Motion object controller, which, in fact, it is the central subject of this review. In addition, TinderBox generated the source code for this project, which we’ll use as a good starting point for the development. The cpp-file contains the main class (in my case, RawImagesApp) of the application that matches the name of the project and is inherited from the Cindera base class, AppNative. The window is created with a macro, CINDER_APP_NATIVE. In RawImagesApp class, virtual functions of the base class are announced and implemented. Setup function is called at the launch of the application, and here we put the code for its initialization: to display “raw” graphic data in this method, you have to install a special flag for the policies of the sensor; to do this, call setPolicyFlag method, to which you pass the value of POLICY_IMAGES controller. The update function is called in each frame for updating; draw is called to redraw the content; mouseDown â when you press the mouse. Default does not include all possible functions, you can, for example, add prepareSettings, a function that is called before the creation of a window and allows you to pass the parameters to it. Let’s add this function to enlarge the window we create, and let’s also set the refresh rate for it. An announcement in RawImagesApp class looks like this:
void prepareSettings( ci::app::AppBasic::Settings* settings );
and the implementation is like that:
void RawImagesApp::prepareSettings( Settings* settings )
{
    settings->setWindowSize( 1024, 768 );
    settings->setFrameRate( 60.0f );
}
I am sure that comments are superfluous here.
Let’s add OpenGL texture to the main class of the application: gl::Texture tex; We’ll need it for displaying. In the update function we will get the images from the sensor frame by frame, then process them and display them on the texture (see source). At each frame we get a frame of the controller: Frame frame = controller.frame();. A frame class object contains all the other objects, and the information about them is generated by the controller. We just need to get them out of it. Incidentally, getting frames this way, i.e., by taking them from the controller (sequential polling of the device), is the simplest and the most commonly used method. Any intermediate steps are predetermined: if at the next poll a new frame is not ready yet, then the old one returns; if at the moment of a subsequent polling several shots are ready, they are sent to history. There is another way to get frames, but we do not need it now, so we will discuss it in the next section.
After receiving the frame, we extract the images made by the sensor: ImageList images = frame.images();. There are two of them, as the sensor has two cameras, so there are two images at any given moment. Next, we process both of them in consecutive stages. First, in the line: const unsigned char * image_buffer = image.data (); we obtain the data on the image; at a specified moment we obtain images from the controller that are different not only in terms of content but also in size. The next line creates a graphics surface object (Surface) included into Cinder API. Its constructor is given four parameters: the width and the height of the surface, the use of an alpha channel, the sequence of the color channels (constant SurfaceChannelOrder:: RGBA complies with the following standard: red, green, blue, alpha, but there are also some other channels, for example, different color sequences are used in GDI or Quartz). Then we use the iterator to go through all the pixels of the surface (which is still empty). Within this cycle, the color of pixels is set. I decided to give the displayed image a reddish hue (like in DOOM :)). Therefore, the value for the red channel of each pixel is set in accordance to the value in the image data. The remaining channels are set to zero. After going round the whole image, we construct a texture object by using gl::Texture method and on the basis of the surface passed in the parameter. If you now display the texture on the screen, it will be too small. Therefore, we need to pre-scale it: glScalef(2.0, 3.0, 0.0);. now let’s display that: gl::draw(tex);.
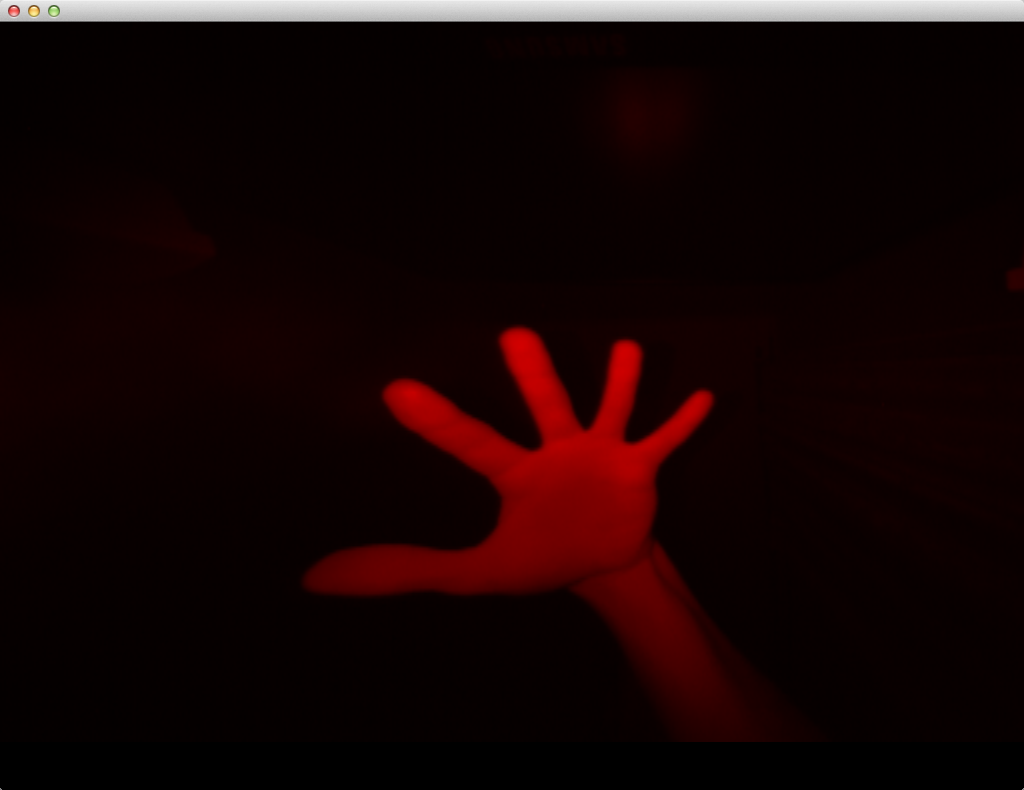
Fig. 5. What Leap Motion Controller sees
The bones
In the following example we will display our hands in the machine context, that is, we’ll draw them in the corresponding coordinates. This task is more difficult than the previous one, and LeapSDK still has a fairly low-level interface, so to simplify our problem we will use some available developments.
Stephen Schieberl, an American programmer working under a nickname Ban the Rewind, has developed a couple of classes (Listener is inherited from Leap::Listener and Device) that perform all the typical work related to processing and recovery of the status of the device. In addition, Steven added some functions to the file that perform calculations of the coordinates and matrix, which allows us to focus on more sophisticated tasks. These calculations are basically related to the fact that, unlike the coordinates of a desktop operating system, where the Y axis increases from top to bottom, the origin of coordinates for Leap Motion (0, 0, 0) is in the left bottom corner (Y increases from bottom to top), and, therefore, when you use the Y coordinate values, they have to be inverted. Additional calculations, as it was mentioned above, are carried out on vectors and matrices.
So, let us create a new project in the same way as the pervious one. Additionally, include files Cinder-LeapMotion.h and Cinder-LeapMotion.cpp (see the supplementary materials to this article). There are now new additions to member variables of the main class of the application, including: mDevice â a link to the device â an object of recorder class, mFrame â Frame class (we have already discussed this class in the previous section), mCamera â an object of CameraPersp class from Cindera lib, and onFrame method has also been added (callback from the ancestor class), which, upon the acceptance of Frame class object, makes it current by assigning it to the mFrame member variable. In the Setup method, we can enable the modes of drawing, smoothing out lines and polygons; camera initialization: setting the visibility scope (within the parameters of the constructor), setting of the point of view (in the lookAt method); after that, a recorder Device class object is created, which includes three essential objects of the following classes: Controller, Device (from Leap namespace) and Listener, moreover, we can not do without mutex. Here we come to the second method to receive frames from the device: listening. Our class of device is inherited from Listener class, which enables us to implement this option, that is, we get frames from the controller with a regularity corresponding to the frequency of its work. When the controller is ready to transmit a frame, Listener class calls onFrame method which we had newly defined and passes it the frame (in the parameter); we have mentioned this method above. By the way, why do we need the mutex? The fact is that when listening, a callback function, is used, onFrame is called in a multithread mode. That is, each of its calls is made in an independent thread. So we need to take care of the thread safety at the time when we receive a frame from the device, and this is where mutex is used. When listening, it is also possible to ignore the arrival of a new frame (e.g., if the previous frame has not been processed) and add it to the history (for subsequent processing).
Let’s return to our code, to the place where we created our Device class object. After its creation, we set the callback function for it.
Redrawing
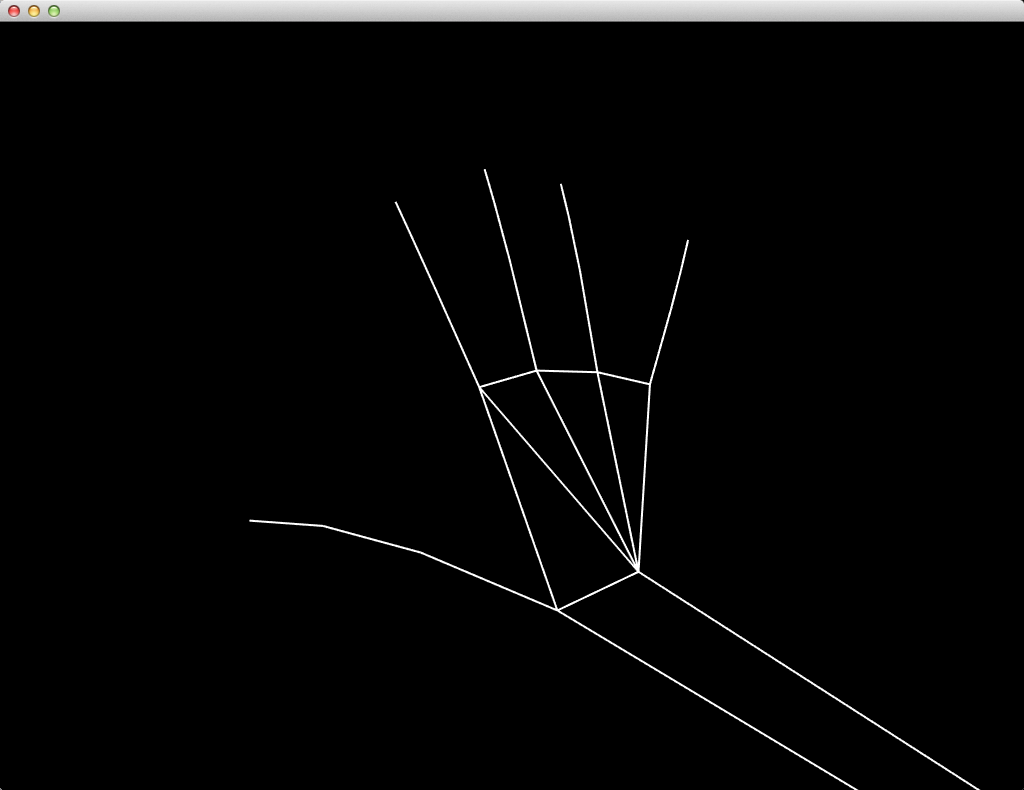
But the most interesting thing happens in the method of redrawing. First, we do some preparation: cleaning of the screen, setting the current matrix for the camera, enabling alpha-blending, ability to read and write into the depth buffer, setting the color for drawing. And this is after that when drawing begins: the device provides us with three-dimensional vectors of the position of the elbow and wrist, and by gl::drawLine method we draw a line between these points. Then we get the number of fingers and, using a loop with the iterator, go through the container with the fingers. In Leap Motion, each finger consists of four parts (phalanges): peripheral, intermediate, proximal and metacarpal. While a thumb of a human hand does not have that last phalange, here it is present but it has a value of zero. The nested loop that goes through all the phalanges provides us with the coordinates of their different parts: start, center, end, direction. The coordinates are represented as vectors (Vec3f). Within this sub-cycle, the phalanges are drawn with the help of drawLine, a drawing method which receives the coordinates detected. Additionally, the first phalanges form the container of joints (knuckles). When the outer loop is terminated, lines are drawn that connect the fingers and form hands. And here we complete the fun mission of redraw. Compile and launch the program, hold your hands over the sensor, and a window will display their silhouette.
To sum up
Leap Motion is a revolutionary controller which not only replaced the touch screen but has also given us the opportunity of space management, making the boundary between the real world and virtual reality even more transparent. At the level of a software developer, we have a user-friendly software interface that allows you to control all the functionality of the sensor. Cross-platform developer’s tools give the developer access to the device via the use of many programming languages, both compiled and interpreted (as for the latter, only two are supported so far, Python and JavaScript). In addition, API has a coherent and clear structure: at any moment, the controller captures an image, forms a frame based on it and sends it to the next level, i.e., to the software program, where the programmer, having parsed the frame, works with such entities as hands, fingers, pointers (tools), etc.
As the device includes two cameras, it is often mounted on the virtual reality goggles to create the effect of augmented reality, which is achieved due to the inclusion into the images captured by the camera of the measured values of brightness of the infrared emitters and calibration data required for the correction of the complex lens.
In today’s article we discussed the issue of creating application solutions that interact with the device through API. This is a very broad topic, and we managed to review only a few aspects, leaving behind such issues as gestures, special movements, touch emulation, and many other things. All that, as well as many other topics, such as the use of the controller in Windows and Web, integration with gaming / graphics engines, can be discussed in the following articles. It is up to you, so write to us and ask for a follow-up :). And now, good luck in everything you do, and I’m looking forward to talking to you in our next issue!
Hello. I see that you don’t update your site
too often. I know that writing content is time consuming and boring.
But did you know that there is a tool that allows you to create new posts using
existing content (from article directories
or other websites from your niche)? And it does it very well.
The new posts are high quality and pass the copyscape test.
You should try miftolo’s tools